How to draw a feather with a pencil. How to draw a bird feather quickly and beautifully
Anya, your first diagram looks more like an oar) and the second one looks like a polystyrene flame. Although maybe my scheme is not much better))) But still I give you the diagram step by step drawing pen. This is a large, stiff feather that is usually found in the wings and plumage of birds. It is relatively strong and light, thanks to which birds fly.
And this must be a tit. in the tit I have already shown some feathers but very simplified:

In general, I draw feathers with simple strokes where contrast needs to be emphasized, here is GOOSE as an example, here, as you can see, I did not show each feather, because there is no need for this - and everything is clear:

At first glance, it is difficult to draw a feather or feathers, since a feather consists of small and thin feathers, but this is only at first glance. I offer you a photo diagram that will help you draw a feather very easily. This way you can already draw a feather headband of Indians:

There is also another, also simple way how to draw a feather. It’s reminiscent of drawing a twig, but step by step a lush and beautiful feather emerges:

Draw a feather, at first glance it’s simple, but in reality it’s not, especially if you’re drawing the plumage of the bird itself. But after trying to draw feathers a couple of times using step-by-step drawing, you will get better and better, and also faster.
Here is an example of an ordinary bird feather, everything is shown quite simply:


And here is another option for drawing a feather, in in this case- this is a peacock feather:


There is one technique quick drawing pen. Let's start by drawing a figure that looks like an oval.


If necessary, you can erase unnecessary details with an eraser.
Drawing a feather is not as easy as it might seem at first glance, because you need to draw every fiber, the correct distribution of shadow and light will help give the drawing a natural look, and this is also not easy. However, if you use a visual diagram of drawing Feather, Feather, Feathers, then it will be much easier for you to do this.
Here's another amazing idea on how to draw and color a feather:
And another option in the photo diagram - a fountain pen:
Let's draw the core of the feather in the form of an arc:

Let's draw the shape of the feather itself:


Let's add feather strokes:

The pen is ready, let's color it:

Drawing a bird feather:
First step. We start with the pen shaft, first draw one line, and then thicken it:

Second step. We shape the feather and draw tears on it:

Third step. We remove unnecessary lines and do shading on our feather:

Fourth step. Shading more dark color and we get:

I propose to draw a feather, feathers with a pencil step by step like this:
Feather drawing steps:
1) draw the base of the pen with a bow and an oval - the outline of the pen itself:

2) We begin to draw the feather:

3) Draw the bottom of the feather:

4) Draw the bottom on the other side:


5) Color our feather:


There is one step by step lesson, how to draw firebird feather. We draw an oval, a stick from it, and then we draw wavy lines, as in the picture, that form the shape of a feather
Birds are very often called feathered, this is not without reason - their entire body is covered with feathers. The bird's feather has a special structure that helps in flight. The color and size of feathers can be very different: very long and bright, like those of peacocks, or small and gray, like those of a sparrow.
Feather structure
Feathers cover the entire body of the bird, with the exception of the beak and legs. But they can be very different, depending on the specific type of bird and their lifestyle. And on the color of the plumage big influence provides a habitat.
As a rule, than more bird, the more feathers she has. For example, in beautiful swans their number reaches 25 thousand, in ducks - about 6 thousand, and in tiny hummingbirds - no more than a thousand.

Rice. 1. Plumage of birds.
There is a special gland on the skin near the coccyx in birds. It secretes a special secretion that disinfects feathers, makes them smoother, and prevents them from sticking together when they get into water. To ensure that the feathers are always well-groomed, birds press their beaks on this gland several times a day and thoroughly lubricate the plumage.
Regardless of whether it is an ostrich or a crow, an eagle or a swallow, all birds have the same feather structure.
The composition of bird feathers includes:
TOP 2 articleswho are reading along with this
- Ochin - this is the lowest, “bare” part of the feather, at the end of which there is a hole. The feather is attached to the skin using a quill.
- Kernel - a long tube, empty from the inside, to which hairs are attached on both sides.
- Fan - visible, hairy part of the feather.
Feathers gradually wear out, and new ones always grow in place of old ones.
Varieties of bird feathers
The structure of feathers is the same, but they can differ in size, elasticity, and strength.
For example, the largest and most elastic feathers are found in the wings and tail, thanks to which the bird can fly for a long time and quickly and abruptly change direction in the air. Such feathers are called flight feathers and tail feathers.
Softer feathers cover the bird's body, protecting it from various damage. These are the main feathers.
The softest, fluffiest feathers are located closer to the skin and reliably warm the bird. Such feathers are called down feathers.

Rice. 2. Down feathers.
There are also feathers that serve as colorful decorations.
Why do birds need feathers?
Only birds have feathers, and that's important difference them from other animals. They perform such functions :
- help to fly;
- protect from cold;
- protect the body from getting wet;
- protect against bruises and minor injuries.
The color of the plumage also plays a big role. It does not affect flight speed in any way, but helps to survive in conditions wildlife. For example, the color of steppe birds is no different from the surrounding landscapes - it is gray-brown, inconspicuous, like everything around. But the inhabitants of the jungle have very bright and beautiful feathers.

Rice. 3. Plumage of tropical birds.
Feathers serve in an effective way attraction. To attract the attention of the female, the male bird of paradise hangs on a branch upside down and fluffs out his luxurious long tail and wing feathers. They bend very beautifully and shine in the sun with all their colors. How can you resist such a dandy?
Step one
In the center of the sheet, draw a small oval - the head. Now we draw the torso from it down. It's always easier to draw if you imagine the shape of what you're drawing. Now our body is somewhat similar in shape to a cucumber. The long, angular tail needs to be continued downwards.
Step two
Let's draw a beak to the head. Long, smooth. Let's designate the eye. Let's show the wing starting from the upper part of the body. It is folded, and its tail sticks out a little over the tail. Now the bird's legs.
Step four
We continue to work on the bird's face. Shade the chin and draw a tuft on the back of the head. We will show long feathers on the wing and tail. Let's work on the paws.
Step five
Now we carefully shade the raven. Let's blend it out a little later. Well, you don’t even have to paint it! It seems to have worked out well.
How to draw a bullfinch with a pencil step by step
Step one. Draw a small branch with a small shape in which you will draw the bird.  Step two. Clearly highlight the wing, since the drawing will be in profile, and then the paws and beak.
  Step three. Make the branch more neat, add feathers and a small black eye.
  Step four. Start adding some silent shadows and sketch out the top of the head.
  Step five. Clean up the drawing, add some shading, and also draw in the tail in black. Don't forget to make the contours clearer.

How to draw a tit with a pencil step by step
Step one. Let's mentally mark the top of the head and from there we begin to carefully move the pencil to the left and then down. Let's pause on the beak and draw it as shown in the picture.  Step two. Using short strokes under the beak, thus creating the effect of plumage, we will show the bird’s neck. We continue with the same short lines and move into a fluffy chest, it protrudes forward relative to the neck. Gradually round off the contour and move on to the abdomen. Now let's go back to the top of the head and draw a line to the right and down to the neck. You can draw dotted line. At the level of the convex chest, we make a bend to the right and go down again, drawing the contour of the body. Let's show relatively a long tail, and under the abdomen there are two legs. Starting just below chest level, draw a broken line - draw a wing. Divides it roughly in half vertical line. This is in accordance with the coloring of the tit. You can turn to photography again here.
 Step three. Draw a black eye - a bead. Underneath it, starting from the beak, we will draw the outline of the cheek and leave it white, unpainted. Using a fairly strong pressure on the pencil, shade a black stripe-collar around the neck. From it we will draw a “tie” down to the abdomen. Our lines should be along the plumage to make it more realistic. We also shade the area above the nose and above the cheek along the plumage. We leave the crown light, this will give us a shiny effect.
  Let's continue drawing the titmouse's wing. Already with larger strokes. And only along the plumage. To prevent our bird from hanging in the air, we will show a wide tree branch under its paws.
Step four. And the last step. Let's add some more shading. OK it's all over Now! The drawing is finished. I hope now you will know how to draw a titmouse! 

How to draw a goose with a pencil step by step
Step one. First, draw two circles, large and small, and connect them with a curve.  Step two. In accordance with the circles, draw the bird’s body, long neck, beak and eyes.
  Step three. We remove the extra lines from the first circles, outline the body itself in bold, draw the paws and the ground under them.
  Step four. All that remains is to carefully draw the main attribute of the bird - the plumage. You can add shading.

Step one.
Let's start with the head. Let's place it in the very center of the sheet. Center of the head auxiliary lines in the form of a cross: level of the eyes, mouth and nose.
 Draw a torso to the head. Swinging to the sides, we draw the lines of the wings. The wings must be symmetrical. Together they are somewhat similar to a heart.
We will draw short curved lines on the wings, then they will turn into feathers. Below the bird we draw a fairly large arc - the outline of the tail. At the bottom of the body we outline the paws with claws.
Step two.
Let's draw the owl's claws in detail. Inside the contour we will show the body, which converges to the legs.
At a horizontal level we outline the eyes. And then we draw feathers all over the owl’s body: along the line of the wings, along the tail. At the same time, the feathers do not have to be the same and their size can also be different. For especially large feathers, draw a center line.  Step three.
On the main area of the large open wings we draw small curved lines representing the plumage. In some places we will show them more densely, in others less often.
Look carefully at the owl's belly and try to do the same.
Let's put a mark in place of the beak.  Step four.

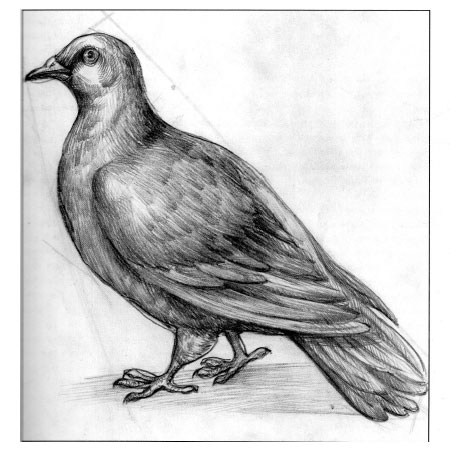
The next stage of drawing a dove will be the play of light on our bird. The neck, tail, wing and other places where a shadow falls or the plumage acquires a darker color are shaded with light movements of the hand and a pencil.

Our creation is almost ready, but when we do, we should not forget the importance of details. We erase the auxiliary lines, add sophistication to the plumage, correct the outline, and, to the best of our ability, try to detail the drawing as much as possible.
How to draw a hummingbird with a pencil step by step
Step one. First you will need bird and flower shapes.  Step two. Draw one eye, a beak and the shape of a tail, and also add a flower that the hummingbird flew to.
  Step three. Carefully draw out all the details, the contours of the wings, carefully sketch out the eye and a branch with flowers.
  Step four. Add more shadows using shading. It should look something like this:

How to draw a seagull with a pencil
Step one.
Let's draw two circles indicating the head and body of the bird. We will also show the tail and legs.

Step two.
Let's outline the contours of the body.

Step three.
We draw the eye, beak and legs. Let's designate the wing.
 Step four.
Let's do the finishing touches and add some details. And here is the result:


How to draw feathers with a pencil step by step
Step one. Let's make a shape similar to a leaf.  Step two. Let's add a couple of touches.
  Step three. Let's make the outlines of the feathers.
  Step four. Using shading we draw a realistic feather. See how it turned out:


That's why I'll be happy to show you how to draw an owl with a pencil.
Step one
We draw two circles in the center of the sheet, and mark with horizontal lines the branch on which the eagle owl is sitting.


Step three
Let's add legs and the outline of the plumage.

Step four
Draw the eyes and key of the owl.

Step five
Let's add a couple of feathers and some shadows. And you'll end up with a bird like this:


Let's get down to business.
How to draw a stork with a pencil step by step
Step one.
Let's draw one large and second small circle in the center of the sheet. From them we will draw lines indicating the wings and legs of the stork.

Step two.
Let's draw the beak and neck. Draw a line with the approximate wing span.

Step three.
Let's draw toes on the legs, and sketch feathers on the wing. Let's outline the contours of the stork's body.

Step four.
Let's finish drawing the head (beak, eyes). Let's add feathering. Don't forget to erase the auxiliary lines.

Step five.
Let's circle more thick line stork feathers, for this use a softer pencil.

Step six.
It remains to add a little shading on the body and darken some areas in order to give it more realism. This can be done using shading - rubbing a pencil over the surface of the paper.
Final result:


I won’t rant too much, let’s get started right away.
How to draw a heron with a pencil step by step
Step one.
Let's draw two circles: one for the body in the center of the sheet, the second higher and to the left for the head. Let's immediately outline the wingspan and show the location of the legs.

Step two.
Connect two circles to create a long neck. Let's add a tail.

Step three.
The heron has a clearly visible tuft of feathers on its head, so this bird is difficult to confuse with any other bird. Next we draw a cone-shaped beak and give shape to the plumage.

Step four.
Let's draw the heron's wings and darken the chest part a little. You can achieve a darkening effect using shading or shading.

Step five.
Let's make it beautiful: erase the auxiliary lines, add shadows, draw bolder contours. In the end it turned out something like this:

How to draw a starling with a pencil step by step
Step one
In the center of the sheet, slightly to the left, we will place the head - a small circle. Let's add an oblong figure to it, resembling an oval. In the future, this will be the torso!

Step two
Let's outline the open beak. Now the paws. One is raised, the other is supporting. Starting from the head, we draw a line... this is the wing. Let's show a short ponytail.

Step three
Outline the outline of the tit. You should get a smooth line. Let's draw the beak. Let's show the eye and claws on the paws. Note the ribbed skin of the raised paw. Try to do the same. On the abdomen and tail there are short lines showing plumage.

Step four
Let's outline the eye with a thin line. There is a small white spot in the center of the eye. Let's shade the bird's mouth.

Now we draw the feathers on the wings, as shown in the picture.
Step five
We continue to show the plumage. It is all over our bird's body. This is how it turned out pencil drawing of a starling:


How to draw a crane with a pencil step by step
Step one. First create the shape of the body, use a long line to highlight the paws, and draw the head on top.  Step two. Connect the head with the body with the neck, draw the second raised paw and the shape of the wing.
  Step three. Shade the bird, correct the contours of the lines and complete the eyes and beak.
  Step four. Clean up the drawing with an eraser and add a little more shading.


How to draw a magpie with a pencil
Step one.
Draw two circles in the center of the sheet. One represents the head, the second the body of the magpie. From the body, draw a line for the tail and two legs below.

Step two.
Let's outline the contours of the body, erasing the auxiliary lines drawn in the first step, and using light intermittent strokes we will add the contours of the plumage.

Step three.
Let's draw a magpie's beak, eye, wing and paws.

Step four.
Let's add a little more touch to the body to give it realistic look. Ready!

Easy and fast, right? I hope it worked out for you too!

We will draw from it.
How to draw a lark with a pencil step by step
Step one.
We draw a sketch of the future bird.

Step two.
On the wings and tail we will add lines indicating the plumage.

Step three.
Let's draw an eye and a beak. And also the hind legs.

Step four.
Let's add touches throughout the body to give the lark a realistic look.
The result should look like this:

How to draw a cuckoo with a pencil step by step
Step one. Let's sketch a bird and a branch.  Step two. Let's add a feather, a key and an eye.
  Step three. Let's remove the extra lines, add shading and sketch out the eye. It turned out like this:

How to draw a rooster with a pencil step by step
Step one. We use circles to denote three parts of the body, these are the head, the torso, the large tail and below an arbitrary stone on which the rooster sits above our world.  Step two. We outline the contours, add the semblance of a head, wings and the tip of the tail.
  Step three. The rooster crows almost all the time, which means we draw an open, screaming beak for him. We also draw the mane and feathers all over the body, especially on the tail and wings. Don't forget about the paws, we fix them too.
  Step four. Now all that remains is to give our rooster more contrast and shadows, let’s draw in the details. We draw the necessary lines in bold and erase the auxiliary ones.
How to draw the Firebird with a pencil step by step
Step one
Let's outline a small circle - the head. Let's frame it in a large semicircle. Below we will draw an arc. The resulting figure somewhat resembles a month. From there down are the lines of the body. Longer and curlier tail. Let's show some curls.

Step two
Let's add a beak to the head. He looks up. It seems that the bird proudly lifts its head up. We bring the curved neck down. Let's add a little more heat, that is, curls.

Step three
Let's outline the outline of the body and wings. The bird's legs are still dim. And a few curls can already be outlined brighter. There is a small crest on the back of the head.

Step four
Let's work on the bird's head in detail. The crest has become completely curly, and we can see an eye on his face. On the wings we highlight individual pointed feathers. The tail becomes more and more fluffy and curly. A pair of lines - a spring - stretches from the body. Let's also outline the outline of the body.

There you go! You can color the Firebird fiery orange!
How to draw a Phoenix with a pencil step by step
Step one
First we will define the position of our drawing. It should occupy the entire central part of the sheet. In the middle we will draw a head with a curved neck. From it downwards there is an oblong body. And now the wings. This is perhaps the biggest detail. Below we outline the waves of the tail.  Step two
Let's draw the bird's head and beak. Smoothly outline the neck and body. Inside the wings we will draw many, many lines that will show us the feathers. And below, where the tail is, we will place beautiful curls.  Step three
Draw the wings, long thin feathers. Let's show the eye and legs of the Phoenix bird. Let's add curls to the ponytail.  Step four
Remained finishing touches. Let's color the eye. Let's draw a winding crest on the head. Let's show the plumage on the body. Let's draw the paws in detail. And let's fluff our tail. That's probably all! Now you can safely paint the most bright colors and pencils! 


How to draw a Swan with a pencil step by step
So, let's start drawing.
Step one.
In the center of the sheet, draw two closely spaced circles.
Below we will place two figures symmetrically, similar in shape to an egg. And now we need to carefully curved line connect a small circle-head with a large body. You need to draw carefully. At the same time, you can imagine the shape of a heart: this is approximately how the necks are positioned.
 Step two.
Draw the head. First, the beak: elongated and not very sharp. Almost at the very neck: dot-eye. We circle the top of the head several times, leaving a small ponytail sticking out to create a tuft.
 Step three.
Perhaps the head is a very important part of the drawing. But still in second place after the graceful symmetrical bend of two swan necks. So, let's draw a triangle from the beak to the eye. We'll decorate the nose next to the beak. Let's outline the neck line.
 Step four.
We already have the neck axis. Around it you need to draw the neck itself. Starting from the head and ending on the torso. At the same time, in the chest area we make a more convex bend.
 Step five.
Draw the outline of the body. We start from the neck line and go along the back. Approximately in the middle of the back we make a small notch in the feathers, then smoothly go down along the oval, drawing out the angle of the wing and the tail.
From sternum to tail let's imagine horizontal line. But in reality it is not entirely straightforward.
 Step six.
Let's paint the red cheeks of the swans. At all thin line Let's outline the outline of the wing. Left just a little bit.
 Step seven.
Erase all auxiliary lines. Let's make the outline clearer. Now our drawing is ready. You can color it and add a landscape. 
How to draw a peacock with a pencil step by step
Step one
Draw a large oval in the very center of the sheet. Let's step back up and show a small circle - the head. From the body downwards we will draw several long and curving lines.

Step two
Let's connect the head to the body. The neck should be thin at the head and gradually widen downwards. Let's draw the wing. It ends at the tail. From the head up draw a peacock feather.
To the left of the body we have a curl.

Step three
Let's draw the heads: beak, eye, flowing curls from the head. Let's fluff up the tail, adding more lines there. Let's formalize it.
There are beautiful curls on both sides of the body.

Step four
Let's turn our drawing into an original, creative one, so to speak. Let's carefully inscribe our peacock into a figure similar to a hieroglyph. Graceful lines ending in either a point or a rounded curl.

Step five
Let's shade our figure. With assertive, strong pressure from the pencil. Almost done. You can add colors and you will have a colored peacock!

How to draw a duck with a pencil step by step
Step one
In the very center of the sheet, but at the bottom, draw a large elongated body. The shape is somewhat similar to a loaf. Above on the right side is a circle. This is the future head. The beak goes away from it. Using an oval we connect the head and body.

Step two
Let's outline the resulting figures with a single smooth line, turning into a sharp tail. In this case, the back is convex, the neck is curved, and the chest protrudes forward. Let's show the surface of the earth and the grass around our feathered guest.

Step three
Let's draw a wing. It extends slightly beyond the contour of the entire bird’s figure. Let's show the beak and eye. And on foreground, in front of the duck, draw small flowers.

Step four
Let's make the eye dark, dark and bright. Let's give it an almond shape. There is a spotted cap on the head. There are small feathers all over the body. Notice how the wings and tail are drawn. Let's add even more growth around.

Step five
Left a little. Take a soft pencil, trace the outline of the bird, and highlight the wing. Let's decorate the grass a little with flowers. The duck is ready! True, not with apples.


How to draw a chicken with a pencil
Step one.
Draw a circle in the upper left corner. This is the future head. Place a large oval in the center of the sheet. So that it touches the chicken's head.
Let's outline the bird's beak with an auxiliary line. Let's draw center lines paws
 Step two.
Now let's draw the beak. In a chicken it is very small and similar to the beak of a woodpecker, only much smaller. The line that we have already outlined should be at the bottom of the triangle.
From the beak upward we draw the line of the forehead. Then we go down the circumference of the head. And on the back of the head we will show a tiny crest. Now let’s draw a zigzag line along the entire body of the chicken to give the bird some fluffiness. (Fluffy cat in pencil) In this case, you can show individual hairs.
Let's outline the paw: it is quite massive, with claws.  Step three.
On the head, as you remember, we drew an auxiliary line. We now need to draw an eye on its tip. Large, almond-shaped. We immediately paint over it, leaving a small light dot - a reflection of the light.
Next we outline the entire body of the chicken: chin, neck, wing shape, leg. In a zigzag line to create a “fluff”. Almost like a kitten.
We will draw additional lines on the chest, forehead and cheek.
Let's draw the second paw with claws.  Step four.
Almost everything is ready. All that remains is to erase all unnecessary lines. Let's outline the contour brighter, and leave the lines along the body, the same ones on the chest, forehead and cheek, light. You can add a couple more of the same throughout the body.  The chicken is ready, congratulations! It seems that you want to stroke it... Or paint it.
How to draw a chicken with a pencil step by step
Step one. Let's draw a jug, or underpants, whatever you want to call it. This will serve well for creating a feathered bird in it.  Step two. We draw the body, correlating its upper and lower points with the corners of the jug, so that the head is on the left, the tail is on the right, and you know where the paws come from - from below.
  Step three. We outline the elements of the body in more detail. There are not a lot of details here, so I won’t comment, everything is clear from the pictures.
  Step four. Let's remove the auxiliary lines. There are not enough feathers.
  Step five. Let's add more plumage, correct the muzzle, remove unnecessary lines, a little shadow under the legs in order to give the effect of movement. And we will add shading throughout the body.
How to draw a rook with a pencil step by step
Step one
We draw the main details of the body: head with beak, torso and tail. At this stage it is only geometric figures, located in the center of the sheet.

Step two
Let's connect the head to the body. The result is a neck. Let's mark a point - the eye. Because of the body we have two protruding wings. Let's show the paws - the legs of the rook.
 Step three
We draw the head: the eye, a point on the beak. Now - the wing. It begins in the center of the oval body, following its contour. Let's continue drawing the paws with clawed toes.

Step four
Now the shading. Using large stitches we shade the neck, abdomen, farthest from the wing. On top, blend it a little. We will leave the wing and head white - untouched. So the drawing of the rook is ready!

 So let's get started.
How to draw an eagle with a pencil step by step
Step one. All lines are first shown with a thin, barely noticeable line so that there is an opportunity to correct the mistake. First we draw the beak - typically eagle-like, hook-shaped and curved down, quite high.  Step two. From the beak to the side we draw the line of the head: we rise up, then go down to the neck.
  Step three. From the bottom of the beak, draw down the neck and convex chest of the eagle. Let's start drawing the wing from above.
Step four. Let's show the back of the wing and paws of our predator. At the back, using a zigzag line, we will draw the plumage.
Step five. Finishing the wing: we lead smooth line along the chest and finish it behind the wing, drawing a pair of zigzag feathers.  Step six. Let's finish with the paws: they are powerful, with very strong claws, feathered down to the toes.
Step seven. Draw the tail. He middle length and rounded at the back.
Step eight. Claws are a powerful and strong weapon of a predator, which it needs in hunting prey. We will place a small but very keen eye above the beak. Draw a line above the bottom line of the beak, repeating it.
Step nine. Our drawing is almost ready. All that remains is to remove the missing lines. You can trace the outline and color it. 
 Let's start drawing.
How to draw a swallow with a pencil step by step
Step one.
First, let's outline the outline of the bird. Let's start with the body: it is oblong and pointed on both sides. The tit's belly is more rounded, and its back, on the contrary, is straighter.
Now we draw the outline of the wings. Please note that they are not completely symmetrical, but at an angle. One shoulder is slightly ahead of the other, because our swallow is now soaring in the air and we see it from one side.  Step two.
Inside the outline we will show the bird's head. It is small, with a small sharp beak. Let's show a round eye. Next - the neck and a sharp transition from the neck to the wings. On the lower part of the wing we will show jagged feathers.
Let's denote the tail.  Step three.
At this stage, we will erase all the auxiliary lines, outline the outline with a thick line and show the details. Let's draw a stripe from the beak, a pattern on the head and a spot on the chest. Let's draw feathers on the wings. Let's draw the tail more clearly, leaving long tail feathers along the edges. There are paws on the tummy.  Step four.
Let's color our little bird. I recommend using either colored pencils or watercolors to show the color transition. Just not with felt-tip pens. And before adding color, you need to carefully look at the color of the bird in photographs and pictures.
In this project, you'll first establish precise proportions and sketch the varied outlines and shapes of an adorable young owl named Hooter, then you'll use shading techniques to characterize the varied textures and define the shapes.
This project is divided into the following 2 sections:
1. Layout Proportions on Paper: You will study the wing and feather structures and then sketch the owl's proportions. Although the structures of feathers and wings are very complex, drawing realistic birds is not difficult.
2. Adding Shading and Texture: You will use shading to add shading to the body to bring out the texture of the feathers. The hatching lines used to draw feathers are jagged and unsmooth, varying in length and thickness. At the end of the work you will draw the details of the eyes and add a woody texture to the tree branch.
Suggested drawing supplies include white drawing paper good quality, molded and vinyl erasers and various graphite pencils such as 2H, HB, 2B, 4B and 6B.
Arrangement of proportions on paper
While feather and wing structure is very complex, realistic-looking birds are not difficult to draw. You will begin this project by studying the feather and wing structures and sketching the owl's proportions.
A basic understanding of wing and feather anatomy is very helpful if you encounter problems trying to accurately capture a bird's design. The next two pictures show the basic design of the pen. The long leathery part in the center of the feather is called the spine (trunk), and the wide end is called the quill feather. Years ago, writers dipped the tip of a pen (which has a dimple in the center) in ink, thereby turning it into a fountain pen.
Feathers vary in size and texture depending on where they are located on the bird's body. The following words describe Various types feathers:
Tiny, soft, downy feathers are located on the head, chest and legs.
. Medium-sized, soft and short feathers with sharp ends are found mainly in the upper part of the wing.
. Long and hard, but sometimes soft to the touch feathers with wide tips and noticeable frames grow in the middle and lower sections of the wing.
This drawing shows the basic design of a wing. Although I defined this pattern for the angel I was drawing, the basic wing structure is similar for a variety of bird species, from the delicate hummingbirds to the majestic condors.

Sketch of exact proportions - basis realistic drawing. Proportion is the relationship between the size of one component of a design to another or others. If there are no proportions, then no beautiful shadows or fancy pencil strokes can save your drawing.
My design is tiny (6" x 7"), but you can try a larger design format such as 9" x 12" or 12" x 14". A drawing format refers to an area of the drawing surface of a given perimeter, limited by a shape of some size, such as the page of a sketchbook.
1. Lightly sketch out an egg-shaped body of an owl, slightly tilted to the left in relation to the drawing area. Here is the truth that the egg is primary! (Green) Don't press too hard on the pencil. You will need to erase these lines later. Rest assured, you will leave the room later, adding the owl's head, wing on the right, legs and tree branch below.

2. Draw a horizontal oval (head), partially overlapping the torso.

3. Add a wing that extends from the bottom of the head at an angle towards the bottom right of the design.

Let's note the following:
The full shape of the wing resembles an inverted oblong teardrop.
. The wing appears to point its tip towards the lower right corner.
. The wing becomes pointed until it ends at the lowest point, slightly rounded.
4. Draw a V-shaped curve on the "face" with the curved ends of the lines at the vertices of the V. The bottom end of the V-curve will be the owl's beak, and the curves flaring out from the bottom tip of the V represent the upper sections of the eyes.

5. Add a small U shape at the tip of the beak. See the picture below.
6. Draw some downy feathers under the wing.
7. Add two oval shapes to represent the legs. Notice that the right paw is much larger than the other. However, in real life, when we look at the owl from the front, both legs will be the same size. In that this paw is obscured from view, perspective dictates that it should be drawn larger than the other one, which is further away from us.

8. Draw the outlines of the owl's eyes. Note that the eyes are partial circles, since inner part The central section of each is hidden by feathers between the eyes. Each eye is a part great circle with a sector of a smaller circle inside.
9. Add a corner tree branch for the owl to sit on.

Clue
Double-check the proportions of your sketch before you begin shading by visually measuring the shapes present in the drawing and the negative areas. Observe lengths, angles and curvatures different lines, which outline an owl and a tree branch.
Adding shading and texture
You'll begin this part of the project by adding shading to the body using shading lines. Next, you'll add texture to the feathers, draw in the details of the eyes, and add a realistic wood texture to the tree branch.
The hatching lines used to draw feathers are jagged and unsmooth, varying in length and thickness. Although some strokes are dark and others are light, you still need to maintain a full range of shades from light to shadow. Let's take into account that the light source in this drawing is in the upper left corner. Afterwards the full shades on the left will be lighter than on the right.
Let's take a different look at the wing pattern (Figure 3-03). Note that the feathers in the layers with the shortest feathers cover the body. Further on, the feathers become longer and thinner, with more defined feathers located at the ends of the wing.
10. Lighten your sketch by lightly erasing the lines with an eraser.
11. Replace the rough sketch lines of the owl's head, body and legs with jagged "fluffy" lines representing the texture of the feathers.
12. Redraw the contours of the tree branch so that it looks rough and unsmooth.

Clue
Keep in mind that a full range of shades provides contrast between areas of light and shadow.
Clue
Remember that light affects the placement and shade of each shaded area. In this drawing, the light source is on the left, so the shadow will be darker on the right.
13. Add slanted lines shading on the head representing small, soft feathers. Look carefully at the directions in which the strokes fall. Take time for this. The directions of the strokes are important as they help convey the illusion of depth to the various shapes.
14. Draw some slightly curved strokes on the owl's beak to show the spots.
15. Sketch out the feathers different forms and dimensions on the wing. Note that the feathers are much shorter in the upper part adjacent to the head than towards the tips of the wings.
16. Add some curved strokes on the feet of the feet to show the direction in which the tiny soft feathers grow.

Clue
Remember that the hatching lines used to draw feathers vary in length and shade. The outlines do not end abruptly, but rather are feather-shaped (or jagged) to convey a more realistic appearance.
17. Using a 2H pencil, lightly shade the feathers on the left and central parts of the leg and the lower part of the body.
18. Use a 2B pencil to shade in-between shades for the most part on right. Remember, the light source is on the left. The feathers on the right side are darker than those on the left.
19. Add darker shades of feathers to the lower body, right shoulder, under the beak and under the wing using 2B and 4B pencils.
20. Add another circle around the perimeter of the iris as an outer rim.

21. Add shading to these outer rims using a 2B pencil.
22. Fill in the contours of the eyes by adding tiny highlights to the upper left corner of the left eye. See the picture below.

23. Use a 6B pencil for shading dark shades on the pupils.
24. Add a long spiky dark piece of shadow on the beak on the right.

25. Shade the lower part of the iris of both eyes with a 2H pencil and their upper parts with an HB pencil.
26. Fill in the shadow of the beak with “streams”. Leave a long thin highlight in the center and a highlight on the lower right outline of the beak (reflected light).

27. Use very hard pencils to add more strokes to all areas of the head. Use 2H for highlights and 2B and 4B for darker areas. Note that the darkest areas are in areas that are in shadow, such as top part eyes and sides of the beak.

28. Add some tiny ovals to the feathers on the top section and sides of the head. This illustration shows the finished appearance of these tiny ovals. If you want to highlight some of them more, simply go over them with your eraser to show and highlight the central parts of each.

29. Use a sharpened one hard pencil and short strokes to draw the soft downy feathers on Hooter's chest and paws. Don't miss dark areas on the upper chest that look like spots.

30. Add shading to the tail feathers. Let's refer to the figure below. The tail feathers are large and can be well defined by textural shading. These shades are very dark on the right and fade to light. The lightest part of each is far to the left.
31. Add some angled lines to the individual feathers. As you can see by looking closely at my drawing, a few angled lines drawn on each of the feathers complete the shading and highlight the details.

32. Add shading to the feathers in the upper section of the wing. Let's establish that the shadow is lighter on the left and gradually becomes darker towards the right side. Also note that there is a very dark shadow in the upper part of the body under the head. This is caused by the head casting a shadow on the body.

33. Use various pencils and hatching lines to convey the texture of the feathers of the upper wing section. Note that some parts on the left are very light, giving the illusion that individual feathers are very light at the tips.

34. Add shading to the owl's talons on the tips of the toes.
35. Use a combination of shading and shading to add shading and texture to the tree branch. Let us note that the shadows become lighter towards each end of the branch.

Add finishing touches if needed. You can create sections of lighter feathers by highlighting them with an eraser. You can make areas darker by using additional hatching lines where necessary.
Sign your name and put today's date on the back of your drawing. You have just completed an important project!

Artists are gifted people. Creative personalities Those who are endowed with the talent to paint beautiful pictures are always admired. In their hands, even a simple drawing can become a masterpiece. But, as you know, everything ingenious is simple. And if so, it means there is a technology for beginners. Let's look at an example of how to draw a feather for untrained masters. This can be considered one of the simplest sketches.
How to draw a feather
IN art world There are plots that are specifically designed for drawing by beginning artists. These include: an apple, a vase, flowers, dishes, a tree, a sculpture, a house, etc. That is, something that represents only a part of great work. To this category simple drawings also includes goose feather.
To figure out where to start and how to draw a feather, you should first imagine its structure. In the artist's eyes, it has a stem (or rod) and fluff, which means it consists of two parts.

Therefore, it is worth dividing the process into several stages:
Take a simple pencil. They are easy to draw and just as easy to correct poorly drawn sketches.
Draw a curved line.
Stepping back a little from the end of the sketch, we draw the feather shell around the shaft.
Now we draw out the tears, as in the photo below.
Using an eraser, carefully erase the extra lines in the drawing.

Now our feather drawn with a pencil is ready!
How to draw with paints step by step for beginners
Of course, painting with paints is much more difficult than with a simple pencil. This rule applies to both beginning artists and experienced craftsmen. You should paint the picture by making the outlines with a stylus. Let's look at how to draw a feather with paints step by step.

Take a simple pencil and draw a curved line.
Stepping back from the end of the sketch, draw the feather shell around the shaft.
Now let’s draw the tears.
Using an eraser, carefully erase any excess marks in the drawing.
Now we choose a palette of colors that will decorate our feather.
Mix the paints in the desired tone and take a light gray shade on the tip of the brush.
Once again we outline our contours gray. Now let's take bright shade. For example, blue. We paint part of the fluff in this color, drawing out the fibers with thin, neat lines.
If we want to use a second color shade, we add bright tones in the form of lines on the other side of the feather or closer to the base of the stem.
Now you can take thin brush, lightly dipping it with black paint. This is necessary to give saturation and shadow to the sketch on one side.
When you have completed the main work, take a clean brush in your hands and dip it clean water and lightly blend the strict lines together.
Now ours colorful drawing ready!

Summing up
Once you learn how to draw a feather, you will definitely want to experiment further. Perhaps you will develop a new interesting hobby.
And remember: nothing is impossible. Learning to draw is within the power of each of us. You just need to follow simple rules and soon you will be painting pictures no worse than talented masters.


