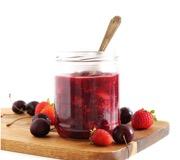
Watercolor patterns. Thin line with pencil
Watercolor painting one of the most complex in the world, but at the same time, it is the most delicate, fragile and attractive for beginning artists. What's so special about it? The whole secret is in the transparency of the lines, thanks to which even the most insignificant details are visible. color transitions. The wateriness of the pattern, which gives it volume.
But how to comprehend this not simple art? Before we start drawing, we need to select auxiliary materials. Let's look at the points in this article that will help us with this.
On what paper and what brushes to paint with watercolors
1. Paper. It’s better to immediately buy a watercolor one, it’s not expensive (about 40 rubles for a notebook). Its difference from the usual one is in the dense texture of the sheets. Such paper will not swell from water and warp.
2. Brushes. In a painting store, first take two brushes. Small and big. Squirrel fur is good for watercolor paints.
3. Palette. The choice of palette is not important, we choose any one. Some artists replace the palette with small glass, it is practical to use and easy to clean.
4. Paints. Children's honey paints with the addition of lemon and other things - immediately set aside. We won't need them. In the artist store we take any professional paints. Open them and look at the colors, you should like them. It is not necessary to take the most expensive ones, this is not important.

How to learn to paint with watercolors from scratch step by step
How to paint beautifully with watercolors? In order for our watercolor drawings turned out to be of high quality, it is necessary to master several basic techniques.
1. Uniform filling. Draw a square or rectangle on paper. It is better to choose a darker color, it will be easier to see. Place it on the brush and stretch it from one corner to the other. Paint again. Draw the next strip so that it overlaps the previous one. If the first strip does not completely flow into the second, then tilt the sheet of paper. Pick up the paint and continue to paint stripes, maintaining a uniform shade. Rinse the brush in water and squeeze. Smooth out the dark stripes with a brush. Let the drawing dry. If you get a rectangle evenly filled with paint, you've succeeded.
2. Dependence of paint shade on the amount of water. We put paint on the brush and draw the first line, then lower the brush into the water and draw the second one 1 cm from it. Let's continue to dip the brush in water and draw lines until they become as transparent as possible. This exercise helps you feel how much water you need to add to get the desired shade.
3. Gradient. The goal of this exercise is to obtain a uniform transition from dark to light. Load your brush with paint and brush vertical line, then dip the brush in water and move the second one so that it extends slightly beyond the first and the paint begins to flow. We repeat the same thing again, adding water. We achieve a complete color transition. Run the last strip with just water. Dry your brush and run a roller of paint underneath the fill.

Learn to paint with watercolors step by step using various techniques for beginners
How to start painting with watercolors? It is necessary to comprehend the basics of art. These are certain exercises, by doing which you will master the first basics of painting with watercolors.
1. Wet on wet. Wet a small piece of paper with water. The sheet should be evenly saturated with water. Now take the paint on the brush and brush it over the wet area. Watch how the paint flows. Practice adding more or less paint to a piece of paper. This will be very useful to you.
2. Flow from color to color. First, let's draw any shapes with water. Take on a brush, for example, Blue colour and apply it to the figure. Add a little burgundy and yellow. You should achieve a smooth transition from one color to another. If this does not happen, add some water.
3. Layering. Let's draw the background as in the first exercise. Let's wait a little and let it dry completely. Draw a couple of circles on the background different colors and let it dry. Draw a third layer on the circles.
4. Reception using table salt. Draw a background and sprinkle a little regular table salt on top. We wait. The salt crystals gradually absorb the paint and become like stars. The effect is most noticeable in dark areas.
5. Clouds using a napkin. Fill in the background and while the paint is still wet, begin to apply a napkin, giving it a shape. This way we get a texture that resembles clouds. This technique can be used to correct mistakes that you encounter while drawing. Just blot off any excess paint.
6. Splashes. We put paint on the brush and run our finger over the brush over the paper or drip it, forming uneven splashes over the entire surface. It is better to cover the table with a cloth to avoid contamination.

Common mistakes of beginning artists
1. Love yourself. Many artists begin to scold themselves and unnecessarily criticize their paintings. There is no need to do this. If you drew something, praise yourself. Everything you do is only for you and to fulfill your creative needs. The more you enjoy the drawing process, the better you will do.
2. Use comfortable materials. High quality brushes, paper and paint. Then the drawing process will bring you only pleasure.
3. Copy stories famous artists. They will serve as the basis of your knowledge.
4. Show your paintings to all your friends, relatives and acquaintances. Donate your painting. Gather like-minded people around you who will support you.
5. Warm and cold colors. Use more cool tones in the distance and warmer ones up close. So you show aerial perspective in your painting.
6. Do not paint the entire background with one paint. Change the tone, mix colors, create color in your painting. Make two or three strokes with one color, add another. The more shades you use, the more interesting your painting will be.
7. Give the painting a chance to dry. This way you will make it more elaborate and deep.
8. Show volume up close. Apply more paint on nearby objects using a palette knife. Make them voluminous.
9. The more colors you mix, the more picturesque your painting will be. Mix in halftones.
10. Decorate paintings with baguettes. It gives the picture additional volume.
Guys, we put our soul into the site. Thank you for that
that you are discovering this beauty. Thanks for the inspiration and the goosebumps.
Join us on Facebook And In contact with
Watercolor is often called the most naughty, capricious paint. It is difficult to work with, difficult to store, unpredictable and requires maximum concentration from the artist. But those who managed to conquer and tame it know the secret of creating truly amazing works, looking at which you ask the only question: “Who did they sell their soul to in order to paint like that?”
website invites you to the gallery of truly atmospheric, bright and talented works. That's exactly it modern Art who is not ashamed to confess his love.
The emotional realism of Steve Hanks
The faces of people in most of the artist’s paintings are darkened or turned to the side. This is done to express emotions and to allow the body to “speak.” “I have always tried to show the world only positive moments in life. I hope that my work brings joy, peace and comfort to the viewer's life,” says Hanks.
Rainy watercolor by Lin Ching Che
The talented artist Lin Ching-Che is 27 years old. He is inspired autumn rain. Cloudy city streets do not make a guy feel melancholy and despondent, but rather make him want to pick up a brush. Lin Ching Che paints in watercolors. With colorful water it glorifies the rainy beauty of megacities.
The boiling fantasy of Arush Votsmush
Hiding under the pseudonym Arush Votsmush talented artist from Sevastopol Alexander Shumtsov. The artist says about his paintings: “I’m not trying to prove anything to anyone with my works. First of all, I enjoy it. This is a pure creativity drug. Or a clean life - without doping. Just a miracle."
The charm of Paris in the works of Thierry Duval
Paris-born artist Thierry Duval has traveled extensively. Hence the presence of entire series of paintings based on “geographical characteristics.” Nevertheless, Paris was and remains the author’s favorite place. The lion's share of works is dedicated specifically to the city of lovers. He has his own technique of layering watercolors, which allows him to create paintings with almost hyper-realistic detail.
Evening Calm by Joseph Zbukvic
Today, Croatian-born Australian Joseph Zbukvic is considered one of the pillars of watercolor painting throughout the world. The artist fell in love with watercolor literally from the first stroke; he was struck by the untamed nature and individuality of this technique.
Secrets of the East through the eyes of Myo Vin Ong
The artist Myoe Win Aung dedicated all his work to his native Burma, its everyday life and holidays, lay people and monks, towns and cities. This world is calm, dressed in gentle colors, mysterious and slightly thoughtful, like the smile of Buddha.
Incredible watercolor by Joe Francis Dowden
English artist Joe Francis Dowden paints hyper-realistic watercolors. And he believes that everyone can do this, you just need to know the secrets of the technique. The secret of his inspiration is extremely simple: “Throw away your watercolor textbooks and get lost in a real forest.”
The magic of ballet from Liu Yi
The watercolors of this Chinese artist can easily be called art about art. After all, his favorite theme is images of people who are directly related to him - for example, ballerinas or classical musicians. The way they are presented in the paintings is peculiar: people seem to emerge from a thin haze, emotional and very characteristic. To some extent they echo the images of ballerinas French artist Edgar Degas.
It was in this country that special paper suitable for working with watercolors was produced. IN Western countries The continent did not pay due attention to watercolor painting for a long time, and only at the end of the 19th century was it given its deserved place in the history of world painting. Using this technique, you can achieve amazing graceful lines, background translucency, and interesting blurry details. All this can give the drawing a mystical effect.
What brushes are needed?
Before you begin to study the technique of watercolor painting, you need to pay attention to the materials for its high-quality execution. The right brushes are the first necessity for those who want to learn how to paint with watercolors from scratch. They must have the following properties: quickly absorb water, have flexibility and the ability to immediately return to their previous shape, and also have smooth, non-brittle hairs. Handles watercolor brushes always short. A wide flat brush is used to remove excess paint, since its hairs have increased rigidity. The blur brush is used to paint the background. It is quite large and soft, so it easily changes its shape and does not dry out, holding water and dye in the hairs. Brushes for work can be of various sizes, which vary depending on the technique used.
Paper for drawing with watercolors
The paper you choose is also important. Its quality is easy to determine. If the paper is thick and does not delaminate, and is well glued, then there is no doubt about its quality. At making the right choice You can paint on drawing paper with watercolors without fear that the water will be slowly absorbed and the colors will become lighter. You also need to pay attention to the grain of the drawing paper. For accurate transmission small parts Fine-grain paper is suitable. For ordinary work You can choose medium-grain paper. And to perform specific designs, a coarse-grained one is needed. It has a rough surface and a distinct texture. This type paper has a high density and is quite often made by hand. Paper without grain is not suitable for watercolor painting, as it will warp.

Correctly chosen paints are the key to success
The choice of the right paints is also important for those who are interested in learning how to paint with watercolors. For beginners, the usual school ones are also suitable. But if an immature artist is still focused on a good result, it is better to give preference to professional ones. It will take some effort to prepare to paint in the trays. First you need to drop a little water from the brush into the paint so that it softens a little. The convenience of such paints lies in the fact that there is no need to look for additional containers. If the artist has some experience in watercolor painting, then tube paints will suit him. Then you can create the desired palette yourself.
On the other hand, hobbyists can also use these paints if they buy a ready-made set with many tubes. Although paint sets are sold in sets of twelve and thirty-six, not all colors are used. In any case, there is a need for mixing different colors to obtain the desired or unusual shade. In principle, a beginning artist will need no more than ten commonly used tones.

Warm or cool tones
Those who want to learn how to learn how to paint with watercolors need to understand warm and cool tones. If the paint is based on red or yellow, it will be considered warm. And blue and purple shades belong to the cold ones. Please note that green, purple, gray and black color have unique feature and can refer to both a cold type of paint and a warm one. The initial tone may depend on the characteristics of the color and the influence of surrounding shades. The main colors are considered to be blue, yellow and red. All others that can be obtained by mixing are called derivatives.

Drawing stages
Learning to paint with watercolors step by step is not at all as difficult as it might seem at first glance. First you need to purchase a pencil, preferably with a hard core so that the lines are only slightly visible. Next, sketch out the main details of the drawing. Afterwards you can immediately take up watercolors. There's no need to rush here. First you need to think carefully about what colors and shades are desirable for the chosen pattern. Having decided on color scheme, you can start applying paint. At the first stage, you should paint with translucent colors. After all, adding tone is easier than removing it. To do this, you need to dilute the paint with water. Once the bases are applied, you can add color to make the design richer. To obtain dark tones, blot the brush with a napkin after wetting it in water. Next, the brush is dipped into the paint and lines are drawn on the paper. It is important to remember about shadows, which need to be thought out before you start drawing. This is important to know for future artists who are interested in how to learn how to paint with watercolors for beginners step by step.

Removing borders
In order to get rid of the difference between the shadow and light parts, you need to create a smooth transition. This means that all colors must be mixed. To do this, dip the brush into water so that all remaining paint on the hairs is washed off. Next, you need to dry the brush and make sure that there is no paint on it at all. Then the bristles of the brush must be immersed in water again. After this, the brush is placed to distinguish between the light and dark parts, and a line is drawn. Thus, the clear boundary will blur, and it will be impossible to accurately determine where the shadow ends and the light begins.

Drawing a landscape
Nature lovers who want to know how to learn to draw should first of all outline the basic composition lines on paper. When drawing the sky area, you must remember that this area of the paper is first wetted with water. Next, while the sky area has not yet dried, diluted light yellow paint is applied to its lower part. Top part turns red or Orange color. The boundaries of shades are erased with a damp brush.

Experimenting with green
How to learn to paint beautifully with watercolors and operate with ease different colors on paper? It's much easier than it seems. The only difficulty may arise with green. Very often, artists have problems using this tone in their works. In order not to make a mistake and choose the right shade correctly, you need to know a few rules. You can't lighten green with yellow color. To mute the rich green, just add a drop of base red. And to give greenery a darker shade, cold is often used. blue tone. Knowing these basic rules on how to learn how to paint with watercolors, you can paint an excellent landscape with a mysterious sky in the background and bright green foliage in the front part of the picture the first time.
The most important thing in learning watercolor painting techniques is not to grab onto everything at once. You need to gradually increase your level of brush control, as well as your ability to correctly handle colors. Some artists prefer to use only soft and warm tones in their works, others, on the contrary, use cold and rich tones. It's not so easy to find your way in creation watercolor masterpieces. The main thing is that the drawing touches the senses, then the hand itself will begin to draw the necessary lines, and the brush will begin to add elegant color shades. Consistency is very important in the question of how to learn to paint with watercolors. You always need to go from simple things to complex ones, at each phase of development, acquire new skills and consolidate knowledge through constant practice.
It is said about watercolor that it personifies the unity of water and color. Using this technique, you can achieve a unique effect due to the ability of special pigments included in the paint to form water suspensions, with the help of which artists achieve smooth transitions colors and overall lightness of the composition.
A little about watercolor
So, when the decision is made and we learn to paint with watercolors, what do we need to know about this direction in art? The term “watercolor” was first used in a publication in 1437, which was written by C. Cennini and was called “Treatise on Painting.” It talked about paints based on the adhesive substance gum. Another artist, Stanley Horowitz, considered watercolor to represent the spring of painting, while winter was engraving, summer was oil, and autumn was the sum total of both. Indeed, there is something fresh and light in these drawings.

Watercolor lessons for beginners first of all involve studying the range of paints for drawing, which are available in several forms. Depending on the final purpose, there are:
- solid tile watercolor;
- semi-solid watercolor (it is produced in ditches and tubes);
- liquid watercolor;
- watercolor pencils and crayons;
- watercolor with mother-of-pearl effect.
Solid watercolors are ideal for drawings and posters, while painting uses semi-solid and liquid forms, as well as pencils and crayons, to create a unique combination of drawing and painting on canvas.

Watercolor painting techniques
Using different painting techniques allows you to achieve different effects and adjust the brightness of the color. The two most commonly used techniques are:
- painting on dry canvas;
- watercolor on wet sheet.
Drawing on dry ground makes the drawing more vivid, with rich colors and allows you to create clear contours and clear lines. While painting on a wet canvas fully reveals all the possibilities of paint.
For work, use a special type of watercolor paper that absorbs moisture well, special watercolor blocks or erasers, in some cases the paper is placed on the glass, wetting the desired area, or placed on a damp piece of flannel.

Watercolor lessons for beginners
Flowers are the most popular subject for drawing. But for novice artists who are not yet confident in their abilities, it is better to give preference to simple large inflorescences - tulips, irises, pansies, etc. You should not use artificial flowers or objects from photos or postcards as a basis. Watercolor art involves drawing from life.

An approximate diagram of the work can help you paint flowers in watercolor step by step:
- place a vase of flowers near the window, catching the light on the bouquet;
- simple light pencil use movements to outline the contours of the composition on the sheet;
- on the draft, schematically mark the chiaroscuro zones to avoid gross mistakes when drawing;
- study the structure of flowers before directly painting them - which petals will form the background (they will need to be drawn first), which ones will go into the shadow;
- start with the top flower in the composition, but do not touch the center of the picture for now, it is drawn last;
- alternate flowers with greenery - this way the composition will not be scattered and will fit into one whole;
- tint the overall background with a light translucent shade.
 >It is the blurry brushstroke that makes watercolor paintings so recognizable and effective. The use of watercolor requires the artist to constantly improve his skills and practice drawing techniques, including the use of fills, dot-line drawing, and drawing on a completely wet sheet.
Do you like watercolor drawings? Share your opinion on
Hi all! You really asked me to publish watercolor painting lessons, and I thought for a long time where to find suitable material, because this topic is not new, and there is already a lot of different information on the Internet, so I decided not to invent it, but to use the materials foreign authors. This article is the first, but not the last. I hope you enjoy it and find it useful!
This article covers the basics you need to know to get started with watercolors. However, if you continue to scratch your head after reading, then please feel free to ask questions in the comments! I will be happy to answer you!
Before I started writing this article, I decided to do a little research on the Internet about painting. watercolor for beginners. This way, I reasoned, I wouldn’t miss a single moment and would write the best post. But good God... I've been painting with watercolors all my life, and the information I found on Google stunned me. After three too many overwhelming articles, I threw up my hands and decided that I would show you how I, personally, work with watercolors - and the adjective to my watercolor approach is “simple”.
Tools and materials
First, I want to talk about the materials and tools you will need. Of course, the most obvious tool would be a watercolor set.
I prefer the set from Greenleaf & Blueberry. It's a little pricey, but I love it! However, if you are just starting out, there is no need to invest in expensive kits.
Advice from the site:
Go to the nearest art store and buy an art set of watercolor paints that suits your price, the main thing is that it is not for children 😉
If you live in the outback, where it is difficult to find such a product, then you can order a set through an online store. So that you can get an idea of the cost, I’m sending you examples of sets that are easy to find in our country:
Finally you will need pure water and fabric(I use an old dinner napkin) or paper towel to dry the brush.

Any glassware will do, I use an old mug.
Transparency of watercolor
The great thing about painting with watercolor is that you have complete control over the opacity of the paint. Watch how one color can change depending on the ratio of water and paint on the brush!

The picture on the left shows what a brush stroke looks like with a lot of water and a little paint. The illustration in the middle has a more equal ratio of water to paint. On right picture more paint than water.
You may be thinking, “That's all well and good, but how can I control this water/paint ratio?” Before you do anything, apply a drop or two of water directly to the cuvettes you plan to use. This will wet the paint and make it ready to go. Then, you can do one of two things:
1. Use a palette
You can take a palette and mix three different shades of the same color on it. For the first color, use a brush to apply about eight drops of water into the indentation. Then, dip the still wet brush into the already moistened watercolor and transfer the color to the palette.

Apply about five drops of water into the second cavity. Again, dip your still wet brush into the watercolor and transfer the color into the water. Be sure to agitate the brush so that all the paint comes off! If this new color very similar to your first one, add more paint.

For the darkest shade, you will simply work directly with the paint from the pan, the shade should be very saturated.
2. We work directly from the watercolor set
You can use the concentration of water on your brush to control the shade of the paint. If you really want light shade, wet the brush well with water and touch the tip of the brush to the paint. If, when transferring to paper, you find that the concentration of paint is too high, dip your brush in water again, and apply this water directly into the paint on the paper. The color will become more transparent! For midtones, you'll still be applying watercolor with a damp brush, but using more paint. For darker tones, I dab my brush with a tissue (it will still be damp, but not saturated) and then take the paint straight from the kit.

Mixing
The reason we looked into transparency is for mixing and overlaying colors. By using various shades With one color you can make any look come true. I'm going to show you how to turn a circle into a ball using watercolor blending and transparency:
1. First, draw a circle in the lightest shade.

2. Assume the light is at the top right as shown in the picture. Accordingly, the shadow will be in the lower left corner of the circle. To start painting the shadow, use your brush to pick your medium shade. Draw the shadow as if it is “hugging” a crescent-shaped circle, like this:

3. You can see that there is now a definite separation between the shadow and the highlight. To get rid of this difference and create a smooth transition, you need to mix the colors together - this simple task when you paint with watercolors! To mix, submerge the brush in water to remove any remaining paint from the brush. Dry the brush to make sure all the paint is gone, then wet the brush bristles again with water. Then, place the brush on the separation between the shadow and the highlight and drag the middle shade with water, it will blur. Soon, you won't be able to tell where the mid-tone and light end and where the shadow begins!


4. Now it's time to add a dark shadow to the bottom of the circle. Apply a dark shade around the bottom of the sphere, as in the photo.

5. Mix dark shade just like you did with the middle shade, and voila!

6. You can add a drop shadow if you want. To do this, draw a thin line on the opposite side of the light below the sphere, like this:

Then, you need to draw out the color with a brush dipped in water until it disappears.

You might find it easier to understand the concept of blending/shading if you watch the video:
If you want more practice with blending and shaping, I'd recommend painting these shapes in different colors:

You could make the sphere green, the cube blue, etc. Drawing shapes like these helps you understand how to make things look three-dimensional. Yes, it can be a little boring... but so rewarding!
Mixing watercolors
To mix watercolors, you definitely need a palette, whether built into your kit or separate. The process of mixing colors is simple: apply one color to the palette and then add another color. Mix them together and you get a new color!

If you have a small selection of colors in a set, knowing how to mix will come in handy. There are many sources that tell you what colors to mix together to achieve the desired result.

If your mixed color dries in your palette, don't worry. You can re-wet it and it will be as good as new no matter how much time has passed.