Gradient manicure at home. Classic gradient manicure. What it is.
Gradient manicure has become the most popular nail coating, winning the hearts of many fashionable young ladies. All the beauties immediately rushed to beauty salons to try out this new nail art product. The time of salon hype has passed and now many beauties are wondering how to make gradient manicure at home? Let's answer the question directly, creating such a design on nails is not easy. But we will try to convey to you the most comfortable instructions.
Popular techniques for creating gradient manicure at home
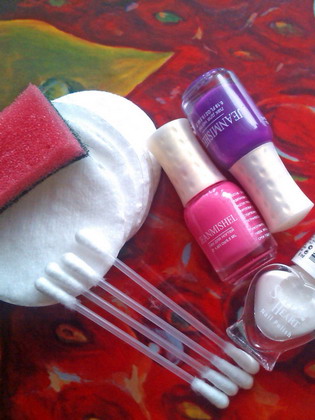
First of all, let's look at all the materials and tools you need for this procedure. The gradient manicure set includes:
- Nail polish remover without acetone;
- Hand and nail cream with a moisturizing effect;
- Set for trim manicure;
- Cotton buds;
- Colorless varnish base;
- A set of varnishes in the desired format color scheme;
- Varnish fixer;
- A sponge or sponge that is used when applying foundation. You can also use eyeshadow applicators;
- If you want to have clean fingers, you can arm yourself with stationery tape.
Gradient manicure using a cosmetic sponge
This technique is considered the fastest.
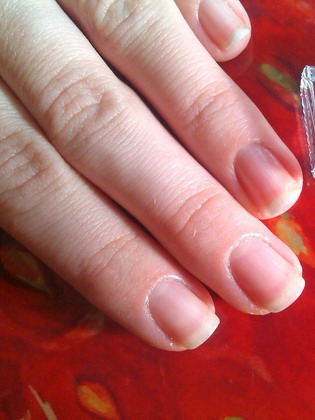
- In order to make a beautiful gradient manicure at home, you must first go through. Use cuticle clippers to remove any uneven cuticle edges, then use a nail file to shape your nails into the correct shape.
- The nail plate and the skin around the nails should be covered with peach oil.
- Apply the varnishes you need fairly thickly to the surface of the sponge. Varnishes must be applied in strips in the color sequence you specify.
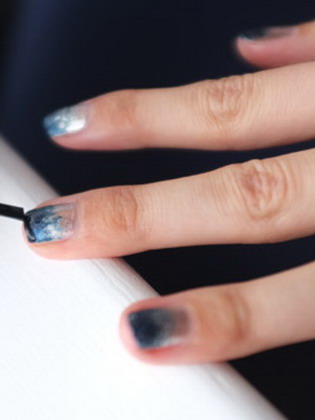
- We bring a sponge coated with varnish to the nail plate and seal it. Be careful to ensure that the entire nail bed is painted.
- This procedure must be performed on each finger. At the same time, refresh the polish for each nail.
- When your gradient design is ready, you will see residues of varnish on the cuticle; they must be removed using a cotton swab dipped in a cotton swab.
- On top of the design you need to secure it with a transparent varnish with a fixative, this will extend the service life of the stylish coating. In addition, the fixative varnish will hide all the unevenness and roughness that the sponge left on the nails.

Classic home gradient manicure using a sponge
This technique is not particularly different from the technique that used a sponge.
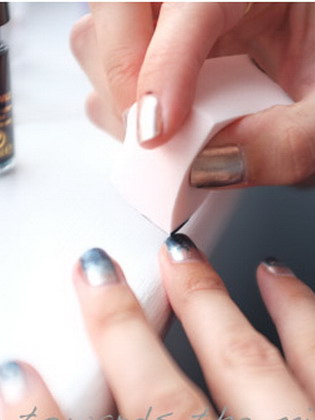
- Cut a piece from a large sponge, which should be the size of your largest nail.
- Take colored varnishes in the shades you need and apply them in horizontal or vertical stripes to the surface of the sponge.
- After this, press the sponge onto your nails.
- Before you start painting a new nail, freshen the polish on a sponge.
- After this, the gradient design is also coated with a final clear varnish.

There is one small nuance in using a sponge - if you apply it too actively to your nails, then do not use it to cover more than 4 fingers, otherwise the sponge may crumble right in your hands. It's better to have several prepared pieces. Here is a simple master class that will show you the most comfortable ways to apply a gradient design at home. Moreover, a gradient manicure at home has a lower cost than the price that a master will give you in a salon.
Gradient manicure using Gel polish
Gel polish won the sympathy of many girls and many beauties wanted to try a gradient manicure with gel polish. Let's remember what gel polish is? Gel polish is a cross between a bright colored pigment and a gel. This type of coating has one significant disadvantage - before covering the nails, the nail bed is sharpened with a file. But there is also a plus: a manicure using gel polish lasts quite a long time. Gradient is slightly different from the standard manicure with varnish and requires the use of special tools that are not always found at home.
- Using a special file with a fineness of 80-100 grits, slightly stick to the surface of the nail bed.
- Then cover your nails with a thin layer of Bondex; it will degrease the surface of the nail plate.
- If there is excess Bondex on your nails, remove it with a cotton swab and then place your fingers in a UV lamp for 60 seconds.
- Take a transparent gel base, a brush for applying the gel, carefully cover your nails with a thin layer and place them in a UV lamp for 30 seconds.
- Remove the sticky layer using a cotton pad soaked in degreaser.
- Using a nail file, we file the nails a little for better adhesion.
- Now you can start applying the first shade of your chosen gel polish. It should be applied to half of the nail, moving in the direction from the cuticle.
- The next step is to apply the second shade of gel polish to the remaining clean area of the nail.
- Next, take the first shade of gel polish and paint a little over the borders between the colors. This is necessary so that the transition between colors is smoother. For this manipulation you will need a thin brush.
- Afterwards, dry your fingers in a UV lamp for at least 3 minutes.
- Wipe the resulting design with a cotton pad soaked in degreaser, getting rid of the sticky layer.
- Apply a transparent finishing gel over the design; it will hide all unevenness and give your nails a glossy shine.
After our instructions on how to create a gradient manicure with gel polish with your own hands, you realized that this manipulation is not so simple and to avoid unpleasant nuances, it is better to go to a professional salon. Moreover, a set for such a manicure will be too expensive for you.
Gradient manicure with Shellac
After the advent of Shellac, fashionable girls I became interested in the question of how to make a gradient manicure with Shellac yourself. The durability of this coating lasts up to 3 weeks, and the range of products is not as extensive as with a manicure with regular gel polish. has many advantages: it strengthens the nail bed, there is no need to file your nails before application, and it can be removed easily and simply.
- Lightly buff the nail bed with a manicure buffer to ensure good adhesion of the Shellac to the nail.
- Treat your nails with Bondex. Wait for it to dry.
- Take a sponge and apply the desired shade of Shellac to it. Press the sponge onto the nail, this can be the tip or the area near the cuticle. As a result, you should have coverage on half of the nail.
- Then dry the design in a UV lamp for 2 minutes.
- Take the next shade of Shellac and apply it to the sponge again. Also apply to the nail plate, on the other side, slightly extending to the border of the first layer.
- Dry again in the lamp.
- Cover the finished design with a transparent gel fixative. It will remove all roughness and add shine to your nails. Dry it in a UV lamp for 2 minutes.
- Soak a cotton pad in degreaser and go over each nail.

At this point, the gradient manicure with shellac is ready, but if you are not sure that you can master this manipulation with your own hands, then it is better to contact an experienced master.
Gradient manicure with design
If you have a good imagination and are confident in your ability to create a gradient manicure, then you can not limit yourself to a simple coating in several colors, but add a drop of design.

If you use the application technique, then there is for you original ideas how to make a manicure more exotic. To do this, take a thin brush, dip it in the varnish of the desired shade, and then draw a design on the sponge with it. It could be a heart, flowers or just . Apply the patterned sponge to the nail bed so that it leaves an imprint on the nail. This pattern is applied on top of a ready-made gradient.
As an option for another nail design, before you cover your nails with the final clear varnish or gel, decorate the tips of the nails or you can choose the option with glitter.
Nuances in manicure with a gradient
- When creating a gradient on your nails, when you use 2 shades of polish, but don’t want to look too extravagant, you can make a coating reminiscent French manicure. To do this, on a sponge one strip of one shade of varnish should be wider, and the other much narrower.
- If you decide to use for a gradient, then expect a completely unexpected and sometimes completely ugly result. Do not use this coating for home manicures. Craftsmen work better with chameleon varnish.
- For people who use it in design, it is better to resort to the gradient technique, which uses a sponge.
- If you use ones that tend to become cloudy over time, then after creating a gradient, cover them with several layers of fixing transparent varnish.
Video: 4 types of gradient manicure at home
Incredibly beautiful and fashionable manicure using a gradient has been in great demand for several seasons now. And with the help of gel polish you can enjoy beautiful and well-groomed nails for up to half a month.
Basic techniques necessary tool And bright ideas- all information is given in our article.
Gradient manicure and its varieties
There are many names for this manicure technique. The most common are ombre, stretch and degrade. Depending on the method of execution, a vertical and horizontal gradient are distinguished, but the essence remains the same - it is a gradual transition from one color to another.
To perform such a coating, you need at least two colors, between which there is a smooth transition in most cases. The great advantage of ombre manicure is its ability to visually lengthen nails, as well as its unusual and attractive appearance.
Sometimes several tones are used in a gradient, and their choice can be arbitrary. To make the transition as natural as possible, you need to select close “neighbors” along the color wheel.
Contrasting tones look no less attractive, especially when chosen correctly. The big advantage is that this design can be used even on short nails, on which a manicure of this kind looks no less stunning.
Preliminary stage
Preparing the nail plate
The key to a successful manicure is a carefully prepared nail plate. It is necessary to treat the cuticle and perform all stages of manicure with gel polish before applying the base layer, inclusive: lightly sand the nail with a buffer, apply a dehydrator and primer, and then a thin layer of base coat, which must be dried in a UV or LED lamp.
It is advisable to apply a layer of light-colored varnish on top of the base coat. Against this background, the colors of the manicure will appear better, and the transition will be as successful as possible. If the colors used are quite intense, this step can be skipped.
Required Tools
In addition to the standard set for performing a gel manicure: a manicure set, files and a buff - you need to prepare additional accessories. This includes aluminum foil, lint-free wipes, a sponge or sponge, and a set of special brushes for nail design.
Methods for performing gradient manicure
Vertical gradient with flat brush
This method is used for two colors. The main tool will be a flat brush with a rounded tip.
Execution technology:
In the same way, a third and, if necessary, a fourth layer is applied, which is then fixed with a topcoat to provide additional durability.
When shading the border between colors, it is important not to press the brush too hard, not to start moving the brush from the middle of the nail and not to break it in any place. Movements should be smooth and continuous from the cuticle to the top edge.
Ombre using a fan brush
One of the easiest and most accessible methods for performing a horizontal gradient at home.
Technique:
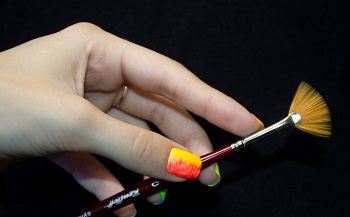
- The most in a light tone The entire surface of the nail plate is painted in a gradient. This layer must be dried in a lamp.
- Separately, on a piece of foil or on a palette, mix the two colors used, which are applied with a regular gel polish brush to the middle of the nail.
- A second color is applied to the tip, and then using a brush it is necessary to distribute the color from the tip to the middle of the nail.
- The result obtained is fixed in the lamp.
In order for the gradient to look as attractive as possible, it is also necessary to repeat the operation for the second and third layers, each of which must be polymerized in a lamp.
A detailed master class on how to perform a gradient manicure with a fan brush is presented in this video.
Gradient pigments
Carrying out such a coating will also not cause difficulties. A layer of pigments is applied to the base coat, which must be “stretched” from the beginning of the nail to the border of a possible transition.
Towards it, from the tip of the nail to the border of the transition, apply pigments of the second color with gentle movements. The easiest way to create this design is with a petal brush.
Brush movements should be done gently, as if slapping the pigments, and not rubbing them into the nail coating.
The layer of pigments is fixed with a topcoat and polymerized in a lamp. At this stage, great care is important when applying the top; the brush must be wiped frequently so that the pigments are mixed on the nail or do not get into the bottle with the top.
Manicure using a sponge
This method can be called the most common. To do this, you can even take a small piece of a new kitchen sponge with small pores; a melamine sponge is also ideal. You need to cut pieces of sufficient size to fit your nail.
To prevent the gel polish from the sponge from imprinting on the cuticle, you can apply a special stamping manicure product to it or use regular PVA glue. It is not recommended to use oil or greasy cream for these purposes, as this will negatively affect the durability of the manicure.
Apply two drops of varnish to the foil different shades close to each other, the boundaries are mixed, and the resulting result is blotted with a sponge. The gel polish is transferred to the nail with several soft springy movements. For a beautiful manicure with a gradient effect, you need to perform several layers, each of which is dried in a lamp.
To ensure that there are no bubbles on the finished coating, it is better to leave the first two or three prints on foil.
At the end a top coat is applied which evens out minor flaws and fixes the manicure.
You can also use a sponge another way. To do this, apply two varnishes back to back on the nail plate. Using a sponge, blot the transition area with several tapping movements, leveling the coating. As the color evens out, the pressure is gradually reduced.
After treating all nails, you need to wait a while for the coating to even out. Air bubbles at this stage are corrected by puncture with a toothpick. After a satisfactory result, the coating is dried, and then the algorithm is repeated for the next two layers.
The video showed step by step the entire process of performing an ombre manicure with a sponge.
Acrylic powder gradient
Acrylic powder is so fine that a gradient manicure with its help turns out smooth and neat. This manicure is very quick to do and again requires a fan brush.
Execution steps:
- A thin layer of top coat is applied to the nail plate.
- Dip a fan brush into the powder and, tapping over the nail, sprinkle half of the nail with powder. At the edge of the nail, the brush is held lower, so the powder lies more densely; at the intended border of color mixing, the brush is raised higher. Due to this, the dispersion area increases, and the powder lays down in a more transparent layer. From time to time you need to shake off the powder from the nail so that the pigment lies more evenly.
- The same must be done with another color.
- The manicure is polymerized in a lamp.
- After drying, shake off excess powder with a thick brush.
- To avoid cutting off the colored layer, sand the coating a little with a soft buff.
- Shake off the dust from the nails, cover them with topcoat and dry them in a lamp.
The video tutorial shows another technique for applying acrylic powder.
Striped (linear) gradient
This manicure looks great on a white or light base. To complete this you will also need a contrasting varnish, a thin brush and a palette (foil) for mixing colors.
Execution algorithm:
Fashion trends in gradient
Having learned the basics of ombre manicure, most girls try to further diversify their skills. The most popular is the vertical gradient, as well as the horizontal one, which creates a French effect on the nails. The most extravagant ones choose an angular ombre.
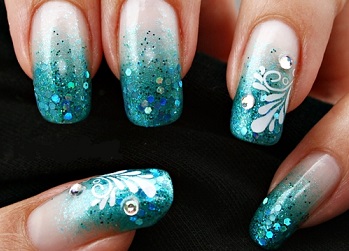
A gentle smoky gradient manicure is ideal for the winter season. pastel colors, decorated with rhinestones, sparkles or other decorative elements. To achieve perfect harmony, you should not use everything at once, but rather plan your preferred decor in advance.
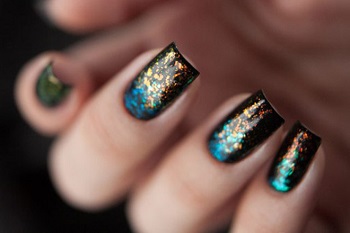
Glitter also looks great paired with thick rich colors: blue, purple, burgundy, emerald and others. These can be either colored pigments or gel polish with glitter.
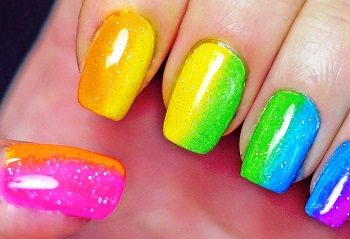
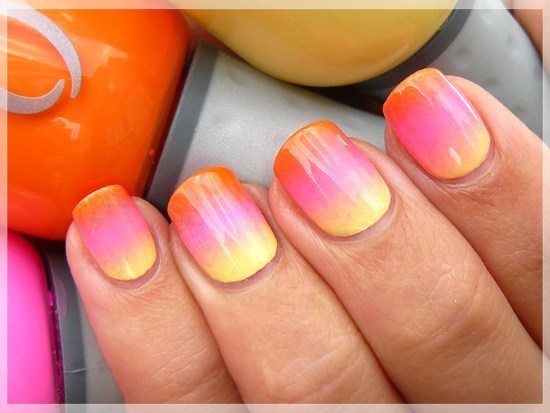
In spring and summer, rainbow gradients are trending. To convey all the colors of the rainbow, such a manicure is performed either vertically or diagonally. A rainbow-style manicure looks amazing both on its own and in combination with designs made by stamping or painted with a brush.
The combination of a gradient with other manicure techniques, such as French manicure or moonlight French, is very important. Patterns made using the stamping technique will adequately decorate more dark shades varnishes, creating on the nails the effect of reptile skin or simply a geometric pattern.
Ombre manicure is always popular and fresh idea for a new look. By following the instructions given in this article, you can easily make such beauty yourself at home, and knowledge of small tricks in this matter will ensure guaranteed success.
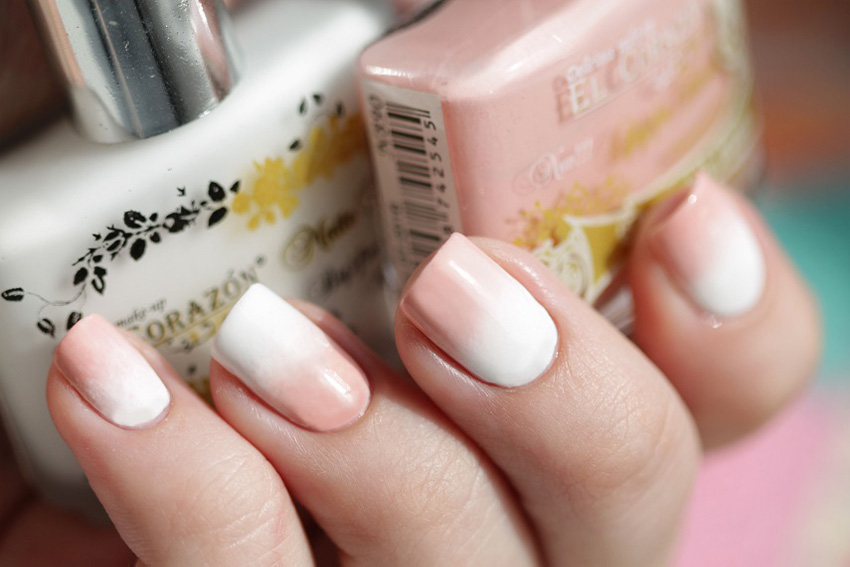
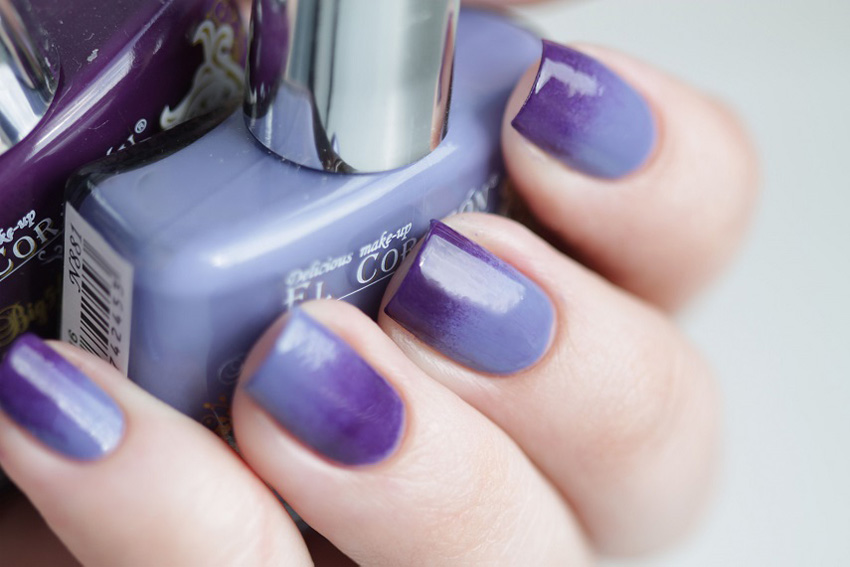
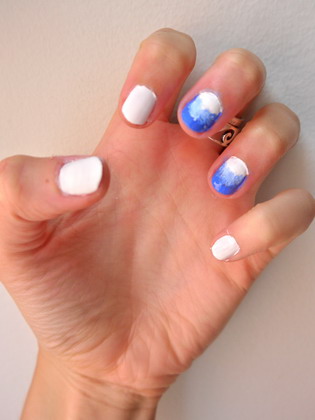
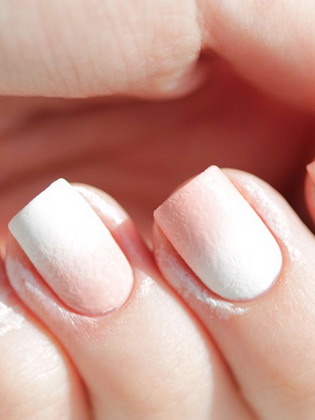
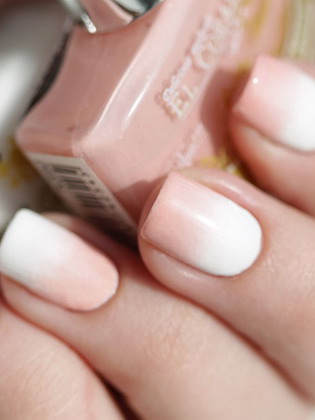
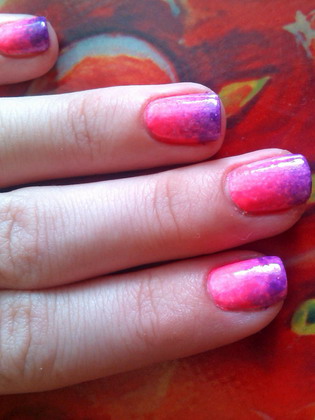
Under gradient imply manicure with smooth transition colors. Gradient manicure can be done at home even with just one color, for example white. But most often they do gradient transition of two colors of varnish, less often of three. Gradient transition can be implemented both on one nail and on all at the same time with a smooth transition from the little finger to thumb. Most often under gradient manicure imply a color transition from varnishes, but gradient You can also do this on your nails using nail glitter. Company EL Corazon® offers customers a huge selection of multi-colored glitters. To obtain gradient manicure The masters rub glitter into the undried varnish, gradually increasing its concentration in the direction of nail growth. In this case, in addition to color, it acquires a bewitching shine. On this web page you will find step by step photos and a video on gradient manicure.
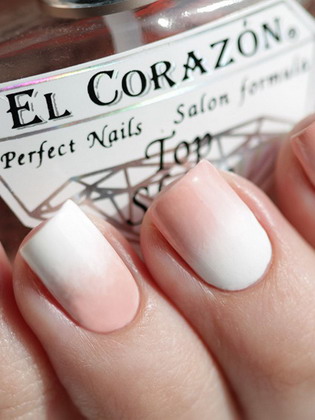
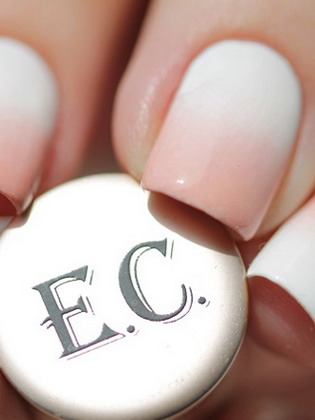
Gradient manicure EL Corazon®
Introducing master class with step-by-step photos on gradient manicure from Natalia Mironova. A very effective and easy-to-perform gradient manicure that does not require any special materials can be done at home.
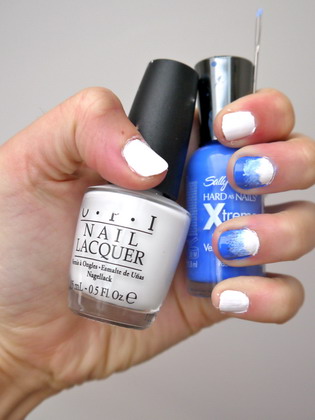
To perform a gradient manicure we will need the following materials:
1. sponge or sponge, 2. Colored varnishes, 3. Base coat and top coat.
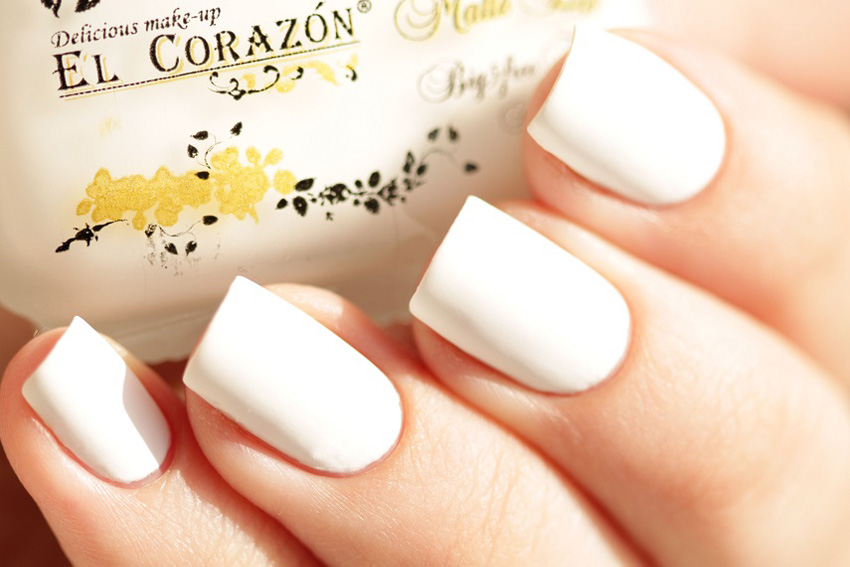
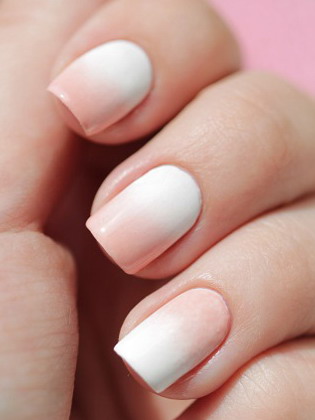
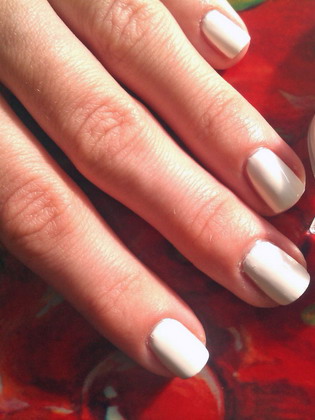
We paint the nails with the base and the lightest of the selected varnish (in in this case white matte nail polish EL Corazon® Matte Effect No. 125), wait for complete drying.
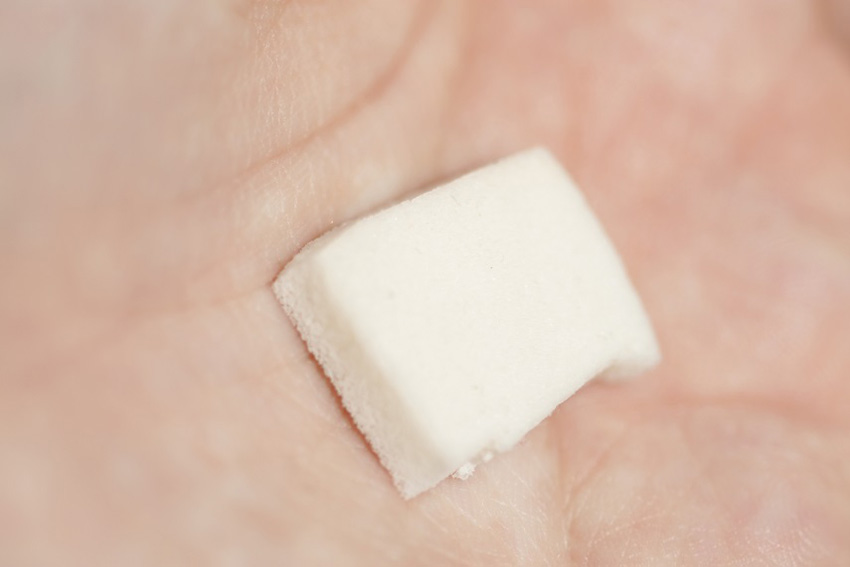
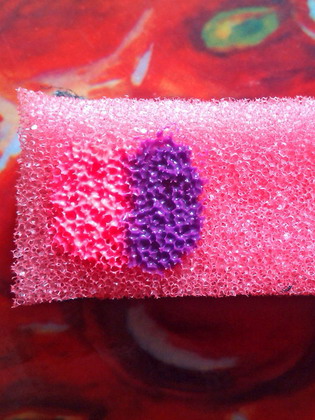
Next, take a piece of sponge or sponge (we will use a powder sponge).
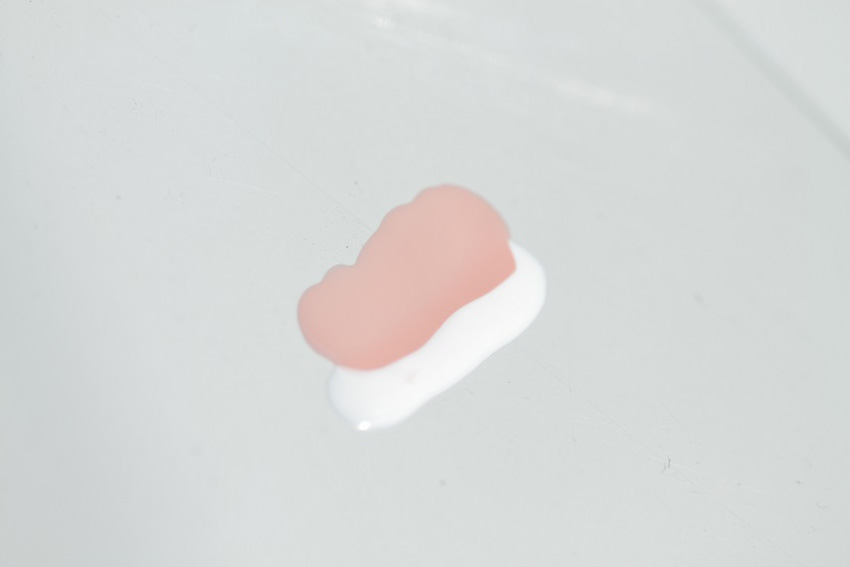
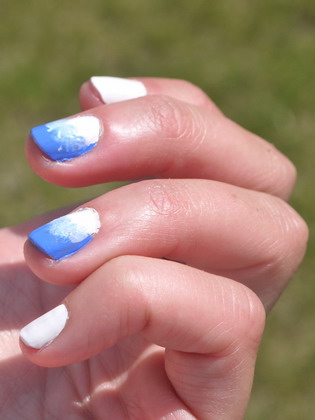
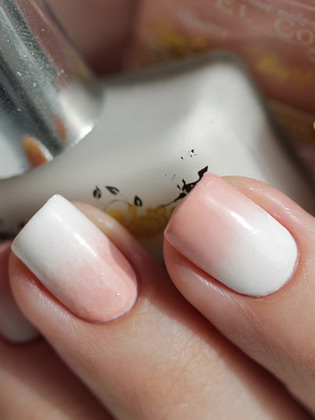
Next on smooth surface(in this case, a piece of plastic), first we paint one varnish boldly, and the second one (No. 890 is used) must be applied so that it slightly covers the first one.
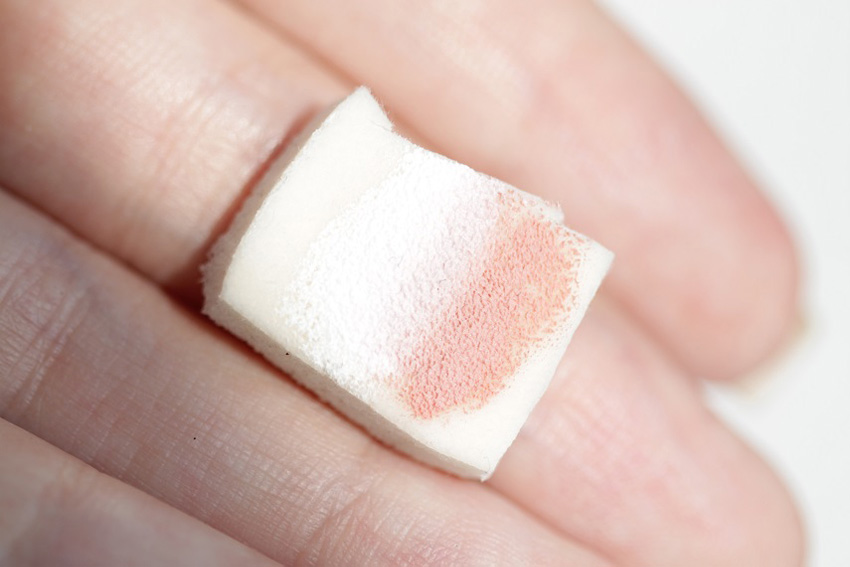
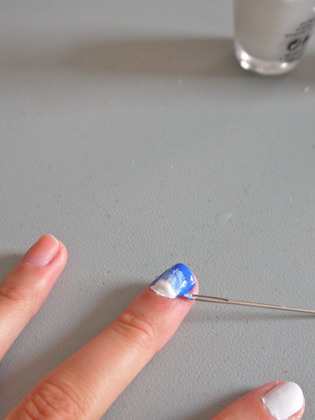
Dip the sponge into the varnish.
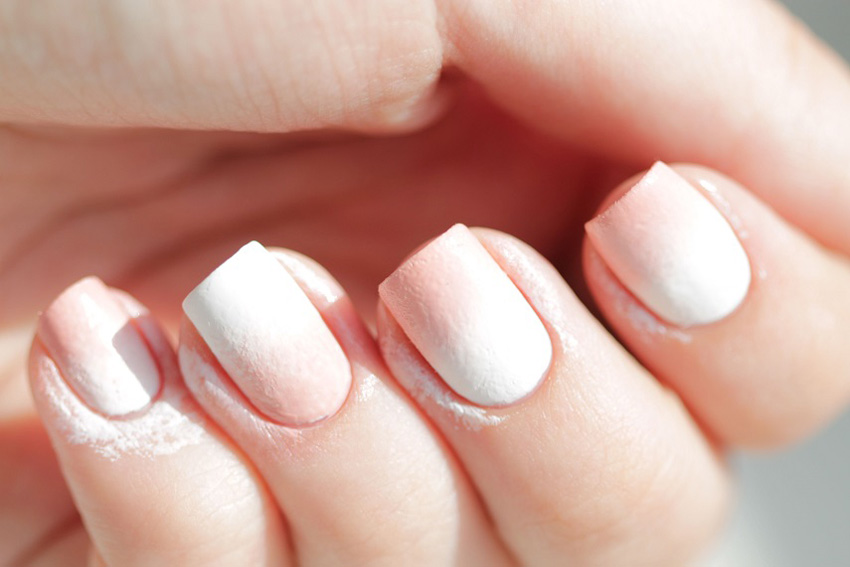
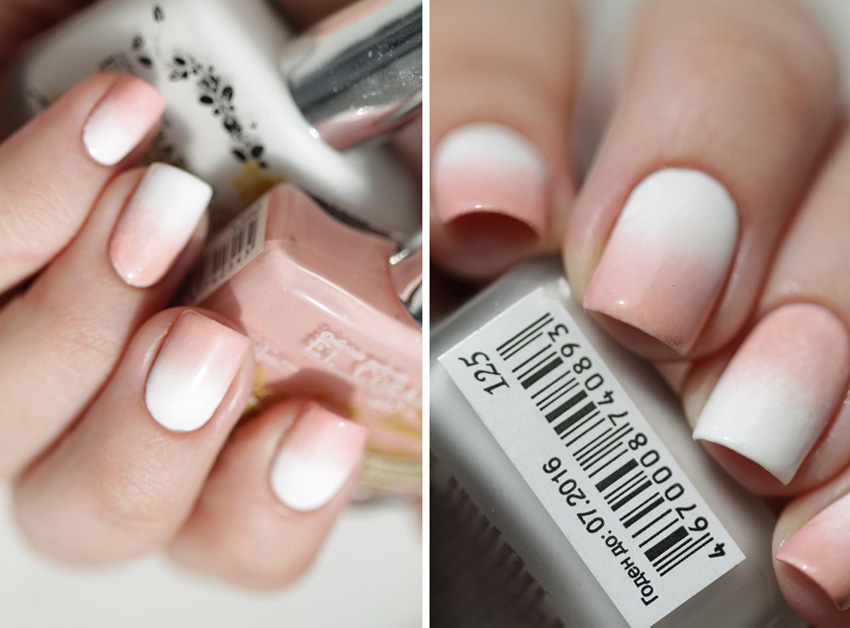
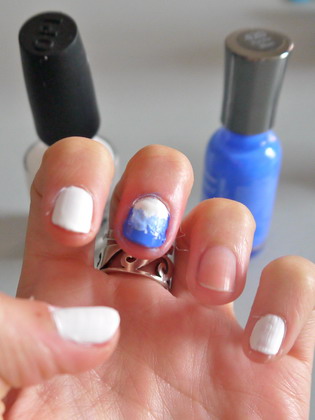
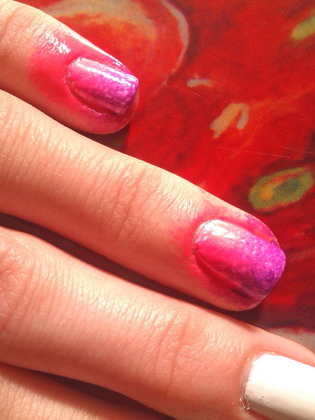
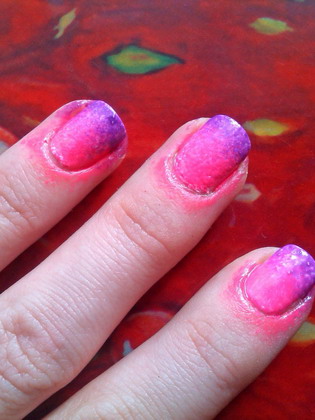
Using patting movements, apply a gradient to the nails.
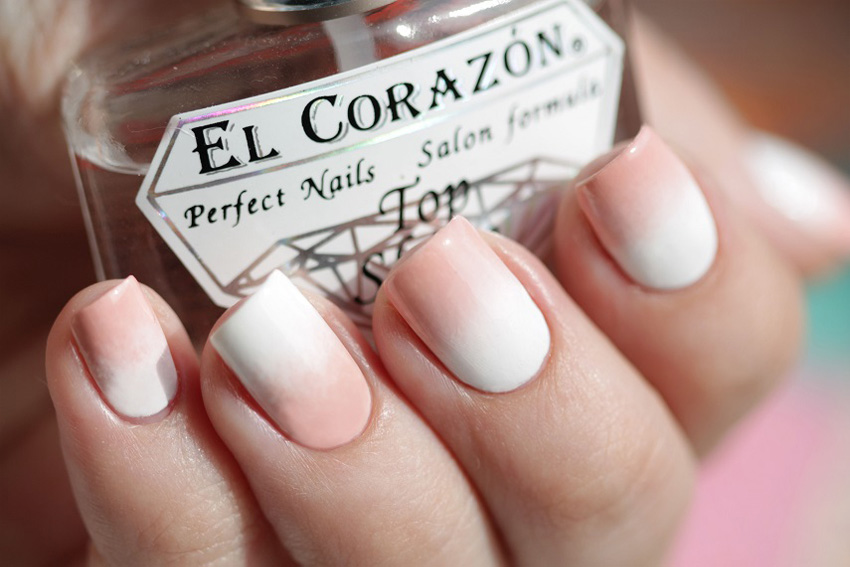
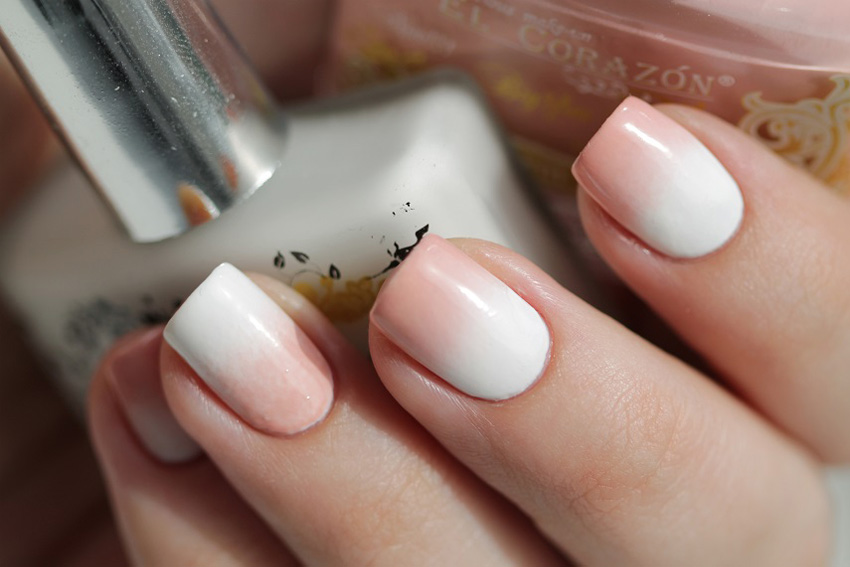
We clean the cuticle with excess varnish and be sure to apply nail topcoat - EL Corazon® No. 410 Top Shine to even out the surface.
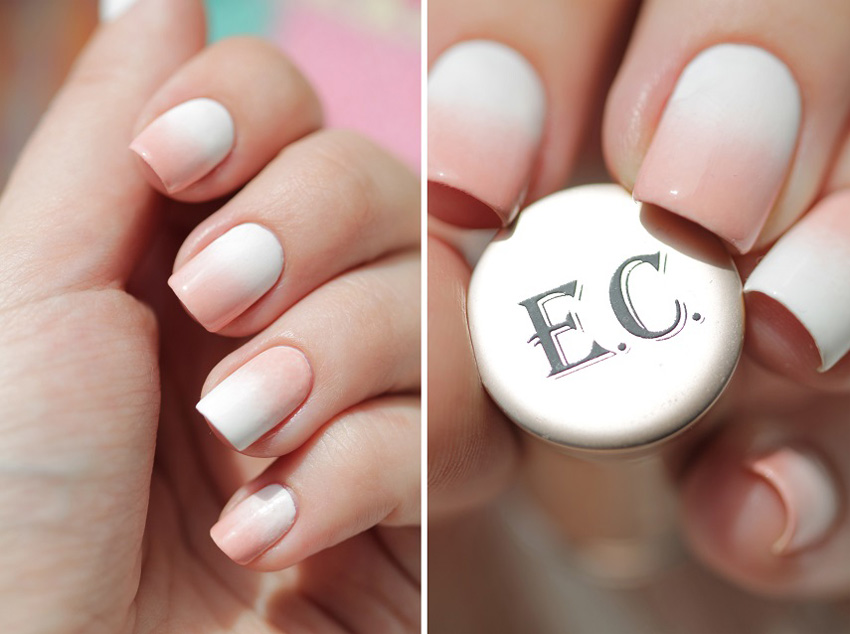
Gradient manicure is ready!
gradient nail tutorial

Gradient Manicure
Gradient manicure - step by step photos
Gradient manicure - step by step photos
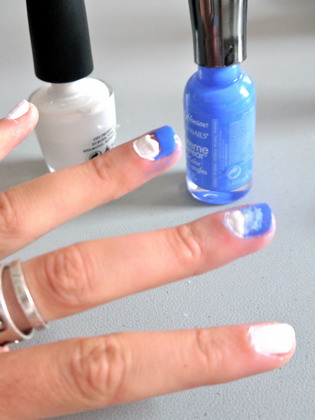
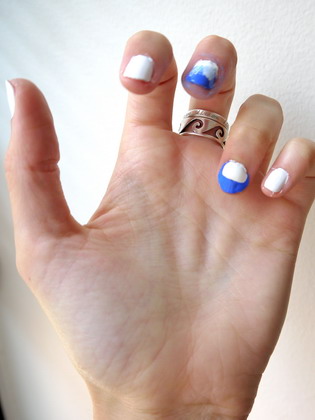
You can also use any shades (use No. 881, No. 854): 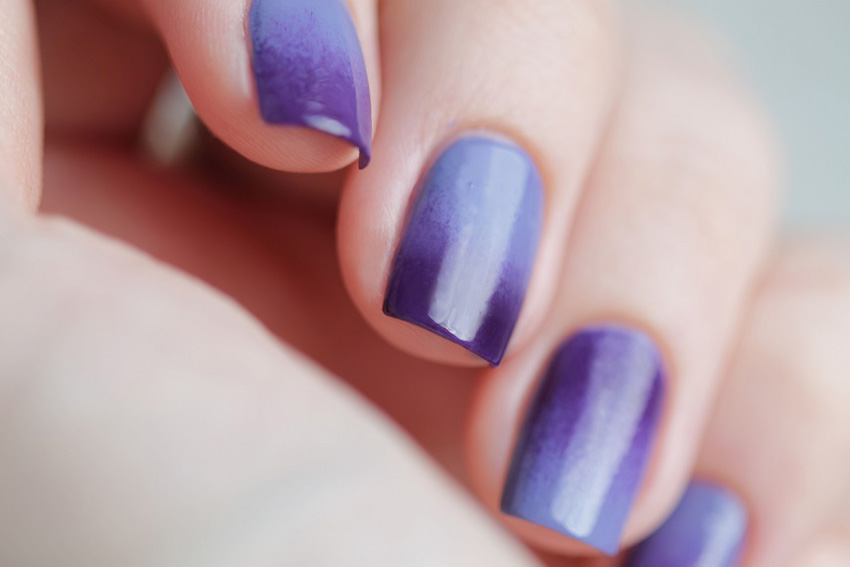
gradient manicure at home
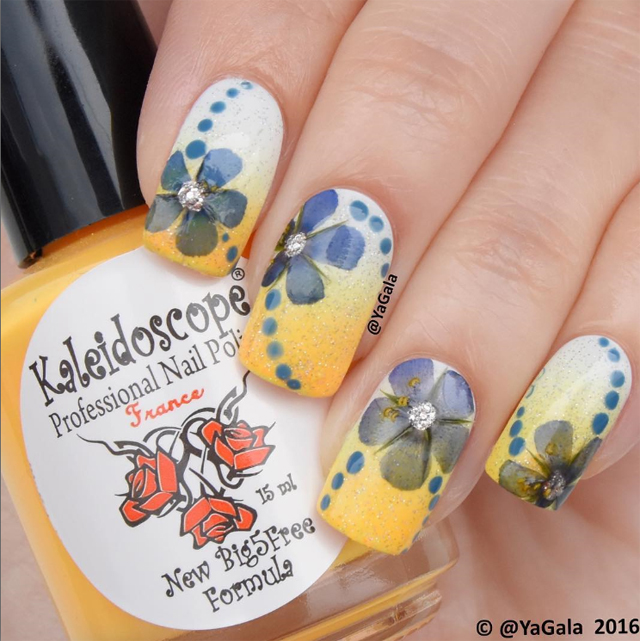
Gradient manicure 2016
Photo and idea from Yagala
If you find it difficult with selection color combinations for gradient manicure, then feel free to use white varnish, it looks good with any shades. By the way, it is often used as a base by fans of multi-layer nail designs. It enhances the brightness of colors. Gradient manicure for this photo was made in the summer, so the author of the idea selected two neon polishes: yellow and pink in combination with white. Two nails are accented with black stamping polish. While watching the video, pay attention to the use of the drug "Cuticle Defender" Kaleidoscope by EL Corazon®. You don't need to scrub off excess finish with nail polish remover. Simply apply "Cuticle Polish Protector" before performing gradient manicure.
Gradient manicure "Summer 2016"
Photo and idea from Yagala
Diagonal gradient manicure summer - 2016
Photo and idea from Yagala
Gradient manicure can be not only vertical or horizontal, but also diagonal, as in this master class. The diagonal line can be effectively designed. If you know how to paint with a brush, then try applying small flowers. If you have just begun to be interested in nail design and have not yet learned how to work with a brush, then use a ready-made solution - “Flowers” nail stickers. This one was made in the summer and therefore bright nail polishes from the Kaleidoscope by EL Corazon® “Bright Me” series No. I-03 (blue) and No. I-04 (pink) were chosen. While watching the video, pay attention to the use of "Cuticle Protection". This drug makes it much easier to perform gradient manicure.
Summer gradient manicure - 2016
Photo and idea from Yagala
Gradient manicure with design
Photo and idea from Yagala
If desired, you can add nail stickers. Using two cream EL Corazon® Active Bio-gel Color gel polish "Cream" No. 423/285 and No. 423/304, the author of the idea made a gentle gradient transition. The EL Corazon® collection of nail stickers has many single-color options, all of which are ideally combined with a multi-color coating. 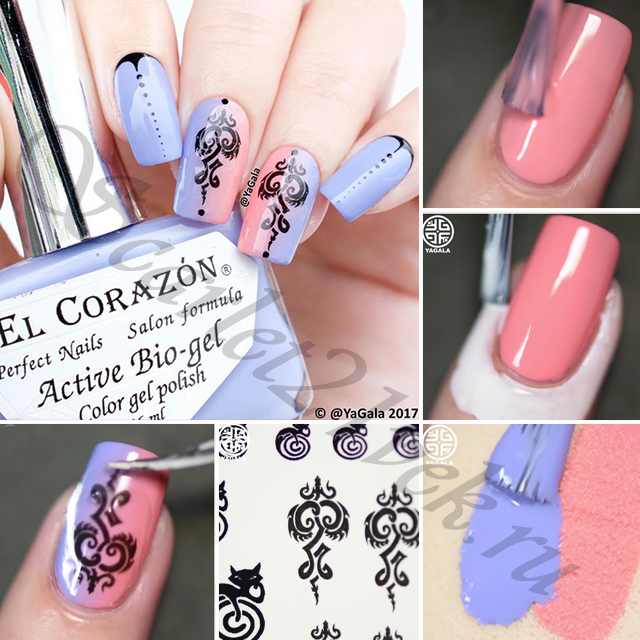
Spring-summer gradient manicure - 2016
Photo and idea from Yagala
At this point photo presented magnificent idea for a bright gradient manicure "Spring 2016". Gradient made using two modern neon varnishes “Bright Me” EL Corazon® - Kaleidoscope No. I-02 (pink) and No. I-05 (turquoise). At the border of intersection of varnishes, a new color And gradient turns out to be three colors. The manicure is complemented by stamping. A large floral design is applied with black stamping paint EL Corazon® - Kaleidoscope Special paint for stamping nail art №st-01 black, which matches perfectly with bright gradient. If you have just become interested in manicure at home and are thinking about buying materials, then first buy black paint; it is ideal for any type of nail art, both for stamping and for stencils. In addition to stamping, it is supplemented with small rivets. According to this gradient manicure You can also view video. 
Photo and idea from Yagala
Gradient: EL Corazon® Active Bio-gel Color gel polish
Cream No. 423/277, Kaleidoscope "Bright Me" No. I-04
Stamping: EL Corazon® - Kaleidoscope Special paint for stamping nail art No. Stm-31 emerald bay - “emerald bay” 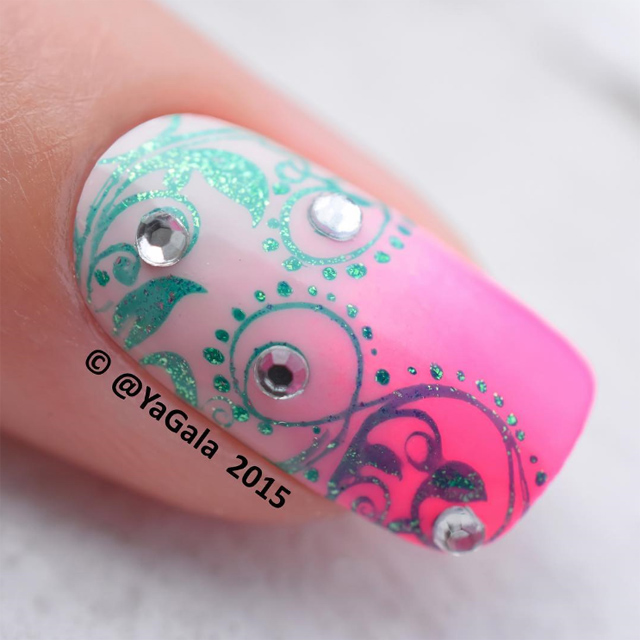
Gradient manicure - 2015
Photo and idea from Yagala
In the master class above you viewed step by step photos on gradient manicure. Now watch the video and find out how you can supplement it with stamping. The lace is applied with white stamping varnish, which, combined with all colors, is the most popular for nail design. Gradient made using cream bio-gels No. 423/276 and No. 423/289. The "Cream" series is the largest in the EL Corazon® Active Bio-gel Color gel polish collection. It includes more than 60 shades. Here you will definitely find matching colors for your gradient! 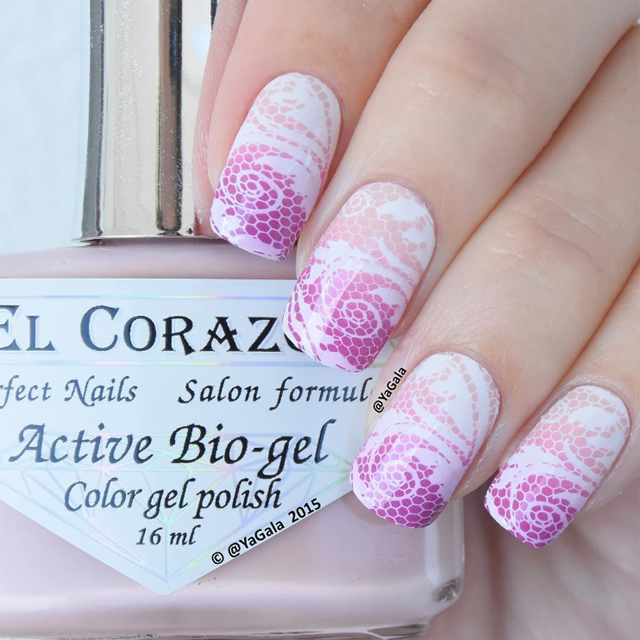
Gradient manicure with stamping
Photo and idea from Yagala
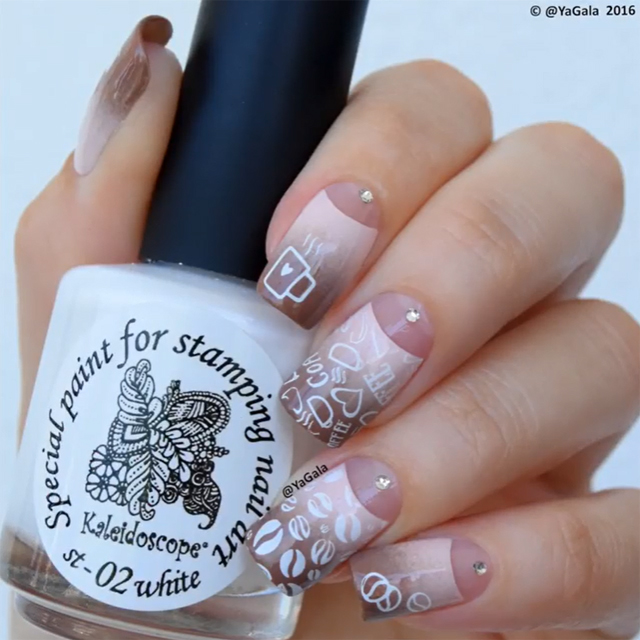 |
In this photo, the gradient is combined with a moon manicure. To leave the hole unpainted, the drug “Cuticle Defender” El Corazon was applied. Let's look briefly step by step: Step 1 - Apply nude nail polish; Step 2 - Using a sponge and brown varnish we make gradient; Step 3 - Apply El Corazon Cuticle Defender to the hole area. ; Step 4 - Stamping with white paint; Step 5 - Cover |
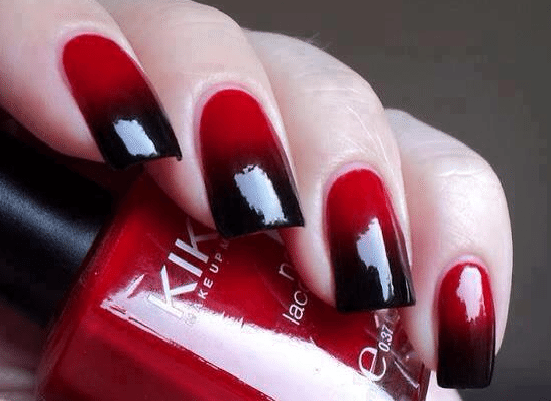
The gradient effect, or, as it is also called, ombre (from the French word ombré - “darkened”), means a smooth change of colors: from light to dark shade of one color or between two contrasting colors. The main thing is that there are no sharp boundaries between them.
This interesting effect has gained immense popularity over the past few years. Ombre is being used more and more often in clothing, accessories, makeup and hair coloring. The gradient on the nails became a logical continuation of the trend. Are you afraid that it will be very difficult to repeat such a manicure at home? There are a few different ways how to make a gradient on nails that will suit craftswomen with different levels professionalism.
First step
A beautiful manicure begins not with polish, but with nail preparation. Take the time to steam your skin in a bath and cut off excess, push back cuticles, and trim your nails. Do not use hand cream or any oils, otherwise the polish will adhere very poorly. Leave this element of hand care for later.
Don't ignore base coats. After all, they not only level the nail plate, allow the varnish to lie more evenly, but also protect it from stains after bright colors varnish
How to make a gradient on nails for beginners?
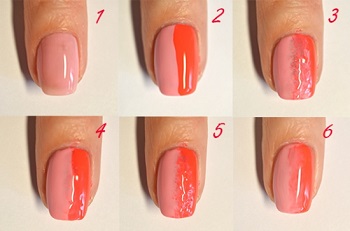
Are you afraid to even think about painting ombre yourself? In vain. There is one simple way - gradient nail polish with glitter and clear polish. The first one, as a rule, has a loose coating, which is what we will use:
- First, coat your nails with clear polish and wait until it dries.
- Then apply glitter on half of your nail. Wait for it to dry thoroughly.
- Then apply glitter again to the tip of the nail so that it is thick and dense.
- Finally, cover the dried manicure with top coat. The fashionable ombre effect is ready.
Once you get the hang of it, you can experiment with darker colors as a base.
Making the task more difficult
Now we will show you how to create a gradient on your nails with two shades of polish. It's quite simple and will help you master this technique.
You will need:
- 2 varnishes of different colors;
- fixing coating;
- a piece of plastic, foil, or just a paper file;
- sponge - an ordinary bath sponge is taken here;
- toothpicks;
- clean brush;
- nail polish remover;
- cotton buds.
Process step by step
- Apply a light polish to your nail. Wait for it to dry.
- Apply a generous amount of varnish of both colors onto the file, so that their borders slightly touch.
- Now we make that same gradient strip. Take a toothpick and mix both colors: the further into each color you mix them, the longer the transition between them will be.
- When you have achieved the desired result, apply the sponge with the even, flat side to the varnish on the file.
- Then quickly and gently press it onto the nail several times, as if powdering it. Repeat on the remaining fingers.
- You can reapply the varnish using a sponge, but only after the previous layer has dried. Otherwise everything will get blurry.
- We apply a fixing coating. It may be necessary to repeat the procedure two or three times, since applying the varnish with a sponge results in a rough surface.
- You need to work with the top quickly so that it does not have time to smear the beautiful stripes. You can move the brush not in the usual direction along the growth of the nail, but horizontally, from its edges.
- Now let's eliminate minor flaws. We take nail polish remover and remove excess on the skin around the nail with a cotton swab, and it is better to remove excess polish around the cuticle with a thin brush. This will give you perfect, neat edges for your manicure.

Without sponge
There's another one interesting technique how to make a two-color gradient on your nails. A photo tutorial on how to do such a manicure will clearly show the work process:

So, get ready to act quickly:
- Using a darker polish, draw rough outlines at the base of the nail.
- After the first layer has dried light color paint the remaining area. Varnish has the property of slightly dissolving previous layers, so quickly and carefully mix different shades with a brush.
- When everything is dry, coat your nails with a base coat and remove any excess polish. As you can see, this manicure is quite simple to do.
Coral Tale
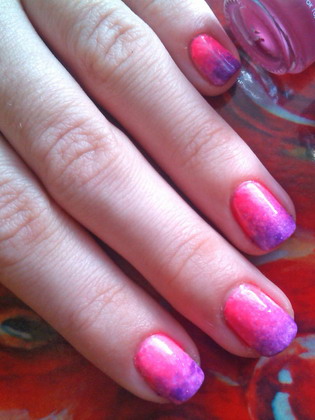
This gradient on nails has become almost classic - 3 shades in one color scheme, which change from the darkest at the tip of the nail to the lightest at its base. Making it just a little more difficult than previous options.

You will need next arsenal manicure products:
- base coat;
- white varnish;
- 3 polishes in colors from light to dark;
- fixing coating;
- cuticle oil (optional);
- makeup sponge;
- scissors;
- Vaseline (optional).

DIY three-color ombre
Let's get started:
- Apply the base coat and wait for it to dry.
- Do the same with white varnish.
- Cut your makeup sponge to fit the size of your nails.
- Lubricate the cuticles with Vaseline - this will make excess polish easier to remove. After all, when you work with a sponge, the skin around the nail will inevitably be smeared.
- Unscrew the cap on all three bottles of polish, but be careful not to tip them over.
- Some craftswomen advise moistening the sponge or sponge before use. Try working on dry and wet surfaces to see which works best for you.
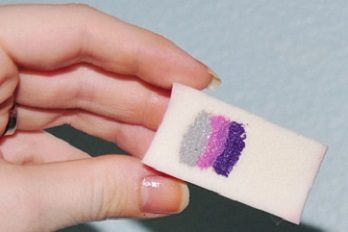
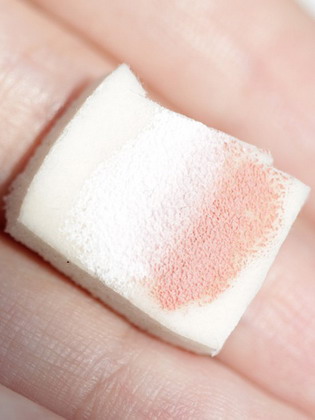
- Now paint stripes on the sponge with varnish, starting with light and ending with dark color. Apply the liquid generously to saturate the porous surface. This will have to be done quickly so that the varnish does not dry out.
- Now gently press the sponge onto your nail to transfer the color onto it.
- Repeat on the remaining fingers. Important: after each nail, renew the layer of varnish on the sponge.
- When the manicure is dry, apply a protective coating so that your efforts are not in vain, and you will enjoy beautiful nails for a long time. Wipe off excess polish and apply cuticle oil if desired.
Unexpected turn
Of course, traditional ombre is done within one nail. But why not break the stereotype and extend the color to all fingers? This creates an interesting gradient on the nails.
And to create such an effect is quite simple; you don’t need to buy half a store of decorative cosmetics.
You will need:
- two varnishes: colored and white;
- a piece of foil;
- brush;
- toothpick.
How is the “wrong” ombre done?
Everything ingenious is simple:
- Apply 4 thick drops of colored polish onto the foil. Next to them, add a little white varnish, gradually reducing its amount.
- Mix both colors thoroughly. You will get four shades of different saturation, for each finger. And for large ones, just use undiluted colored varnish.
- Using a clean brush, paint your nails as usual.
- Remove excess varnish and the job is ready.
 How to make a gradient on nails with gel polish?
A regular manicure is convenient because it does not require significant investment. It allows you to change your nail design every day. But the modern pace of life does not always leave time for playing around with drawings and patterns. Gel polish has come to the aid of fashionistas who are always in a hurry. Its undeniable convenience lies in the fact that the manicure remains in perfect condition for at least 2 weeks.
Making a gradient on nails with gel is no more difficult than with regular polish. The main thing is to strictly follow the order of applying layers and drying them. 
For manicure you will need:
- colored gel polishes (1-2), depending on how many color transitions you want to make.
- gel polish of primary color;
- base and top (fixing) coating for gel polish;
- nail polish remover (necessarily without acetone), alcohol or alcohol-containing wipes;
- a napkin that does not leave lint;
- a small sponge from an eyeshadow applicator or a regular sponge and a piece of foil;
- tweezers;
- drying lamp - 36W UV or 12W LED.

Step by step
Now we’ll tell you in detail how to make a gradient with gel on your nails. The process can be divided into the following stages:
- Once you've prepared your nails, degrease them using alcohol or nail polish remover. Here you will need a napkin that will not leave lint on your nails.
- Now apply the base and dry it for 10 seconds (no more!) under the lamp. Here and further: the gel layers should be as thin as possible. This way the manicure looks neater and is less prone to chipping.
- Now you can apply the main color. This layer, like all the others, should be dried for 2 minutes under an ultraviolet lamp or just a minute under an LED lamp.
- It's time to create the gradient itself on the nails. This can be done in two ways.
- First: Apply a small amount of polish to the tip of your nail, or in stripes if you have a three-color gradient. Using tweezers, take the eyeshadow applicator sponge and blend the colors. If necessary, add a little more varnish. When the transitions are completed, dry.
- The second method is good for two-color ombre: first draw a smile on the nail, dry it for a minute in a UV lamp or 30 seconds in an LED lamp. Then drop the gel polish onto the foil and scoop it onto the sponge. Apply to the nail until you achieve the desired result. Dry as usual.
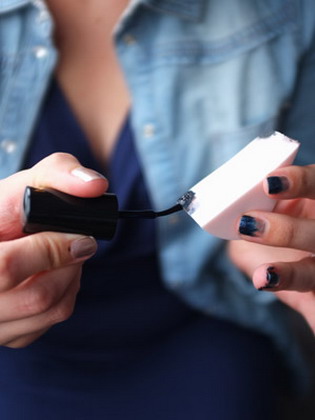
- Now apply the top coat, and grab the end of the tip of the nail to further secure the gel polish. This way it will last longer. Masters call this technique “sealing.” Dry this layer.
- To remove stickiness, wipe your nails with alcohol or alcohol-containing wipes.
Your fashionable and long-lasting manicure is ready. Do not expose it to liquids containing acetone. It is advisable to wear gloves when working around the house to prevent scratches on the varnish and reduce its glossy shine.
Beautiful combinations
Now that you're familiar with the technique of creating a gradient, check out a few beautiful options manicure:
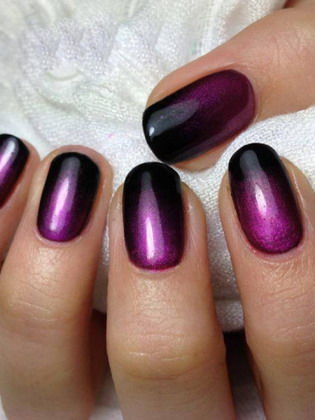
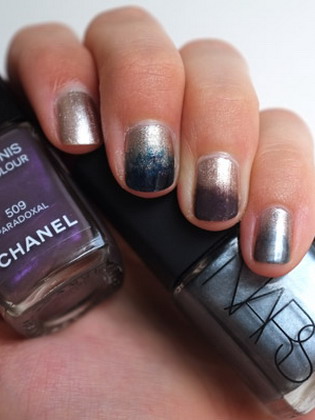
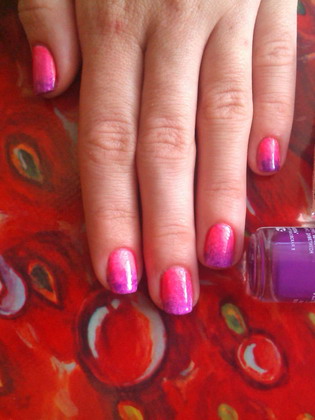
- Sparkling purple shades — great option for a party.

- Ombre in soft pink colors, bright sand varnish and patterns create luxury manicure for special occasions.

- Another variation in the colors of the sea:

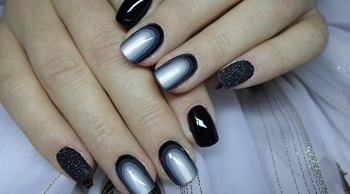
- But calm shades will give an equally beautiful gradient on the nails. The photo is a bit reminiscent of a French manicure - the same elegant femininity, but with a fashionable twist.

There are several ways you can diversify the gradient on your nails:
- Don't know how to draw at all? Patterns using a stamping plate are an easy way to decorate any manicure with complex patterns.

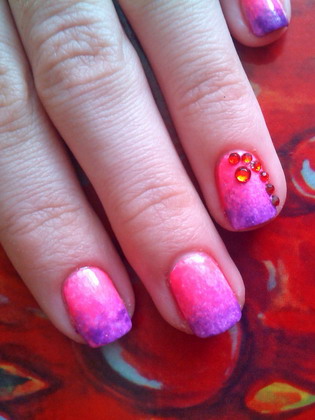
- The “special nail” rule also works with ombre. There are several ways to highlight your ring finger: paint it with one shade, make a design with a brush or rhinestones, or you can simply reverse the gradient.
- It happens that the hand trembled, the varnish did not dry well, etc. As a result, the color transition border turned out to be rough. This flaw can be disguised with a glitter coating, which will cover all the roughness and add an attractive shine to the nails.
One of the most fashionable options nail design is a gradient manicure. His main feature – smooth transition from one color to another.
Making a gradient manicure at home is not at all difficult, because there are many photo and video instructions.
Interestingly, the gradient is a smooth transition and can be placed on the nails both horizontally and vertically. The shades of the varnishes used can also be completely different - from the same color scheme, or the opposite, creating contrast.
For a more original nail design, a gradient manicure can be complemented with any designs.
The easiest gradient manicure at home
The easiest way to create an ombre on your nails is when the gradient moves from finger to finger. You should first decide what color scheme you will use for the stretch. Then you need to select 3, 5 or 10 shades of varnish of the same color.
The selected coatings for nail plates should have the same texture and density. Experts strongly do not recommend combining matte, pearlescent, enamel and glossy materials in one composition. Such a manicure will look funny and ridiculous.
Before applying colored materials, it is advisable to cover the nail plates with a base; it will protect them from harmful effects and preserve them for longer. beautiful manicure. Arrange all prepared varnish coatings in a row according to their tone - from dark to lighter.

If you are using only three shades, the darkest should be middle finger. Nails on the ring finger and index finger cover with a lighter material, and cover the little finger and thumb with the lightest one.

When using 5 shades, start with the little finger, it should be the darkest, all subsequent nails should be lighter. With 10 shades of nail polish, you can create a gradient transition between all the fingers of both hands.
The simplest gradient manicure at home is in the photo below:
How to do a gradient manicure at home (with step-by-step video)
Let's find out how to make a gradient manicure at home using different methods.
First of all, before we begin the beautiful and fashion design marigolds, prepare the following tools and devices:
- a piece of foil, film or a small plastic cap;
- sponge for applying makeup or a regular sponge - a small piece;
- 2-3 colored polishes and clear nail polish;
- several ear sticks;
- nail polish remover.
Do a gradient manicure at home step by step in the following way:


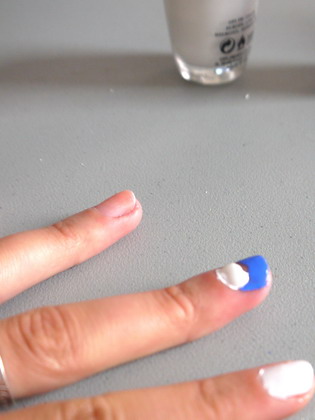
Paint your nails with a base color polish. Take a polish of a different color with which you will combine the main one. Apply a few drops to foil, film or cap.
![]()
Soak a sponge or sponge in the varnish and, using gentle, blotting movements, begin to apply the varnish to the nail.
Apply a different color of polish to another piece of foil and do the same with the rest of your nails.
When the coating dries, apply a clear varnish to it. There may be polish on the skin around the nail plate; to remove it, wet it cotton swab in nail polish remover and wipe stained fingers.
There is another option for creating ombre nails. You can apply 2-3 strips of varnish to a sponge or sponge, a base color and two additional ones. Using a dabbing motion, apply them to nails that are already coated with base polish. Cover the top of the nails with a fixative.
Nail technicians share another method with which you can create a beautiful “ombre” at home. Take the selected varnishes, apply them in strips on plastic wrap, then use a toothpick to mix the varnishes together at the joints so that the lines are blurry. Apply the film to your nail so that the striped pattern is imprinted on it. Do this with each nail.
How to make such a gradient manicure at home, in this video:
Creating a gradient manicure with gel polish at home
You can also do a gradient manicure at home with gel polish, then it will last much longer - up to two weeks.
To create such a manicure, you must perform the following steps:
Treat the surface of the nail plates with a file with an abrasiveness of 80-100 grit.
Apply Bondex to them to degrease the surface.
Dry each nail under a UV lamp.
Cover the surface of the nail plates with a transparent base and dry well again under ultraviolet light.
Apply one color to the middle of the nail, starting from the edge of the cuticle. Cover the remaining part with another shade.
The first varnish, using more thin brush, tint the transition so that it is smooth.
Dry your nails under the lamp, apply a top coat to give them shine, and dry again.
This version of a gradient manicure is step by step at home in this video: