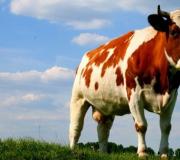
How to draw a fox from a fairy tale step by step. How to draw a fox with a pencil step by step at different levels of preparation
For those interested in fine art, it would be useful to learn how to use a pencil step by step. To create a drawing you will need a simple pencil, an eraser, an orange and black felt-tip pen or other materials for coloring.
For beginners
For those who are just mastering this type of creativity, you first need to learn how to draw a fox with a pencil step by step. For beginners, a more suitable option is when the animal looks more like a cartoon. What do we have to do:

For children. First way
Little artists need to simplify the task of creating an image as much as possible, but the result should be beautiful, bright and even a little funny. Learn how to draw a fox with a pencil step by step. For children, we offer different ways to create a drawing. First way:

For children. Second way
You can draw a fox with a pencil step by step using this method in a few minutes.

- Draw a head with ears. The shape resembles a triangle with rounded edges.
- Draw the legs of a fox. In this case, she is sitting, so her front legs are standing.
- From the head draw the torso and hind legs.
- Draw the tail.
- Add two dots to the muzzle, representing eyes and a nose located at the very bottom.
- Color it. Wax pencils work well.
Fairytale animal

This method is a little more complicated than the previous ones, but with its help you will learn how to draw a fox with a pencil step by step from a fairy tale. In fairy tales, animals not only can talk, but generally live like ordinary people and wear clothes. In this lesson you will learn how to draw a fox in clothes. What do we have to do:
- Mark the location of the stump, head, clothing and legs.
- Draw the muzzle. In this picture, the fox will be looking to the side, so only one eye is visible. Give the circle the shape of a head, draw ears, a long curved nose, a mouth and an eye. Mark the position of your hands.
- Add an eyebrow above the eye, using small strokes to depict shaggy cheeks. Draw the ear.
- Work on the arms more precisely, making them thicker and outlining the shape of the paws.
- Draw the toes and finalize the dress.
- Show the location of the fluffy tail, decorate the dress by drawing a neckline and an ornament.
- Draw bark on the stump and grass around it.
- Possibly on the nose.
- When finished, erase the outline lines and color.
This method is good because you can use your imagination in creating a dress and jewelry for it.
You have learned several ways to draw a fox for beginners, kids and professionals.
If you don’t know, we hasten to say that it is not as difficult as an inexperienced artist might think. Despite the fact that this forest hunter is cunning and resourceful, the lines of her body are smooth and flexible. It is enough to show a little perseverance, then you will be able to depict a cheat on a piece of paper.
Basically, all foxes look the same - short legs, a long body, a sharp muzzle with protruding ears and a bushy tail. Ours will be a great help for you, and you can easily draw a red fox.
Step by step drawing of a fox
Stage 1 - draw the silhouette of a fox
Using light, abrupt lines, draw the muzzle, slightly rounding it at the bottom. Then move to the back. Go down a little to create a tail. Don’t be afraid to make sharp movements with a pencil - during the drawing process, all unnecessary details will be erased with an eraser.
Having drawn the tail, you can outline the area of the neck, back of the body and paws. Don't forget to outline the belly with a thin, curved line, as shown in the first picture.
Stage 2 - adding details
Now you can start detailing your sketch. On the face you need to draw small pointed ears and move on to the head itself. Draw a thin vertical line in the center, and then a small horizontal line in the center of this line.
The fox will have eyes in this area. Draw a small circle for the animal's nose. The front legs should be straight, but the hind legs should be slightly curved. How to do this is shown in the figure. You can also draw a shirtfront on the animal’s chest—a few lines so that we don’t forget about this detail in the future.

Stage 3 - remove extra lines
Erase all unnecessary contour lines from the sheet, leaving only a clear silhouette of the fox. Add richness to your eyes and nose. Round the ears slightly at the top of the head. Work on the paws and tail. It needs to be made more fluffy, and fur should be drawn on the paws. This can be done with small touches.

Stage 4 - adding fur, drawing eyes
This stage is the penultimate one in our lesson. All you have to do is finish the eyes, nose and draw a small mouth. The entire body of the animal must be “covered” with fur using strokes. The figure clearly shows in which area to do this.

Stage 5 - final
Here we come to the last step, which will help make our fox more realistic. Add more fur throughout the body, and also spend time on the eyes. You need to draw small eyelashes and make the eyes darker. Don't forget about such small details as whiskers, claws on the paws, fluff on the top of the head and the black tip on the tail. That's it - the fox is ready!

Other step-by-step drawing options
Option 1
 Option 2


The fox is very similar to its relatives the wolf and the dog. She has a similar body structure and is only slightly smaller than them. But the fox has a very bushy red tail, which she needs not only for beauty, but also for business. For example, when chasing with its tail, a fox covers its own tracks in the snow and also warms itself in severe frost, “covering itself” with it like a blanket. The fox's fur is longer and thicker than that of a dog and a wolf, and, of course, it has an original bright red color, sometimes with a red tint. The fox's muzzle is more elongated with a narrow mouth. This makes it easier for foxes to catch mice in holes. Typically, foxes have a small body size and short, stocky legs. Since they live in burrows, their body is slightly elongated, like that of a dachshund.
All this must be taken into account in order to draw a fox correctly. In this lesson we will learn how to draw a fox step by step with a pencil.
1. Draw the contours of the fox’s body and head

First, let's draw the main contours in the form of two circles. One is slightly larger - for the fox's head, the second - for the collarbone and the back of the body. Then we will draw a tail from it. Let's connect these circles with lines. Then add two lines on the back and front for the fox's paws.
2. General shape of the contour of the fox’s body

Draw preliminary outlines to create the approximate shape of the fox's body, legs and head. Draw an arched line around the head and neck. Outline the paws, draw a line on the lower abdomen, on the back, and on the back of the head. Then smoothly connect all these lines. This is a preliminary outline; it can be corrected if something goes wrong.
3. How to draw the head, tail and paws

Now mark the position of the tail, and also add the position of the two paws on the back of the fox drawing. Next, in the middle of the circle of the head outline, draw two straight lines, almost meeting at the nose. Draw the outline of the nose and add preliminary outlines of the ears.
4. Drawing of a fox in detail

Remove some previously drawn unnecessary outlines fox drawing. Draw the fox's tail, add more detail to the head drawing. The ears should be voluminous, for this we will draw an additional contour of the ear. Make the eyes elongated and paint them with a small gap in the middle. Specify other details of the muzzle.
5. Final drawing in pencil

Erase all previously drawn unnecessary outlines of the fox drawing and trace all the outlines of the fox's torso and legs. Pay attention to details, such as the claws on the paws.
6. Color the drawing with a pencil

Now almost all the contours can be marked with small strokes to convey the fluffy fur of the fox. And it is better to first lightly wipe these contours with an eraser so that they do not stand out in the final drawing with a simple pencil and are not noticeable after coloring with colored pencils or paints.
Color in the fox drawing with strokes of a simple soft pencil. In some places, make the strokes lighter, and in some places, on the contrary, darker. The tips of the fox's ears, paws and tail are sometimes black and white. You can do this in your drawing.
7. Color your drawing

I did this tutorial entirely on a graphics tablet. You can add yellow and red shades to the entire picture with colored pencils. You can add color even to a black and white drawing, just a little bit so as not to paint over the thin dashed lines made with a simple pencil. I hope the lesson “How to draw a fox” was not difficult for you.
A wolf is similar in appearance to a fox because they have the same ancestors. But the wolf has more pronounced predatory characteristics. Its fangs are longer than those of a fox, and its tail is not as fluffy. A wolf, unlike a fox, is most often depicted with a grin in drawings to convey its aggressive character. This grin can create a great wild animal effect in your drawing too. In this lesson we will learn how to draw a wolf step by step with a pencil.
A hare can sometimes become a fox's prey. You can use this lesson for a picture with such a plot, a rabbit is very similar to a hare. Drawings of rabbits jumping merrily seem simple to draw only at first glance. In any drawing of an animal, you need to accurately maintain the proportions and convey its character and grace.
The fox is the most dangerous enemy of the swan. Foxes often destroy their nests, destroying eggs and chicks. The swan is a very beautiful bird. Its beautiful wide wings and especially thin, graceful neck give grace and noble grace to this bird. Drawing a swan is not that difficult. Its body consists of a large round belly, a long elongated neck and wings. The most important thing is to draw the neck and wings well, they are the most important parts of this bird.
A deer lives together in the same forest with a fox and sometimes their paths cross. If you decide draw a fox in a forest clearing, you can draw in the distance a deer emerging from the forest.
Who doesn’t know Krylov’s fable about the fox and the crow? In the fable, the crow is presented as stupid and gullible. In fact, the crow is a very smart and cautious bird, since it lives next to a person and has “gained” intelligence from him.
Drawing a fox or a bear requires some preparation and practice in drawing animals. The fact is that it is necessary to reflect the character of a ferocious and dangerous animal in a drawing of a bear. Of course, if you are drawing an illustration of a fairy tale about a sly fox, then the bear should have a good-natured appearance. In nature, bears, be they white or brown, are quite dangerous predators.
It’s difficult to say which elements are easiest to start mastering painting with. Some people advise trying still lifes, others recommend three-dimensional geometric figures, but if we are talking about children, then they definitely need to learn from images that are interesting and understandable to them.
What could be more fun than trying to portray a fairy tale or cartoon character? Red Fox Patrikeevna is an excellent option for creativity and development of artistic skills.
If you are taking the very first hesitant steps in the world of painting, do not take on complex realistic drawings, especially if you have not made any attempts at drawing before. First you need to gain an understanding of composition, proportions, projection, and only after that try to achieve light-shadow transitions and texture imitation. Therefore, the best options for training would be children's cartoons or fairy-tale images.
- To create a sketch, use pencils of medium softness (HB) or soft (H, 2H): if necessary, their mark is much easier to erase. But the final stroke can be done with a hard (B) pencil or even a felt-tip pen.
- Do not press on the lead - it should leave a very light but clear mark. At the same time, it is important to move your hand confidently so that it does not tremble and gives a straight line.
- If you can’t draw basic elements, practice first on a separate sheet of paper. If we talk directly about the silhouette of a fox, then it is dominated by deformed circles.
Before you pick up a pencil, take a look at an example of the finished drawing, if you are working by repeating a step-by-step diagram, and evaluate the relationship of the main parts, as well as their location on a sheet of paper. This basic and fairly simple rule is often forgotten.
How to draw a fox for children for beginners step by step?
For children's drawings, stylized images are most often chosen, in which the elaboration of each shadow and hair does not play a special role. Object recognition is based on the silhouette, facial expression, and some characteristic features.

- So, draw a lying oval, the left side of which should be slightly pointed: this will be the fox's nose. Then on top, almost in the center, add a small pointed vertical oval with the corner pointing up. Exactly the same, but more elongated, should be placed to the right, at a distance equal to its width. These will be the ears.
- Now draw a new lying oval, which is the body of the fox: it should be clearly in the center of the drawing (figure) and partially overlap the oval-head - at the top a little less than half its length, and no more than 1/4 of the height. The oval can be absolutely smooth, or you can narrow it slightly towards the right edge, since the animal’s chest is usually more pronounced.
- Often no one has any problems with drawing paws: these are 3 small vertical ovals, equal in height to the height of the far ear. They have the same dimensions and are located approximately at an equal distance from each other, however, between the back and the front it is slightly less than between the pair of front ones. Lying ovals are added to each paw, the underside of which is flat: these will be pads.
- The drawing is close to its completion: now you need to make a tail - first you can draw a vertically reflected letter “C” with an extended lower tip to the right side of the body, and then draw a bend on top. Remember that even a fairy fox's tail comes out of the spine, so it should be almost at the same level as the head (joint).
The last details to appear are: an inverted elongated heart in the ear, which shows its shell, an elegant line to the nose, button eyes, a mouth, straightening of the back, “fingers” on the paws. Then the main lines are duplicated with a hard pencil, and the auxiliary lines are erased.
How to draw a fox from fairy tales: job description
We suggest trying an alternative version of this charming animal, which was often seen in Soviet cartoons. The silhouette turns out to be quite simple, but much closer to the real one. In addition, there are fewer steps than in the previous scheme. Here the body will become the largest element, the tail is close to it, but narrower, and the head is quite small.

- In the center of the composition area, draw a horizontal oval that is slightly raised on the left side. There you need to draw an even circle and connect it to the raised end of the oval with soft diagonal lines indicating the neck. Its height should be approximately 20% greater than the diameter of this circle. Above the head, add ears that look like an elongated letter M - they are located very close to each other, as well as an elongated triangle of the nose.
- Now, at a short distance from the neck in the lower part of the oval, outline 2 front legs, taking into account that the far one should be smaller, and they themselves are concave, since they are under tension. There is only 1 hind leg, it is voluminous in the upper part, and its width takes approximately 1/4 of the length of the lower side of the oval.

- The tail is loosely drooped, so it is drawn in soft lines around the hind leg in a forward direction, widening towards the end and then softly tapering. Its tip should stop on the vertical of the far front paw, and the distance is equal to the height of 2 paws. The basic sketch is now complete.
- Now comes the turn of details: start connecting all parts of the animal with smooth lines, paying special attention to the neck, transitions from the chest to the paws, as well as the muzzle. On the tail with a zigzag of different depths you need to show the difference in fur. It is also advisable to designate the white chest, dark lower parts of the paws, and, of course, draw the eyes and nose.
What You'll Be Creating
Foxes are wonderful animals that some of us enjoy keeping as pets. They are quite easy to draw, especially since they resemble dogs in many ways. But what distinguishes the different types of fox? And how can you create your own look without making it weird? Keep reading and I'll show you!
1. How do you characterize a fox?
This may seem like a strange question, but it is important to answer it in order to draw a fox and not a dog. Foxes belong to the same family as dogs (Canidae) and they share many common features such as general body shape, eyes, paws, ears, nose, muzzle and tail. In fact, they are so similar that you can successfully use them to draw these parts. However, you need to consider the following differences:
- The fox's paws are small, attached to long, slender legs;
- The puppies of real foxes (except for the corsac) are small, like those of a cat;
- The ears are always pointed and triangular (only very young and some domesticated foxes may have floppy ears);
- The largest of the foxes is the size of a Shiba Inu.
Let's take a look at the main differences between a dog and a fox body. You should have no problem recognizing which is which, although I made them the same size to make comparison easier.
Difference between a dog and a foxThe picture below shows many of the features common to a fox. Not all of them need to be shown, especially if you're not drawing a real fox. Required elements are:
- Slender body with a long tail, thin legs and small paws;
- Triangular, pointed ears;
- Flattened skull with an oblong snout;
- Long characteristic sideburns;
- Long, fluffy tail.
Additional features you can use when creating your own fox species:
- Dark tear mark (dark spot between the corner of the eye and the mouth);
- The tip of the tail is colored differently than the rest of the body (usually black or white for good contrast);
- Slit pupils;
- The lower part of the body is lighter colored than the rest of the skin;
- “Socks” of different colors.
2. Draw a red fox
Body Features
The most popular species is the red fox. You can use it as a template for all other views, keeping in mind the differences between them.
- The overall silhouette of a red fox depends on the season and its habitat. The thicker the coat, the more “lacey” the body looks. Otherwise it looks thinner and longer;
- The less fur, the smaller the neck looks. When more fur appears, the head appears fused with the neck;
- Do not confuse a red fox with a wolf cub (this is neither a fox nor a wolf).
color
- Most of the fur is red, with a slight yellowish tint;
- The back part is less saturated in color, sometimes even grayish;
- The underparts are white;
- The tip of the tail is white;
- There are dark or even black socks;
- The eyes are light, amber or reddish brown;
- The back of the ears is black;
- A dark tear may appear, but is not required;
- There is a dark stripe throughout the body.
Head proportions
The head is based on a diamond shape. Follow the instructions below to create your fox head. Drawing a Red Fox Head - Front View Drawing a Red Fox Head3. Draw a gray fox
Body Features
Although the gray fox is not a real fox, its popularity earned it a place in this tutorial.
- The gray fox's body is thin and long, a bit like a weasel;
- The tail is long and tapered;
- The head is small, with a short muzzle.
Color
When observing these foxes from a distance, you can easily distinguish it from the red fox by noticing the colors:
- There are three noticeable layers of color on the gray fox's body: white for the lower body, red for the middle, and gray for the upper;
- Slightly light colored socks may appear;
- The tip of the tail is dark;
- The eyes are dark brown with oval pupils;
- There is a dark teardrop.
Head proportions
Keep in mind that the gray fox's head is smaller, with a short muzzle, it also looks more puppy-like.
Drawing a Gray Fox Head - Front View Drawing a Gray Fox Head - Side View4. Draw an Arctic fox
Body Features
The Arctic fox is an easily recognizable furry animal from the tundra. Its winter form is the most popular:
- The body is short and compact;
- White fur is the thickest and warmest of all animals. It is so fluffy that individual strokes are not clearly visible;
- Legs appear shorter than they actually are;
- The back is clearly rounded;
- The ears appear short and round, deeply hidden in the fur;
- The head seems to be fused with the furry neck.
When summer comes, the winter coat becomes redundant and our Arctic fox changes into a less impressive form:
- The body looks thin and long;
- The tail is less bushy;
- The ears become more distinctive;
- There may be remnants of winter fur all over the body. This type of fur is noticeably longer.
color
- Eyes brown or blue;
- The fur is white or cream in winter, black or brown in summer, and a mixture in between;
- Dark teardrops can only appear in summer form, when some white fur remains on the face.
Head proportions
The furry head of the Arctic fox looks like a polar bear cub.
Drawing the head of an arctic fox - front view Drawing the head of an arctic fox - side viewThe fur changes the proportions of the head, so keep this in mind in the last phase of drawing.
Arctic fox - comparison of winter and summer forms5. Draw an American fox
Body Features
The American fox is similar to the coyote, but it is still a real fox.
- The body is very long, thin and almost rectangular in shape;
- The muzzle is long;
- The ears are very large, almost fennec-like.
Color
- The whole body is white, with a grayish layer on top;
- Eyes dark brown;
- The tip of the tail is dark;
- The underparts are yellowish-white;
- Socks may sometimes be visible.
Head proportions
To avoid looking like a fennec fox, make the muzzle longer and the ears rather pointed.
Drawing a Fox Head - Front View Drawing a Fox Head - Side View6. Draw a fennec cat
Body Features
The fennec fox is undoubtedly the cutest of them all and, surprisingly, still belongs to the real fox family. These small foxes live in groups and are very sociable, making them easy to tame.
- Imagine that the whole body is like a puppy: a short torso, short legs and a large head;
- The tail is relatively short and tapered;
- The ears are huge!
Color
- The whole body is one color, fawn with a lighter lower part;
- The tip of the tail is black;
- There is a pale orange tear;
- The eyes are dark brown.
Head proportions
The fennec cat's head is small, with a short muzzle, huge eyes and ears, and a small nose.
Drawing a fennec head - front view Drawing a fennec head - side viewCongratulations!
Now you can draw any fox that retains the characteristic features of each species. You can even create your own look while keeping it anatomically accurate! If you like other animals, take a look at this whole series of lessons.