How to cut a straight skirt. The perfect skirt: ideas and building the base.
Authors of the article: Valentina Nivina Alexander Nivin.
We bring to your attention another method for constructing a straight skirt pattern. If the previous method is designed for so-called standard figures and is more suitable for mass tailoring, then this method is good because it can be used to create a pattern for any figure, including a figure that deviates from generally accepted standards. This technique, compared to the previous one, takes into account some individual characteristics of a particular person.
There are even more precise methods, methods and techniques used to construct patterns for individual tailoring of skirts. We'll get to know them later.
We start by taking measurements.
In order to take measurements correctly, you need to tie a cord or thin elastic band around the waistline. Moreover, the lace should lie in the place of the body where the skirt belt is usually located when worn, and not horizontally to the floor. Otherwise, during wear, the skirt belt will inevitably tend to take its usual position, which will entail a displacement of the side seams towards the front or back, i.e. a violation of their verticality, and therefore a violation of the horizontality of the bottom line. Everyone will suffer from this appearance skirts.
The process of taking measurements should always be approached with special responsibility, since it depends on final result.
To draw a skirt drawing, in addition to the half-circumferences of the waist and hips, you need to take the following measurements:
In our table, as an example, we took half-girth measurements for size 48, the length is arbitrary, and you take your measurements or the measurements of the person for whom you are going to sew this skirt.
Half waist St |
For belt products, the half-waist measurement is measured at the place of the body and in the position where the skirt belt is usually worn, and not horizontally to the floor. The measurement is recorded in half size. |
|
Half hip circumference Sat |
Measure horizontally along the most protruding points of the buttocks, taking into account the convexity of the abdomen. The measurement is recorded in half size. |
|
Distance from waist to floor in front |
Measure along the middle of the front vertically down from the lace at the waist to the floor. The measurement is recorded in full. |
|
Distance from waist to floor at side |
Measure along the side line vertically down from the lace at the waist to the floor. The measurement is recorded in full. |
|
Rear waist to floor distance |
Measure from the back in the middle of the back vertically down from the lace at the waist line to the floor. The measurement is recorded in full. |
|
Distance from floor to bottom edge of skirt |
Measure from the floor to the desired length of the skirt. Or it is determined by calculation, subtracting the desired length of the skirt from the distance from the waist to the floor. For example, 102–67(skirt length) = 35cm. The measurement is recorded in full. |
|
Back length to waist Dst |
Measure from the seventh cervical vertebra to the waist line. The measurement is recorded in full. |
In addition to the basic measurements, it is necessary to provide allowances for a loose fit along the waist and hips. These values depend on several factors, such as the thickness and density of the fabric, the characteristics of a particular figure, fashion trends, client wishes, etc. And most importantly, you determine all this based on what problems you need to solve.
We will take the following increases:
Along the waist line Fri - 0 cm
Along the hip line Pb - 1 cm.
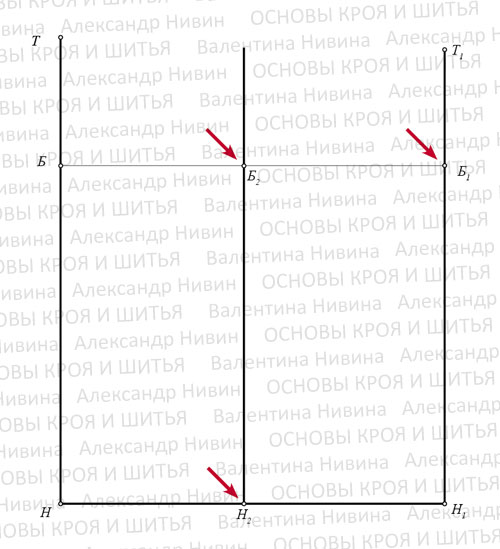
The peculiarity of this technique is that the construction of the pattern begins not from the waist line, but from the bottom line of the skirt.
Therefore, let's start the construction from the lower left corner with the vertex at point H.
From this point upward we set the length of the skirt at the back of the Duse.
To determine the length of the back of the skirt, we subtract: The distance from the waist to the floor at the back minus the distance from the floor to the bottom edge of the skirt.
Nozzle=101-35=66 cm.
From point H upward we set aside 66 cm and place point T.
The distance from the waist line to the hip line usually ranges from 18–20 cm (rarely up to 23 cm), regardless of how it is determined. Therefore, in some methods this value is proposed as a constant, for example, 18 cm for all sizes.
You can determine it using the formula - this is 1/2 of the length of the back to the waist minus 1-2 cm, or even simpler - take a centimeter and measure this distance on a specific figure.
From point T downwards we will put the result obtained and place point B.
In our example, this is 18 cm, we determined it using the above-mentioned formula Dst: 2 - 1 cm = 38: 2 - 1 = 18 cm.
From point B to the right we draw horizontal line.
We determine the width of the skirt - the half-circumference of the hips plus an increase for a loose fit.
Sat + Fri = 52 + 1 = 53 cm
From point B to the right we set this value aside and place point B1.
Through point B1 we draw up and down vertical line. Let us denote the point of intersection with the bottom line by the letter H1
To determine the length of the skirt in front of the Dupe, we subtract: The distance from the waist to the floor in front minus the distance from the floor to the bottom edge of the skirt.
In our example it looks like this:
Dupe = 100 - 35 = 65 cm.
From point H1 we set aside 65 cm upward and place point T1.
The position of the side seam can be determined using the formula given below, but you always need to take into account the characteristics of a particular figure (bulging buttocks, protruding belly) and based on this, move the side seam in one direction or another.
In our example, the side seam is determined by the formula:
Distance BB1 (skirt width) divided by 2 plus 1 cm.
53:2+1=27.5 cm.
From point B1 to the left we set aside 27.5 cm and put point B2 through which we draw a vertical line. The point of intersection with the bottom line is designated by the letter H2.
Side skirt length.
To determine the side length of the skirt, we subtract:
The distance from the waist to the floor at the side minus the distance from the floor to the bottom edge of the skirt.
In our example it looks like this:
102 - 35 = 67 cm, and you do the calculations with your numbers.
From point H2 upward we set aside 67 cm and place point T2.
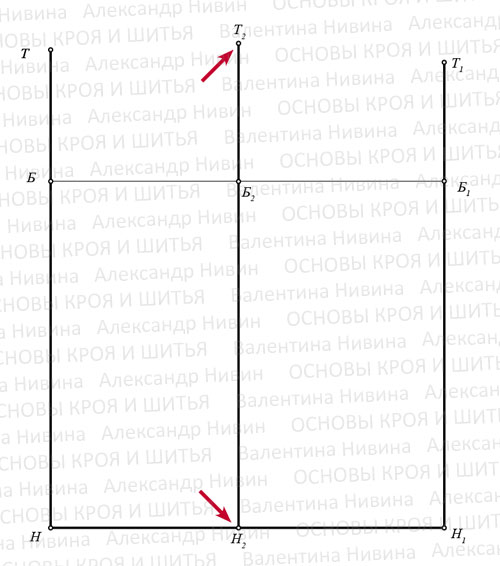
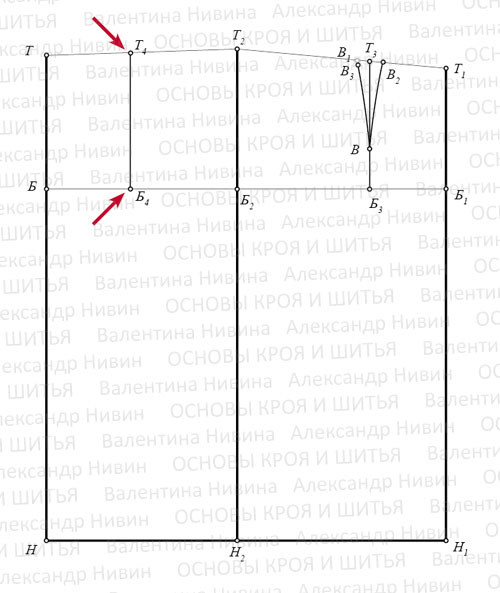
We connect points T, T2 and T1 with straight lines.

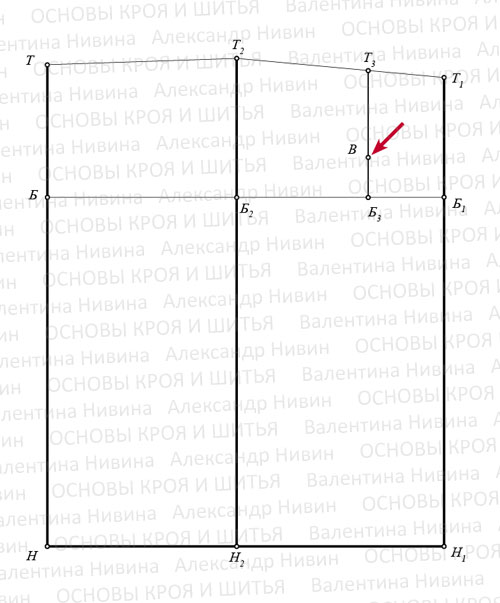
Calculation of darts along the waist line.
The total opening of darts along the waist line is determined by subtracting the half-circumference of the waist with an increase for a loose fit from the width of the skirt along the hip line, i.e. from the half-girth of the hips with an increase for a loose fit.
In our example it looks like this:
(Sat+Fri) - (Sun+Fri)=(52+1) -
(38+0) = 15 cm.
And you substitute your values into the formula.
The front dart opening is equal to 0.16 - 0.2 of the total dart opening 0.2 x 15 = 3 cm.
The back dart opening is equal to 0.3-0.35 of the total dart opening 0.35 x 15 = 5.2 cm.
The side dart solution is equal to 0.45-0.5 of the total dart solution 0.45 x 15 = 6.8 cm.
The coefficient that you choose for calculations should reflect the characteristics of a particular figure as accurately as possible.
Check: 3 cm + 5.2 cm + 6.8 cm =15 cm
Front dart position can be determined by calculation, but it is better to proceed from the features of the figure and, in accordance with them, move the dart closer to the side line or to the line of the middle front, depending on these features (the presence and shape of the abdomen).
Moreover, the position of the darts, both on the front and back panels, can be determined during the first fitting. Details of this method are in the following articles.
In this example, we determine the position of the dart using one of several existing formulas:
Divide the width of the skirt along the hip line by 5:
BB1: 5 = 53: 5 = 10.6 cm.
From point B1 to the left we set aside 10.6 cm and place point B3. From this point upward, draw a vertical line until it intersects with the waist line and place point T3.

The length of the front dart can vary significantly in size (from 6 to 14 cm or more), if we are talking about an individual approach.
In our example, we will determine it using the formula, multiplying the tuck solution by 4, we get: 3 x 4 = 12 cm.
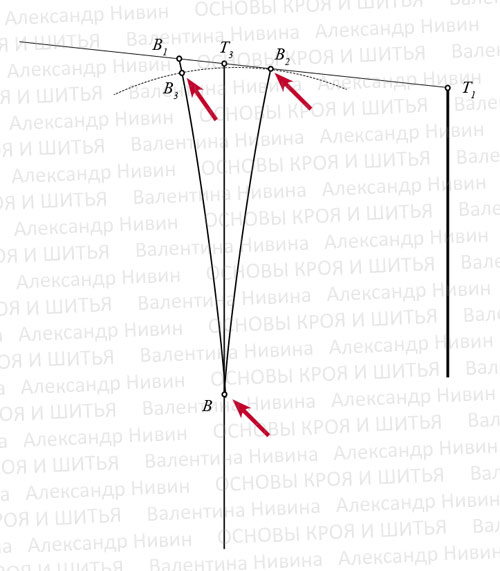
We put this value down from point T3 and place point B.
From point T3 to the left and right we set aside half of the front dart solution 3: 2 = 1.5 cm and put points B1 and B2.
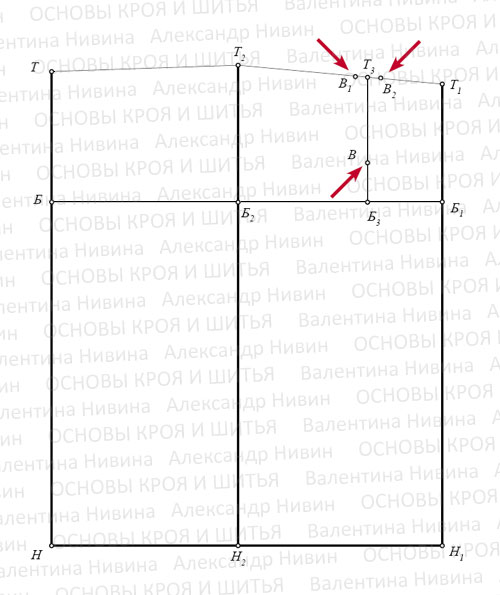
Connect point B with points B1 and B2. Using a compass, align the sides of the dart with the smaller side and place point B3. (Fig. 11 Enlarged)
The sides of the darts can be straight or curved. Their configuration depends on the shape of the abdomen. In our example, the darts are slightly curved, and you are guided by the data of your client’s figure.
Position, length and depth of the back dart.
The position of the back dart can be determined by calculation, similar to the front dart, but it is always necessary to take into account the features of the figure and adjust the position of the darts in accordance with them. If necessary, move the dart closer to the side line or to the mid-front line.
The length of the back dart should also be based on the characteristics of a particular figure (buttock shape).
You just need to keep in mind that the top of the back dart should not come closer than 3 - 4 cm to the hip line (to the protruding point of the buttocks).
We determine the position of the back dart in the same way as the front:
BB1: 5 = 53: 5 = 10.6 cm.
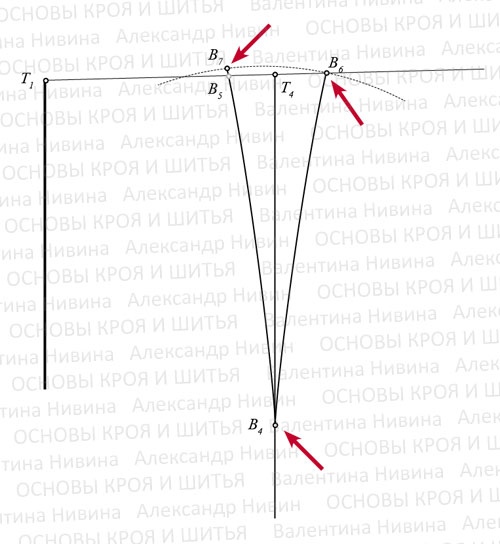
From point B to the right we set aside 10.6 cm and place point B4. Draw a vertical line from point B4 upward.
At the point of intersection with the waist line we place point T4.
From point T4 downwards we set aside the length of the dart 14-15 cm and place point B4.
From point T4 to the left and to the right we set aside half of the back dart solution
5.2: 2 = 2.6 cm and put points B5 and B6.
We connect point B4 with points B5 and B6.
Using a compass, align the sides of the dart along the larger side and place point B7.
The sides of the darts can be straight or curved. Their configuration depends on the shape of the buttocks. A figure with flat or lush buttocks, all these are individual characteristics of a particular figure, and this is where we should proceed from.
In our example, we bent the sides of the back dart slightly to ensure good fit on the moderately curvy buttocks of our conditional client.
When determining the length of the side dart, you should take into account that the area from the waist to the hips along the side line for each person has an individual configuration.
The length of the side dart depends on the steepness of the hips of a particular person, i.e. the one for whom you are making the pattern.
On average, the length of the side dart is 15 -18 cm.
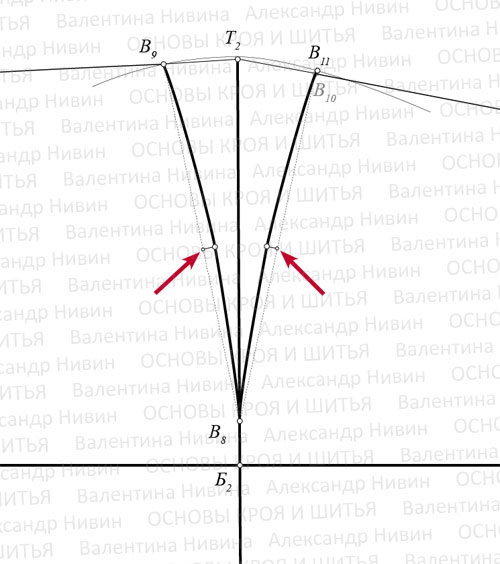
From point T2 down the side line we set aside 16 cm and place point B8.
From point T2 to the left and right we put aside half of the side dart solution 6.8: 2 = 3.4 cm and put points B9 and B10.
If the resulting size is more than 4 cm, then it is better to make two darts on the front and back panels of the skirt rather than putting everything in the side darts.
We connect points B9 and B10 dotted line with point B8. Using a compass, align the sides of the dart along the larger side and place point B11.
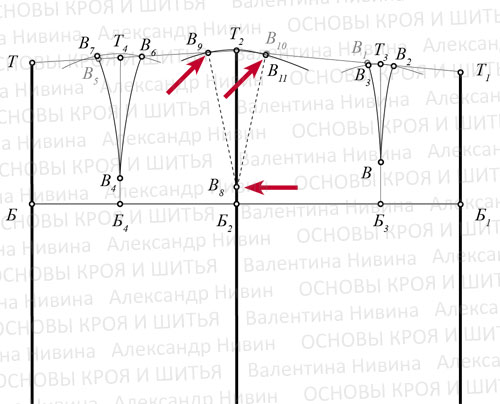
If you are creating a pattern for a proportionally folded figure, divide the sides of the dart in half and from the resulting division points at right angles to auxiliary lines set aside 0.3 - 0.5 cm and form the side lines into a smooth curve.
If you are dealing with a figure in which the steepness of the hips has its own characteristics, then the side line should be brought into line with this steepness.
Moreover, this does not mean that lateral line should follow the curves of the figure. Rather, it means that by changing the configuration of the side line, you can change the accents, i.e. hide something, veil it and thus achieve the desired visual effect.
When cutting in places that cause you doubts, increase the allowances for later clarification during fitting and possible correction of cut details.
Finally, we draw the line of the upper cut of the skirt with a concave line with closed darts.
IMPORTANT: The line of the top cut of the skirt should approach the middle lines at a right angle.
The construction is complete.
This basic pattern straight skirt.
Based on it you can create various styles skirts
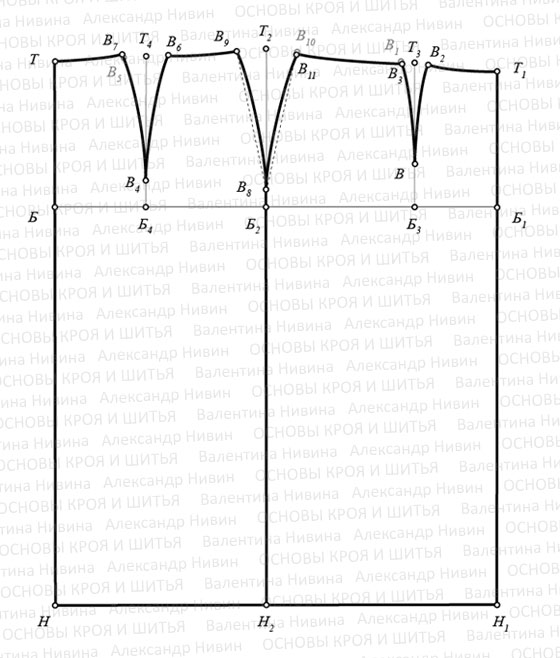
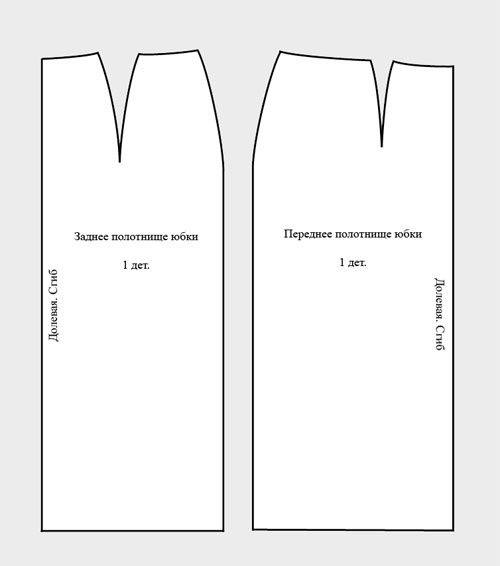
Cutting details
In the near future, we will present to our visitors several more methods for constructing a skirt pattern, which to one degree or another take into account the characteristics of non-standard figures.
I wish you inspiration and confidence in your abilities.
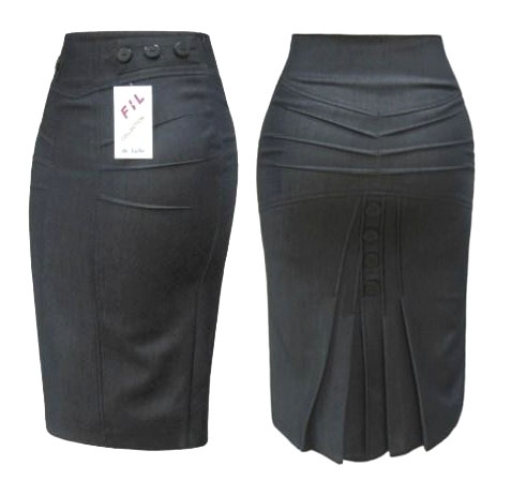
Straight skirt with a belt with slot in the back seam
It often happens that you have a new blouse or blouse, but you need a skirt of a certain color to go with it. In such cases, instead of spending a lot of time searching for exactly what I need, I just go to the store and buy 80 cm of fabric in the right color. And sew office skirt It takes a few hours to wear to work tomorrow. In order to sew straight skirt with a belt with a vent, we will need:
- Textile
- Adhesive gasket (non-woven fabric)
- Scissors
- Threads
- Chalk
- Pins
- Lightning
- Sewing machine
![]()
Let's draw a sketch. We will have a stitched waistband, a seam in the center back, a vent and a zipper in the back seam:
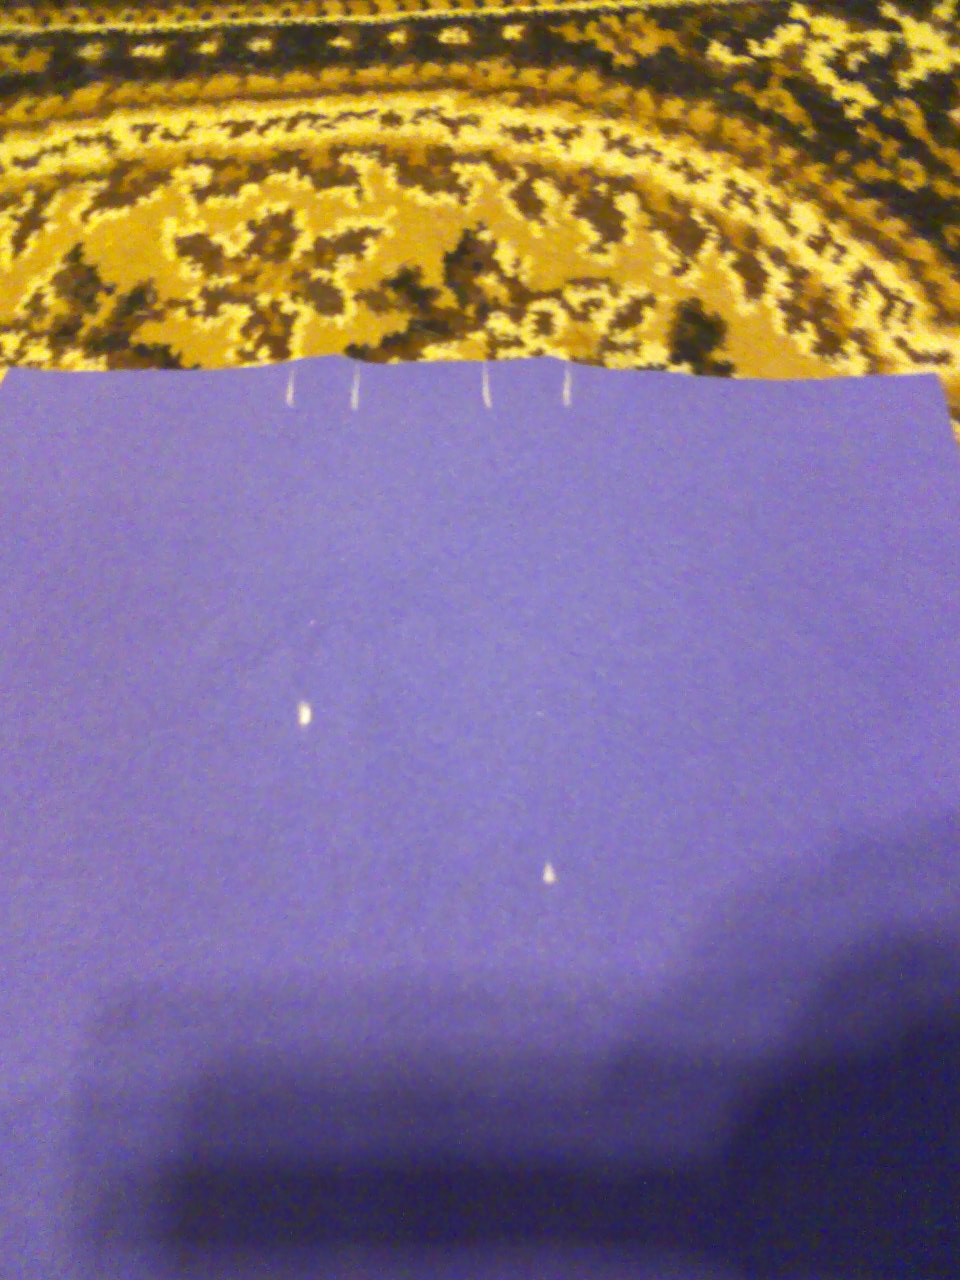
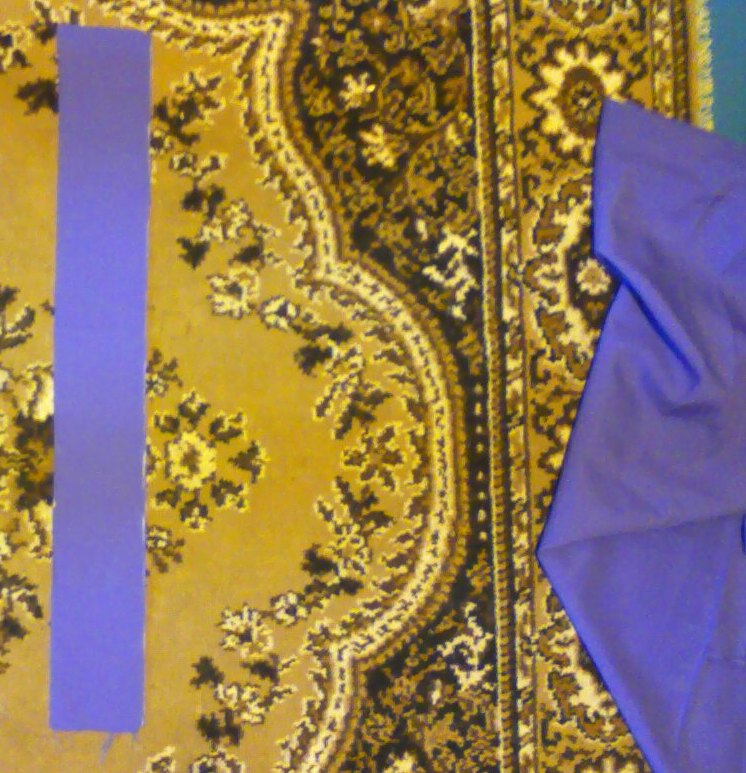
I don’t have a large cutting table right now, so I cut directly on the floor on the carpet. This is convenient from the point of view of precise cutting, since the fabric does not slip anywhere on the carpet. Fold the fabric to the width of the skirt and pin the pattern:
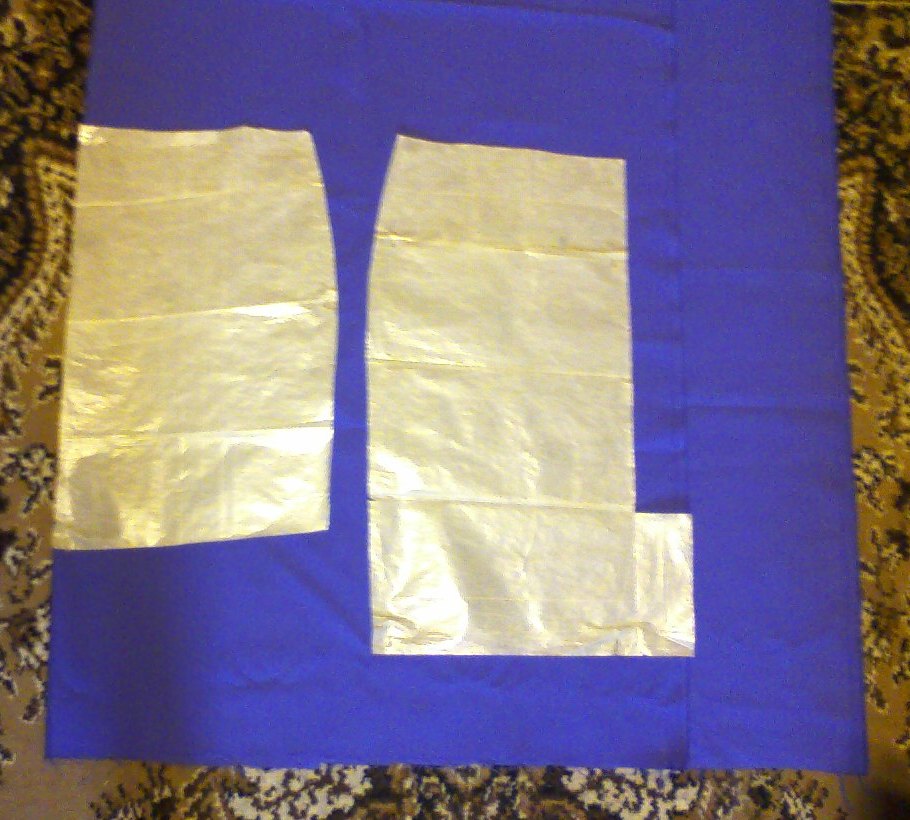 We must cut out one front piece with a fold, two back panel pieces and a waistband. We cut everything with allowances.
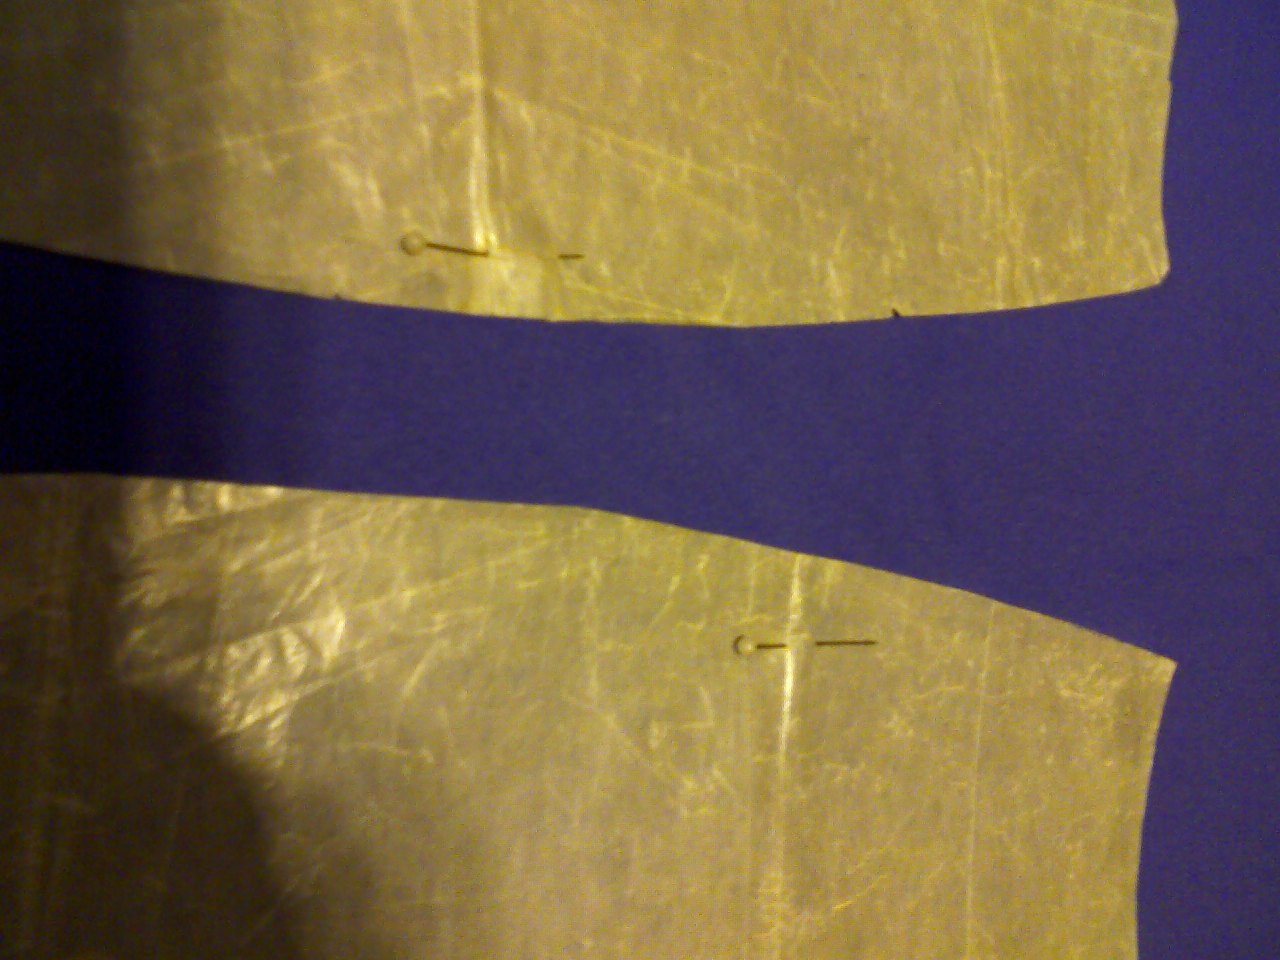
 Once we’ve cut it out, take a piece of chalk and mark the darts on both sides as equally as possible so that no distortions occur during sewing.
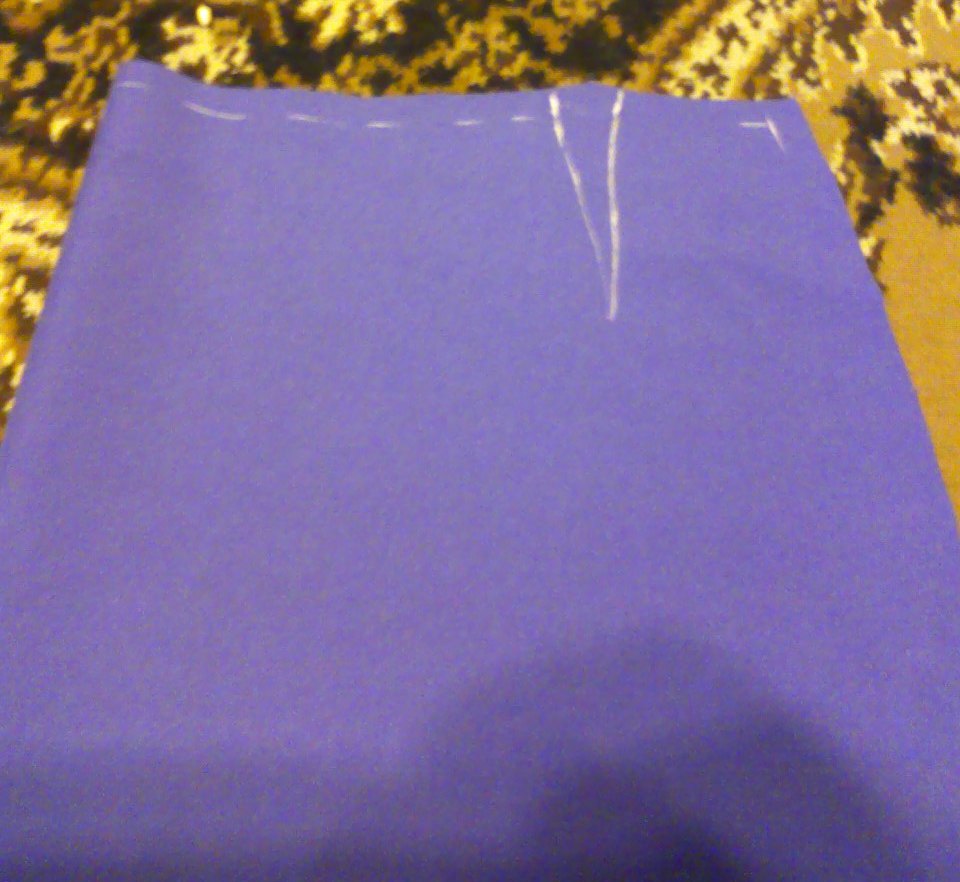
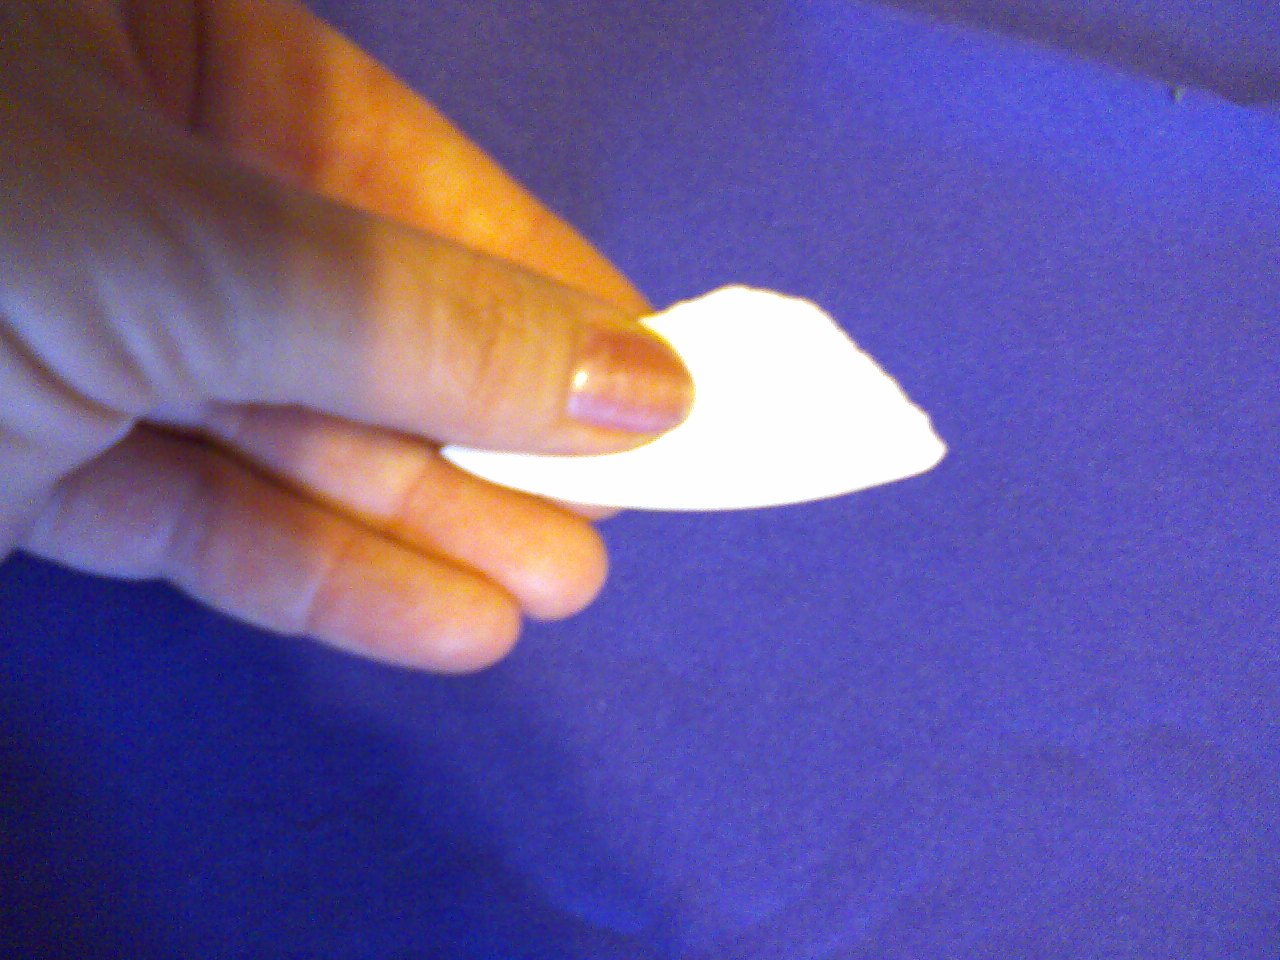 Here I show you what darts look like on a paper pattern:
 You don’t have to draw the entire dart, but mark only its beginning and end (the top of the dart). Thus, here they are marked on the back panels of the skirt.
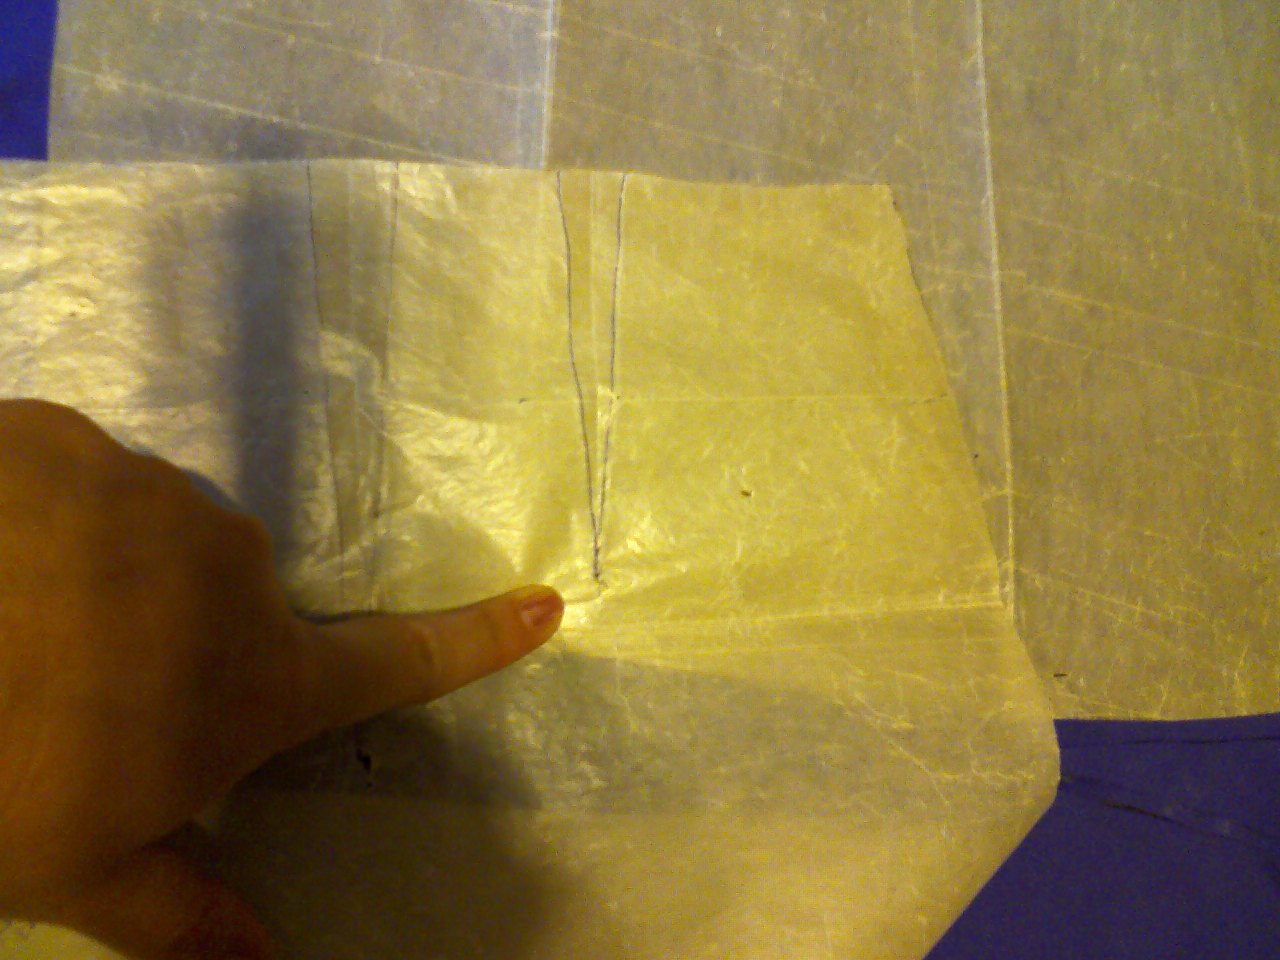
The following is painted in full on the front panel:
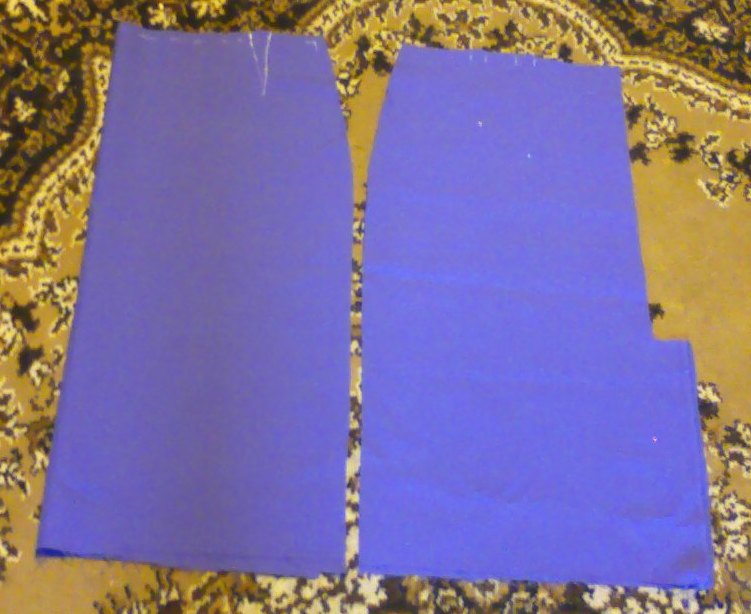
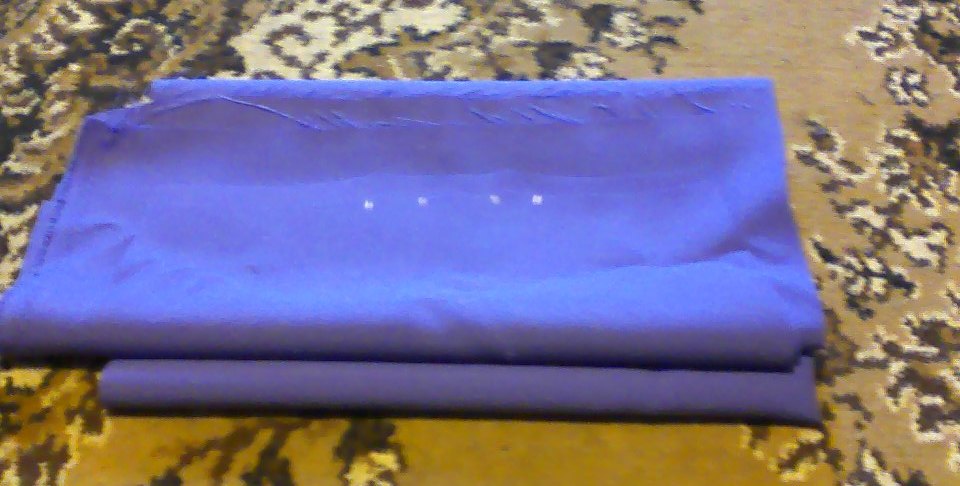
For now, let's put the cut aside:
We cut out the belt...
We do a fitting. During the fitting, we remove everything unnecessary and decide on the length of the skirt. Press the side seams.
Sew on the belt. Fold the belt in half lengthwise. Short cuts at the ends of the belt should be made. We sew the belt to the top edge of the skirt, then you can sew it from the wrong side of the skirt to the stitching seam. But I often just sew a stitch from the right side exactly into the stitching seam. I did the same now. In this photo I draw a seam line:

Cut the corner close to the stitching.
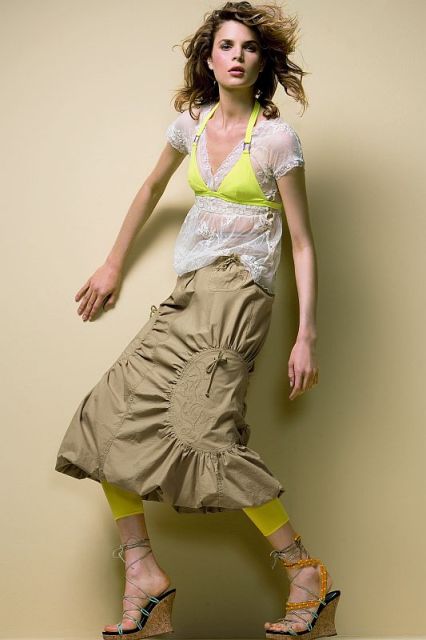
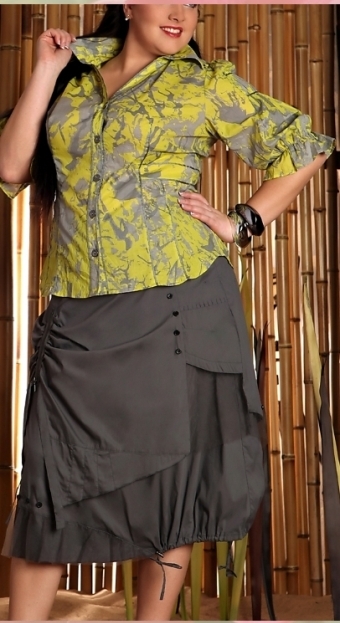
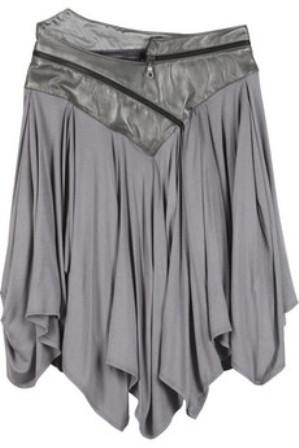
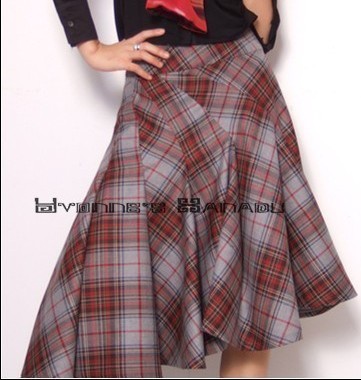
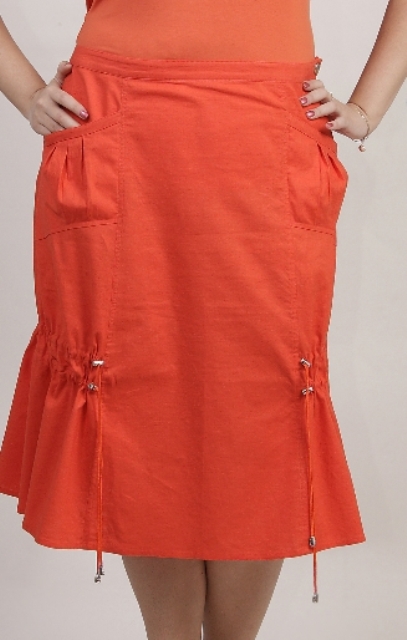
Ready-made life-size pattern fashionable skirt this season. The front is a godet skirt, and the back is a flounced skirt. There are high pleats on the sides of the middle wedge of the skirt. The skirt has pockets in cut-off barrels.
A skirt with a flounce, just like a year skirt, always looks impressive and stylish.
This style suits almost any woman.
Be responsible when choosing fabric for your skirt. Fashionable, high-quality material is half the success. And when the skirt is ready, choose a blouse for it, fashionable shoes, “complete” the look with a stylish hairstyle, add accessories and go... to work, for a walk or to the theater.
A flounced skirt goes well with short jacket or a jacket, as well as with a loose silk blouse tucked into a skirt. You can wear such a skirt with a turtleneck or sweater, but here it is important to choose the correct length of the above items - it (the length) should be no more than 10-15 cm below the waist line.
The life-size floor-length skirt pattern is suitable for girls with a waist circumference of 100-104-108-112 cm.
The pattern is sent instantly by email (to your e-mail address). There is no need to download anything. The file with the pattern is located in the attachment letters. Open, print, glue the sheets, cut out the size you need and you can start cutting.
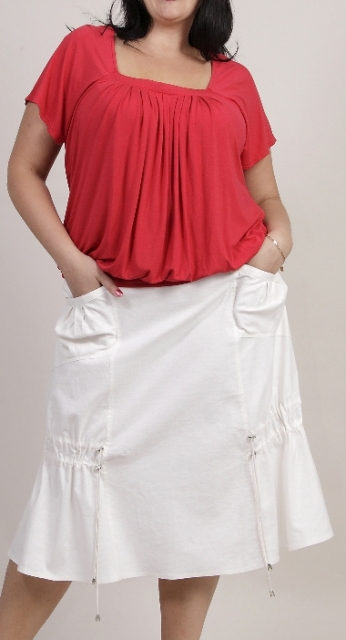
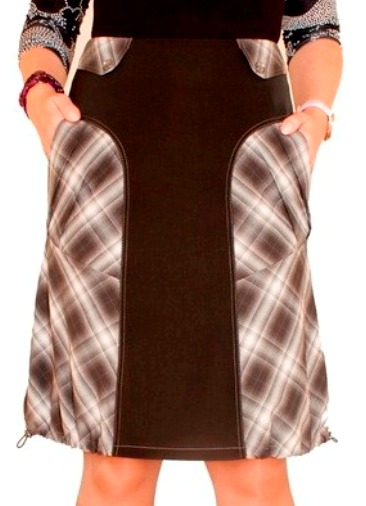
Maxi skirt for plus size people, slightly widened at the bottom, made of soft, comfortable fabric. In the left side seam there is a slit of moderate height.
Using the proposed pattern, choosing the appropriate fabric, you can sew a skirt for the off-season, and for winter, and for summer. Fabric consumption is approximately 2.2-2.3 m with a width of 1.5 m.
To sew a skirt, choose soft dress fabrics. Pay attention to fabrics in blue shades, they perfectly hide the volume. You can also recommend checkered fabrics; when cut on the bias, they visually elongate the figure.
Actually, the color of the fabric is a matter of taste. Experiment to your heart's content.
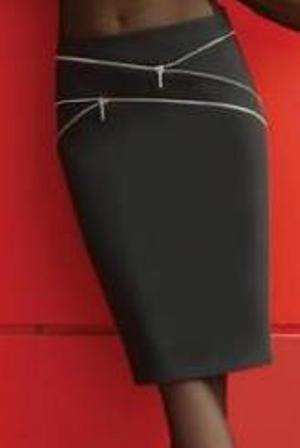
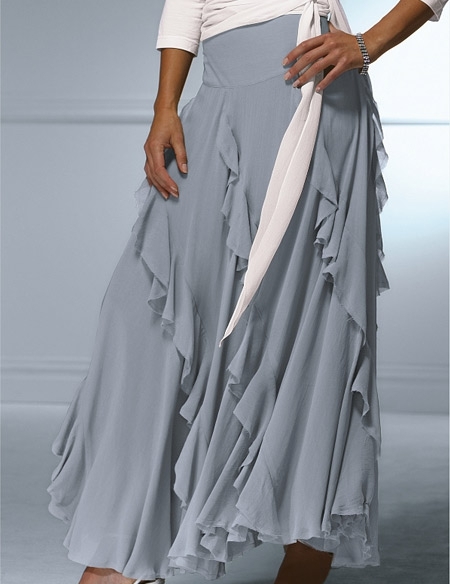
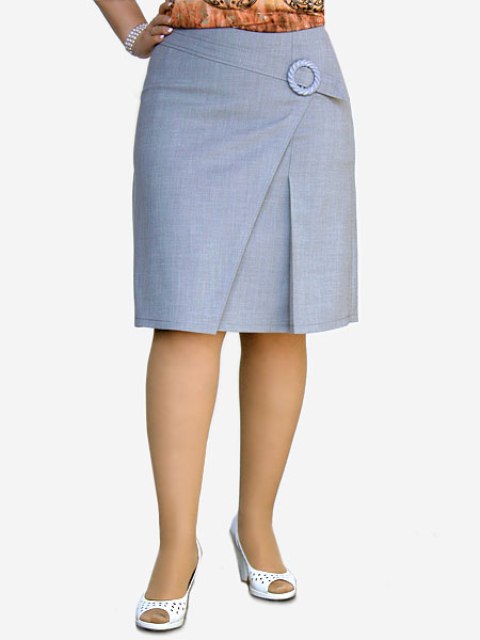
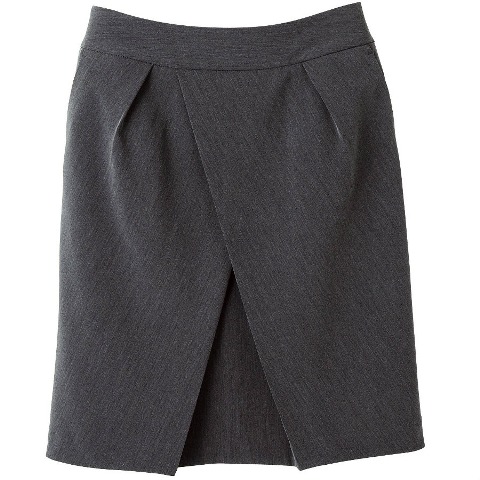
![]() Another skirt for the wardrobe of a modern business woman.
Another skirt for the wardrobe of a modern business woman.
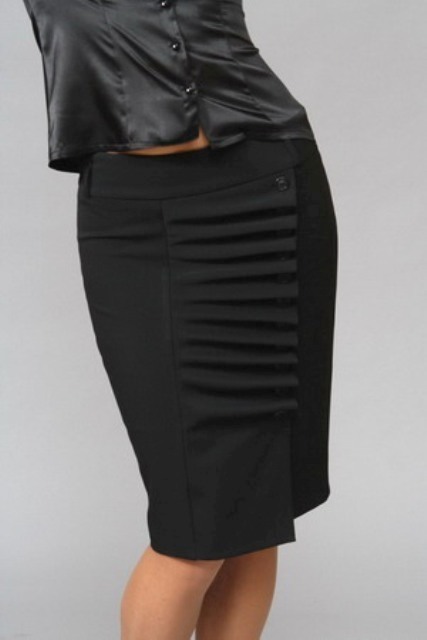
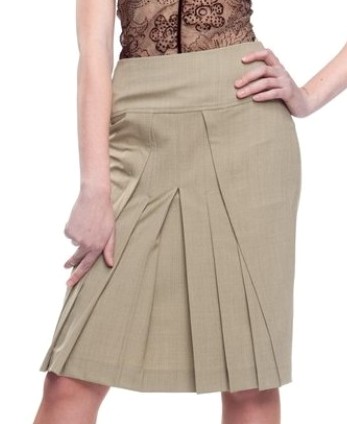
U classic skirt- pencil - lots of options. These are various undercuts, yokes, folds, etc.
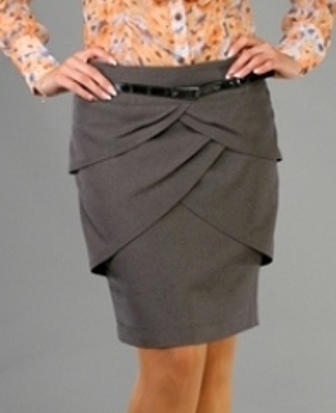
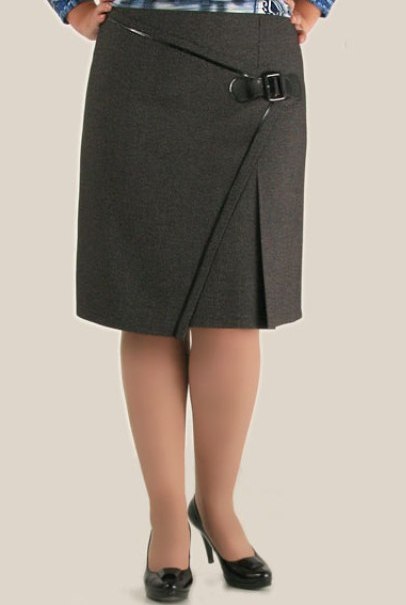
The proposed skirt model for plus size people has classic look, and the back panel of the skirt is decorated with a wide flounce.
The finished pencil skirt pattern is designed for girls and women of curvy shapes with a hip circumference from 116 to 128 cm.
Sewing this skirt model will not seem difficult even for novice seamstresses.
A variety of fabrics are suitable for sewing and the final result will depend on this choice. Ideal for gabardine, loose suiting and dress fabrics, taffeta, thick silk, etc.
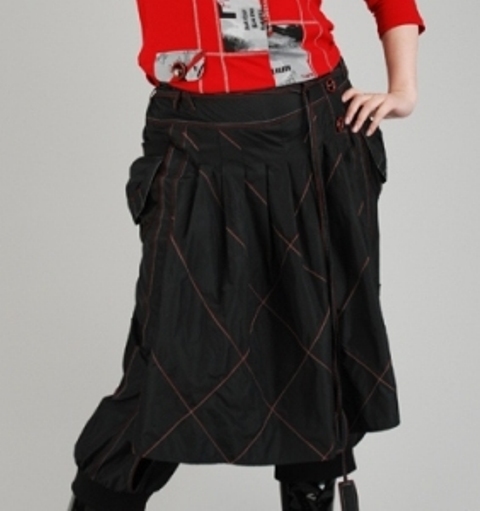
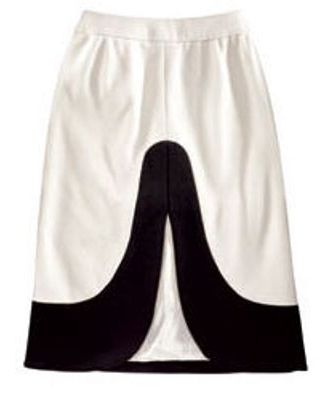
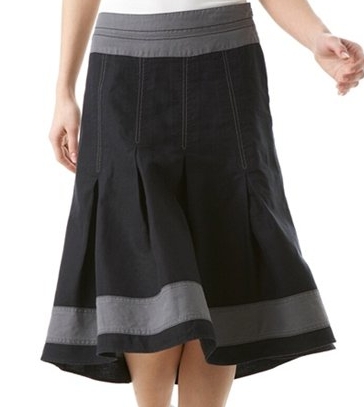
 Ready-made skirt pattern with a figured yoke. Knee-length skirt, widened at the bottom. Additional fluffiness is given to the skirt by counter pleats located in the middle of the front and back panels of the skirt. At the bottom of the skirt - wide stripe contrasting fabric.
Construction of the base of the skirt according to the method of G. Zlachevskaya
We all know that when creating a pattern for any skirt, it is necessary to have a proven and well-fitting base. Any of these skirtscan be modeled using the basis of G. Zlachevskaya
.


.. .
.
Perfect Skirt
Calculation of the basis of a straight skirt with a perfect fit. To do this, take measurements using the instructions.
We will further use the following data for calculations:
Waist circumference 76
Hip circumference 106
Back skirt length 104
Side skirt length 105
Skirt front length 103
To construct the drawing, we introduce abbreviations:
St - waist semi-circumference 38
Sat - hip semicircle 53
Dusz - Back skirt length 61
Dusb - Side skirt length 62
Dusp - Skirt front length 60
Increases in looseness of fit.
At the waist for freedom we add: Pt = 0.5 -1.0 cm.
It adds 1 cm along the hips. For cutting the lining, we will not give this increase so that the lining fits the figure.
"Models women's skirts"
The increase in hips depends on the fullness of the figure:
Ob= 96cm - 100cm => Pb= 0.5cm
104cm - 108cm => Pb= 1cm
112cm - 116cm => Pb= 1.5cm
Over 120cm => Pb= 2cm
To construct the drawing, we use the same measuring tape that was used to take measurements.
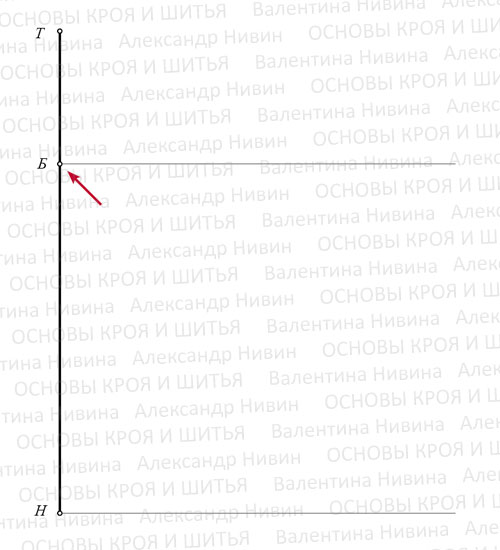
1. Construct a right angle in the lower left corner with the vertex at point H.
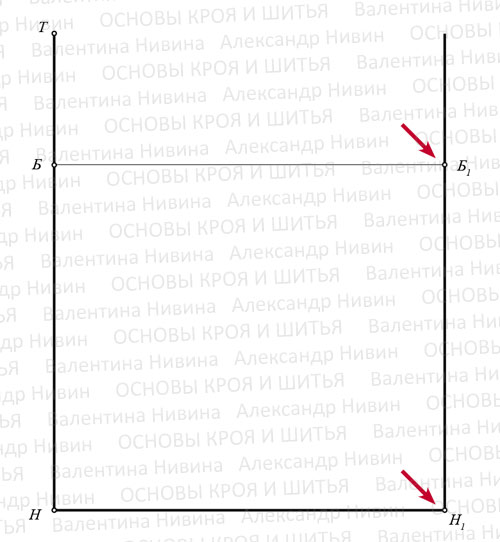
2. Skirt width: HH1 = Sat + Pb = 53 + 1 = 54
3. Skirt back length: NT = DYUSZ = 61
4. Mark the hip line. TB = 18-19 cm draw a horizontal line BB1 = HH1.
The TB figure is average. If you think your buttocks are too high (low), ask to measure your distance from the line to the maximum protrusion of the buttocks.
With an asymmetrical figure, this measurement may differ for different halves and two different halves of the back panel of the skirt are built, differing in the position of the hip line.
5. Rear panel width: НН2 = НН1: 2 - 1 = 54: 2 - 1 = 26
.
Advice from the book by G.N. Alexandrova:
Shifting the side seam towards the back panel for small sizes, hip volume (OB less than or equal to 104), is not necessary.
For medium sizes, up to OB=116 - offset by 1 cm (used in point 5)
For large sizes, OB more than 116 - displacement 2 cm
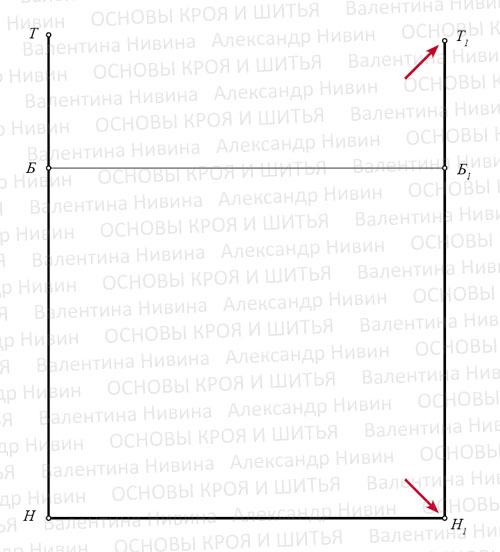
6. Draw a vertical line from H2 and mark the side length of the skirt on it. H2T2 = Dusb = 62.
From H1 we set off the length of the skirt in front vertically: H1T1 = 60
7. Connect points T1, T2 and T with straight lines. This is the position of the waist line. Create a smooth line with a slight downward bend.
8. Darts. We determine the sum of the solutions of the front and rear darts:
SUM = (Sat + Pb) - St = (53 + 1) - 38 = 16
9. The side dart solution is half of this amount:
T3T4 = SUM: 2 = 16: 2 = 8 (from point T2 we put equal amounts to the right and left)
Let's connect points T3 and T4 with B2
Let's make the side line smooth (for a proportional figure): Divide T3B2 and T4B2 in half and restore along a small perpendicular, set aside 0.5 cm on each. Draw through these points smooth lines hips.
10. Divide the remainder of the SUM into three parts. One part goes to the front dart: 8: 3 = 2.7 Two parts - to the back: 2.7 x 2 = 5.4 11. Placement of the darts on the waist line (for a proportionally folded figure): section of the waist line from the middle of the back We divide the panels in half to the side dart (TT4) and from the division point we draw a straight line, perpendicular to the waist line. This is the middle of the dart, its inner fold. The back dart accounts for 5.4 cm, which means we set aside 2.7 cm to the right and left of the middle of the dart. Average length back dart - 14-16 cm.
Advice from the book by G.N. Alexandrova
Darts visually expand or narrow the figure. With narrow hips, it is better to shift them 1-2 cm towards the lateral line. And when full figure, on the contrary, move it 1-2 cm to the middle of the front.
12. We design the front dart in the same way. The length of the front dart is much shorter: 9-11 cm.
Advice from the book by G.N. Alexandrova
At flat stomach It is better to move the front dart 1-2 cm towards the side line. With a protruding belly, on the contrary, move it 1-2 cm to the middle of the front.
For a proportional figure, the darts are designed with lines with a slight deflection (0.1 - 0.2 cm) from the middle to the inside of the dart. 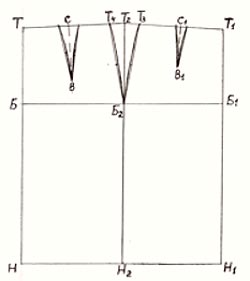 http://www.season.ru/sovety/modeling/yubki/vik_jubki.html
Skirt for an asymmetrical figure
To understand the material, you must read the article "Study and description of the figure. Zlachevskaya's skirt."
Many ladies can notice a slight asymmetry of the left and right parts of the body when carefully examining themselves in the mirror. Different shoulder heights, curvature of the hips and convexity of the chest - a lot of all sorts of “little bits” make us non-standard.
However, when making clothes, it is customary to hide the fact of asymmetry, and shoulder products are made on the highest shoulder, hiding the different bevel of the shoulder due to the thickness of the shoulder pads.
Skirts are another matter. The waist (belt) area is the supporting one, which is why the products are called waistbands. The skirt should fit tightly around the waist and hips, and clearly “sit” on the convex points. Then it will not shift when moving, spin and ride up. The accuracy of construction is especially important when there is obvious asymmetry of the figure.
Taking measurements for an asymmetrical figure.
Before us is a lady with different steepness of the hips on the left and right and different convexity of the abdomen - Ksenia. Already at the stage of taking measurements, your work will increase.
It is necessary to measure the left and right parts of the body separately, carefully taking the x-s and y-s values. The length measurements on the left and right sides may be different.
All calculations and measurements on the left side will be accompanied by the index L, and on the right side by the index P.
The value of the transverse diameter of the hips D will be taken taking into account the greatest convexity of the abdomen. She is on our left PH=5. So, the measurements have been taken:
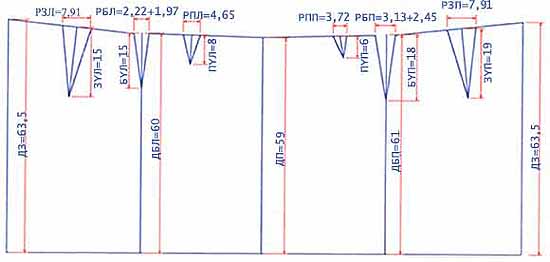
Left half Right half DP=102
PHL=5 PHP=4 DBL=103 DBP=104
BHL=4.5 BHP=b D3=106.5
WHL=8.5 ZHL=8.5 OT=107
PYL=8 PYP=6 OB=141
BYL=15 BYP=18 D=45.5
ZYL=19 ZYP=19 d=32
The difference in the measurements of PCL and PCP indicates different abdominal convexity.
The difference in the BHL and BHP measurements is about the different curvature of the hips. Note also different heights hips
Perform calculations.
Since the figure is asymmetrical, the calculation and construction are carried out entirely on the entire product in a spread.
Let's calculate the darts: S=OB-OT=141-107=34
There are six of them on the entire product: two front, two side and two back. Since the measurements of the rear darts on the left and right are the same, we can assume that the solutions of the rear darts on the left and right will also be the same.
Calculation of darts for the left half.
RPL=PHL*S: (PHL+BHL+ZHL+PHP+BHP+ZHP)=5*34:(5+4.5+8.5+4+6+8.5)=4.65
RBL=BHL*S: (PHL+BHL+ZHL+PHP+BHP+ZHP)=4.5*34:(5+4.5+8.5+4+6+8.5)=4.19
RZL=ZHL*S: (PHL+BHL+ZHL+PHP+BHP+ZHP)=8.5*34:(5+4.5+8.5+4+6+8.5)=7.91
Calculation of darts for the right half.
RPP=ПХП*S: (ПХЛ+БХЛ+ЗХЛ+ПХП+БХП+ЗХП)=4*34:(5+4.5+8.5+4+6+8.5)=3.72
RBP=BHP*S: (PHL+BHL+ZHL+PHP+BHP+ZHP)=6*34:(5+4.5+8.5+4+6+8.5)=5.58
RZP=ZHP*s: (PHL+BHL+ZHL+PKHP+BHP+ZHP)=8.5*34:(5+4.5+8.5+4+6+8.5)=7.91
We will need the sum of the darts on the left half, let's calculate it: 4.65+4.19+7.91=16.75
The amount of darts on the right half of the skirt is: 3.72+5.58+7.91=17.21
There are six darts in total. Let's check:
RPL+RBL+RZL+RPP+RBP+RZP=4.65+4.19+7.91+3.72+5.58+7.91=34=S
The first stage of work has been completed, an accurate calculation of the darts has been made, taking into account the asymmetry of the figure. If you sew a skirt with one seam, for example, at the back, the above calculation is enough for a perfect fit.
The question of determining the width of the product panels arises when the skirt model must have side seams and exactly certain line middle front.
When constructing a symmetrical figure, we separately calculated the width of the front and back panels of the skirt, explaining this by the different convexity of the abdomen and buttocks. We have derived a formula for calculating section OO1.
OO1=D:2-(d:2+PH) or OO1=(ZH-PH):2
In the model's figure, the X values in the front and back are also different on both sides.
PHL = 5, and ZHL = 8.5 - from the left side. On the right - PHP = 4, and ZHP = 8.5.
Let's take this into account when calculating section OO1 (we use higher value measurements):
OO1=D:2-(d:2+PH)=45.5:2-(32:2+5)=1.75
On our figure, the situation is further complicated by the different curvature of the hips. The most convex hip will require more fabric. Translated into design language, this means that the width of the front left panel will be less than the width of the front right panel of the skirt. In turn, the width of the rear left panel will be less than the width of the rear right panel of the product. Thus, all four panels of the skirt will have different widths, which must be calculated. How to do this?
You remember how in detail we discussed the calculation of section OO1 in the previous article in the chapter “Applied Geometry”.
In this article, we looked at the figure from the side and calculated OO1 from the values of HH and ZH. Are you familiar with the drawing?

Now imagine that this is a view of the figure from the front. And you see not the bulge of the abdomen and buttocks, but the curvature of the hips. Your task is to calculate the width of the area between the verticals. Let us denote them by the letters A and A1 from the word asymmetry, since the need for this calculation arises only with an asymmetrical figure.
The formula for calculating AA1 is similar to the formula for calculating OO1. Only instead of the deviations of the most convex points along the front and back, let’s substitute the values of the deviations along the left and right thighs or the values of BHL and BHP.
AA1=(BHP-BHL):2=(6-4.5):2=0.75
Now you can calculate the width of the panels. General pattern is as follows: subtract OO1 from all front parts, add OO1 to all rear parts, subtract (AA1:2) from all left parts, add (AA1:2) to all right parts. We divide the distance between the verticals A and A1 by two so as not to follow the lead of the figure and not to emphasize the asymmetry.
Width of the front left part=OB:4-OO1-AA1:2=141:4-1.75-0.375=33.125
Width of the front right part=OB:4-OO1+AA1:2=141:4-1.75+0.375=33.85
Rear left part width=OB:4+OO1-AA1:2=141:4+1.75-0.375=36.625
Width of the rear right part=OB:4+OO1+AA1:2=141:4+1.75+0.375=37.375
Let's check. The sum of all the widths of the panels should be equal to the circumference of the hips.
33.125+33.85+36.625+37.375=141, which is what was required.
To distribute the side dart, you need to find the left and right arcs at the waist. On asymmetrical figures they are different.
To do this, from the sum of the widths of the left panels, you need to subtract the sum of the left darts and divide the resulting value by two: (69.75-16.75): 2 = 26.5
So, the left arc at the waist on the figure is equal to 26.5, then the arc on the drawing is equal to the arc on the figure plus the dart opening or: 26.5+RPL=26.5+4.65=31.15
Subtracting the arc along the waist in the drawing from the width of the front left panel, we get the part of the left side dart that needs to be removed from the front left panel. In numbers it looks like this: 33.125-31.15=1.975
Therefore, the distribution of the side dart is as follows:
1.975 cm is removed from the front panel, and from the rear panel RBL-1.975 = 2.22 cm.
Let's check the rear part. The width of the back left panel minus the left arc at the waist and the opening of the back left dart should be equal to the part of the side dart that needs to be removed from the back left panel.
36,625-(26,5+7,91)=2,22
We will also calculate the distribution of the side dart for the right side of the product.
Right arc at waist=(71.22-17.21):2=27 cm
Arc according to the drawing: 27+RPP=27+3.72=30.72 cm
Part of the right side dart, which we remove from the front panel:
33.85-30.72=3.13 cm
Part of the right side dart, which we remove from the back panel:
5.58-3.13=2.45 cm
Check on the back part: 37.375-(27+7.91)=2.45 cm.
The calculations are finished. Now you will not only be able to fit the skirt on an asymmetrical figure by accurately determining the openings of the darts, but you will also calculate the width of each panel of the skirt separately. In practice, this guarantees a clear vertical position of the side seams, despite the different curvature of the hips.
We carry out the construction.
Start building from the bottom line. Then determine the middle of the front part, set the width of the left front panel to the left, and the width of the right front panel to the right. Raise the corresponding verticals of the side seams. And so on, gradually, setting aside the appropriate widths and verticals, you form a drawing grid. Applying darts is no different from constructing a regular skirt.
And this is also an application from Galia Zlachevskaya for constructing a skirt according to individual measurements.
Hello dear Ladies! With you - as always - Galia Zlachevskaya.
Last time we completed the construction of the “sticky shell”. The drawing was made for a specific Marya Ivanovna, taking into account her individual physique. The “skinny skirt” nicely fitted the steep hips of its owner, sat on the convex buttocks without distortions or creases, and even a small tummy comfortably occupied the bulge that the front dart formed for it. The strict vertical side seam is simply pleasing to the eye! It’s comfortable for the customer, it’s nice for the cutter, it’s convenient for the tailor! You can immediately take the item “under the machine” and sew it.
Marya Ivanovna has a good figure. People say about such feminine forms: “Everything is in place.” And how are you?
From the numerous mail I have selected several instructive examples, which I propose to analyze together.
Marya Ivanovna was our first example, so we will consider the girl Lida as example No. 2. So, Lida sent us her measurements:
PH=0 PY=0 DP=90 OT=73
BH=5 BY=11 DB= 92OB=85
ZX=0 ZY=0 DZ=90
To some, such measurements may seem strange or incredible. Can such measures even exist? They can! The figure can have any features! Therefore, we will take Lida’s word and work with what she gave us.
Using Lida's example, we will learn how to make increases.
In skirts, increases are made to the waist and hip circumference. If the OB and OT measurements are correctly taken from the figure, it is enough to add two cm to each girth for the freedom of fit. “Long-fitting” means that you can breathe easily, so that you can drink a glass of tea and sit down without unfastening the buttons. If someone is not going to do this - eat, drink, sit and breathe - then you can refuse to increase your waistline.
So, adding 2 cm to the waist, we get: FROM=73+2=75 cm.
When making products from elastic fabrics, the increase in the hips can be zero. However, the use of such fabrics is a special case.
The increase in hips can be more than 2 cm if the skirt is supposed to be worn over several layers of clothing, which is common in our harsh climate. IN educational purposes Let's consider the most common option, when the increase is 2 cm: OB=85+2=87 cm.
Let's move on to Lida's calculations. Since you have carefully studied our previous issues, my comments will be brief.
Sum of front, side and back darts:
S=(87-75):2=6 cm
The values of the hip circumference and waist circumference are substituted into the formula, taking into account the increases.
Now we calculate the tuck solutions:
RP=0:(0+5+0)x6=0 (next time, if deviations from the waist are equal to zero, we won’t count, we’ll take zero right away)
RB=5:(0+5+0)x6=6
Despite the simplicity of the calculations, let's check:
RP+RB+RZ=0+6+0=6 cm.
According to our calculations, the openings of the front and rear darts are equal to zero, i.e. in this design they are simply absent. This result leaves some people completely confused. Let's return to the figure and look at it carefully (LIDA). There are no bulges in the abdomen or buttocks. Darts are provided by the cut to create volume in a certain area. And if there is no volume, then why make darts? A very funny answer follows: “That’s how it’s supposed to be,” or “That’s how they usually do it.”
Everything that is “usual” is used on ordinary figures. And the girl Lida has a very unusual figure, frankly speaking, a rare figure. And the cut of the skirt for her will not be ordinary, but suitable only to her figure.
Let's continue our calculations. The measurements sent by Lida do not contain D and d values. Let's try to do without them. Distance OO1, necessary to calculate the width of the front and rear panels, can be found using another formula. It looks like this:
OO1=(ZH-PH):2
It is convenient to use, you will quickly get used to it and give up the D and D measurements. But don't rush to do this! The available values of transverse diameters make it possible to check the overall correctness taken measurements, which is very important especially for beginners. They do this according to the formula:
Check it out for yourself on your figures.
When PH and ZH are equal to zero, the verticals drawn from the centers of the ellipses coincide (that is, OO1 = 0). The width of the front and back panels of such figures is the same.
Front piece width=
OB:4-0=21.75 cm
Rear part width = =OB:4+0=21.75 cm
Important Note: the width of the front and rear panels of the skirt will be equal if the condition PX = ZX is met.
Knowing this for the future, you can skip some of the calculations.
waist FROM:4=75:4= =18.75 cm.
Let's take care of the distribution of the side dart. The front dart opening is zero, so the length of the arc along the waist in the drawing coincides with the length of the arc along the waist in the figure. The same thing, stated in mathematical language:
RP=0; 18.75+0=18.75 cm
To calculate the part of the side dart that needs to be removed from the front panel, subtract the arc at the waist from the width of the front part:
21.75-18.75=3 cm
This makes up half of the side dart.
The fact that the side dart is distributed evenly across the front and back panels of the skirt is a special case. This is typical only for this figure! Sometimes you will encounter such a distribution, but do not relax: this is just an exception to the rule, not a pattern.
The calculations have been completed, now to the construction.
Draw a horizontal line, which is the line of the bottom of the skirt. We put a notch in the center and lift up a perpendicular, on which we set the length of the skirt along the side seam. For example, let’s determine the desired length of the product as 60 cm. 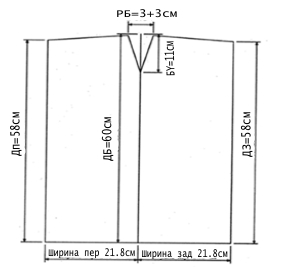
To the left horizontally we plot the width of the front panel of the skirt along the hip line (according to our calculations, this value is 21.8 cm). To the right - the width of the rear panel along the hip line (21.8 cm).
From the obtained points we build upward perpendiculars to the bottom line, on which we respectively set aside the front length of 58 cm (by the standards of DP and DZ, 2 cm less than DB), and the length of the product at the back is 58 cm.
From the waist along the side seam line we go down by the amount BY = 11 cm. We place the leg of a compass at the resulting point and with a radius equal to BY = 11 cm, draw small arcs to the left and right.
On the front panel along an arc we set aside the size of the calculated side dart (3 cm). To the right, on the back panel, set aside the size of the side dart at the back (3 cm). We connect the resulting points with point R, and the side dart is completed. There are no front or back darts. “Olipochka” is ready!
Let's remember the rule that we derived at the beginning of our lessons:
Clothes that fit well on the figure are a compromise between classic proportions and the individual characteristics of the figure.
Half of the work is done, i.e. Individual features of the figure are taken into account.
The unusualness of Lida's figure, the presence individual characteristics requires individual approach in choosing styles or models of skirts. A regular straight skirt would be inappropriate here.
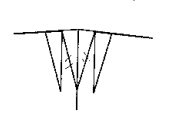
The large width of the side dart RB = 6 cm suggests the idea of distributing the amount of this solution into two or three darts - as desired. I'll split it into two. The sum of the solutions of the distributed darts should be equal to the original solution, I think this is understandable. New darts should be located precisely in the area of the side seam, since they are determined by the convexity of the front part.
The distance between the darts when stitched should be 3-5 cm. The length of both darts is in this case is equal to BY=11 cm, i.e. the distance of the most convex point of the thigh from the waist. The presence of a side seam in this case is not only not necessary, but also undesirable. This type of straight skirt base is already acceptable.
 Developing the theme of selecting individual model features for a specific figure, we can suggest transforming the side darts into raised seams (see pictures on the right and left).
By doing this, we would solve two problems at once: firstly, we would remove the excess at the waist into reliefs, and, secondly, we would break up the front and back panels with verticals, visually making the figure slimmer. This is especially important if there are no front or back darts. 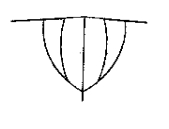
These are only the most elementary options that can be offered for the given values of HH, BH and ZH. In fact, diversity possible styles, the location of relief seams and decorative elements that bring Lida’s figure closer to the standard, practical
Hello, dear readers of the blog “site”. I am glad to welcome you! Now we will talk about the importance of skill build a drawing of a straight skirt. If you still have a desire sew a skirt with your own hands, then you will need to understand how the drawing of a straight skirt is constructed, since it is this that underlies the construction of absolutely all models of skirts.
Here is a small list of possible skirt models:
- Skirt with Basques
- Skirt with pleats
- Skirt-"gode"
- Godet skirt with set-in wedges
- Tulip skirt
- Semi-sun skirt
- Balloon skirt
They can be of different lengths, absolutely the same as you see them, but they have one thing in common - these skirts are modeled on the basis straight classic skirt. And now we will learn how to make a basic drawing using your measurements.
First, take a measuring tape and measure yourself. About how.
The entire process of creating a skirt can be divided into two stages: this is the construction of a drawing according to your measurements, and the sewing stage itself.
Constructing a drawing is a primary matter, unless, of course, you take as a basis ready-made pattern. But our task is to learn how to do it ourselves! And I decided to include this large section in a separate article.
How to sew a straight skirt with your own hands?
Well, now let’s imagine that we already have a pattern. And we start working with the fabric. I would like to remind you that after purchasing the fabric from which you are going to sew a skirt, you need to wash it or iron it with steam. And then choose the right needle for your sewing machine.
First, transfer the pattern to the fabric: fold the fabric in half with the right side inward.
We make sure that the shared threads coincide. (The shared thread runs parallel to the edge).
We place the part of the front panel (from now on I will simply refer to it as PP) on the fold and cut out, as in the drawing, one solid part. (Photo 2)
We remember about allowances. 1.5 cm on all sides, 1 cm on the waist side.
(photo 1)We outline the belt. We remember that when drawing up the drawing, allowances in the belt were already taken into account. So we'll just circle it.
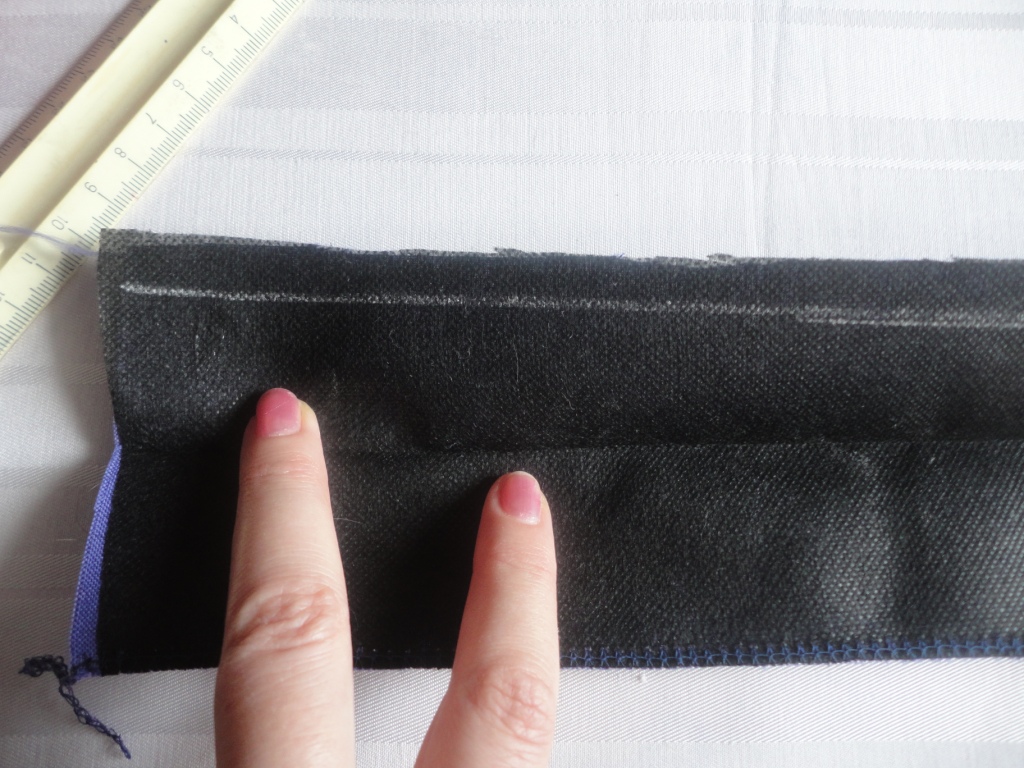
We also cut out the lobar belt from an adhesive lining (flazelin, doublerin).
Through cotton fabric(iron) iron the belt from the inside out, attaching the flazeline belt pattern to it (the rough side of the flazeline to the back of the belt made of the main fabric).
Leave to cool for 20 minutes.
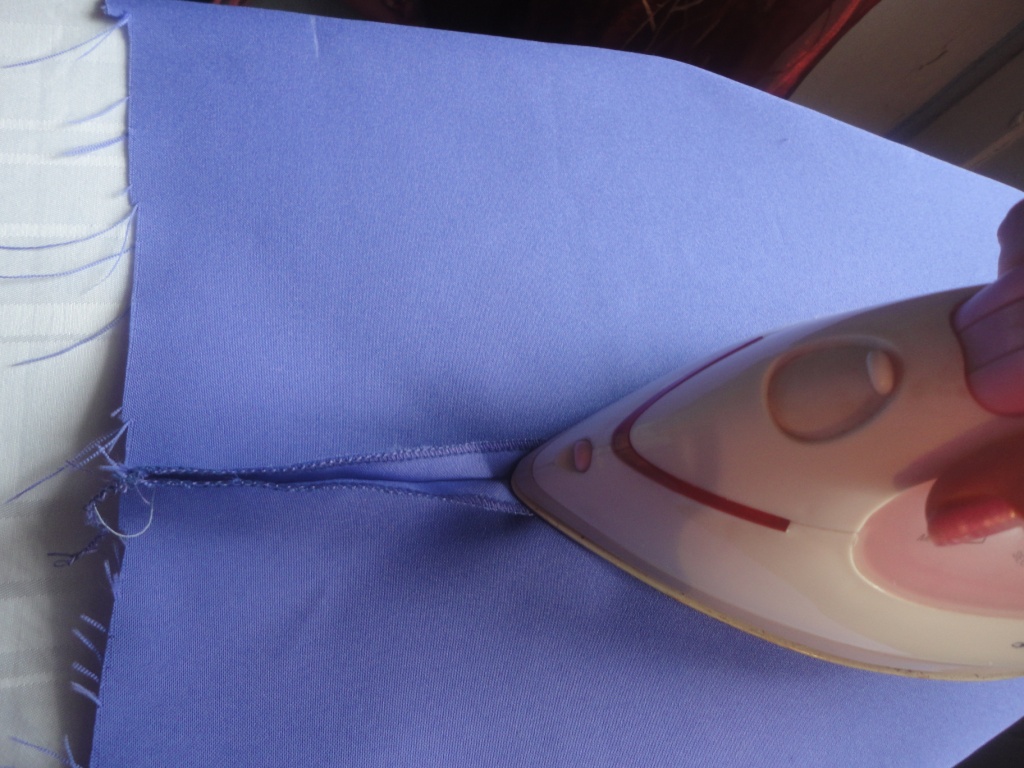
We do the same with the zip darts. We also iron them towards the center.
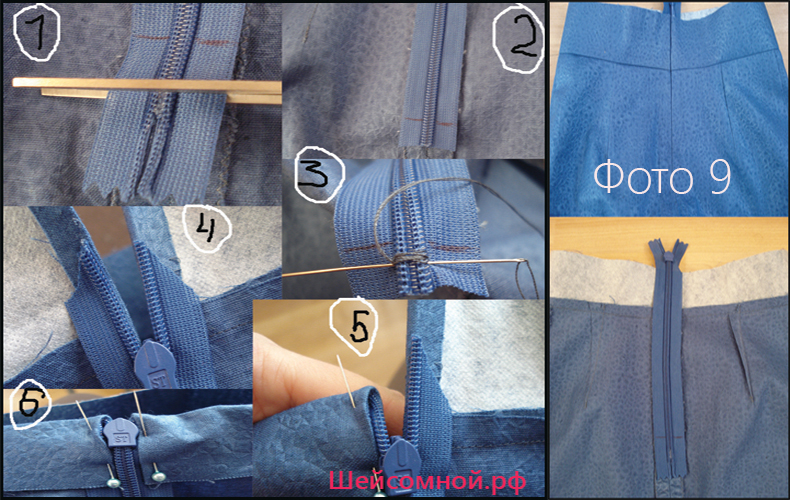
Sew the skirt along the side seams.
First you need to pin or baste so that the bottom layer does not move relative to the top while we sew it on the machine. This happens often(((.
So we outline EVERYTHING in advance.
We process the side seams with a zigzag. And iron it out. (photo 3)
Sew the back middle seam from mark to mark.
We leave an unstitched incision and space for a zipper. (Photo 3)
Do not add 2 cm to the zipper mark to make it easier to sew on the zipper. Iron the seam in different directions.
We take our belt and apply it to the seam at the waist face to face. We combine so that everything matches, pin and stitch. (photo 4) 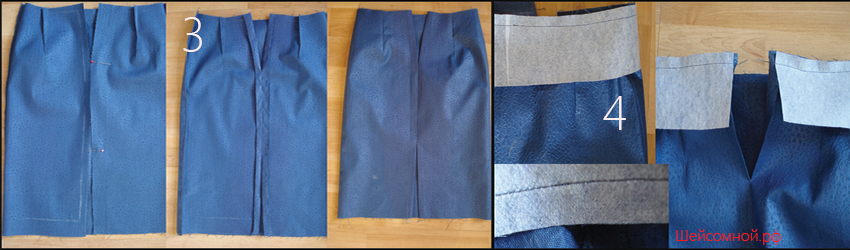
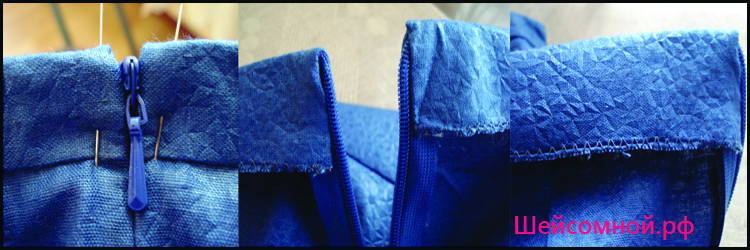
Thickness has formed at the waistband allowances due to the joining of the undercuts. We cut out this extra thickness everywhere, as in the photo. (photo 5) 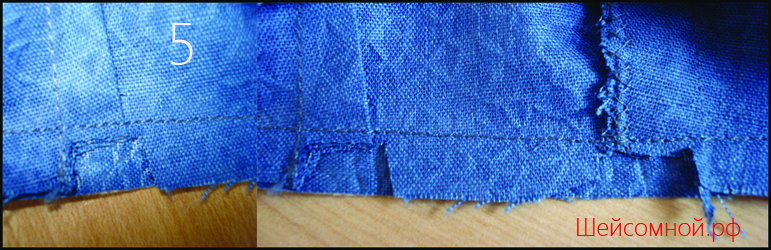
This rule applies to all products, especially if you sew from thick fabrics in order to remove excess thickness.
Then, when ironing, these places will not be printed and create shine from the iron.
Press the seam allowances onto the waistband side.
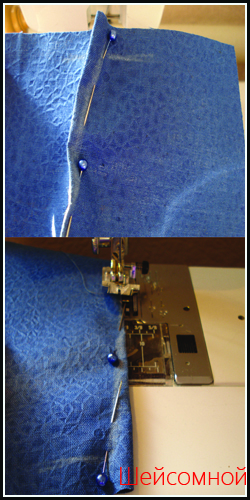
How to sew a hidden zipper?
(photo 6)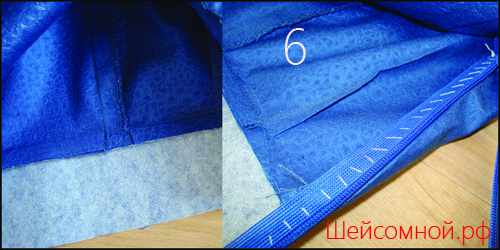
And now important point! Before basting the second part of the zipper, you need to close it and align it along the belt line with a pin so that everything turns out perfectly smooth. (Photo 7)
We sew both sides.
We hem the 2 cm that we left earlier on the middle seam under the zipper mark. (photo 8) 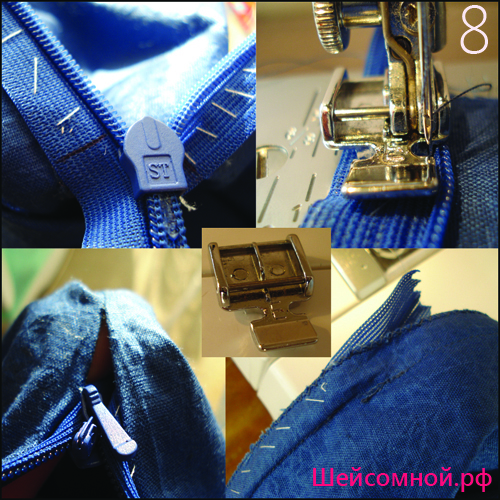
We sew a zig zag stitch on the inner bottom edge of the waistband.
And we sew slowly and carefully, clearly getting the needle into this seam. 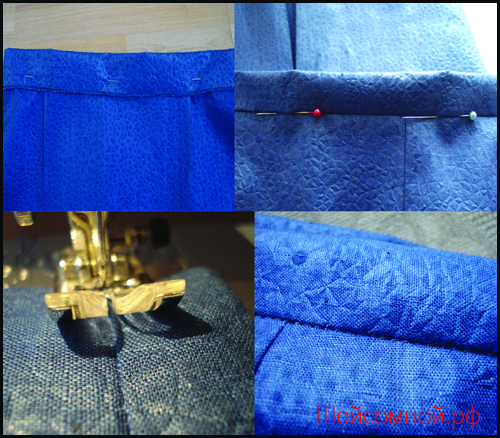
Thus, this seam should not be visible at all after ironing. Iron the belt.
(photo 10)We process the corners: we bend the allowance of the bottom of the skirt to the front side, face to face.
We stitch from the corner side. Cut out one layer of fabric and carefully turn it inside out. (photo 11) 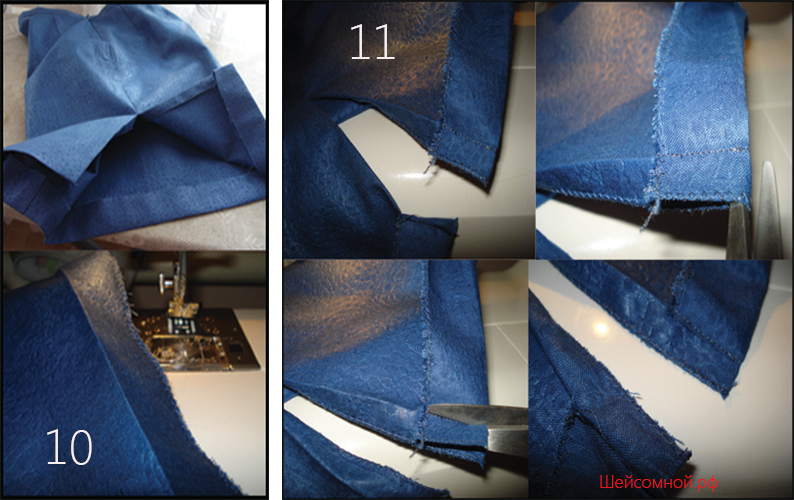
We hem the bottom of the skirt, placing a finishing stitch along the bottom of the skirt and along the slit in one step. Iron it. 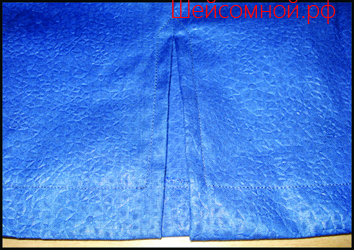
Steam the skirt.
The skirt is ready! Enjoy!
I also really liked this nice video about how to sew a straight skirt with appliqué on the back panel:
I really hope that this article has opened many answers to your questions and was useful to you. See you soon on the blog pages!!!