What's the best way to hang pictures? How to hang a picture without drilling on a concrete wall
It should be noted that virtual communication is much more difficult in terms of attracting the attention of the opposite sex than in real life.
What actions need to be taken to get a guy to show interest in you?
1. No young man can fall in love with you during correspondence. Therefore, in order to build a full-fledged relationship, you need to meet a young man in whom you are interested.
When can you invite a young man to meet? Remember not to rush into a meeting.
You need to think very carefully about how much you want to meet him. If you have formed an image of the ideal in your head young man, then there is a very high probability that in reality the guy will turn out to be completely different.
To avoid disappointment from waiting, you should not come up with anything unnecessary. You should concentrate on real facts and build on them only.
However, there is also a possibility that the young man will fully meet your expectations and even exceed them.
The predominant number of psychologists argue that nothing should be adjusted in a special way. If your interlocutor turns out to be unprepared for the meeting, you should not be upset. Perhaps he will be inspired by your interest and after a while he will invite you to see him.
There are situations when a person you are interested in lives in another city. And if you are absolutely sure that you want to be with this person, then you need to make every effort to please the guy of your dreams.
2. Don't be afraid to make the first one and important step, don't wait for him to do it. To invite a guy on a date, you can use any excuse, for example, going to the cinema, to an exhibition. This will be a wonderful excuse to meet.
3. Remember, we attract and fall in love with those in whom we show interest. For this reason, often in correspondence ask the guy about himself, his hobbies, profession and lifestyle. It is very important to be inquisitive, but you should not forget to talk about yourself.
4. The advantage of communicating on the Internet is that you can carefully select words and think through what you want to write.
5. Correspondence should not be intrusive or interfere with your interlocutor. Keep in mind that if a guy doesn’t answer your message right away, then you need to take into account that perhaps he is busy with important things, at work or school.
6. Be yourself in correspondence; you should not be shy as a young man. Also remember that you cannot invent anything about yourself, try to appear better than you really are.
Remain yourself, be natural in your correspondence. If you follow these recommendations, you will undoubtedly interest any guy.
We will send the material to you by e-mail
Until recently, the main design requirement own home or apartment was limited only to correctly selected wallpaper: color, pattern, texture. Today, designer accessories have entered our lives as an integral part of the interior of residential premises. Some of them that have become very popular today are − Modular pictures. In this article we will talk about them and how to properly hang a modular picture on the wall using different technologies.
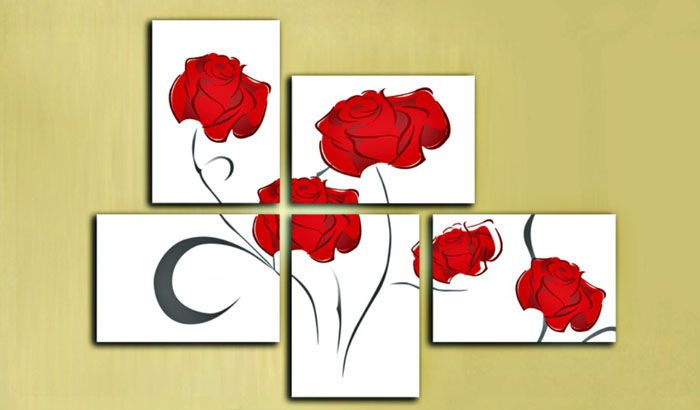
Modular painting on the wall
This is a composition consisting of several elements that depict part of a drawing or a fragment of one common canvas. When joining parts, it forms overall plan, therefore it is very important to correctly arrange the modules, comparing them with each other.

The number of modules must be at least two. Based on the number of elements, modular paintings are called differently:
- a painting consisting of two elements is called diptych;
- of three parts - triptych;
- out of five – penaptych;
- more than five elements – polyptych.
However, it is not always a large number of stands for larger size paintings. Elements can be small in width, which allows them to more effectively display a piece of the overall design by writing small details on it.

With this, you can finish the conversation about the modular paintings themselves and move directly to main topic articles - how to hang modular paintings on the wall.
Options for hanging pictures on the wall
Let's start with the fact that modular elements are pieces of one large canvas. They are purely structural separate picture, which can be hung by anyone in a convenient way. The main requirement is the strength of the fastener, which would allow it to withstand the weight of the item being hung. The second requirement is the exact location of the modules among themselves and in the required plane. For example, in the photo below you can see that the parts of one whole are not located on the same level. So this dimensional location on the wall needs to be accurately determined.
There is no point in considering the first two; these are ordinary fasteners that have been used for a long time. They can be classified as classic fasteners. But others need to be dealt with thoroughly.

Liquid Nails
This adhesive is known to be strong and reliable. But when using it, you need to make sure that the wall surface is very smooth. The thing is that the remaining fasteners can smooth out some of the unevenness of the plane. The adhesive composition is applied in a thin layer, and the paintings are pressed tightly against the wall. This means that surface unevenness will immediately be transmitted to the mounted modules in the form of distortions, which will be visible to the naked eye.
As for the process itself, depending on the size and weight of the picture, liquid nails are applied either to the entire perimeter of the frame with reverse side, or sections.

After which it is applied to the wall along the marked area and pressed with hands. Within a few minutes the element can be moved, leveling. It should be noted that in this way paintings can be installed in any premises for any purpose, because the adhesive composition does not change its strength properties either under the influence of temperature changes or changes in humidity. So paintings in the kitchen or bathroom, glued with liquid nails, hang for years.
This fastening material appeared on the market relatively recently, but many home craftsmen rightfully rated it as one of the most reliable and easy to use. Basically, it is a fabric base treated on both sides with an adhesive composition. The top of the tape is covered on both sides with a protective polymer film. You remove the latter, apply the strip to the required place, and it is immediately firmly attached to it.
It is on this quality of adhesive tape that the method of using it for hanging modular paintings is based. How it's done:
- The sticky material is cut into several pieces up to 10 cm long.
- The protective film is removed from one side.
- The adhesive side of the tape is pressed against the picture frame.
- This is how all segments are installed, evenly spaced from each other. Be sure to install it in the corners of the object.
- The top protective films are removed.
- The module is pressed against its installation site.

Expert's point of view
Dmitry Kholodok
Technical director of the repair and construction company "ILASSTROY"
Ask a Question“Regardless of the texture of the wall (plasterboard, plaster, wallpaper with different surfaces, etc.), double-sided tape can be easily attached to it. Therefore, there is no need to perform additional manipulations related to increasing the adhesion of the wall plane.”

Velcro
These fasteners are called the “Command” system. In their use, they are reminiscent of double-sided tape, but only these are two parts, each of which has one side that is a sticky adhesive composition, and the opposite side that is Velcro. That is, one of them is attached to the wall, the second - to the picture. Then the latter is applied to the wall so that both parts of the Velcro adhere to each other.

The most unique thing about this whole option is that the Velcro can be separated from each other just as easily. Of course, when connected, they firmly hold the picture on the wall. But not very much effort allows you to separate them. So, so to speak, this is a reusable fastener.Let's add that you can install regular plastic hooks on Velcro, which come complete with fasteners, and modules are hung on them. Also a simple option with the ability to take a picture.

There is exactly the same fastening system, which is called “Creps”. You can see how to use it in the video below.
Spider hook for pictures
This fastener got its name from its resemblance to a spider. This is a plastic hook, the design of which has two to four nails sticking out in the form of insect legs. The nails are made of durable steel, their ends are sharp, so that with the help of a hammer they can be driven into almost any construction material. The main requirement for the latter is strength in the sense that it does not crumble under impact loads.

Using spider hooks is simple:
- Pull the nails towards the front part of the fastener.
- They place it at the installation site.
- Hammer the legs to the plane of the hook.
- If it is necessary to remove a fastener, simply pull it out of the wall with pliers. There will be 2-4 small holes on the surface that can be easily masked.

Smart lock
These are polyurethane rectangles that are easily attached to any surface. These are reusable products that just need to be washed after dismantling. warm water, and they are ready for use again.
To help you understand what we are talking about, we suggest watching the video below.
Video: how to hang modular paintings and other household items on the wall
What else can you hang a modular picture on?
One more is enough interesting option – suspension system for paintings and photographs. Essentially, this is a strip (wooden, metal or plastic) that is attached to the wall under the ceiling. There are vertical rods attached to it, to which the painting modules themselves must be attached. In this case, the parts can be moved along the rods, lowering or raising.
Threads with hooks at the ends can be used as guides. This is a more complex design because it has a built-in mechanism that lowers and raises the elements of the modular canvas.

How much do they cost and where can I buy mounts for modular paintings?
Today, all the fasteners described above are not in short supply. They are sold by both ordinary construction stores and online services. Let's just designate their average prices across the country.

How to hang a picture on a concrete wall
The last question of the article concerns the most common wall, or rather, the material from which it is made. Concrete is the most durable material of all wall materials. Previously, in order to hang a picture, you had to drill it, hammer in dowels or wooden “chops”, and only then screw screws into them. It is reliable in terms of withstanding heavy loads, but it is long and dusty, and the process itself cannot be called simple.
Therefore, all fasteners that were described above can be used for concrete walls. The main thing for the first is a clean and smooth surface.
The question of how to properly hang a picture on the wall interests many. And not just hang it, but so as not to drill into the concrete, or even damage the wallpaper. After all, if you want to move it to another place, then what to do with the wall?
During the ancient period Soviet history There was only one way to hang a picture on the wall. To implement it, a hammer was required. And a nail. Then in some apartments the walls became concrete and it became impossible to drive a nail. Then it’s time for drywall; it’s easy to drive a nail into these walls, but it won’t hold. Is it really that technically difficult to solve this problem?
In fact, everything is much simpler if you know different ways and choose the appropriate one. It is not difficult to attach paintings, appliqués, embroideries and other decor to the walls. It is more difficult to select and place them correctly. Here are the main ways to attach paintings and other decorations:
Method one. For light paintings
Pins and buttons. The easiest (school) way is to use pins or pushpins. The pins cling at an angle to the wallpaper, leaving behind a tiny hole, and the buttons are equally easy to attach to both wallpaper and a painted plasterboard wall.
One drawback: you can only hang posters and drawings this way. Although modern wallpaper is much stronger than old paper wallpaper, it will not withstand much weight. Let’s make a reservation right away: you can’t overcome a concrete wall with a button.
Double-sided tape. Hang light picture A4 size onto the wall without drilling, quite easily using double-sided tape. Almost the most common one. Just make sure that it is fabric-based, because such tape can withstand more weight.
This method is very popular on plasterboard walls, which are sensitive to any violation of the integrity of the surface.
At the right approach Neither pasting nor removing tape will spoil the paint or wallpaper. A little advice: The correct way to remove the tape without leaving a trace is at an angle of 90 degrees. That is, the corner that you have already peeled off must be kept at a specified angle in relation to the wall.
Hook glued to the wall. If you don't know how to hang a picture weighing about 1 kilogram, take a hook without decorative ornaments. We align the metal base so that it fits as closely as possible against the wall.
Glue the hook to the wall and hide the base behind a piece of matching wallpaper. Only the loop remains visible, on which it is easy to hang what you want.
Spider hook. This simple device is sold in stores. Instead of a screw, which cannot be done without drilling, the hook is attached using four sharp metal “legs”, clinging to the wall with them.
After dismantling it, 4 small holes remain, which you can simply rub with your finger to eliminate. On such a hook you can hang a frame weighing up to 2 kilograms.
Sewing needle. Unusual, but effective method. We bite off the eye of a sewing needle (it is steel and durable) with pliers, and drive the needle into the wall with the sharp end. And without nails, and almost no marks are left, and it’s easy to hang a picture
Method two. Reliable
Liquid Nails. This is one of the types of glue. It is suitable for a situation in which two uneven surfaces need to be tightly glued to each other.

A painting on “liquid nails” can be hung above your head in the bedroom (not scary) and in the kitchen (it won’t fall off due to dampness). You can hang it on the wall this way heavy picture, but it will hang there for a long time.
Polymer glue. It, unlike silicone, does not leave greasy marks. We glue a heavy product around the perimeter, a light one - according to our mood. You need to press it a little and leave it overnight, propped up with a stick or mop.
Foam double-sided tape. Will not adhere to textured wallpaper. This tape is glued to the wall, not to the frame. Mark out the area where your artwork will hang and then place strips of tape there. When you press them well against the wall, remove the protective top layer and press the picture.
Method three. Professional
If you are deciding how to hang a picture on the wall with a minimum of effort, if your wall is flat and not covered with textured wallpaper, then try special strips for hanging pictures. They are different sizes, with and without hooks. Easy to use and reliable.
These are Velcro for paintings that do not damage the walls and do not leave marks later. The entire operation will take a few minutes, but according to the instructions, it takes about an hour to stabilize the connection.
One part of the Velcro is glued to the wall, and the other to the picture. These parts are then connected, securing the painting securely in place. The chance of falling on your own is negligible, but if you want to move the picture to another place, dismantling takes a second: just pull out the white strip from the system.
This method is best if you often change the decor of your home, hang pictures or decorate walls for parties and holidays.
Good luck to you in creative process home decorations!
Alexandra Larina | 12/26/2014 | 700
Alexandra Larina 12/26/2014 700

Don't know how to hang a picture correctly so that it looks impressive on the wall? Use our tips and you will quickly and easily decorate your room.
To hang a picture you will need:
- pencil;
- level;
- screwdriver or hammer drill with drills;
- screw, screw, nail or hook.
If the painting is large and heavy, ask someone to help you. Otherwise, it will be very difficult to hang it evenly alone.
Sufficient time should be taken to select the appropriate location. Consider the room's decor and lighting.
The ideal solution is to hang the picture at such a height that the line of sight is ¼ from the bottom edge of the picture. Although it's not required condition, but rather a matter of taste.
How to hang a picture correctly?
1. Use a pencil to mark the midpoint of the top side of the painting on the wall.
2. Place the painting face down on a flat surface. Measure the distance from the top of the picture to the mount where you will hang it.
3. Measure the same distance down from the point that you previously marked on the wall. At the same time, try to keep the line as vertical as possible.
If the picture requires only one mounting, then you will already see where it will be located.
If there are several fasteners, proceed to the following steps.
- Measure the distance between the fasteners located on the picture. This will allow you to navigate where the hooks should be on the wall.
If a rope or tape is used as a fastening in the painting, then it is necessary to very accurately mark the locations for the holes so that the screws are on the same line. Otherwise the picture will hang crookedly.
However, if you are a fan of shocking trends contemporary art, you don’t have to try so hard, but on the contrary, tilt the picture a little to the left or right.
- Divide the distance between the screws by 2.
- Measure the resulting length to the left of the intended point, and then to the right. Use a level to make sure the marked points are at the same height.
4. Drill a hole and screw a screw into it. If you don't have a screwdriver or hammer drill, you can use a hammer and nails.
5. Carefully hang the picture on the mounts.
- If you need to hang several pictures on different heights, first hang the one that should be higher than the others. This way you can quickly measure the attachment points.
- In museums, works of art are usually hung about 150 cm from the floor to the middle of the painting. You won't go wrong if you use this rule either.
- After hanging the picture, place a level on the top of the picture. This way you can know which way to tilt the painting so that it hangs perfectly straight.
- Be careful when driving nails and drilling holes. There may be electrical wires in the wall, which are highly undesirable to damage. You can not only cut off power to the entire apartment, but also risk your health.
- Do not remove the protective film from the painting until you hang it. Drilling holes in a wall usually involves a lot of construction dust, which can stain the work of art.
- After installing the screws, make sure they are strong enough to hold the painting.
Based on materials from the website www.tipy.pl
Beautiful paintings, reproductions, engravings, prints or photographs can transform any home, giving it individuality and comfort. Hanging pictures correctly is a skill on the verge of art, because it is very easy to destroy uniform style incorrect combination of elements and details of the situation. When choosing a painting, you need to remember that it will not just take empty place on the wall, and will give the room a new sound.
Paintings in the interior play an important, and sometimes main role. In some design solutions, other furnishings are built around the painting, and it serves as the center of the interior. In this article we will talk about how to hang a picture on the wall correctly and beautifully.
Subjects

For your home, choose paintings with positive themes; do not buy paintings depicting scenes of violence, war and other horrors. Even if you are a fan of Karl Bryullov, “The Death of Pompeii” can be viewed at the State Russian Museum, and it is not at all necessary to hang this disaster in your home, creating a depressing atmosphere in the room.
Images of flowers, animals, landscapes or positive scenes from life will look good in the living room.
People relax in the bedroom, so pictures depicting storms and storms should not be hung there. Although calm seascape quite suitable, having a calming effect on the nervous system.
An appetizing still life with its harmony of abundance will add a picturesque character to the kitchen.
For an office, Feng Shui suggests placing a painting depicting nature on the wall. Office in classic style will decorate the hunting scene, it doesn’t have to be famous painting Perov "Hunters at a Rest", you can hang your own enlarged photograph with a hunting trophy. Mountain landscape, if hung behind the back of a work chair, will symbolize support, reliability and stability. Images of a river, waterfall or lake placed in front of your desk will bring good luck and prosperity, but they should not be hung behind your back.
Landscapes according to the seasons are arranged as follows: spring - on the eastern and south-eastern walls, summer - on the southern walls, autumn - on the western and north-western walls, and winter - on the northern walls.
Family portraits are a priceless heritage that should not be placed in front of front door, stairs or in semi-basements.

You can hang several paintings on one wall to create a composition. By maintaining symmetry, this is easier to do. When creating an asymmetrical composition, you need to remember that its balance can easily be disrupted by incorrect placement. Having a sense of space and natural taste, it is quite possible to cope with this task.

Now you can choose a frame to suit any, even the most sophisticated taste, by visiting a framing workshop. The frame is chosen in combination with the furniture, but it must be in harmony with the plot of the picture. Thus, a massive carved baguette will suit an oil painting, and a photograph or watercolor can be inserted into an aluminum or plastic frame.
If the walls of the room are covered with patterned wallpaper, then the picture frame should be wide.
Fasteners

- To mount a painting on the wall, you need to take into account its weight and size. Light, a small picture Can be hung on one hook-shaped bracket. To do this, mark the place where the picture will hang. Using a drill or hammer drill, a hole is drilled in the wall using a concrete drill with a Pobedit tip. The drill is selected with a diameter of 6 mm. A plastic dowel, like a drill, with a diameter of 6 mm, is inserted into the drilled hole, into which a hook is screwed. Fastening the picture to the wall is achieved by simply hanging the picture on this hook. If you don’t have a drill, then a small, light picture can be hung on a concrete wall in this way: a nail is driven into the cork, and the cork itself is glued to the wall with superglue. Then the picture is hung on a nail. The cork can be replaced with a piece of wood.
- How to hang a picture on the wall , if it's heavy? To do this, you can use two flat hanging plates; they are attached with short screws to the back of the picture, closer to its edges. Then the picture is placed against the wall, on which the holes are marked. The places of the marks are drilled with a drill with a Pobedit drill bit with a diameter of 8-10 mm, dowels corresponding to the size of the drill are inserted into the holes, into which the painting is secured using screws.
- How to attach a painting to a wall using the trellis hanging method? This way you can hang several paintings of the same size and theme. A metal rod in the form of a pipe with hooks attached to it is fixed just under the ceiling along the entire length of the wall. A thick double nylon fishing line is attached to them, on which the paintings are hung one below the other. The outer edges of the composition should form a rectangle, then the whole composition will look harmonious.
Environment

A good painting should be hung in a well-lit place, but not in direct sunlight, otherwise the colors of the painting will quickly fade. If the wall is not well lit, you can install additional special lighting, which will give the entire interior a modern, sophisticated look.
Medium-sized and small-sized paintings are hung at eye level, while large-format paintings, especially oil paintings, are hung higher and at an angle.
In order for the decor of the room to be harmonious, paintings that are vertical in format are balanced by a low, wide vase placed on a table, bedside table or cabinet, and horizontal ones by a tall vessel placed on the floor.


