How to draw beautifully with pastels. We draw with dry pastels. Review of materials. our competition “Master of Drawing” - Irina Maltseva
Have you never drawn before? And sometimes you really want to convey on paper a colorful landscape that struck you with its beauty during a walk. Then pastel drawing lessons for beginners in our art studio just for you. Our attentive professional teachers will teach you how to draw almost everything with pastels. Special proprietary programs will give you the opportunity to learn this technique in a minimum amount of time. After completing the course, you will be able to draw a landscape, still life and portrait with pastels. Small groups of up to ten people allow the teacher to communicate with each student during the lesson and convey the necessary information to everyone.
Watch how to mix with oil pastels
How to mix with oil pastels is very simple by understanding these two simple steps.
- Build pastels from light colors to dark colors.
- Then use your lightest color to smooth and blend.
- Oil pastel.
Step by step instructions
Use yellow oil pastels to color the edges of the fire first. Then use Orange color to create the same fire shape, but below the yellow edge. Then do the same with the red oil pastels. Draw the same fire shape, but below the orange edges.
What is pastel?
Pastels are dry soft pencils without frames, similar to crayons. Using them when drawing allows you to achieve a particularly realistic image, to convey the natural environment as accurately as possible. color scheme and create smooth transitions of halftones and shadows. On pastel drawing lessons For beginners, step by step you can draw a picture yourself that will become a wonderful decoration for your interior.
Then with yellow oil pastels go back over all the colors. This will smooth out the texture and blend all the colors together. To make the background, we switched the rule and used more dark color. It's okay, it will just give you a different result. Use red oil pastels for quick coloring in the background.
Then use orange to even out and blend the red. Now experiment with it by trying different colors and see how it turns out. In this case, the initial sketch was done with a purple pastel pencil. After some testing, it was found that most of the other colors in the box fit comfortably on top of this color.
Rapid development of drawing skills.
Perhaps you think that learning to draw professionally will cost short term impossible. For this you need long years constant classes. In part, perhaps you are right. However, our programs are based on effective methods training. Therefore, even the very first pastel lessons for beginners, will allow you to master the basics of this technique. The special warm atmosphere in our studio is conducive to excellent learning and creativity. You will not need to bring class materials with you. Everything will be given out by the teachers. You just come, learn and enjoy creative process. Our studio is not far from the metro. This will allow you to quickly get home or to work after the course.
A purple pencil was used to define areas of dark tone, which were then smeared and blended using both tortillon and tissues. For finer details, a similar colored pastel pencil was used. Make sure you leave enough blank paper to accommodate lighter tones and colors. If you apply too much dark tones at the beginning of your work, you will find it difficult to maintain light colors bright because the dark tones will last as you mix them.
Pastel is line and color at the same time. It has a soft and velvety texture and a subtle shine of silky material. It allows for speed of writing, instant transmission of ideas and emotions, ease of correction, and complete spontaneity of work.
Adding this deeper level of tone will enhance the shape of the objects and increase the impact of the still life. The goal is to create a balance between light, dark, and midtones: light colors white chalk, dark tones created by a mixture of purple and burnt ummer, and midtones set by the neutral color of the paper. It is very important that you do not overdo the light and dark tones and do not leave enough paper to accept the layers of colors that have yet to be applied.
Board chalk is more complex than pastel and can be sharpened to a fine point to highlight crisp edges and small parts objects. At this stage the layer yellow color applied to exposed areas of paper on those objects whose colors range from yellow to green.
Pastel like art material- these are colored blocks of compressed pigment. Available in the form of crayons or pencils.
Happens three types: dry, waxy and oily. All these different types pastels cannot be used in one work.
"Pros" of pastels:
- Ease of operation. Basically, all you need is paper and crayons. There are no specific technologies or rules for working with this material. You can easily apply color, blend and remove.
- Light fastness. Unlike other materials, pastel does not fade in the sun, does not fade or change color over time.
- Color nuances. Pastel gives soft transitions from color to color; it is easy to depict portraits with subtle color nuances.
- Velvety. A layer of pastel gives a beautiful velvety surface.
"Minuses":
Or rather, there is one minus - loose pastel crumbles or smudges. It must either be drawn on a rough surface, or immediately framed under glass. Fixing the surface of the pastel with varnish leads to a color change.
Applying green color over yellow gives color and complexity that you don't get from a single color. The success of this method largely depends on the colors you choose for the dark tones at the beginning of the still life. Always test colors before starting a still life to see what range of tonal expressions they can produce.
It's because Blue colour more opaque than green. Such changes must be adjusted and balanced after all colors have been applied. This usually shows up as variations in tonal contrast throughout the work, usually due to opacity different colors or lapses in your concentration and technique. In any case, this problem should be solved by final stage work.
Masterpieces of artists made in pastels (J. Lyotard, E. Degas, Z. Serebryakova)
Pastel for beginners: material technology
Aids
Most artists do not use any auxiliary means in pastel: this is one of its advantages. True, sometimes, especially in complex, multi-layered works, some of the so-called mediums are simply necessary.
This was done by adding subtle variations to the color of certain objects and careful use of black to balance the contrast of tones in the work. The dangers of black abuse cannot be emphasized strongly enough. It should be used sparingly and with great care as it overpowers other colors too easily.
Acrylic paints, oils and watercolors are not the only options for painting. Pastel painting offers a unique way of creating illustrations that have the same benefits as regular paints. Read on to learn the basics of using pastels, and also get step by step guide on creating a pastel composition.
- Water, turpentine
In multi-session sketches to create a kind of underpainting, artists spray a certain volume of water, turpentine or other thinner onto the initial layers of pastel, which evens them out, generalizes them and makes it possible for further work, refinements, and avoidance of natural color losses in this case.
Painting with pastels has the same benefits as watercolor or acrylic pigments. 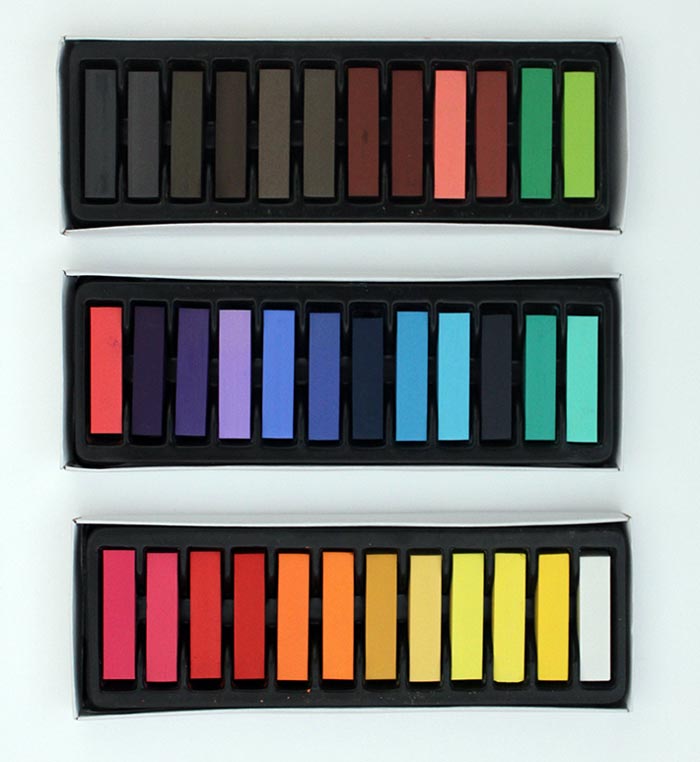
Pastels are an art medium that comes in stick form and contains pure powdered pigment as well as a binder. There are two types: soft pastels and oil pastels. Beware, however: they produce dust!
Learn Pastel Painting in 5 Easy Steps!
Oil pastels, while they can be made more complex, do not leave behind powdery pigment.
Create a rough sketch of your property
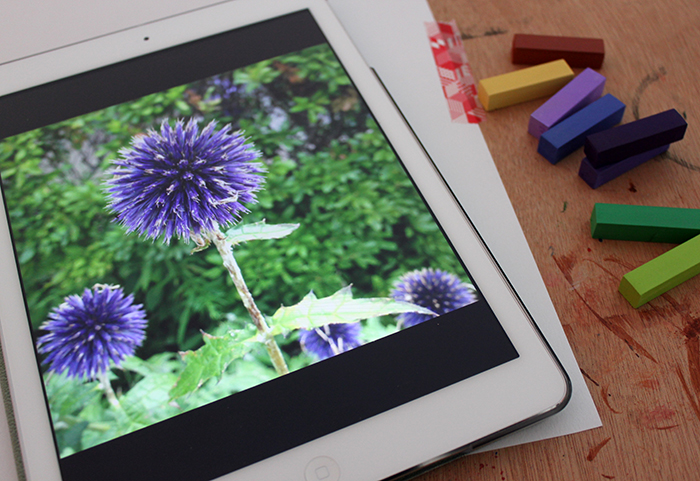
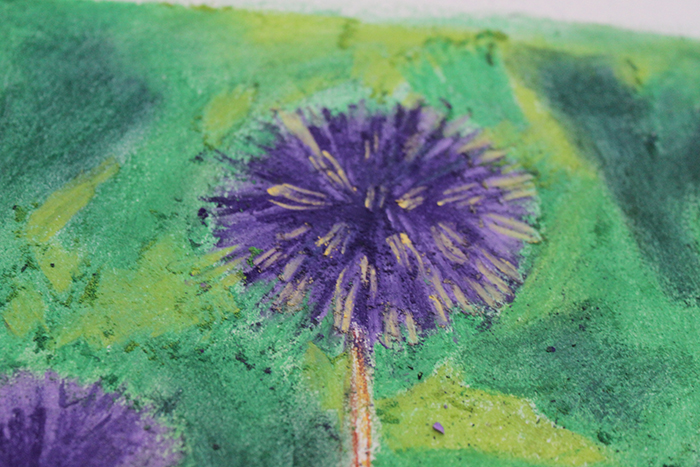
My supplies include a wide range of colors that will suit this vibrant natural scene perfectly. To begin, choose the colors you are going to use and create a rough outline of the prominent shapes. For me it was green background with three purple circles.
- Fixatives
In long-term works, to fix the pastel particles before applying subsequent layers, artists spray a thin layer of fixative onto the sheet. They also coat the finished piece with a fixative to prevent the pastels from fraying and peeling during framing and transportation.
But there are masters who are fundamentally opposed to fixatives, since the latter “mute” the color values of the painting. The consumer is given a choice of two types of fixatives in aerosol cans - matte and glossy.
Fill in the basic color palette

Once you have the basic shapes of the composition, create a color base. You'll layer on top of these pigments, so don't worry about being precise - we just need general idea about where our fields lie.
Step 3: Start Coloring Layers
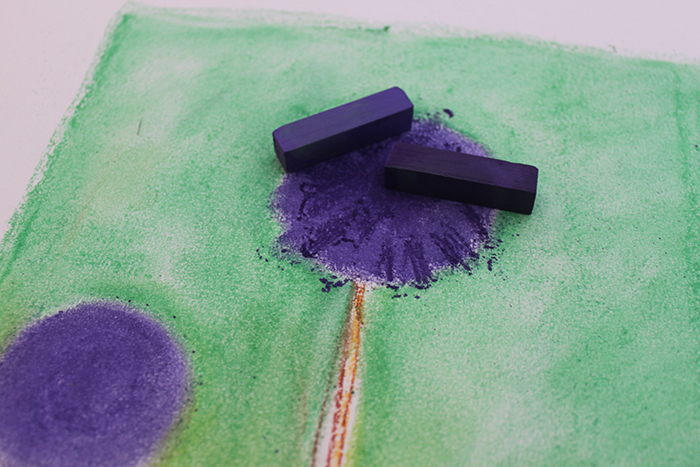
This is where the work really begins. Now that you have a basic idea of color, start refining your design layer by layer. Start simple, still working on the large shapes and color of the building. The more you work on your drawing, the more complex your shades will become.
If you decide to use them, try to do it very carefully. Excessive fixative will irreparably ruin the work.
Pastels for beginners: about again for pastels
Although pastels can be painted on any surface, they usually work on paper, cardboard, and sometimes on canvas. In addition to strength, the base for pastels requires a certain texture.
Don't be afraid to get your hands dirty!
The great thing about soft pastels is that your fingers are your brushes. You can mix colors with just the touch of your finger. Try using the edge of your pinky for small areas, using your index for larger fields of pigment. Wash your hands frequently to avoid contaminating your work.
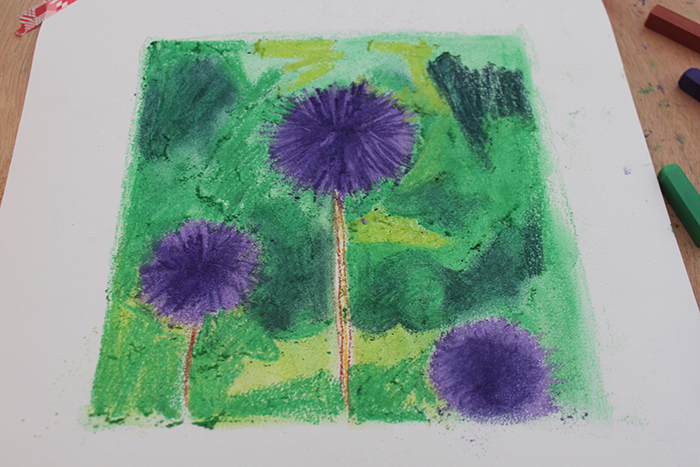
Use the sharp edge of your pastel to create precise details. This will give your drawing some visual clarity and a sense of completion. Select multiple areas to focus on. For me this meant tips from my purple plants and some leaves in the background.
- Special paper for pastels.
For pastels, paper with a coarse-grained texture is selected, which promotes better adhesion of its layers. In addition to white, there are many colored papers - ivory, tan, gray, blue, green, purple and so on. The color of the paper is as important as the shade of the underpainting in other painting techniques. Remember that this choice is quite large and it is necessary to gradually try out as many varieties of base as possible.
![]()
Depending on the color, you can easily layer a light pastel on top of a darker color. Also, you can mix White color to lighten color or add highlight - use it sparingly. This will diffuse the intensity of your drawing. 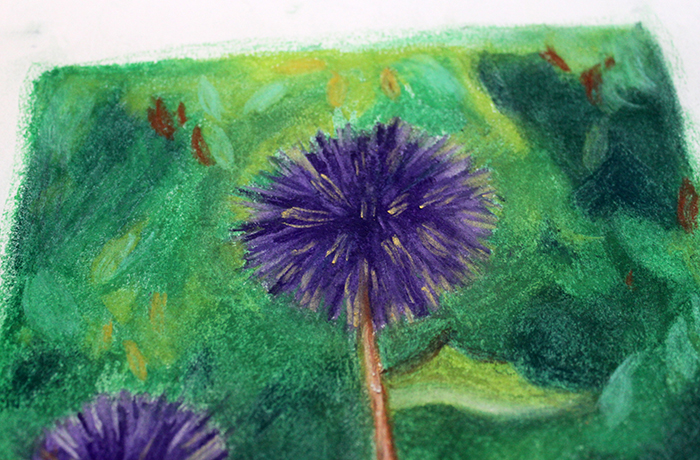
This step will get a little messy. Remember all the powdery pigment when you painted? It's time to remove it - without destroying your drawing.
- Watercolor paper.
Any watercolor paper will work for pastels, but cold pressed paper is best. If underpainting with watercolor or acrylic paint, this basis is the best choice, since not all paper reacts equally well to water-based soils - water causes deformation of their surface.
Don't scrape away any excess pigment or you may ruin your art. Instead, carefully remove the bilge paper and gently tap it onto a hard surface. All the extra powder will fall down and you can clean it up from there. On the one hand, it's time to delve into art pastel pattern. Used by artists for centuries, pastels are a particularly portable medium, allowing the creation of colorful art without the need for water, brushes or palettes.
But first, what is pastel? The definition is not at all clear, and art societies there has been some debate as to what exactly constitutes pastel. Please note that artwork made using pastels is also called pastels. Pastel is used as a verb to create a piece of art with pastels. And of course, neither of these terms should be confused with the use of pastel as an adjective to have a pale color!
- Paper for charcoal pencil.
Some types (as well as inexpensive types of pastel paper) are quite friable, which makes them an unreliable material. Charcoal pencil paper usually lacks significant texture, which weakens its ability to hold pastel particles. Used for short-term sketches.
Pastel drawing allows you to create bright color with the ease of drawing with pencils. The pastels themselves come in stick form, consisting of pure powdered pigment and a binder. The pigments used in pastels are the same as for all colors. artistic media, including oil paints; the binder has a neutral shade and low saturation.
Soft pastel sticks become dusty or dirty when in transit, so bring a cloth to dry them before pastel drawing. It is generally easier to work on a tinted surface rather than pure white. You can buy tinted paper or iron it yourself using an acrylic or watercolor wash.
- "Sandpaper.
This paper is coated with small particles of abrasive material (like regular sandpaper), due to which it holds a significant amount of pastel. Although it contains acids, it is very popular among artists.
Making sandpaper
- Use high-quality, acid-free paper (including watercolor paper), or cardstock.
- Moisten it lightly reverse side. This is necessary to prevent deformation when you apply the aqueous composition to the front side of the sheet.
- Now, using a flute, generously moisten the front side of the paper (or cardboard) with the previously prepared composition:
– 4 parts acrylic gel.
To prevent mixing and smudging when pastel drawing, you can use it in this area. Beware: if the fixative is sprayed too much, it will fade away abruptly and darken the vibration. Do a few quick test runs spraying the fixative to experiment with a lighter approach.
With those basics in place, let's start with a pastel drawing. Use special pastels for different methods. Soft pastels have a rich, buttery tone and blend easily. Hard pastels, including pastel pencils, are great for adding detail to a pastel drawing. Oil pastels have an oil binder, are less opaque than soft pastels, and do not smudge as easily. The newest water-soluble pastels create translucent washes when water is applied to them.
– 2 parts of a composition to create a granular structure (flint, marble dust or pumice).
– 1 part water (volume may vary).
- Let it dry. If you are not happy with the results, repeat steps 2 and 3. If the paper does become warped, place the paper face down on a clean, flat surface and wet the concave areas. Then press the edges of the paper and let it dry. If the sheet does not straighten, repeat the entire process using less water.
There is another way - use the recipe given in the insert, replacing the acrylic gel with an acrylic primer. Using a palette knife or sponge, apply the mixture onto the paper. The result is a superb textured surface that can react with pastels in a new, unexpected way.
- Graphic paper
You should familiarize yourself with other types of paper. There are many varieties available in art salons. The best way Determine whether the proposed option is suitable - feel the texture by touch. Paper weight varies between 120 – 360 grams/sq. meter.
- Fabrics
Pastels can be used on fabrics, such as canvas. Many artists stretch fabric onto a regular stretcher. Some people stretch the fabric onto stiff cardboard using acrylic gel as an adhesive.
You can write directly on the fabric or cover it with a layer of acrylic primer. If you want to do an oil underpainting, a primer is required because Oil paint may damage (“burn”) the fabric.
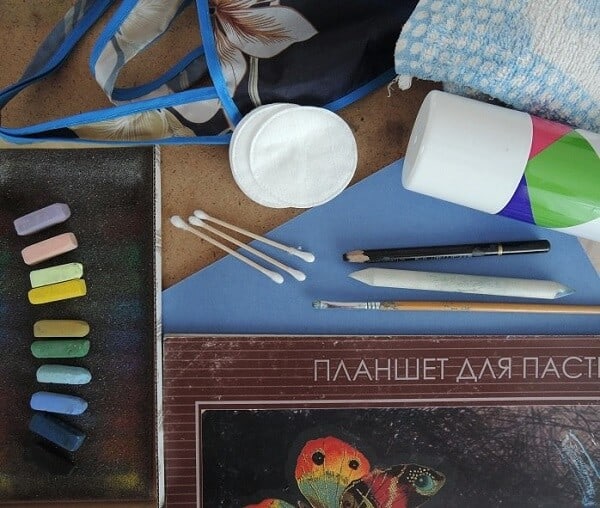
Pastels for Beginners: Tools and Accessories
With the possible exception of a vacuum cleaner, pastel tools are simple and inexpensive.
- Drawing board, adhesive tape and buttons
Pastel paper should be firmly secured to a solid surface, such as a drawing board, to which the paper is attached with adhesive tape or thumbtacks. Sometimes they use soft cardboard (like Homosote), which fits the buttons well.
- Brushes
Brushes can also be useful when working with pastels. For example, an elastic bristle brush can easily remove an unnecessary fragment of a sketch (if it is not fixed). A watercolor brush is suitable for mixing paints, creating smooth transition one color to another. If necessary, use a brush to moisten areas of the paper.
To remove paint and correct mistakes in pastels, pieces of soft fabric are used: it can be suede, pieces of velvet, but cotton rags are perfect for this; they should always be at hand.
- Sandpaper
Attach a piece next to your work sandpaper to sharpen a chalk or pencil from time to time (it’s better to put it in a glass so that the sawdust falls to the bottom). If you use pastel pencils, you will need a sharpener. You can take a knife or razor, but a sharpener is more convenient; Just be careful not to break the fragile core of the pastel.
- Shading, eraser
A shading stick is a tightly rolled paper cylinder, pointed at both ends, necessary to create a smooth transition from one color to another. To remove pastels, artists use an eraser, lightly pressing and tapping it on the surface of the paper (rubbing with an eraser, as when correcting mistakes in a pencil, is not advisable!).
- Vacuum cleaner, masks
Do your best to prevent pastel dust from entering your respiratory tract and lungs. Artists who constantly work with pastels usually install special filter hood systems in their studio.
At the very least, you can use a vacuum cleaner by placing the hose at the bottom of the sketchbook; to do this, take a very long hose, placing the vacuum cleaner in another room so as not to hear the sound of the running motor. Authors who work with pastels only from time to time will be quite happy with a portable hand-held vacuum cleaner.
Sometimes they use a mask, which can be purchased in pharmacies and art salons. It is a paper filter secured to the head with an elastic band. Masks are very effective, although they take some getting used to.
- Sketchbook
Almost any sketchbook will do, provided that it is possible to tilt the work towards you - in this case, pastel particles will fall off onto the floor or into the tray. You can strengthen the paper in a horizontal position, but do not forget to vacuum up pastel dust from time to time, which can contaminate the colors of the sketch.
- Transport box
To work plein air, you will need a special box with many compartments for storing pastels. Artbin pastel boxes can hold anywhere from two dozen to over 100 pastel crayons. In addition, they are quite lightweight, have locks and a handle. If you purchase boxes with compartments for pastel crayons, pay attention to the size of the compartments.
Some types of pastel crayons, such as Schmincke, are thicker than others. Make sure that the box has a good lock, otherwise the pastel may simply fall apart. Although the huge selection of pastels is tempting, I recommend starting with a small selection of basic crayons colors.
After doing a few sketches, you will have an instinct for the missing color shades of the pastel (and stamp).
So, let's summarize.
The most complete list of materials for drawing with pastels!
- Soft pastel – set of 25 – 30 crayons.
- Hard pastel – set of 24 crayons.
- Pastel pencils – set of 12 pieces.
- Paper: 45 x 60 cm sanded, 30 * 45 cm colored pastel paper in the set.
- A drawing board large enough to accommodate the largest sheet of paper.
- Adhesive tape.
- Cloth, paper towels.
- Brushes – a pair of bristle or elastic synthetic brushes for removing pastels.
- Stew sticks, tortillons.
- Eraser eraser.
- Sandpaper.
- Sharpener.
- Mask-bandage. Vacuum cleaner.
Materials at your discretion:
- Soft pastels - one or two crayons of each brand - to compare manufacturers' products.
- A can of matte fixative in an aerosol.
- Soft brushes – for moistening pastels.
- Sketchbook (for work outside the workshop)
- Latex gloves.
However, before you go to the art store, remember that to begin with, you can get by with just one set of pastels, paper and... the desire to draw :)
I will be grateful to you behind questions and responses to the article. Leave your suggestions for the topics of future pastel master classes in the comments!
 More interesting and useful information about drawing
from the artist Marina Trushnikova
You will find in electronic magazine“Life in Art.”
Receive magazine issues to your e-mail!


