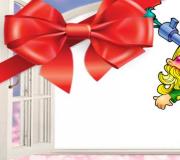
Bunny face makeup. Children's face painting: master class for a Fairytale party
The coming 2011 is the year of the Rabbit (Hare), therefore New Year's bunny makeup will be very relevant (of course, if you already have a bunny costume). To make this makeup, apply makeup to your face gray. In this case, the chin, tip of the nose, cheekbones and eyelids should remain without makeup.
Take white makeup and draw spots under the nose, above the eyebrows and under the lower lip. Outline the spots above your brows with a thin black line to create high, triangle-shaped brows. To simulate a cleft lip, swipe thin line from the upper lip to the nose. Draw hare teeth down from the lower lip.
Black pencil (or makeup and with a thin brush) draw a mustache and the tip of the nose. To give your eyes an elongated shape, line them (draw “arrows”). New Year's makeup the hare is ready!
How to do cat makeup
Another symbol of 2011 is the Cat, so the cat costume and New Year's makeup for a cat will also be in great demand. The main tone for this makeup is beige; it should be applied to the chin, cheeks, forehead and nose. Then you need to take white makeup and use a thin brush to apply it from the inner corner of the eye. curved line towards the forehead.
Apply white makeup under the nose, in the place where the cat's whiskers should grow. Draw the mustache itself with black makeup above the upper lip. You shouldn’t put too much pressure on the brush - the mustache line should be light and thin. Draw a few more hairs with light strokes above the eyebrows.
Remained finishing touches. Line the lower eyelid with black, creating the illusion of an almond-shaped cat eye. Paint the tip of the nose with black makeup and draw with a thin brush vertical line from the upper lip to the nose. Apply red (or black) lipstick to your lips. The cat's New Year's makeup is complete!
Using our tips on how to do makeup, you can apply the makeup of almost any animal in a similar way, or even depict a Venetian carnival mask on your face!
Alex Gromov
Shapeshifters
Makeup is the freedom to choose your face...
When did a person first wear a mask? Conventional language masks are almost forgotten, as is their history. Only ritual masks of different tribes, dance masks and carnival masks have survived to this day.
Carnival masks for your thousand-year history changed shape and size more than once. They were made from multi-colored leather, velvet, gold and silver foil. Traditional masks Venice carnival– Harlequin, Columbine, Pulcinello, and the most common mask is “bauta”, which has almond-shaped slits for the eyes. To this day, in museums and private collections, masks painted famous artists, decorated with inlay from precious stones…
The history of makeup is the history of the stage. The evolution of culture can be traced by changes in makeup. Thus, one of the most unusual makeup was used in the Kabuki theater, which originated in Japan in the 16th century and still exists today. This music and dance drama features traditional flower symbolism in the makeup and mask. So, white makeup was applied to the face of the actor playing a positive actor, and negative character should have had a general red background on the face and blue stripes. Paint application method sharp lines, different in color, shape and pattern, enhanced the natural lines on the face. After the performance there was ancient custom- the actors gave the audience a print of “their drawing” on silk fabric or rice paper.
Makeup is the most striking element of the image. Successful makeup in films is remembered for decades: suffice it to say “Baba Yaga”, and Georgy Millyar appears before your eyes in this role. This make-up of a grumpy old witch transcended the boundaries of the film, making the “cinematic fairy tale” a reality.
In musicals, makeup is often applied according to the “young, Beautiful face" The book describes in detail the makeup and history of the creation of the star musicals “Cats”, “Hair”, “Metro”, “Jesus Christ Superstar”, productions of “ Independent group plastic drama" by Alla Sigalova, and the creation of "football" makeup on the body of French beauties from the famous cabaret "Moulin Rouge".
In the 21st century, branding has become fashionable - modern version placing marks (brand) on the body. The most common designs burned onto the skin are runes, hieroglyphs, ancestral seals and magical symbols.
Who will argue, the mysterious art of makeup can turn a young man into a decrepit old man, a blonde into a mulatto, a beauty into an ugly woman - and vice versa. Make-up is the freedom to choose your “own” image, face, yourself...
First, decide what kind of pattern you will draw on your face.
The face should be washed clean and wiped dry.
So that the makeup comes off better. The face must first be lubricated with Vaseline.
Select the colors you will use to paint.
First draw the outline, and only then point.
You don’t have to spend a long time with face painting of a hare for a child, because accents can be placed on the nose, mouth and eyebrows.
An interesting version of face painting of a hare with a carrot in its mouth. As a basis, first draw on the ears and forehead of a bunny or rabbit, and the space between the nose, using white paint. The upper lip and tip of the nose are also treated with a thick white layer, a carrot is drawn in the corner of the mouth, and the teeth characteristic of a bunny are drawn on the lower lip.
When the top layer has dried well, take a thin brush and paint all the details with black paint.
Don't forget to draw the hare's nose right on the tip of the model's nose.
In the second version, the entire nose is covered with white paint, but otherwise the sequence and idea are the same.
I hope that one of these options suits you and that you will definitely use it.


Children's body art or face painting is very fashionable now, so children take great pleasure in drawing cute animal faces. By the way, they claim that face painting helps remove nervous tension and psychological stress.
For face painting you need paints, sponges, brushes and napkins.

Draw a bunny quite simple. If you have gray and white face painting, then consider the job half done). So, we need white face painting, gray, black paint, a couple of sponges and brushes (preferably thin ones). We apply white face painting on the eyelids and eyebrows, above the lip and slightly grab the cheeks. We work carefully with the sponge and don’t pick up a lot of makeup. Now we will work on the eyebrows. We draw in the eyebrows and create the look of a bunny's fur with strokes of gray makeup.

When we're done with the eyebrows, let's move on to the cheeks. We also create strokes of gray color. Next, use black paint to make dots above the lip. And then use the same black paint to draw an arc on the upper lip.

Using a sponge with white makeup or a brush, draw a stripe on the lower lip and draw black paint along the middle. All. The bunny's face is ready.

If you want to draw a bunny on a child's face, you don't have to tint the entire face. It is enough just to outline the main details - a nose, eyebrows (and someone draws ears directly on the forehead), a mustache, teeth (this characteristic feature, the main one, perhaps) and so on.
For tinting you need to use any light shade. And white, and slightly blue or brown. Hares are also different.
Once we've applied the base, we'll start drawing. For this you can use black or any dark shade. Let's show the fluffiness, mustache, outline the teeth.
The result will depend on the skill, of course, and the accuracy of the hand.
It might look something like this:

(photo from the Internet)
If this is an older child, then he will be able to withstand the procedure of applying face painting to his face with paints longer. Therefore, the drawing can be more complex and cover the entire face.

For small children, you can limit yourself to only a small area of the drawing. It's better to attach additional detail in the form of ears.

Drawing a bunny on a child’s face is not difficult; you should have special paint face painting, and then you can draw a bunny as in the picture below:
1) First, you paint the child’s face with gray paint in an oval;
2) Start with the eyes, paint the eyelids with white paint, and use black paint to mark the border of the eyes above and below;
3) Draw the muzzle and teeth with white paint, and outline the borders of the muzzle and teeth with black paint and add a mustache. As a result, you should end up with such a cute bunny.

A child’s New Year’s bunny costume can be complemented with a mask, but it will be better if you draw a funny face for your baby.
To do this, you should purchase a special set of face painting for a hare (they are now on sale), or choose the colors yourself.
You can learn how to do face painting by watching this video tutorial.
Or this one
The face of a Bunny, a hare on a child’s face as face painting is depicted with ears and mustaches, a nose is also drawn on the nose and teeth are drawn near the mouth.
The ears can be drawn on the forehead, and the tip of the nose can be made up like a pink, black or brown bunny nose.
When making a drawing, you can completely paint over the entire face light shade(white, blue, gray or even pink), or you can simply show it symbolically by only depicting a nose, muzzle, mustache, cheeks and ears.
To make it more clear, you can look at the most different drawings and face painting.
First you need to apply all the light parts, and then add more dark shades, gradually complicating the entire drawing. Outlines and individual parts can be done with a brush with black color.
Learn how to make “Fox” face painting at home for your child for a matinee and holiday.
The cunning sister - the fox - is a character in many fairy tales and cartoons, the heroine of children's matinees and productions. Buying, renting, or making your own fox costume is not at all difficult. The image of the child will be completed with face painting. Let's learn how to do it!
How to draw a fox with face painting on a child’s face step by step for beginners?
Face painting and drawing on the face will allow the child to transform into a fox and will give him great pleasure. And how beautiful the photos will turn out!
If you have decided to draw the face of a cheater for your baby for a matinee, children's party and just for fun, the first step is to think through some details:
- Decide how complex the drawing will be. You can limit yourself to a black nose and mustache, or depict a full-fledged fox face on the child’s face. The time spent on it and the amount of material will depend on the complexity of the work.
- If you are a beginner doing face painting, you need something to focus on. Look at the photos further in the article, some of these ideas may suit you. Do you have a developed imagination, and can you imagine exactly what a fox’s face should look like? Great, but don’t draw it right away on the child’s face, make a sketch on paper.
- Please note that creating an aquagym is not a quick process. Will your child sit while you apply makeup? It may be worthwhile to start by painting it simply and quickly.
You will also need certain materials and tools:
- tone is the basis
- sponges for applying tone
- brushes for painting, preferably natural
- pointed and flat brushes
- wet and dry wipes
- glass of water
- a cape for a child so as not to stain his clothes
- a hoop, clips or headband to keep hair out of your face
- glitter optional
And, of course, paints. For sale special sets for face painting and body art with dry and liquid paints. For the fox's face you will need colors:
- black
- white
- orange
- yellow


IMPORTANT: Face painting paints can be made with your own hands. You will need food coloring in the desired colors, starch (3 tablespoons), baby cream (15 g), warm water(1.5-2 tbsp. spoons). Baby cream is mixed with starch and water, and dye is added to this mixture until the color intensity becomes desired.
Remember, face painting for a child in the form of a fox’s face or any other must be safe. Before using the paint, you should conduct an allergy test on a small area of your baby's skin. If a child has an allergic rash, wounds or irritation on his face, he cannot do face art.
When everything is ready, you can begin to directly draw the fox on the child’s face.
- Lay out the materials and tools for face painting in front of you. The drawing you choose should be before your eyes.
- Place your child comfortably in a chair with a backrest. Cover his clothes with a cape. Remove hair from your forehead and cheeks.
- Wipe your baby's face with a baby wipe.
- After a couple of minutes, you can begin to apply the tone with a sponge soaked in water and well wrung out. To ensure the base lays evenly and smoothly, make light circular movements. The tone is applied to the entire face: from the roots of the hair to the ears and chin, as well as on the eyelids.
- Take a wide brush and dampen it in water. Pick up some orange paint. Now you will outline the contours of the fox's face. Start with the child’s forehead: above his eyebrows, mark the fox’s ears with triangles. Outline the temples, outer corners of the eyes and cheekbones with lines. Draw horizontal lines from the cheekbones to the wings of the nose.
Fill in the contours of the fox's face with orange paint, also using a wide brush or a small sponge.
Apply with a medium brush white paint on the nasolabial triangle and chin of the child.
Using a medium brush, paint two small white triangles inside the orange triangles above the eyebrows to detail the fox's ears.
Also apply white paint to the child's eyelids.
Using a pointed brush, draw a black circle on the baby's nose and fill it with color. This will be the fox's nose.
Using black paint, outline the white nasolabial triangle and the child’s chin, draw a line from the middle of the nose to the middle of the lips, draw a mustache. - Using a thin black brush, make eyelashes for the fox by drawing double or triple arrows on the child’s upper eyelids.
- To add fluffiness to the face, swipe across your baby's cheeks. broken lines as shown in the photo. Using short strokes of black and white paint, paint hairs all over the fox’s face.
- Add brightness to your face painting with glitter.

 Fox face painting step by step: step 1.
  Fox face painting step by step: step 2.
 Fox face painting step by step: step 3
  Fox face painting step by step: step 4.
 Fox face painting step by step: step 5.
  Fox face painting step by step: step 6.
 Face painting on a child's face: fox.
 Here's another one step by step photo– instructions for face painting with a fox. Here they start by applying white paint to the “ears” and “muzzle”, fill orange“Head” and then the details are indicated in black.
 Face painting “Fox face” for beginners.
 VIDEO: Face painting “fox”. We do it at home
Animal makeup on a child’s face - face painting of a fox: options
You can see options for face painting of a fox on the face of a child and an adult in the photo. Realistic fox face: face painting for adults. 
 Girl with face painting of a fox.
VIDEO: Face painting of a fox
Cheerful and interesting drawings bring joy to both children and adults.
Before you draw something on your face, you need to remember a few simple rules:
- paints must be natural and without chemical additives;
- It is best to choose paints that were created on a water basis, because they are very quickly and easily washed off the face and washed from clothes;
- Before applying, it is best to test the paint for an allergic reaction on the crook of your arm to avoid irritation and rash.
How to draw a tiger on the face
As with any body art, you need to start painting with light shades.
- First, the nose is drawn in a white tone, then imaginary cheeks are drawn under it.
- Next is drawn upper eyelid, chin, contouring of the face.
- Brown or red paint is applied to the rest of the surface. The paint should apply evenly, which is why you need to use different brushes.
- AND final step the use of black paint remains. It is used to draw stripes like a tiger, mustaches, the tip of the nose and, of course, lips (but one detail must be taken into account: if face painting is done for a holiday, then it is better not to draw lips with black paint, since it will be uncomfortable for the child to eat).

How to draw a fox on your face
Every little girl dreams of being sly fox. Sometimes one costume is not enough and therefore you need to do a beautiful face painting so that the child feels like that same fox - a sister.
- First, the main tone is applied. It is advisable to use either white or light yellow color for it in order to create a non-intrusive base for the main makeup.
- Eyebrows, arrows on the eyes, the tip of the nose, dots under the nose and mustache are drawn with black paint. You can also draw cheekbones (optional).
- And at the end it is applied orange paint from the nose to the cheekbones to create the impression of fox fur.

How to draw a butterfly on your face
In order to make the butterfly as bright and beautiful as possible, you first need to apply a white outline to the cheeks and draw the outlines of the wings. Make multi-colored wings with bright colors in any order.
- The body of the butterfly is drawn with black paint (it can be depicted in place from the bridge of the nose to the forehead).
- You can create beautiful swirls and curves on your cheeks.
- Don't forget to add bright colors and highlight the eyes. To outline the eyelid, it is better to use eyeliner and then add patterns with paints.
- You can also add glitter to make the butterfly light and magical.

How to draw a bear on your face
To draw a bear you need black, white and brown paints.
- The outline of the bear's head should be drawn along the chin, near the ears and along the forehead.
- Ears are drawn on the forehead, above the eyebrows.
- The face is painted over with brown paint, and it is better to use light brown paint when painting the area around the mouth and capturing the tip of the nose.
- Outlined with black paint inner part ear (on the forehead), the tip of the nose and a path from it to the upper lip, in order to draw the muzzle.
- You can use light paint to highlight the cheeks, and use white paint to mark a spot on the nose.
The bear can also be depicted in full height on the face, but then you need to choose the right scale and just turn it on.

How to draw a pirate's face
Most boys want to be pirates and robbers. In order for a child to look like his beloved captain Jack Sparrow or another one-eyed pirate, you need to take white, red, black and brown paints.
- A mustache and beard are drawn with black paint (you can draw from the chin to the neck). The beard can be painted with both black and brown paints.
- A scar is always drawn on the cheek, but you shouldn’t focus all your attention on it.
- Next, be sure to draw an eye patch. Attention, you should not paint over the eyelid, as this can damage the eye. It is better to draw a contour around the eye and extend the “bandage” to the ear.
- It is advisable to draw a bandage on the forehead. For this, red paint is used (you can paint polka dots). In the corner of the eye you can draw the ties from the bandage (you can lower them straight to the cheek).
To complete the look, you can buy a pirate hat.

How to draw a dog on the face
There are so many ways to draw a dog on your face, let's look at one of the most common.
- Using light paint (white or gray) the puppy's ears are drawn (from the eyebrow to the cheek).
- There is a white spot under the nose and on the chin.
- One eye is painted over dark paint and a spot is drawn on the nose.
- In the corner of the mouth, a tongue is drawn with pink paints and a dash of white. All details are drawn with a black outline.
If you need to draw a puppy on a girl’s face, then you can add sparkles, bows and brighter colors to the makeup. You can make a Dalmatian and draw the fur (it’s best to do this with a brush). It is imperative to shade all the details so that the makeup is beautiful and unobtrusive.

How to draw a joker on the face
Joker face designs are very popular around Halloween. Almost all themed parties you can see at least one joker.
So, in order to draw a joker beautifully and quite accurately, you need to take a lot of white, and, of course, black paint, although many people prefer blue.
- To begin with, it is distributed over the entire face white base. It should be rich and cover all areas of the face well.
- The area around the eyes is outlined with dark paint (you can use gray or black).
- A scar is drawn from the corners of the lips. To make the effect better and the scar more voluminous, you can use a special wax base that creates the effect of reality.
The lips and scar should be a rich, bright red color.
And for the final look, you need to make a “slight mess” on your head and enjoy an unforgettable evening.

How to draw a snowflake on your face
When it comes to drawing a snowflake, you need to use your imagination and just create. A snowflake can be drawn on the forehead, in the corners of the eyes, all over the face, starting from the nose. It is best to use paints in cool shades (blue, light blue, white and azure). Sequins and sparkles are used as decoration.
Typically, frost curls are used as the basis for such a snowflake image. It is best to draw them with a thin brush and shade everything.
If face painting is done for an older girl, then everything can be complemented with beautiful winter makeup to match.

How to draw a spider on your face
A spider on a child’s face is not always scary, because face painting with the image of a spider can be quite kind and sweet. First you need to decide what kind of image should be on your face. Let's look at how to draw a spider on your face.
- On top part red paint is applied to the face and shaded.
- Then the web is drawn with a brush. To ensure that the makeup is not so aggressive, you can highlight the eyebrows in black (it’s best if they are highlighted with a curve).
- On the bridge of the nose you need to draw a spider and a web from it, so the image will be quite clear.
If the child wants to be like a spider-man, then you can add blue paint. In any case, it all depends on the person’s imagination and desire.

How to draw a cat's face on a child's face
Before you start applying face painting, you need to make sure your baby’s face is clean.
- First, a white tone is applied to the face, and pink is applied above the eyebrows and on the cheeks. To ensure that it lies evenly, it is advisable to use a cosmetic sponge.
- Let's circle pink tone black paint, thereby drawing the ears.
- You can draw between the ears pink bow(you can draw it somewhere on the side, it’s better to do it the way the child himself wants).
- The nose is also drawn with black paint (it’s made a little wavy so that it looks like a cat’s).
- Black dots are placed under the nose and antennae are drawn from them.
- You can also draw strokes on the chin that will resemble the fur of a kitten.
This is how quickly and easily you can create the makeup of a wonderful little kitten.
A carnival costume and appropriate accessories will complement the image and make it more harmonious.

How to draw a hare's face on your face
A cute bunny face is drawn very quickly. To do this you will need paint in white, black, gray and pink colors.
- First you need to apply a white base to your face.
- Then, with a black pencil or eyeliner, you need to emphasize the eyes with long arrows.
- It is advisable to apply white shadows to the eyelids (don’t forget to apply them under the eyes as well).
- A pink tone is applied over the eyebrows and strokes are made, creating a furry effect.
- The tip of the nose can be marked red and outlined in black.
- A mustache is drawn above the lip over a white tone.
- Two large teeth can be depicted on the lower lip.
To make the image complete, you can complement it with cute fluffy ears on the child’s head.

How to draw a monkey face
To make the image of a monkey appear on the face, you will need a lot of brown paint of various shades.
- To begin with, you need to draw the outline with a little light paint, and then with each stage the paint should become darker and darker.
- It is best to paint the eyelid with black shadows or just black paint.
- The contour of the eyebrows is raised, and wrinkles are drawn throughout the face, creating the illusion of monkey skin.
- Lips are best outlined brown paint mixed with pink and white.
- Make strokes along the chin that will resemble wool.

How to draw a beard on your face
In fact, drawing a beard is very, very simple. To do this, you should choose a paint of a special shade and begin to draw strokes, moving from the chin to the cheekbones.

How to draw a goat on your face
To do this you will need white, gray and black paint.
- First, a white tone is applied, some areas of the face are painted over with gray.
- You can paint horns on the forehead with the addition of black paint.
- You can also draw strokes that will resemble fur and, of course, a beard (preferably with gray paint).
- The eyes must be highlighted in black (lined both above and below with a black pencil or eyeliner).
- The sponges are tinted with gray paint. You can apply a pink blush to your cheeks, which will add brightness and richness to the look.

Desire and imagination are the key factors for successful face painting! If face painting is done for a child, then be sure to take his wishes into account and the holiday will become unforgettable.