We draw with paints with preschoolers. Children's drawing techniques
Good day everyone!
The most wonderful holiday is approaching - New Year. Many prepare for it already a month in advance. Would you say something is too early? However, it is never too early to purchase jewelry, quite the contrary. Especially if you decide to make some decorations with your own hands, for example. What interesting things can you do? First of all, these are, of course, snowflakes. What do we make them from? From paper.
In this article we will try to make paper snowflakes, as well.
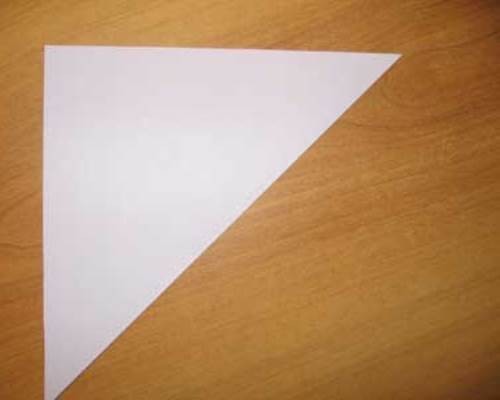
Making snowflakes out of paper is quite simple. All you need is paper and scissors. Take the paper and fold it several times to form a triangle. Like this:

All that remains now is to cut out the patterns. Draw the desired pattern along the edges of the triangle and cut it out. After this, we unfold the paper and get a beautiful patterned snowflake.

Depending on what pattern you draw, the snowflake will be like that. There is no limit to imagination here. For example, you can cut out a snowflake like this:

Or like this:

In addition to ordinary snowflakes, you can make three-dimensional ones. Here the manufacturing scheme is slightly different.

If we are making a six-ray snowflake, we will need six sheets of paper, if we are making an eight-ray snowflake, we will need eight, etc. On each sheet of paper, cut out a square measuring 10x10 cm or more. The larger the size of the sides of the square of the workpiece, the correspondingly larger the snowflake itself will be. Now, at some distance from each other, draw parallel lines to make several squares inside a sheet of paper. Approximately as in the diagram.

The next step is to take scissors and make cuts along the drawn lines (red). We don’t cut it out, but just make an incision so that these squares are secured at two opposite corners.

Next, take the central square (shown with an arrow in the figure) and roll its edges into a tube, towards the center. Glue the ends together. Then we turn the sheet over and reverse side We do the same operation with another strip. Then we turn it over again and roll the tube, and so on as many times as you drew squares.

We make all other preparations in the same way. After this, we fasten them to each other and, as a result, we get a snowflake.
Cut out paper snowflakes using printable templates
You can cut out snowflakes not only by folding paper. You can select special templates, print them, and then cut out your craft using them.

Another fairly simple option.

And this snowflake template is a little more complicated.

If you are folding a sheet of paper, but have no idea what design to draw to make a beautiful pattern, then here are a few templates.

Or, for example, like this.

This template is a little complicated, but the result is a beautiful snowflake.


There are several templates at once, some of them are simple, some are somewhat more complex. However, patience and perseverance will help you create a masterpiece. And, of course, children, how to cut out snowflakes without them.

And a few more templates

The patterns are also beautiful, even somewhat lacy.

These are some great templates you can use.
Schemes for cutting beautiful snowflakes
In this section you can see some patterns for making snowflakes, which you can use to cut out beautiful crafts.
Using this pattern, you can cut out a snowflake, following the step-by-step drawings.

And here is another selection of patterns from several beautiful patterns.

Using this pattern, you can cut out several different snowflakes.

Another example of how to bend a sheet of paper and cut out a snowflake.

This diagram shows how to cut out unnecessary pieces of paper (shown in color) to create a beautiful pattern.

Variant of the snowflake pattern with hearts.

And look at this diagram, quite interesting and original drawings.

And according to this scheme, we make a snowflake not only from a square sheet of paper, but also from a round one.

Choose these wonderful patterns for making.
Simple snowflake patterns for beginners in origami technique
Origami is the making of paper crafts without cutting. Snowflakes can also be made using this technique. Here are some diagrams.

This option uses scissors, but only to make cuts.

You can make the following snowflake from paper:

To do this, use the following scheme:

In this option, you make a snowflake from prepared modules.

Then we assemble the snowflake itself from them.

Try this pattern for folding a snowflake.

These were all snowflakes, let's say, in 2-D format. But voluminous snowflakes are also popular.
Video on how to make voluminous paper snowflakes with your own hands (video)
Volumetric snowflakes, of course, look more beautiful and original. And if you make them also big size, then they will look quite impressive.
And here watch a video that clearly explains how to make such a snowflake.
Making snowflakes from paper strips with your own hands
Volumetric snowflakes can be made using colored strips of paper. For example, you could do something like this:

For this we take colored paper(colors can be any of your choice). Cut strips 29 cm long and 0.5 cm wide. Cut approximately 20 strips.
Now we put stripes in the form of a cross, 4-5 pieces each, alternating colors. We put them intertwined with each other.

First, we glue the outermost strips together (they are yellow in the picture) so that we get something like an auto-detachment on a map.


Glue the remaining strips (white in the picture) to the corners of the opposite yellow petals. As a result, we get a snowflake, as in the example at the very beginning of the description.
An easy way to make 3D snowflakes step by step
Volumetric or 3-D snowflakes look a little better than simple ones. Let's try to make one like this.

Take a square piece of paper and fold it several times until you get a triangle. You need to make six such triangles. And they should all be the same. Now, on each triangle we draw parallel lines at a distance of approximately 1 cm. The number of such lines depends on the size of the triangle and there can be three or more. Now we cut along these strips from one edge to the other, but, of course, not to the very end.

We unfold the triangle back into a square and fold and glue its central part.

We turn the square over to the other side and glue the next cut square in the same way.

Flip and repeat. And so on until we glue all the cut strips together. A similar procedure is carried out with all workpieces. After this, we first fasten three figures together, then the remaining three.
As a result, we get a snowflake like this.

or like this.

Its size depends on the size of the paper. This craft requires a little more time and more painstaking work compared to simple snowflakes. But the result is worth it.
Master class on snowflakes in quilling style for beginners (video)
Quilling is a technique for making crafts from paper that is cut into strips and rolled. After which all these twisted blanks are connected and we get the intended craft. For example, these wonderful snowflakes.

How to make snowflakes using the quilling technique, watch this video
So we've looked at various ways creation New Year's snowflakes. Choose, craft and decorate your homes. Good luck!
Soon we will have the most popular and magical holiday- New Year. This is a great time for creativity. Of course, you can buy jewelry and toys in the store, but it’s better to make them yourself.
Windows are already being decorated in apartments and public institutions. Another common way of decorating is snowflakes - this is the most popular New Year's attribute.
In the previous article I already told. Today we’ll look at a few step-by-step instructions for making voluminous snowflakes.
This may seem like a complicated process, but even children can make this decor. So gather your family together free time and start creating.
First, let's look at one of the simple ways to make a New Year's accessory. You can use colored paper as a material. If you have a white piece of paper, then, if desired, color the finished snowflake.
Our result will be like this:

Fold a sheet of paper in A4 format in half lengthwise. Smooth out the bend with your hand.

Now we bend the sheet on either side by 1.5-2 cm. Don’t forget to iron the folds. After this, we turn the workpiece over and also bend it a couple of centimeters. That is, we make a kind of accordion.

We cut the resulting workpiece lengthwise. As a result, we end up with two accordions.

On each craft we draw a pattern, which is shown in the photo below. Then we cut out the paper along the marked lines.

If you did everything according to the instructions, then the unfolded blanks should look like this:

Lubricate the ends of the paper with a pencil and glue. Then we glue both parts of the future snowflake to form a kind of ring.

Now carefully turn the ring inside out and our craft is ready. When you acquire the skills, you will need a couple of minutes, no more.
Step-by-step instructions for making a simple three-dimensional snowflake
There is another easy way to make paper Christmas decorations. We will need regular sheets and glue, as well as a little patience. Attract to creative process their children.
Now we will learn how to make a snowflake like this:

We make a perfect square from a regular sheet of paper. To do this, fold it diagonally, connecting two opposite sides to form a triangle. We cut off the lower part with scissors and set it aside, we will need it later.

Fold the second sheet in half and cut it into two equal parts.

We make squares from the two halves by analogy with the first sheet. That is, we bend them diagonally and cut off the lower part.

From the strip that we have left from the first sheet, we use the same principle to make two more small squares. As a result, we should have five blanks.

Fold the largest triangle twice, then bend it diagonally to the opposite side. Turn it over and cut off part of the workpiece diagonally along the line opposite the corner.

Now we make longitudinal lines with scissors, without cutting the workpiece to the end by 1 cm.

We perform the same actions with the remaining figures. Then we unfold our snowflakes. Apply glue to the center of the largest craft and attach the middle craft, and then the smallest one. We turn it over and glue two blanks on the other side.

New Year's decor element is ready to decorate the room
How to make beautiful paper snowflakes with your own hands
Anyone can make an original craft for the winter holiday. This exciting activity, so you won't even notice how time flies and you will have several accessories to decorate your room.

We will need five sheets of paper, scissors and a glue stick. The craft will consist of 5 parts, so let's look at how to make one of them, and the rest according to a similar pattern.
Fold the sheet along the short side. There is no need to smooth out the bend, just make a mark by pinching the paper with your fingers, top and bottom.

We bend one side of the sheet to the mark with an overlap of 1 cm. We also bend the second side with an overlap.

Apply a strip of glue to one side with a pencil, and glue the second side of the sheet to it.

We measure 2 cm from each, and use a ruler to make folds.

Now the formed folds need to be bent inward to make it look like in the photo below.

At the next stage, fold the workpiece in half.

We put a dot in the center of the strip, then mark 9.5 cm on the right side, and 5.5 cm on the left. After that, draw lines along the marks.

We have a double bag so that the workpiece does not fall apart, we will glue it together.

After this, we make cuts along the marked lines. Cut off the excess parts of the workpiece.

If you did everything according to the instructions, you should end up with this voluminous blank for the future snowflake.

We perform the same actions in four more parts. The first one can be used as a template to cut off the corners.

Now we need to glue all the parts. To do this, apply horizontal and vertical stripes of glue. Make sure that all corners match.

Let's wait a little until the glue sets well. And then all that remains is to unfold the snowflake and glue it together.

For decoration you can use glitter, colored markers, and beads. In general, use your imagination to create a beautiful craft.
Templates and diagrams of volumetric snowflakes for cutting out onto windows
To decorate window openings, you can use not simple stencils, but three-dimensional attributes. Making them is not as difficult as it might seem.
To make the snowflakes look voluminous, you need to select a stencil, download several copies and secure them in the middle with thread or glue.
And here are the options for blanks that you can download or print by clicking on the icon at the end of the subtitle.


Click on the PDF file below and a new window will open where you can click on the download button or the printer icon to print the images.

If you can draw, then try to create a stencil with a beautiful pattern yourself. And if you want to decorate the windows with a symbol next year, then please use .
Step-by-step production of three-dimensional paper snowflakes
Let's look at another one interesting option manufacturing New Year's decoration. Like previous technologies, this method is quite simple, so even children can cope with the task.

In almost all cases, to make a snowflake we need an equilateral square. Therefore, we fold a sheet of paper in A4 format diagonally and cut off the excess strip.
Fold the resulting triangle in half twice. As a result, we get something like this.

Now we cut out the workpiece in a circle, starting from the corner on the opening side and ending with the closed side, not reaching 2-3 cm to the opposite corner.

In the same way we make two more cuts. We make another similar blank.

Carefully unwrap the craft. Glue the ends of the middle strips to the center of the template.

On the back side we glue the second part of the snowflake so that its rays are between the edges of the first part, as shown in the photo, and we also glue the middle strip of the lower part to the center of the snowflake.

The volumetric craft is ready. It can be used as a separate decoration, to create garlands or stick to windows.
How to easily make a 3D snowflake with your own hands
Beautiful decor can be made in just a couple of minutes. Several of these voluminous decorations will help decorate the interior for winter holidays. We will need 2 A4 sheets, glue, scissors and a regular elastic band.
We make 2.6 cm marks on the two long sides of the paper. Then we fold the sheet like an accordion and cut off the excess part.

We do the same with the second sheet. After this, mark the middle of the workpiece and draw a template.

Now cut along the marked lines. Bend the accordion in the middle and use the first half as a template for drawing lines and cutting out. We make the second part of the snowflake in the same way.

We fasten both blanks with an elastic band and glue them together.

Now we unfold the snowflake and glue it along the edges to fix it in this state.

If you wish, you can stick glitter or beads on the craft.
Video with a master class on creating three-dimensional paper snowflakes
To understand how to make a more complex accessory for the New Year, watch the video from step by step instructions. The whole process will take you no more than a quarter of an hour.
I tried to choose the simplest ways to create New Year's snowflakes. And remember “The eyes are afraid, but the hands are doing.” Once you start the creative process, you won’t even notice how you’ll have several ready volumetric crafts that will help create a festive atmosphere.
We continue our acquaintance with the creativity of cutting out snowflakes. A master class on cutting simple snowflakes was shown in
Today we will create beautiful three-dimensional paper snowflakes. Let's raise New Year's Eve together with the children festive mood, there is still time.
We will need sheets of A4 paper and scissors. Invite your children to the monitor screen and let's start watching a master class on cutting and gluing snowflakes.
Volumetric paper snowflakes “Fluffs” - master class
The New Year is approaching and we need to create and decorate it with our own hands. Let's study simple way cutting out unusual snowflakes from paper.

How to fold paper step by step
- Made from A4 size paper blue color We make a square by bending the sheet as in the photo.

2. Cut off the excess paper and throw it away; it will be useful for creating small snowflakes.

3. We bend our triangle with two identical sides of 20 cm each as shown in the photo.

4. The triangle was bent and all sides were straightened.

5. This is how you should end up with a triangle with three folds that you see.

6. Upper part lift the common fold with your fingers up and connect it to the side of the triangle where there are three folds. You will end up with a triangle with a long, acute angle.

7. Cut the folded triangle at an angle the same as the angle on the right.

8. This is what we got from folded paper. We will cut a snowflake from it.

How to cut a fluffy snowflake
9. We lift the long corner of the workpiece up, on the left there is one common fold, and on the right side is the side with three folds. We begin to make cuts as thin as possible with scissors.

10. The thinner we cut the strips, the fluffier the snowflake will be.

11. Cut the strips to the very bottom corner of the workpiece.

12. This is the template we ended up with.

13. Carefully unfold the template and see a fluffy simple snowflake in front of us. Where is the volume of this snowflake?

How to make voluminous snowflakes
14. To make the snowflake three-dimensional, we will cut it out and complement it with other smaller snowflakes different color paper. Take white paper and cut out a square with sides equal to 15 cm (before this, the side of the blue snowflake was equal to 20 cm).

15. White square we bend it in the same way as we folded the blue one (see above).

16. We also cut off the paper on the left with the side equal side on the right (you can mark the cutting line with a pencil and ruler).

17. Like this small template made from paper.

18. We unfold the paper and in front of us is a small fluffy white snowflake.

19. Let's make another snowflake from the blue paper we cut earlier. A square of workpiece with a side of 10 cm.

20. Bend the blue square exactly repeating the previously performed steps. We cut strips on the workpiece and create a template.

21. We unfold the paper and see a very small blue snowflake. Using glue, we glue the snowflakes in the center and see a beautiful three-dimensional snowflake with the presence of blue and white colors.

22. You can do another alternation of colors, first White color, then blue, then white again.

23. As you can see, making voluminous snowflakes is simple, interesting and exciting.

Would you like to have such fluffy snowflakes at home?
Original volumetric snowflakes for decoration - video
You can use these snowflakes to decorate your office space at work or at home and create New Year’s decor.

How to fold paper for a 3D snowflake
- We will need: White paper A4 format, scissors, pencil, glue, beads.

2. Fold the paper so that we get a square.

3. We connect the two sides of the square or bend the square in half.

4. Fold the resulting rectangle in half again.

5. Connect the corners of the square - you get a triangle.

6. Turn the triangle with the side with three folds towards you and fold it in half. The blank for drawing a diagram (drawing) with a pencil is ready.

How to cut voluminous snowflakes
7. Using a pencil, draw a diagram on a piece of folded paper.

8. We begin to cut out the snowflake. Along the first line, cut off the excess paper.

9. Along the second line we make a cut to the end of the line.

10. We will need such a strip in the workpiece. The strip will indicate beautiful shape the snowflake itself, its edges.

11. Along the third line we also make a cut to the end.

12. Cut out the entire darkened triangle and remove it.

13. We unfold the resulting template and in front of us is the creation of our hands - a snowflake.

14. We bend the second, free rim of the snowflake towards the center and glue its top with glue.

15. We do this with each protruding edge.

16. Glue beads to the center of the snowflake.

With beads, voluminous snowflakes immediately became elegant, cheerful, festive - New Year's.
How to make voluminous paper snowflakes - video
Paper crafts always delight children, whom parents simply must attract. At the same time, children's creative interest remains for life.
Snowflakes are the main decoration of rooms and Christmas trees on the eve New Year's holidays. Since the next New Year is just around the corner, the question is, how to make a snowflake with your own hands, is very relevant. In this article we will tell you and describe in detail master classes on how to make beautiful snowflakes from paper.
Who among us as children, preparing for the arrival of Grandfather Frost, did not try to decorate our room and Christmas tree with homemade decorations? We were all, of course, immersed in the process cutting out beautiful snowflakes made of paper together with parents, brothers and sisters, so that the holiday is truly a success, and a joyful atmosphere reigns in the house.
In just half an hour we managed to create a lot of simple snowflakes from thin white paper, because it’s very simple, especially if you have pre-prepared ones on hand snowflake stencils, for example, these:

For those who have forgotten, how to fold paper to cut out snowflakes, we remind you:
- Fold thin sheet paper positioned vertically in relation to you, so that you get equilateral triangle. If you did everything correctly, then when you expand the triangle, you should see a square.
- Cut off the excess strip under the square using scissors. As a result, you should have something like this:
- From it you need to make another triangle, folding the previous one in half, and then another one in exactly the same way. The result should be this:

- We again cut off the excess part from this triangle (to do this, you need to bend it in the same way as shown in the photo):

- On the blank we draw the pattern of the future snowflake. You can use these templates for cutting snowflakes from paper:

The above paper folding pattern is the simplest of all. However, there are many other techniques.
If you want to get air and light snowflake, which can be easily glued to anything, then there is nothing simpler and better, how to make a snowflake from a napkin. According to the manufacturing technique, it is no different from simple paper. It is even easier to work with, because the napkin is initially square in shape and has a very thin structure - it is easy to cut.

Most often, preschoolers work with such material to create snowflakes, but experienced needlewomen can also use it. If you fold the napkins beautifully and fasten them together with glue, you can get New Year's star, a flower that will look very similar to a snowflake.
Snowflakes made from napkins can be easily attached to glass and mirrors if you moisten them with water and let them dry in the place where they should be. Here are some beautiful ones stencils of snowflakes from napkins for windows:


Openwork snowflakes for beginners
Paper snowflakes, the more elegant they are, the more beautiful they are. However, to make an openwork snowflake, you need to show patience and perseverance, because it will take a long time and a lot of cutting.
If you decide to create such beautiful elements of New Year's decor, then use the following patterns of openwork paper snowflakes:


So that you don’t have to figure out for a long time how to redraw a pattern from a stencil via the Internet, you can download this template for paper snowflakes and print on the printer:

How to make a 3D snowflake?
Non-flat snowflakes look much more beautiful, but are much more difficult to make. Therefore, if you are preparing to receive guests in New Year's Eve, then it is better, when decorating your home, to give preference to volumetric decorative elements.
They can also be made from colored or any other decorative paper with patterns and designs, from newspaper or magazine, and not just white.
There are many ideas and techniques for creating three-dimensional paper snowflakes. Some volumetric snowflake schemes At first glance they may seem simple, while others may seem overly complex. Therefore, to all options for voluminous snowflakes we have attached photo instructions, looking at which, you can easily figure out how to create decor for the New Year's holiday.
Modular paper snowflakes for the New Year
Snowflakes made in this complex technology, look great. We will tell you how to do step by step this modular snowflake with your own hands:

- Assemble triangular modules from paper (in this case white, light blue and dark blue). In total you will need 270 blanks:
- 78 modules – blue
- 42 modules – blue
- 150 modules – white

- Now assemble the modules into rows:
- 1st and 2nd row - 6 white modules each (they need to be connected in such a ring):

- Row 3 – 12 white modules, which should be attached to the resulting ring:

- 4th row – 12 blue modules:

- Row 5 – 24 blue modules:

- Row 6 – 24 modules – alternate 3 blue (long side) and 1 white (short side):

- Row 7 – put 6 modules on each blue module of the previous row
- For each white module of the previous row, put on 2 more white modules
- Assemble with a pocket 6 white arches from 17 white modules:

- Collect 6 blue rays from 5 blue modules:

- Insert rays between the arches to make a snowflake
How to fold snowflakes using origami technique?
For some, working with paper using the origami technique is even easier than cutting out simple snowflakes. If you consider yourself one of these people, then we suggest you try to create a New Year’s decoration like this:

- Take 1 translucent white sheet of paper
- Cut out an equilateral hexagon from it
- Start making a snowflake according to the following diagram:


Diagram: how to make a snowflake using the quilling technique
Quilling is a very popular type of needlework today. With its help you can make various beautiful decorative elements, including snowflakes. As an example, we suggest you create the following snowflake using this technique:

To make it, you can use paper of any color. It will need to be cut into strips of the following sizes:
- 5 strips of 15 cm
- 12 strips of 7.5 cm
- 4 stripes of 5 cm
Now we'll tell you step by step how to make a snowflake using quilling technique:
- We make a blank for the center of the snowflake: for this we use one strip of 15 cm, twist it into a spiral, lower it a little and glue it.
- We make blanks for the rays of snowflakes: for this we use 4 strips of 7.5 cm each. On each side of one strip we make 2 turns, but so that there is a strip of 2.5 cm between the turns.
- Glue the center of the snowflake and the rays together to make something like this:

- We make blanks in the shape of hearts: to do this, take 4 strips of paper 15 cm each, fold them in half, and then twist the ends in a spiral and glue them to the center in the same way as in the photo:

- We make drop blanks for snowflakes: from strips of 7.5 cm we twist spirals in the form of drops and glue them to the center of the straightened heart.
- We make “eye” blanks from 5 cm strips and glue them to the tops of the rays:

How to decorate a paper snowflake: photo
A paper snowflake can be decorated with either cut up rain, various sparkles, or fluff. Apply glue to the snowflake and sprinkle decor on top.