Arseny, Valeria's son and his girlfriend. Arseny Shulgina's girlfriend spoke about her difficult relationship with her chosen one
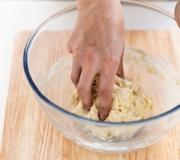
For a long time, chipboard (chipboard) has been used as the basis for furniture. For those who have minimal skills in working with wood and carpentry tools, homemade furniture will provide an opportunity to significantly save the family budget. Do-it-yourself furniture made from chipboard will be exclusive and will take its rightful place in your apartment. Everything you need for work can be found in specialized stores.
To repair or assemble chipboard furniture yourself, you need a small set of materials and tools. Everything you need can be found at home, or bought for a small price.
For work you will need the following tools:
- Small drill or screwdriver. Of course, it is better to use a small and not heavy drill to assemble furniture;
- Circular Saw, milling cutter, jigsaw. If you don’t have these tools, you can rent them;
- Level, square, tape measure;
- Set of hex keys, countersinks, drills;
- Conductor.

The materials you will need are:
- Chipboards;
- Wax of the desired color;
- A felt-tip pen for retouching or a marker of the desired shades;
- Wax melter;
- Felt fabric;
- Staple.
With such a small set, you can both update furniture and make new ones.

Manufacturing process
Chipboard cutting is carried out independently or by turning to professionals who have the necessary equipment. In addition to chipboard, when making furniture you will need fiberboard (fibreboard), natural wood lumber, fittings, and fasteners.
It is quite possible for anyone to carry out a simple update, a master class of which is offered by experienced specialists. The result will be a beautiful, completely new product, and the family budget will not suffer. The most important details The structures that need the most attention and time are:
- Facades - the front part of the furniture and its doors - are made of a more attractive material. DIY furniture made from chipboard should look attractive. The facade is a separate part of the furniture; it is usually made to order. There are many different types furniture facades, they differ in the material used and design;
- Bottom and side walls drawers - these furniture elements, like some other parts, are most easily made from fiberboard. Some craftsmen prefer to fasten fiberboard with a furniture stapler, but this is wrong. After some time, the staples will become loose, and then the entire structure may become warped. It is best to fasten fiberboard with self-tapping screws or nails; it is good to install self-tapping screws with special washers;
- A tabletop is a horizontal surface where you can write and read. Most tables made at home (photos below) are made from the same chipboard. The weakest area of the countertops is the cutting of the surface. They are most often protected with a melamine edge, for this reason they begin to break in the first year. To prevent this nuisance, the edges are covered with aluminum profiles. The tabletops are fastened from below using small self-tapping screws so as not to damage the front surface.
Choosing the right fasteners and fittings is no less important than quality materials. Furniture fasteners - products necessary for connection individual parts. Basically, all elements are connected at right angles.
- Dowels - their installation schemes imply the use of pre-prepared holes. They are used for preliminary fastening and increasing the strength of the connection;
- Furniture corners are a common, but already outdated type of fastening. They don’t look very nice, they become loose after a while;
- Euroscrew – screws for connecting parts of furniture.
The holes are made directly on site, using a special drill capable of drilling a groove of the required diameter. The question of how to make furniture with your own hands requires control of the perpendicularity of the drilling direction, so as not to spoil the furniture element. When connecting elements, you need to take into account the subtleties:
- Furniture screws are screwed in using a hex key. Heads designed for a Phillips screwdriver cannot be completely screwed in;
- The main disadvantage of this mount is that fully screwed heads remain visible. To hide them, the holes are covered with plastic plugs of a suitable color;
- Eccentric ties are a convenient, modern fastening method. It allows you to make a hole on the inside of a piece of furniture.
To make holes of the required size, use a Forstner drill. It is not rational to buy it only for assembling hidden elements, but they are convenient for installing doors. Even a novice craftsman should have no problems with how to repaint furniture at home, and step-by-step recommendations will help you assemble new products.


Tabletop
Bookshelf
Every person who loves books is faced with the need to store a library. The easiest way is to purchase a ready-made cabinet, but you can save a lot of money and make or restore furniture from chipboard yourself. Easiest to do classic version A cabinet with open shelves that can easily fit in any room. The ideal depth for this furniture is 400 mm, overall dimensions are 2000x800x400. (height width depth). Most of books will easily fit on such shelves.
You need to start work by drawing up a drawing, separately depicting all the details. Then transfer the parts to chipboard. Next come cutting and other stages:
- Assembly must be done on a flat surface so as not to distort the structure;
- We connect the top of the cabinet and the side walls. You need to use a special square to ensure that the corners are even;
- All elements are connected using fasteners;
- Having installed the top of the cabinet, fasten the bottom, checking the correct connection with a square;
- Don’t rush to attach the back wall; it’s more convenient to install the shelves first. It is better to secure them with confirmation in several places. This will add reliability and increase the service life of the shelves;
- At the end, the back wall is attached;
- Finally, the supports are installed.

Preparing the elements

Connecting the back and sides

Installing skids

Fastening the shelves

Making additional supports

Ready product
TV table
Although TV devices that can easily be mounted on the wall are now common, there are many devices that require special stands. After all, you need to find a place not only for the TV, you may want to install a home theater, a remote control, or find a shelf for a collection of discs. By making a comfortable TV stand yourself, you will not only save money, but will also be able to take into account all your desires - style, how to paint chipboard furniture with your own hands.
The most convenient dimensions for the product are 600x400x1850 mm (height - depth - width). The bedside table is placed directly on the floor, it can withstand serious loads. Making furniture of this size will allow you to easily place even a large TV, and next to it - the rest of the necessary equipment.
- First, the frame of the TV stand is assembled;
- Place marks for attaching the middle shelf, make holes and install it in place;
- From elements 0.12x0.45 mm, assemble frames for drawers. Then attach the plywood bottom to them, with glue or nails;
- Install hardware for moving drawers;
- Attach handles to the drawers;
- Prepare a place for installing the doors by milling and secure them;
- At the end of assembly, secure the top panel.

Preparing the details

Screw the bars on the sides

We fix the front part

Fixing shelves for drawers

We make a box, secure the elements with self-tapping screws

Computer desk
The computer, after the refrigerator and TV, is the most popular item in the house. For this reason, the table at which we work must be suitable. A computer desk is a piece of furniture with different accessories and parts that can be adjusted if necessary. In addition, a self-made version will cost much less than in a store.
When making a table, you can simplify the work and limit its design to straight lines. Additional shelves, holes for wiring, and space for the system unit can be made as you wish.
Designs of such tables great amount, there are special tables used for a netbook or laptop. In small apartments, transforming tables are convenient. The narrow object does not require much space, and if necessary, it turns into a normal computer desk, with all the necessary elements.
For independent execution it is better to choose simple model, rectangular in shape. After completing the drawing and cutting out all the parts using a circular saw or jigsaw, you can begin assembly:
- Holes are prepared in the central and side walls for attaching the lower shelf. After this, secure it with confirmations;
- The top shelf is also attached;
- After this, the back wall is installed. It is on the same level as upper parts central and side walls;
- Now you need to screw the guide elements for the retractable console under the keyboard;
- The table top is attached to the side walls with dowels. You cannot make through holes in the tabletop;
- If you plan to make shelves on top of the tabletop, they are also attached to dowels.

Cutting out the details


Safe finishing rules
- Chipboard needs to be sawed into pieces slowly, for this would be better suited saw with a fine tooth - this is how you will succeed straight line cutting You need to drill smoothly, using only a sharp drill and turning on high speed drills. It is necessary to control the perpendicularity of the drill's entry into the material, otherwise you can chip in a noticeable place. To remove irregularities, a rasp and a plane are needed; the tool is moved from the outside of the workpiece to the inside. It is important to prevent fibers from being pulled out - this will ensure a neat cut of the part;
- Laminated chipboard does not need additional processing, you just need to smooth the edge. The rest of the surface is painted, varnished or a special film is glued. Adhesive tape is used to protect the surface from splitting when sawing. If you are cutting by hand, the saw must be positioned at an angle. The edge of a part covered with teeth is an unpleasant sight, especially noticeable on white fiberboard boards. Saw the material slowly; excess haste will cause an unsightly joint between furniture elements;
- Dull or slowly rotating drills, in most cases, break out the edges of the hole. Only with the help of a sharp and high-quality drill can you make a smooth hole. If the cut is good, no additional processing will be required. When working, a circular saw leaves irregularities on the edge, which are removed with a plane. He is carefully led along the edge, to inside so that the edge becomes neat. For laminated boards, do not use a rasp;
- You can finish the surface of furniture made of fiberboard in 2 ways - either paint furniture made of chipboard or veneer it decorative material or varnish;
- Often the cladding is carried out with a special film, which has an adhesive coating on one side, which simplifies the finishing of furniture. It is unusually thin, for this reason the surface must be well sanded before gluing. You can stick laminated plastic, it is stronger and noticeably thicker. It is glued with a special glue; this coating makes chipboard furniture beautiful and at the same time protects the surface from external influences;
- Wood products are usually varnished; particle boards are varnished very rarely, only if it is necessary to “ennoble” the unattractive appearance of an ordinary board. Before varnishing, the surface must be leveled with putty. Even after factory processing (without lamination) it needs leveling. The smallest defects will be visible under the varnish film, and this greatly worsens appearance furniture. After filling the chipboard, you should get a very smooth surface, and one coat of varnish should be enough for it. If defects are noticeable after varnishing, the surface will need to be sanded again. sandpaper and varnish again;
- The layer of protective varnish should be thick, it prevents harmful fumes. You need to pay attention to the joints - you need to make them as tight as possible. Wallpaper and fabric are not suitable for finishing chipboard; these are porous materials that are not capable of serving as protection. Carpet can also allow harmful substances to pass through;
- The edges of the fiberboard slab can be trimmed with thin wooden strips. The wood is selected in a suitable color; the material must be in harmony with the coating of the piece of furniture. When you have glued the required number of wood planks, you need to varnish them, like the entire surface, or completely repaint the furniture. Even planks 5 mm thick will protect the edges of the slab well. If you glue a wide strip, it will prevent the tabletop from sagging.
Drawings and diagrams

Laminated chipboard literally immediately after its appearance in construction supermarkets gained enormous popularity, since it allows you to make furniture no worse than what is offered mediocre furniture showrooms. Which is not surprising, because if you order the production of furniture in a showroom without assembly, then they will simply bring you a set of cut boards made of laminated chipboard and fasteners for them. Many people are afraid to assemble furniture themselves and then try to make it, but there is nothing difficult about it.
Making furniture with your own hands: where to start?
You need to start, of course, with the design of the future product. It doesn’t matter what you plan to assemble: a table, a cabinet or a whole wardrobe– you can’t do without a project. If you have good spatial and abstract thinking, you can draw your future table simply with a pencil on paper. If you want more naturalism and a 3D view, you can use special programs for designing cabinet furniture, for example, Pro100, K3-Furniture and others.
How to cut chipboard for cabinet furniture
After our project is ready, we go to the store to buy laminated chipboard and all the necessary fittings. You should also worry about purchasing in advance decorative elements for future furniture (mirrors, glass, etc.). We highly recommend that you ask at the same place where you will purchase chipboard about the possibility of cutting and edging it on site - this will significantly save time and nerves. If you decide to cut the slab yourself, then before starting work you should consider a few points:
It is better to apply the pattern to the sheet in advance so as not to make a mistake in size
Chipboard must be sawed with a fine-toothed saw at an acute angle
When sawing with an electric tool, the pressure and power should be adjusted so that no breaks are formed (since the material is quite fragile)
When irregularities and chips form, they are sanded with a file - from the edge to the center
Electric saws “eat” approximately 5 millimeters of sheet on each “cut” during a cut, so it is better to leave a small margin.
In general, working with chipboard is quite simple; the simplest set of household tools will do for sawing it. The material itself is compacted quite tightly, however, it can crumble in places where there are cuts and breaks - this is worth remembering. It is recommended to edge the edges of the slab, which will be end-on and noticeable, using a special tape (sold in the same stores where furniture fittings are sold or on the market) or painted over in order to protect them from destruction over time.
How to assemble cabinet furniture yourself
After the slab has been successfully sawn and edged, and the fittings have been purchased in the required quantity, you can begin assembly. You should mark in advance and make all the necessary holes and recesses in the slab (through holes for tightening with eccentrics, recesses for hinges, etc.).
It is best to start assembling from the very large parts, for example, for a closet this will be assembling the box itself on the floor; for a table-book - connecting all parts of the tabletop to each other, and so on. At the next stage, we connect the main elements together, hang the doors, attach the mirrors, and so on. At the very end, we install shelves in the closet, assemble drawers and the like. We recommend that you do not tighten the screws until the assembly is completely completed, so that later you will have the opportunity to trim or adjust certain elements.
Cabbage juice is a healthy life-giving drink that can give our body many necessary and useful substances. We’ll talk about the beneficial properties of cabbage juice and how to drink it correctly in our article. Cabbage is one of the most useful vegetable crops because it has very valuable properties. This product is tasty and nutritious, moreover, it is an affordable medicine that anyone can grow in their own garden. By eating cabbage, you can eliminate many health problems. Although everyone knows that due to the fiber contained in cabbage, this vegetable is difficult to digest, causing gas formation. To avoid such problems, it is healthier to drink cabbage juice, receiving the same beneficial substances contained in the vegetable.
Freshly squeezed cabbage juice contains vitamin C, which increases the body's resistance to infections. Scientists have calculated that in order to satisfy daily requirement our body in vitamin C, you can eat about 200 g of cabbage. In addition, the vegetable contains the vitamin K we need, which is responsible for the full formation of bones, as well as blood clotting. Cabbage, and therefore cabbage juice, contains B vitamins and a very rich set of minerals, including iron, zinc, magnesium, phosphorus, calcium, potassium and other elements.
What is very nice for people losing weight is that cabbage juice is very low in calories (25 kcal per 100 ml). This is a diet drink that will help you get rid of excess weight. Cabbage juice has wound-healing and hemostatic properties. It is used externally, to treat burns and wounds, and for oral administration (to treat ulcers). Effectively use fresh cabbage juice to treat gastritis and ulcers. The effect is ensured by vitamin U contained in the juice. This vitamin helps regenerate cells in the mucous membranes of the stomach and intestines. The juice is used to treat hemorrhoids, colitis and inflammatory processes occurring in the stomach and intestines, as well as bleeding gums.
Cabbage juice is used as an antimicrobial agent that may affect some pathogens dangerous diseases, such as Staphylococcus aureus, Koch's bacillus and ARVI. Cabbage juice is also used to treat bronchitis; in particular, it can thin and remove mucus. For this treatment, it is recommended to take juice with honey to enhance the healing effect. Cabbage juice is also used to restore tooth enamel, improve the condition of nails, skin and hair. For diabetes mellitus, drinking cabbage juice can prevent the occurrence of skin diseases.
Cabbage juice should definitely be included in the diet of those wishing to lose excess weight, due to its low calorie content and high biological activity. At the same time, cabbage juice can fill you up very quickly without getting extra calories, and it also prevents the conversion of carbohydrates into fat deposits. Cabbage juice can normalize intestinal function by removing bile that has stagnated in the body, fights constipation and helps remove harmful substances from the body.
Since the juice contains folic acid, which helps conception and full development of the fetus, it is useful for expectant mothers to drink. The vitamins and minerals contained in the juice protect against infections and colds.
When consuming cabbage juice, you should follow the rules. Juice has contraindications and restrictions. The drink is capable of dissolving and decomposing toxins accumulated in the body, causing severe gas formation in the intestines, so you can drink no more than three glasses a day. You should start drinking it starting with one and a half glasses. For the reasons listed above, cabbage juice is not recommended in the postoperative period, if operations were performed in the abdominal cavity, and during breastfeeding, with gastritis with high acidity, with kidney disease and problems with the pancreas.

The world we live in often affects the state of our nervous system, since it is full of various stressful situations, chronic fatigue and systematic stress. However nervous system should be constantly monitored and not overexerted. To do this, you need to streamline your daily worries, for which you need to create and adhere to the correct daily routine, and, if necessary, attend a course of psychotherapy, yoga, auto-training and other activities. But most in a simple way relaxation is simple cup herbal tea, fragrant and warm. An excellent natural remedy for calming, which has a gentle effect on nerves worn out during the day, is drinking tea in the evening. Teas that relax the nervous system help eliminate irritability, nervous exhaustion and relax before going to bed, overcoming insomnia. We will talk about how tea calms the nervous system in our article.
Tea from a collection of fragrant herbs
To prepare this wonderful tea, you should: equal proportions take plants such as St. John's wort, peppermint, chamomile and hawthorn flowers. Grind the ingredients, then tbsp. l. pour boiling water over the mixture in a cup and leave for 30 minutes, covering with a lid. Strain the cooled infusion and add a small amount of honey. Drink while sleeping. This tea will easily calm your nerves, but it is recommended to drink it for no more than two months.
Lime tea
To prepare tea, mix dry linden and lemon balm flowers in equal parts, pour the mixture into a glass warm water, and boil for about five minutes. The broth is infused for 15 minutes, filtered, a spoonful of honey is added and taken for tea drinking. If you take this tea regularly, your nervous system will react more calmly to various unpleasant stimuli.
Peppermint tea with motherwort
Mix chamomile and motherwort herb 10 g each, add chopped mint 20 g, linden blossom, lemon balm and dried strawberries. Three tablespoons of the mixture should be poured into 1 liter of boiling water and left for up to 12 minutes. You need to drink the infusion throughout the day, adding a little jam or honey if desired. This infusion is designed not to completely suppress the nervous system, but only to gently calm it. This tea should be drunk for a long time, without the risk of adverse reactions harmful to health.
Simple soothing teas
Mix 50 g of hop cones and valerian roots, then brew a dessert spoon of the mixture with boiling water, leave for 30 minutes, filter. Drink in small portions throughout the day. It is better to drink a whole glass of this tea at night. The product quickly calms the nerves and helps in the fight against insomnia.
Mix peppermint herb and valerian roots in equal parts, then pour boiling water over a dessert spoon of this mixture, leave for half an hour and filter. We drink this tea in the morning and evening, half a glass. To enhance the effect, it is recommended to add a little anise or dill.
Melissa, valerian root and motherwort are taken in equal proportions and brewed in a cup. Then infuse and filter. You need to drink a dessert spoon of tea before meals.
Drinking half a glass of tea before meals, prepared according to the recipe below, can calm your nerves and improve digestion. To prepare it, you need to place 1 tsp in a half-liter jar. motherwort, hop cones and green tea, pour boiling water, leave for 12 minutes, strain. Add honey to taste.
Complex soothing teas
Mix peppermint, oregano, St. John's wort and chamomile in equal parts. Then brew a dessert spoon of the mixture in a cup, leave, strain and add honey. Drink a glass of this tea in the morning and before bed.
Mix peppermint, valerian root, hop cones, motherwort and ground rose hips in equal proportions. A tablespoon of the mixture should be brewed as tea, steeped and strained. This sedative should be drunk throughout the day.
Soothing teas for children
To prepare a soothing tea for children, you need to mix chamomile flowers, peppermint and fennel in equal parts. Then pour boiling water over a dessert spoon of the mixture and keep in a steam bath for about 20 minutes, strain. It is recommended to give this tea to small children in the evening before bedtime, a teaspoon, as it can soothe, relax, and normalize a healthy alternation of sleep and wakefulness.
The teas that were described in our article can calm the nervous system and normalize blood pressure. Such daily tea drinking helps improve sleep and skin condition. The medicinal plants included in these teas help eliminate dark circles under the eyes, improve vision, and improve the functioning of the stomach and intestines.

Previously, people could not imagine that a person’s breakfast could consist of various crispy balls with dried fruits, cereals and milk. But these days such food does not surprise anyone, because such a breakfast is very tasty and also easy to prepare. However, such food opens up a lot of controversy and discussion, since it is important for people to know the benefits and harms of breakfast cereals for human health. The very concept of dry food appeared in 1863, and it was introduced by James Jackson. The first food was compressed bran. Even though it wasn't very tasty, it was healthy food. The Kellogg brothers supported the idea of dry food already at the beginning of the twentieth century. At this time, both Americans and Europeans were seized by the idea of correct and healthy eating. At that time, the brothers produced breakfast cereals made from soaked corn kernels passed through rollers. These breakfasts were more like raw dough, torn into pieces. They were helped by an accident in which this body was placed on a hot baking sheet and forgotten about it. Thus, the first breakfast cereals were created. This idea was picked up by many companies, and the cereal was mixed with nuts. Fruits and other products.
What are the benefits of breakfast cereals?
In the last twenty years, ordinary breakfasts, which consisted of sandwiches and cereals, began to be replaced by dry ones. The main advantage of dry food is, first of all, saving time, which is very important in our time. Few people can afford a complete and proper breakfast these days. That is why the main benefit of breakfast cereals is their simple and quick cooking. These breakfasts are prepared simply. All you have to do is pour milk over the cereal. In addition, milk can be replaced with yogurt or kefir.
During the production of breakfast cereals, all the beneficial substances of cereals are preserved. For example, corn flakes are rich in vitamins A and E, while rice flakes contain amino acids important for our body. Included oatmeal includes phosphorus and magnesium. But, unfortunately, not all breakfasts are good for the human body; some of them can be harmful.
Dry breakfasts include snacks, muesli, and cereal. Snacks are balls and pads made from rice, corn, barley, oats and rye. different sizes. These grains are steamed under high pressure to preserve maximum quantity useful microelements and vitamins. However, with additional heat treatment, for example, by frying, the product loses its benefits. When you add nuts, honey, fruits, and chocolate to the flakes, you get muesli. For the production of snacks, ground flakes, as well as various additions to them, are fried. Children often love snacks, so they are produced in the form of different figures. Some manufacturers add various fillings to snacks, including chocolate. However, after adding sugar and various additives to breakfast, it will no longer be very useful. In this regard, to maintain health and figure, it is better to choose unprocessed cereal or muesli with fruit and honey.
Why are breakfast cereals harmful?
The most harmful product is snacks, since their preparation destroys a large amount of beneficial substances. One serving of such breakfasts contains only about two grams of fiber, while our body needs up to 30 grams of dietary fiber per day. It is healthier to eat unprocessed flakes that have not undergone heat treatment. This product will fill the body with the necessary amount of fiber. Snacks are harmful due to frying as they become high in calories and fat.
It is necessary to take into account the high calorie content of breakfast cereals. For example, the calorie content of stuffed pillows is about 400 calories, and chocolate balls are 380 calories. Cakes and sweets have a similar calorie content, and this is not healthy. Various additives included in breakfast cereals cause more harm. That is why buy raw cereal for children, without various additives. Add honey, nuts or dried fruits to your breakfast cereal and avoid products that contain sugar substitutes.
Wheat, rice and corn flakes are very easy to digest because they contain simple carbohydrates. This fills the body with energy and provides nutrition to the brain, but excessive consumption of these carbohydrates leads to excess weight.
Heat-treated breakfast cereals are very harmful. During the cooking process, fat or oil used during the cooking process can cause problems of cardio-vascular system and increased cholesterol levels. Breakfasts often include flavor enhancers, leavening agents and flavorings. Avoid purchasing products with such additives.
A child can be given flakes from the age of six, not earlier, since coarse fibers are difficult for the child’s intestines to absorb.

Pain, which people may periodically feel for various reasons, can ruin all their plans for the day, ruin their mood and worsen their quality of life. Pain can be of different nature, but to get rid of it, people resort to using painkillers. However, few people think about the fact that when using an anesthetic, we can harm our health, since each drug has side effects, which can manifest themselves in an individual organism. However, not everyone knows that some products can reduce or relieve pain, while being quite effective and without exposing the body to additional risk. Of course, when any pain appears, it is necessary to determine what it is associated with. Pain is a kind of signal from the body indicating that it has problems. Therefore, you should never ignore pain, and sometimes it is impossible to do so, since it reminds you of itself, sometimes at the most inopportune moment. In our article we will talk about what products can relieve pain, or reduce its manifestation at least for a while.
People with chronic diseases that periodically manifest themselves as pain can be put on some kind of pain-relieving diet to alleviate their condition. So, here are the foods that can soothe the pain:
Turmeric and ginger. Ginger is a proven remedy for many diseases that can effectively cope with pain. For example, in oriental medicine this plant is used to relieve toothache. For this purpose, you need to prepare a decoction of ginger and rinse your mouth with it. Pain resulting from physical activity and due to intestinal disorders and ulcers, can be soothed with ginger and turmeric. In addition, these plants have a positive effect on kidney health.
Parsley. This greenery contains essential oils that can stimulate blood circulation in the human body, including blood supply internal organs. When parsley is consumed, the body's adaptive abilities increase, which speeds up healing.
Chilli. This is another pain reliever. In the course of research, it was revealed that red pepper can increase a person’s pain threshold. The molecules of this product activate the body's immune defense and produce endorphins, which work as a pain reliever. Traditionally, this pepper is included in the menu of peoples living in complex natural conditions and those engaged in heavy physical labor.
bitter chocolate. As mentioned above, the hormone endorphin, which is also called the “hormone of happiness,” is a natural pain reliever. The production of this natural pain reliever is stimulated by eating chocolate. The ability of chocolate to bring pleasure is known to everyone, however, this product not only gives you a good mood, but can relieve painful sensations.
Whole grain products. According to some experts, the ability of foods made from whole grains to relieve pain is excessively high. These products contain a lot of magnesium, which helps relieve muscle pain. In addition, these products help relieve headaches, as they protect the body from dehydration.
Mustard. Mustard can reduce headaches that arise from overwork or other reasons. It is enough to eat a piece of bread spread with fresh mustard.
Cherry. It is very easy to eliminate headaches by eating a few ripe cherries.
Garlic. This is another burning product that can relieve pain, and this also applies to pain resulting from various inflammations.
Citrus. These fruits have pain-relieving properties, just like other foods containing vitamin C. Citrus fruits relieve pain due to various reasons. In addition, these fruits act as a general tonic. Therefore, this is the first product to be given to patients in the hospital.
Cinnamon. Another important remedy used in the fight against various inflammations and pain. Cinnamon reduces the degree negative impact uric acid, high levels of which can trigger the development of many diseases, including arthritis.
Modern interior items very quickly go out of fashion or lose their attractiveness, but purchasing new ones is not always possible. This raises the question: how to repaint chipboard furniture with your own hands so that the product acquires an attractive appearance? This is not always easy to do, because the result is influenced not only right choice materials and technology, but also the accuracy of the process.
Painting old furniture with your own hands is considered a difficult and risky procedure. The fact is that for the manufacture of interior items (cabinets, chests of drawers, kitchen modules) processed materials with a decorative layer are used. Therefore, it is necessary to correctly determine the type of coating in order to draw up a work plan.
Chipboards used in furniture production can be of the following types:

There are other types of slabs, but they are not as common.
How to paint old furniture
To paint boring or defective interior items, you need to select a composition suitable for these purposes. The main recommendation when choosing is to refuse cheap options.
Paint for chipboard furniture should be selected taking into account the characteristics of the composition:
- Oily. Preference should be given famous brands. A significant drawback is the unpleasant and toxic fumes, and the drying period of the solution is quite long. This mixture must be laid in thin layers, which is why the material is used infrequently.
- Acrylic. Modern version water-dispersed paints. The composition has many positive qualities, which makes it in demand. But when working with laminated chipboard, it is necessary to purchase a solution with increased adhesion and not dilute it with water.
- Alkyd. This option is much preferable to the oil option. The product is suitable for painting furniture, but the work is carried out in well-ventilated areas due to the specific smell of the composition.
 Of the three proposed, the best is acrylic paint, oil enamel is affordable, and alkyd enamel is considered the golden mean
 On a note! For tinting or decorating small areas, spray paint is used. For example, a bedside table will require one or two containers.
Chipboard can also be repainted with other types of compositions. Stain is used only for tinting veneered material. The varnish serves to secure the decorative layer; it can act as an independent composition, but this will require complex preparation of the base. For work it is better to use a quick-drying variety.
A mandatory element of the coating is a primer; the composition must have good adhesion.
 No decorative coating can be applied to chipboard without primer.
 How to paint chipboard
Painting chipboard furniture includes two main stages:
- preparatory stage;
- painting work.
On a note! When deciding whether to paint laminated chipboard, it is worth considering that final result even if all the nuances are observed, it does not always meet expectations.
 It is convenient to paint chipboard from an aerosol can, especially if you need to make a pattern using a stencil
 Tool selection
Various tools can be used for work:
- Spray gun. Due to the fact that furniture parts made of wood-based material have a flat base, this particular device is the best option. When spraying, the paint can be applied more evenly. The main problem with using such a tool is correct selection distances. In case of erroneous calculations, drips and sagging are formed.
- Roller. This device is most often used at home. Painting with a roller is not always easy, since the applied layer must have a small thickness, otherwise sagging will become noticeable. To paint furniture, use tools with a medium-length fur coat.
- Foam sponge. Suitable for tinting and painting well-primed elements, it allows you to obtain a uniform coating, but subject to extreme care.
 When restoring old furniture, you can get by with affordable tools
 Brushes are rarely used for this process; their main purpose is decoration. They allow you to create an antique effect, but if a base layer was previously applied to hide the base.
On a note! Repainting old table or a chest of drawers, the joining of parts is taken into account: the new layer should not lead to the appearance of distortions and protruding areas.
Preparing the base
Step-by-step preparation instructions:

All details are processed in this way.
 If it is not possible to completely disassemble the old furniture, then before painting the floor is covered with polyethylene
Repainting
Coating of fragments with paint is carried out according to the scheme:
- A primer is applied to the element. It is recommended to perform at least two treatments, each time waiting until the product is completely dry.
- The coloring composition is being prepared. It is stirred well and tinted if necessary.
- The mixture is poured into a convenient roller container. The instrument is soaked in the solution and the excess is squeezed out.
- Painting starts from the middle. The mixture rolls out well over the base, the movements should be parallel, and a thick layer should not be allowed to be created. The first layer is the base; you need to wait until it dries completely.
- Then the main coating is applied according to the previous principle.
- When using a spray gun, you will need to dilute the composition used. For selection optimal distance training staining is carried out.
 Regardless of the type of composition, the surface is painted in 2 - 3 layers
 If the part will experience constant impact, then an additional layer of varnish is applied.
Furniture decoration
Decorating such material is not very easy. There are many recommendations for creating a Provence style, but achieving the effect that is obtained on furniture made of wood, plywood or MDF will not work. This is explained by the fact that chipboard products rarely have the required appearance.
 Using simple devices on chipboard furniture you can create true masterpieces
 You can diversify the interior in the following ways:
- Painting countertops or dresser fronts in White color, and other front parts – black. For this, paint with a glossy finish is used. The technology is completely the same as described above, but the difference is that three layers of varnish are applied to the parts. The first layer is left untreated, and subsequent layers are sanded and polished.
 To work using the Decoupage technique (artificial aging), special paints are used
 - Aging. To create this effect, after laying the base coat, apply a darker color of paint with a brush. The movements should be sweeping and slightly uneven; a diluted white compound can be applied on top. Everything is fixed with varnish.