Draw a candlestick with a pencil. How to draw a candle step by step
Nikon D610 is absolutely the same gorgeous FX camera as its predecessor D600, but, nevertheless, it has one important fix.
It's a correction, not an improvement. In the D610, the shutter was replaced, which became a little faster, literally half a frame per second (6 frames/s), but as Nikon themselves say, the problem with spots on the matrix from shutter lubrication has been solved. To be honest, I personally haven’t seen this problem before, although maybe I was just lucky. But there are a certain number of people who see these spots. In any case, regardless of the model, if there is something wrong with your camera, it is better to first contact the official service, and only then build conspiracy theories. More often than not, it’s not the camera’s fault.
Since the D610 and D600 are otherwise identical, there is no point in comparing them. I will compare it with something else, and you will have the opportunity to compare reviews from different authors of almost the same camera to make it more interesting.

In terms of dimensions and capabilities, the D610 is closer to the old Nikon D700, only it is noticeably lighter. But to be more precise, it is more like a D7100 with an FX sensor. Even the autofocus module is similar to the D7100. Only if on the D7100 / D7000, due to the size of the matrix, the autofocus points are more or less distributed throughout the frame, then on a larger frame there is a feeling that all the points are in a pile in the center, and there is emptiness at the edges:

There are even theorists who argue how inconvenient and unsuitable it is to insert a module from a DX camera into a camera of this level. Personally, I don’t join these comrades, because for photographing sports the D7100 doesn’t have enough points, but for everything else the D610 is absolutely enough. As for sports and fast-moving children, ideally the autofocus zones should be distributed across the entire screen, much like mirrorless cameras, only they focus very slowly, but we need them quickly. On the other hand, on the D610 you will have many sharp shots with the subject in the center;-) But the D610 has no problems with focusing speed, even in moderate lighting.

However, it seemed to me that when it’s completely dark, the autofocus on the D610 simply goes blind and you can’t do without an autofocus illuminator. I don’t remember the D700 having similar problems in the same situations. In other words, when it's time to use the flash, the autofocus on the D610 will need help.
Regarding the outbreak, it exists and it’s very good. In this regard, the D610 is great for travel, as long as you don't mind the size and weight of FX lenses. I would not want to take a camera without a built-in flash with me on a trip, since I would definitely have to carry some other junk on myself. And the flash in Everyday life you need it much more often than some people think, even the built-in one. Here, for example, is an option without flash:

And this is the same thing, but with a built-in flash, find 10 differences:

Of course, you won’t do serious portraits like I did - in a hurry, but you will take special lighting equipment and then at least do some tinting. But to understand why the built-in flash is important, this example is enough.
The maximum flash sync speed has decreased slightly compared to the D700 - only 1/200 and 1/250 in FP sync mode. For those who like to click with a flash in clear weather, you will have to get an ND filter and experience some inconvenience. In general, in clear weather, don’t even think about going out without a polarizing filter. By the way, a polarizing filter can be used as a weak neutral filter, as it reduces exposure by 2-3 stops, depending on the model.
The built-in flash of the D610 has one very unpleasant moment - during recharging you cannot take photographs at all, you have to wait 3-4 seconds. On older models, you take the shot anyway, even if the flash is not ready. It’s better to take a shot without a flash than to sit and crow for several seconds in a row.
The built-in flash of the D610 can also work in command mode, like on all other serious cameras, making it possible to use i-TTL and remotely adjust the power of external flashes by group.
What else I liked:
Custom Settings
Very convenient modes U1 and U2 are right on the wheel on the left, like on the D600 and D7000/D7100. All camera settings, including autofocus and exposure metering settings, can be saved to these modes and recalled instantly. I prefer to save settings for landscapes in U1, since I shoot them most often, and U2 for portraits. In other modes P, S, A, M I do all sorts of experiments. I would also like to have U3 and U4 instead of stupid Auto and Scene. I don’t even understand who Scene is for, and the green Auto mode is the same as P, only the flash automatically pops up. If you give the camera to a beginner, the P mode does a great job and the beginner will take wonderful shots even in difficult conditions. Personally, I mostly shoot in P.

HDR
The Nikon D610 has a fantastic HDR (advanced) dynamic range, although in fact the camera narrows it, that’s the paradox). Once you try this mode, you will never shoot without HDR again, believe me, I don’t shoot without HDR in the evening anymore. This mode takes 2 frames with different exposures and stitches them into one, preserving very bright and very dark areas as much as possible. HDR only works when shooting in JPEG. In RAW you will do everything yourself, spending a lot of time, and the result will hardly be better.
Here's how without HDR:

And this is already with HDR:

Not a great example, but that’s only because I don’t really shoot without HDR, it was some kind of mistake. So you can be sure that all evening landscapes taken with the D610 were with the HDR function. Of course, this trick will not work if something moves in the frame - the image will appear double.

Virtual horizon
The gyroscope on the D610 operates in two planes. A very convenient thing when you quickly need to click on a landscape so that the horizon is not blocked and the perspective is not distorted.
You can assign the function button to turn on the gyroscope so that it is displayed in the viewfinder, then it will appear instead of the exposure scale. To adjust the tilt forward/backward you will have to turn on big screen, only in this mode there will be such an opportunity.
Two memory card slots
Very useful thing. Firstly, I really like the card format - SD. You won’t have any problems with such cards, they are small and you can work with them on any modern laptop without having to carry a reader with wires. Secondly, you can configure different behavior to your taste: record photos in parallel on two cards for reliability, or sequentially to increase the available memory.
There are only a couple of nuances. The most important thing is to buy the fastest memory cards possible. You need to look not only at the class (10 is the minimum for you), but also at throughput, it is advisable that the card says UHS (Ultra High Speed), this is 300x and higher. Otherwise, you will feel like the camera is faulty. With slow class 6 cards, the camera may freeze altogether. You definitely didn't spend that much money just to have your high-speed camera slow down because of some small card. It’s better to save on the size of the card, but get it quickly.
By the way, due to the fact that the matrix on the D610 is 24 megapixels, which is a lot, it seems to me, some common 8Gb card will fill up catastrophically quickly if you shoot in JPEG. I’m generally silent about NEF. And give up hope that you can use the cards you already have from old technology. You will have to buy new high-speed, large-volume ones.
Second important aspect– I don’t recommend switching the card occupancy mode while shooting, otherwise you may get ghosts, especially when you think the frame has been deleted. The camera is not very smart to understand what you shot in what fill mode. There is a risk not only of unkillable frames appearing, which is not a big deal, but also of losing an important frame when you thought you had a backup. It’s better to set this thing up once and not touch it again.
Auto ISO
I almost never turn off Auto ISO, even when I take pictures in the evening with a long shutter speed - I just turn up the shutter speed to the maximum until the exposure starts to go positive, and I know for sure that my ISO is at a minimum. But these are old habits.
On the D610, if you press the ISO button and turn the rear wheel, the minimum ISO value will switch, but if you turn the front wheel, the Auto ISO mode will switch to manual mode and back - very convenient!
In addition, Auto ISO recognizes the focal length and makes the shutter speed shorter for telephoto cameras, but for the opposite, you can improve the quality with a longer shutter speed and low ISO. For more flexible settings, there is an ISO correction; if, for example, you don’t drink and your hands don’t shake too much, then you can shift the balance towards longer shutter speeds. To do this, in the Shooting Menu, where ISO is adjusted, in the Minimum Shutter Speed item, where there is an Auto mode, you need to press the right arrow on Auto, there will be a correction. So far this is the most flexible and most convenient ISO setting I have seen.
As for the ISO itself, I’m quite comfortable shooting even at ISO 6400. Of course, noise is already visible, but not too much. At least this allows you to take a pretty decent handheld shot from the shaking Brooklyn Bridge in New York, there is nothing to do with a tripod:

Another little thing you can note is the presence of an infrared port for
In addition, the Nikon D610 body is perfectly protected from moisture and dust. The location of all rubber gaskets is the same as in the D600. You shouldn’t test the camera’s water resistance in a swimming pool, but you can safely shoot in rain and snow. Just don’t forget that the lens must also have the appropriate degree of protection - not all “glasses” in the Nikon collection can boast of this.
Display, viewfinder, interface
The additional display pleases not only with a pleasant green backlight, but also with information content. In this parameter, it surpasses the similar screen in Canon cameras.
The software interface will probably not be new to anyone who has ever held any Nikon DSLR in their hands. The menu moved unchanged from the Nikon D600, and there was simply no reason for changes. Here we have six main sections - the viewing mode menu, photo and video shooting mode settings, a set of user settings, a general settings menu, an image processing menu and a custom user menu. The menu items are also provided with fairly detailed tips, and the Russification is one of the most literate and understandable.
Even during the local Ukrainian presentation of the new product, an employee of the Russian representative office of Nikon directly stated that there are revolutionary cameras, and there are evolutionary ones - and the Nikon D610 belongs to the second type. Indeed, making a revolution just a year and a half after the introduction of an iconic full-frame camera that costs just $2,099 is extremely difficult. However, this very evolution at first glance looks very modest - a quick examination of the declared characteristics turns into a game of “find 10 differences.” Finding them is extremely difficult. But what you can notice is the decreased cost - in one fell swoop by $100. The continuous shooting speed has increased by 0.5 frames/s to brighten up a boring presentation. Otherwise, the camera is extremely similar to the D600 - it has the same matrix, processor, viewfinder, display, autofocus and exposure metering module, after all, the cameras have exactly the same batteries and bodies. It turns out that this is not even an evolution, but some kind of facelift? Let's try to figure it out.
⇡ Technical characteristics declared by the manufacturer
| Nikon D610 | |
|---|---|
| Image sensor | 35.9x24.0mm CMOS sensor (Nikon FX format) Total pixels: 24.7 MP |
| Effective number of points, MP | 24,3 |
| Image saving format | Photo frame: NEF (RAW): 12-bit or 14-bit (lossless compressed, compressed or uncompressed), JPEG Video: MOV (H.264/MPEG-4 Advanced Video Coding) |
| Lens mount | Nikon F mount (with AF interface and AF contacts) |
| Frame size in pixels | Photo frame: up to 6016x4016 Video: up to 1920x1080; 30p (progressive), 25p, 24p |
| Sensitivity, units in ISO equivalent | 100-6400 in 1/3 or 1/2 EV increments (ISO 50 and 25600 also available) |
| Shutter speed range | 1/4000 to 30 seconds in 1/3 or 1/2 EV steps, Bulb, Long Shutter (requires optional ML-L3 Remote Controller), X200 |
| Exposure metering | Matrix, center-weighted, spot |
| Exposure compensation | -5 to +5 EV in 1/3 or 1/2 EV steps |
| Flash Guide Number | 12 |
| Self-timer, s | 2, 5, 10, 20; 1 to 9 exposures at 0.5, 1, 2 or 3 s intervals |
| Storage device | SD (Secure Digital) and UHS-I compatible with SDHC and SDXC memory cards |
| LCD display | 8.0 cm (3.2 inches), 921k dot resolution |
| Interfaces | HDMI, USB 2.0, remote control connector, audio output (mini-jack 3.5 mm), microphone connector (mini-jack 3.5 mm) |
| Nutrition | Lithium ion battery EN-EL15.14 Wh |
| Dimensions (WxHxD), mm | 141x113x82 |
| Weight, g | 850 with battery and memory card, but without protective cover; 760 camera body only |
⇡ Delivery set
Supplied with accessory shoe cover BS-1, rubber eyecup DK-21, monitor cover BM-14, protective cover BF-1B, Li-ion battery EN-EL15 (with protective cover), charger MH-25, eyepiece cover DK-5, strap AN-DC10, USB cable UC-E15, CD with software ViewNX 2. There are five covers alone! The standard kit also includes a universal AF-S NIKKOR 24-85mm ƒ/3.5-4.5G ED VR zoom lens. For testing, we got a “carcass” with the well-deserved old man AF-S NIKKOR 24-70mm ƒ/2.8G ED, which has been available for testing together with full-frame Nikon cameras for several years now.
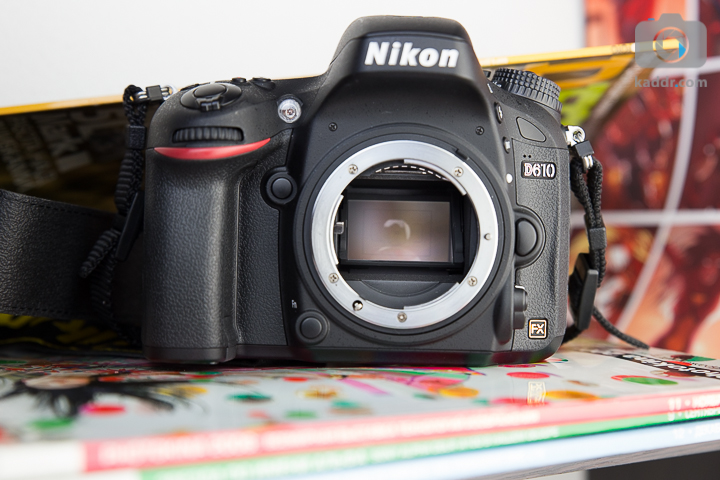
⇡ Appearance and ease of use
The camera is not just similar to the previous D600 - it looks exact copy, and not only the size and shape have not changed, but also the icons printed on the keys and body. In general, if you close the nameplate on the front panel, as well as the information sticker on the “belly”, then even the owner of the latter will not be able to distinguish the new product from the D600. However, from a subjective point of view, the controls are very convenient, so nothing needed to be changed. Conservatism is not always a disadvantage.
|
|
|
|
|
|
|


The body materials are naturally of the same quality. And the assembly traditionally pleasantly pleases with the precise fit of the body panels and the absence of squeaks when squeezed. Like its predecessor, the camera under test was assembled at the company's Thai plant. Actually, the D610 is on this moment The company's only full-frame camera is assembled outside of Japan, but this did not affect the build quality - there is nothing to complain about.

On the front are the lens mount, face control dial, autofocus assist lamp, IR remote control signal receiver, monaural microphone, and a pair of programmable keys, one of which, by default, is, of course, responsible for preview.

There are no differences from the rear either. To the left of the display there is a row of multifunctional hot keys, above the display there is a viewfinder, as well as keys for switching to viewing and deleting mode. To the right is a rear control dial, an AE/AF lock button, a round eight-way key with an input button in the center and an equally round focus point lock selector around the perimeter. Nearby is a button for switching to LiveView mode, supplemented by a display mode lever (photo/video) when shooting LiveView, as well as a button for changing the display mode of the main display. There is also a system speaker, a recording indicator and a rear IR receiver.

From above - again no differences. To the left of the pop-up flash, complemented by a hot shoe at the base, are the familiar control dials, placed one above the other, both equipped with lock keys. The upper dial is responsible for selecting the shooting mode, and the lower one is for selecting the drive mode. To the right of the flash there is an additional monochrome segment display, keys for selecting the metering mode and video exposure correction, as well as a shutter button, supplemented by a power lever, the extreme position of which is responsible for activating the backlight of the segment display.

Below again, no changes. There is a tripod mount connector (ISO 518), as well as a battery compartment and a connector for connecting the battery grip hidden by a rubber plug.
|
|
|


The left side surface is quite heavily loaded. There is a flash eject button (also known as operating mode selection), a bracketing button, as well as a focus mode selection lever with an autofocus adjustment button in the center. In addition, under three rubber plugs there are hidden connectors for headphones, microphone, USB and HDMI cables, as well as a wired remote control. On the right, there is only a large cover that hides a pair of memory card slots.
A bad soldier is one who does not dream of becoming a general. This truth was written down many years ago and does not lose its relevance today. But among photographers there is a slightly different expression: “It’s impossible not to want a full frame.” But at the same time, the cost of a full frame did not allow every second person to buy such a carcass. In the camps of both Canonists and Nikonists, such cameras were intended for more professional use or for advanced enthusiasts, while it should be borne in mind that professional tools simply cannot be cheap.
It’s scary to imagine how much time in total is spent in the world dreaming about a 36x24 frame.
There was talk about the full frame scary legends. It was rumored that anyone who picks up such a camera simply won’t be able to shoot with anything else, that there is a “Masterpiece” button, and every third photo taken with a full frame will be bought and printed by magazines such as National Geographics, Playboy and Esquire. Many even simply went to stores and held such carcasses in their hands in order to be imbued with the holy spirit of real creativity.
But now camera manufacturers are breaking all boundaries and are starting to produce cameras that you will not only want, but can afford. And one of these is Nikon D610.
Nikon D610 video review:
Design and ergonomics
Externally, the device most closely resembles the Nikon D600. Same controls, same ports. Go and check out his review.
I was very lazy to describe all this, but the evil editor-in-chief said: “Work!” So you have to work.
The base of the case is magnesium alloy, which protects the camera from external negative impacts. A small amount of plastic is still present and can be seen on the front of the device. But at the same time, the solidity was not affected in any way - the carcass feels strong. It has dust and moisture protection, although its level is, of course, inferior to that of the D4 master, but you can shoot in light rain or snow without worrying. Even in ten-degree frost, all functions worked adequately for me, however, for this you need to prepare the camera in such a way.

The case fits into your hand like a glove, does not slip and does not tend to fall out. On the front side there is a battery handle with a functional wheel for more comfortable grip and control, a canonical red stripe, and two functional buttons. One has a function for changing the frame format - switching between FX and DX. This is very convenient when you need to bring your subject closer, but the zoom is not enough. Or for more convenient compositional construction frame. On the second one, I personally installed an aperture repeater in order to quickly and conveniently assess the depth of field.
In the center there is a metal mount, and on the other side there is a lens release button, a lever for switching between automatic and manual focusing and a button for changing autofocus modes. Above, on the protruding prism block, there are keys for bracketing and opening the built-in flash. This is undoubtedly a plus, because all models of this class usually do not have a flash. Manufacturers believe that people using such a camera will use external lighting sources. This is partly true, but sometimes the built-in puff saves the day.

On the left side, under rubber plugs, there are connectors for connecting external accessories - Mini USB, HDMI, a port for a GPS module, and a remote control. There are also connectors for an external microphone and headphones, so it’s now much easier to control the quality of sound recording.

The right side still houses two SD card slots under a plastic cover. This solution will allow you to use twice as much memory and forget about worries about lack of space.
The bottom edge is occupied by the battery compartment and tripod socket.

At the top end everything is familiar. On the left are two wheels for switching modes, which are locked with buttons to protect against accidental rotations, while the lower one is responsible for selecting the shooting speed, mirror pre-raise, quiet mode, and the upper one is for selecting PASM, user saved modes and auto.

On the right is a monochrome display for displaying information, a shutter button with a three-position on/off/backlight lever, video recording, exposure compensation and focus area selection keys. It is worth noting that to control the functions you need not only to press them, but also to hold them while turning the wheel.
In the center above the bayonet mount is a hot shoe and a hidden built-in flash.

The rear edge is given over to a non-rotating 3.2-inch VGA display. Viewing angles and color rendition evoke genuine delight and a desire to view pictures right at the shooting location.
To the left of the display are five buttons: menu, color correction, setup information, zoom in and out. Almost all buttons have two functions. Thus, setting information can change the white balance, and zooming can change the image quality and ISO.

To the right of the screen is an info button, Live View mode framed by a video or photo selection lever, a four-way joystick, an OK button, and a focus point lock lever. Above the screen there is a viewfinder with a proximity sensor and diopter adjustment, to the left of it is gallery viewing and deletion. On the right is AE-L/AF-L and the second mode dial.

What's under the hood
Behind the mirror is a 24 MP sensor measuring 36 x 24 mm. Classic narrow film format in digital form. The Expeed 3 processor is responsible for correct operation. This is absolutely enough to ensure the highest speed of operation and forget about any slowdowns or speed problems.
The photosensitivity range is from 100 to 6400 units, and in extended mode the range from 50 to 25600 ISO becomes available. At the same time, the matrix makes little noise - values up to 6400 can be considered working. If you shoot in RAW with subsequent competent development, then 12800 is quite usable not only for the web, but also for printing in small sizes. Falling parts and colored noise cease to be noticeable even from a distance of one meter.
For printing from a device in A4 format, oddly enough, almost all values are suitable. Up to 6400 ISO receive prints High Quality You can at least from Jpeg, but after that you still have to switch to RAW. 12800, after proper development, still shows some colored noise, but at arm's length, and even more so on the wall, it is difficult to see. But 25600 is not worth printing even from RAW larger than A5. Here you can already see the loss of detail on small textures and noise creeping in.

The rate of fire of the device is high – 6 fps in full resolution in RAW. The buffer is enough for a series of 15 frames, then the camera will shoot endlessly with a frame rate of almost 1 fps. With JPEG you practically don’t have to worry about the buffer – more than 30 frames will be enough in 99% of cases. Measurements were made with a fast memory card (review). With slower cards, the results may differ for the worse.

There is also quiet shooting at 3 fps. True, the volume here is an exclusively comparative parameter, but you will clearly attract much less attention.
The dynamic range deserves special praise - lights and shadows are processed correctly and correctly, but if the need arises, you can safely enable the D-Lighting or HDR extension. High Dynamic Range does not work with RAW or even in RAW+JPEG mode. To activate it, you will always have to switch to JPEG.
Autofocus
The autofocus system is inherited from the D7000. And I must say that she is cool. These are 39 points, of which 9 are cross points. But there is also a minus - the main array is concentrated in the central part of the frame. This means that you should aim at extreme point It will be somewhat problematic, just like the small one in the center of the frame. For me personally, this was not a problem - I focused, locked, moved the camera a little and got a good result. In general, the automatic focusing system works very correctly - quickly, tenaciously, accurately.

These definitely include the Time Lapse Motion shooting function, or time-lapse video, as you please. If earlier, to obtain such an effect it was necessary to spend a lot of time and effort, now we simply select the required item, interval and shooting time from the menu. Click “OK” – and we get the finished video in *.mov format. Everything else is not something supernatural - expanding the dynamic range, bracketing. That's all, we saw this in previous models.
Video capabilities
They are at their best here. FullHD up to 30 fps, high bitrate, flexible sound settings, microphone and headphone connections. But here, as almost everywhere else with Nikon, a minor and annoying bug appears. Well, why the hell am I, buying a carcass for two grand bucks, but I can’t change the aperture value when shooting video in Live View mode? At the same time, there are no problems with this in the older D800. I'm simply shocked that the company that was the first in the world to implement video recording in DSLRs behaves like this.
Nikon D610 vs. Nikon D600
- 6 fps versus 5.5 fps;
- the new model now features quiet continuous shooting;
- Fixed some bugs with color correction and white balance;
- From now on, in new models there are no problems with the shutter/mirror unit and no oil stains on the matrix. And in the predecessor this sometimes happened.
Fine
- excellent low noise sensor;
- Wide dynamic range in standard mode;
- bright and rich display;
- good level of video quality;
- variety of ports;
- dust and moisture protection;
- adequate work in low temperature conditions;
- fast and tenacious focusing;
- viewfinder with 100% field coverage;
- availability of time-lapse photography;
- many functions for correcting lens defects;
- slot for two SD memory cards.
Badly
- minimum shutter speed 1/4000;
- crowding of dots in the central part of the frame;
- IT IS IMPOSSIBLE TO CHANGE THE APERTURE IN Live View MODE;
- not the fastest autofocus in live sighting mode;
- absence of a histogram on the display when viewing via the display.

Which glass to take

It is worth saying that to unlock the full potential of the matrix installed inside the carcass, it is worth planning to purchase good and bright optics. At the same time, in conditions of limited finances, you can easily get by with primes - for example, Nikkor AF-S 50mm F1.8G.

In full frame conditions, this will be exactly the right fifty-kopeck, universal lens. It’s not for nothing that all film cameras were equipped with just such fixes - they can shoot almost all subjects: from architecture and genre, to portraits and landscapes. And the high aperture allows you to shoot even in poor lighting conditions. At the same time, the photographer will always have the opportunity to switch to DX mode and get 75 mm for shooting large portraits.
If there are no funds at all, then fifty dollars will be enough for the first time. His review.

If you have extra funds, you can take it. Its cost is approximately $400, but the aperture is two-thirds higher.

Nikkor AF-S 85mm F1.8G will be good choice for those who like to take portraits. It's compact enough to carry your camera around every day, does a great job of blurring backgrounds, and provides a soft, beautiful drawing. But its cost is about 500 conventional units. There is also a version with F1.4 aperture, but whether it’s worth overpaying, decide for yourself, based on the tasks at hand.

Nikkor AF-S 28mm F1.8G is the same glass that is suitable for shooting architecture or landscapes. Wide angle, beautiful pattern, low level of distortion for $700 is a good choice.

You can also look at the expensive one - one of the best wide-angles ever created. . Let it be darker, but it will give a better picture. But considering the $2,000 price tag, it's worth thinking twice about whether you need it.

- This is a standard fast lens for every day. Sharp, fast, beautiful, heavy, it will allow you to shoot all kinds of scenes, getting good results. It costs a lot - 1600 bucks. .

Nikkor AF-S 70-200mm F2.8G VR II is a light telezoom for reporters. The built-in stub minimizes smears, there are practically no defects observed, and the price of 2100 conventional units makes you lick your lips. But keep in mind that it’s worth buying such a huge thing for professional work– when I came to the club with him, they asked me to confirm my journalist’s accreditation.

Alternative
In fact, the only alternative and competitor. The price category is about the same, and even a little cheaper. Its cost now in the vastness of Ukraine starts at $1,500. The carcass is lighter and smaller, the sensor loses slightly in detail nominally. In real conditions, you are unlikely to feel the difference. A matrix from a competitor will make a little less noise in the dark and have the same excellent DD and color rendition. The rate of fire is slightly lower - 4.5 fps versus 6. On board there are only 11 AF points with one cross-shaped one. But the dots are located more evenly across the frame. The viewfinder loses - only 97% coverage.

Also, the Canon 6D has one memory card slot and no built-in flash. But there are Wi-Fi and GPS modules.
You can, of course, take the Nikon D600 - it will cost a little cheaper - about 1600 US dollars. But at the same time, you doom yourself to torment over oil on the matrix and damage to the mirror/shutter. And considering the $100 difference with the next generation, I don't think it's worth it.

Summary
I am sure that the Nikon D610, despite a number of small disadvantages, will easily win the love of many photographers. This is the most compact and most affordable full-frame DSLR from manufacturers, which brings to life the best practices: excellent detail, low level noise, wide dynamic range.
And, if you belong to the cohort of Nikonists and can afford such a device, take it. You are unlikely to be disappointed. The camera will allow you to complete the entire range of assigned tasks quickly and efficiently. And considering that the price tag for it now starts at $1,700 on the Ukrainian Internet, this is an excellent upgrade of equipment. Although, if you have a Nikon D600, then it’s definitely not worth upgrading.
And yes, I hope that the elastic bands will not come off after six months of active use. Otherwise, this is another minus in the manufacturer’s karma.
Gallery of pictures
(move your mouse cursor to the upper right corner to view in full screen mode)
Elena Samonkina
Master class “Drawings - scratches with a candle (wax)”
“I’ll tell you about grattage.
It arouses interest.
You're like a magician scratching
You paint a whole world of wonders.”
I'll tell you about interesting technology drawing "graffito" or GRATTAGE! This technique is interesting and accessible to both children and adults of any age.

Scratch - unusual technique drawing, translated from French means to scrape, scratch - this is making a drawing with a sharp instrument, scratching paper or cardboard filled with ink on wax. That’s why grattage is affectionately called “Tsap-scratchy”!
Materials for work: a sheet of paper or cardboard, a brush (sponge, candle, oil pencils, ink (gouache, a jar of water), soap (soap solution, sharp objects for scratching, napkin, newspaper.
Classic scratch paper (black and white): rub a sheet of paper with wax (candle). Then apply mascara (gouache) to the surface with a brush or sponge.
Mascara (gouache) hardly sticks to a greasy surface. To prevent mascara from collecting in drops on the wax surface, there is one trick - mix it with soap (soap solution).
When the ink dries, use a sharp object - a stick, a toothpick - to scratch the design, forming thin white strokes on a black background. The table must be covered, otherwise everything around will be strewn with black ink-wax crumbs. The work uses sharp tools to remove black paint from the surface of the cardboard, resulting in a white layer. The result is a spectacular black and white image.

You can paint over a landscape sheet not with a candle, but with egg yolk (base). The drawing will turn out very bright.

Colored scratch paper - it can be drawn using wax or oil pencils, and then a candle is not needed.
Stage 1: paint over a sheet of paper (cardboard) oil pencils, wax crayons. (can be used colored paper or cover the sheet with watercolors, but then the drawing must be rubbed on top with a candle).
Stage 2: add liquid soap or shampoo to the black mascara (gouache), cover the painted sheet with this mixture and let it dry. It is necessary to paint over it so that the pencil does not show through. You can let the paint dry and paint again.
Stage 3: the most interesting thing - when the black color is dry, you can draw the contours - with a pencil or transfer it using carbon paper. Then we take a toothpick (stick, stack, knitting needle, fork) and scratch the design across the ink. A pattern of thin colored strokes is formed on a black background.

Drawing unusual materials(V in this case candle) brings a lot of joy and develops Creative skills children.

Children's drawings:


I'm sure you will succeed. If you try, you won't stop at one drawing.


I wish you and your children pleasant moments of creativity!