Openwork Japanese patterns. Japanese openwork
Japanese knitting magazines are famous not only for their models, but also for quite detailed descriptions and diagrams for them, which allows us, knowing some of the features, to understand them well.
Since all descriptions are given for a certain size (sometimes 2) and for a certain yarn and knitting needle size (we’ll dwell on this a little later), we must remember that we need to make “adjustments”, namely: for the yarn that we have us and under our knitting needles. Therefore, we start everything as usual, don’t be lazy!!! We knit a sample pattern, on the basis of which we calculate the loops in the future. Therefore, we begin to disassemble the pattern (Fig. 3).
It is better to start getting acquainted with Japanese schemes with those that contain basic symbols. There are not many of them in our diagram; we look for all the symbols found in the description of the pattern and find the corresponding picture for each in the symbols that are given in each magazine.
Our example shows a standard set of loops, but in addition to this, there is also a set of loops in the diagram, which is not so common. And it is its implementation that is given in the picture separately along with symbol in the diagram, which is very convenient.
The patterns in Japanese magazines, like ours, include purl rows, but unlike our patterns, the loops in them are depicted as they are seen from the face.
For example, in stocking stitch (knit stitch), in our usual patterns, purl stitches will appear in the purl rows. IN Japanese schemes in the purl rows, as in the front rows, there will be facial loops. Therefore, when knitting Japanese patterns, you need to clearly understand which row you are in, and if you are in the purl row, then the loops need to be read differently, i.e. see them from the inside out. If the pattern has a front loop, then on the wrong side it is knitted purl and vice versa. It is also necessary to pay attention to the “reverse” slope of the loops in the purl rows.
Now we begin to carefully look at the information below or next to the diagram.
The icon located at the bottom left tells us that a graph with an empty cell is equal, i.e. corresponds to a purl loop. Prudent Japanese often use this technique for visual ease of reading diagrams. (If the purl loop in the diagram were depicted as it should be: in the form of a cage with a horizontal stripe in the middle, then reading such a diagram would be extremely difficult, since the front and purl loops would merge into one whole when perceived).
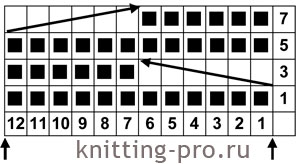
The pattern report is indicated in the right corner. In the first horizontal row of the diagram, the numbers indicate which loop is counted from the beginning, and in the vertical row the number of the row.
With Latin letters A and B indicate the boundaries of the pattern.
Next we are given a diagram of part of the sleeve, which shows the addition of loops.
The directional arrows indicate to us which row we are knitting from right to left, and which row from left to right. So far everything is clear.
Now we turn our attention to the patterns (Fig. 2). The large hieroglyphs in the middle tell us what kind of piece of clothing is in front of us. By the silhouette we ourselves can see where the neckline is smaller - the back, further - the front and, accordingly, the sleeve. Next, under the hieroglyphs, we read information about the pattern (in our case B) and the number of knitting needles. Please note that the fitting here will be carried out by changing the knitting needles, moving to thinner ones and back, i.e. No. 7 to No. 6 and back to No. 7. Nearby we also see information about where this actual fitting needs to be done. The horizontal numbers (between the back and the shelf, which is the same for both the back and the shelf) in brackets are the number of rows, without brackets it’s just the length in centimeters. Therefore, on the 47th row we change the number of knitting needles to smaller ones, and after 12 rows back to the original ones.
Anyway this information for us it is approximate, since we do our own loop calculations.
Below on the pattern we see arrows showing the direction of knitting. In our case there are two of them: up and down. This means that first the main fabric is knitted from the bottom up, and then loops are picked up along the bottom of the product and the binding is knitted; from the photograph of the model I realized that this is a purl, knit and purl rad. (If we don’t understand something, we start looking at the model’s photo under a magnifying glass) By the way, this binding is in the pattern on the neckline, which we haven’t gotten to yet, so I wasn’t mistaken, exactly 3 rows.
Also below we see that we cast on 122 loops for the front (49 cm) and 120 for the back (48 cm) (the symbol means a loop) and knit the first 18 rows according to pattern A.
Now we have reached the point of decreasing stitches for the front and back armholes and for the neckline.
Let's start with the armholes. All decreases in Japanese magazines follow the following scheme. Every “X” rows ( - row symbol) decrease “X” loops ( - loop symbol) “X” times ( - repetition symbol). Below this table, in parentheses, the number of loops that need to be decreased immediately, the row continued, and then decreased according to the pattern. Naturally, the decrease on both sides at the back or front will be the same. So, what do we see in the back diagram. We decrease 4 loops, knit a row, and then 1 time in the second row we decrease 3 loops (2-3-1), then 3 times in each 2nd row we decrease 2 loops (2-2-3), then 2 times in each In the 2nd row we decrease 1 loop (2-1-2) and, finally, 1 time in the fourth row we decrease 1 loop (4-1-1). Next to the decrease table behind the armhole line, in parentheses with a minus sign, there is the number 16 loops, exactly as many as you need to decrease for the armhole.
Let's count: 4+3+6+2+1=16, everything is correct. Using the same principle, we decrease the loops for the front armhole: (-17 loops) 5+3+6+2+1=17, and for the sleeve hem (-32 loops) 3+3+8+7+8+3 and for back neck 3 loops, and front neck 12 loops on each side. The number of stitches that need to be cast off to knit the neckline is also given in parentheses above the front and back diagrams above, along with the number of stitches that remain after decreasing (also given in parentheses).
Now that we have figured out how to read information using the example of the back and front, we can easily read the sleeve diagram. We cast on 54 loops, knit 18 rows with pattern A, then knit according to the pattern of pattern B and begin adding 15 loops according to the pattern that we have, then on the 108th row for the sleeve cap we decrease 32 loops according to the table and close off the remaining 20 loops. We make a binding at the bottom of the sleeve. There is a neckline left, but for it we have a diagram of pattern C and a pattern. The neckline has a clasp, which is also reflected in the description.
From the text at the beginning of the description we can get information about the yarn. As a rule, it is given after the first point in the description (
Pattern "Braid with shadow"- from category Patterns with interceptions , One-sided knitting, used for sweaters, cardigans and hats. The number of loops is a multiple of 12 plus two edge loops.
1st row: facial loops;
2nd row and all even ones: purl loops;
3rd row: interception 3x3 with knits to the left: remove 3 sts for extra. knitting needle and leave it before work, knit 3, knit 3. with additional knitting needles; knit 6 *
5th row: like 1st row;
7th row: knit p., interception 3x3 knit to the right: remove 3 p. for extra. knitting needle and leave to work, knit 3, knit 3. with additional knitting needles;
9th row: rep. from the 1st row;
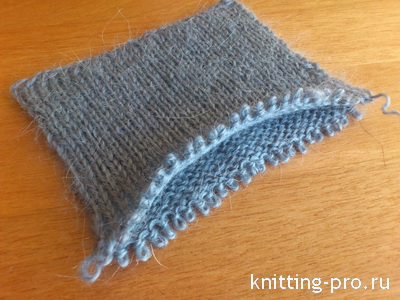
Hollow, or double, elastic belongs to the category of patterns with elongated (removed) loops. But it has nothing in common with them except the way it is knitted.
This knitting is also called tubular. This knitting is classified as an elastic knitting because when knitting from a regular knitting to a hollow elastic knitting, the knitting becomes compressed due to the fact that the knitting becomes double on the same number of loops. This knitting is called double because the fabric turns out to be double and looks like stockinette stitch:

The application of this knitting is very wide. It is used when knitting belts on skirts, when initially knitting elastic, in order to obtain an elastic edge for Italian casting. Due to the fact that the knitting is double-sided, it is used in finishing elements - pocket flaps, shoulder straps, belts, when they want to get a finishing fabric with stockinette stitch. In addition, using this knitting, you can get the toe of a sock or burlap pocket:

It is difficult to overestimate the importance of a hollow, or double, elastic band, and yet it is very easy to knit. Type for sample even number loops and knit according to the pattern:
Description of work:
1st row:
2nd row: 1 person, 1 single point thread before loop, repeat. to the end of the row;
3rd row: repeat from 1st row
Knitting pattern for hollow (double) elastic
This stitch can be knitted in the round, but it is knitted a little differently. And keep in mind that you won’t get a through pocket; at the transition point from one row to another, the layers will be connected. When knitting in a circle, when removing loops, the thread must be passed in one row in front of the loop being removed, and in the next row - behind the loop being removed.
Knitting pattern for hollow (double) elastic in the round
2nd, 3rd, 4th, 6th, 7th, 8th, 10th, 11th and 12th rows: how the loops “look”, i.e. elastic band 1x1;
5th row:* moving three loops: remove 3 loops (knit, purl, knit) from the left knitting needle to the right without knitting. Left knitting needle with purl. we pick up the 2nd stitch on the sides, and take the right knitting needle out of the two loops and use it to pick up the 3rd stitch in front of the work. Thus, the 2nd and 3rd loops swapped places. Then two knits.p. return to the left knitting needle and knit them together with a knit stitch tilted to the right (by the upper lobules). From the next purl. we knit 2 loops: the 1st - purl, capturing the upper lobe, and the 2nd - front, capturing the lower segment of the same loop. After this, purl 1. *, rep. from * to *, at the end of the row, knit 1, purl 1;
9th row: K1, P1, * move 3 stitches as described above, P1. *, rep. from * to *, at the end of the row 1 purl;
13th row: rep. pattern from the 5th row.
Today we will take a journey through traditional Japanese patterns and ornaments.
Thanks to pinterest.com for photos and pictures
In Japan, the art of ornamentation was formed on the basis of various factors, but in the end a unique system was created, filled with a certain meaning and has strict criteria for use.
The Asuka-Nara period (6th-8th centuries) was characterized by active borrowing of ornaments and patterns from nearby countries. Research into the ornaments of this period shows obvious similarities and analogies in the ornaments of other ancient cultures of Eurasia. Images of mythical animals and plants associated with strength and power were placed on clothes.
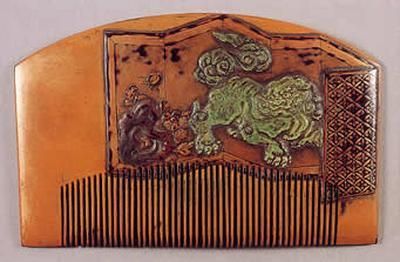
Many patterns were borrowed from China along with their semantic meaning. For example, the phoenix and dragon were considered auspicious patterns, which were capable of driving away evil spirits, as well as giving a person strength and power. The image of a Chinese lion, which in many cultures was the King of Beasts, was used as a talisman.
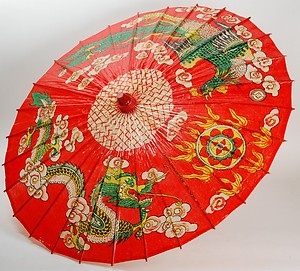
As examples: black men's kimono with dragons and butterflies. Umbrella in chinese style with dragons and phoenixes and a hair comb with the image of a lion.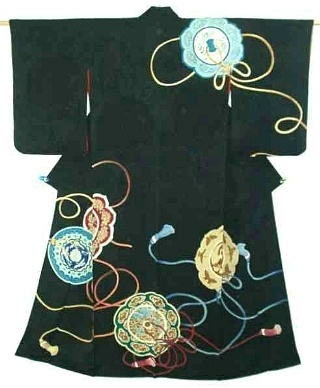
During the same period, Buddhist ornaments were borrowed - plants and animals of India - a turtle, a bird with a tree branch in its beak, the heavenly fairy bird Kalavinka, mythical flowers.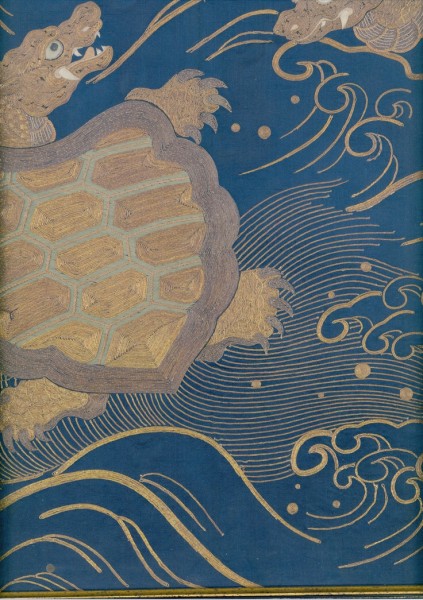
Subsequently, the image of the wise, long-lived turtle is transformed into a “turtle shell” pattern and is actively used in many products: clothing, kimonos, belts, dishes. 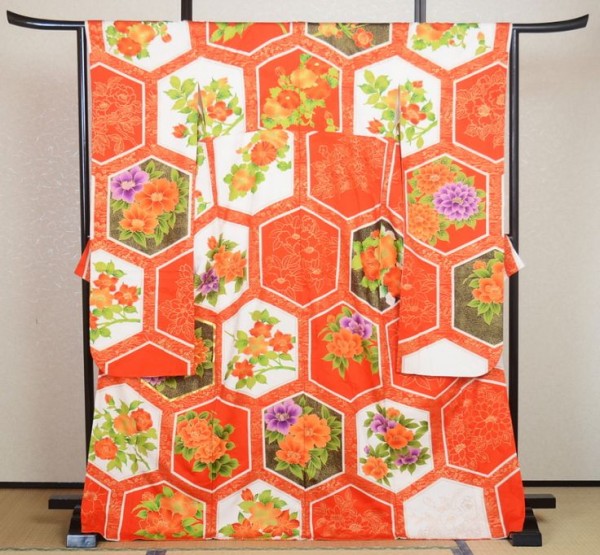
The third group of ornaments of antiquity was associated with heavenly bodies And natural phenomena- the sun, moon, stars, clouds, etc., which were considered the habitat of deities, which gave them magical powers.
Black kimono for a boy on the day of Shinto dedication - sea, cranes and seahorses. 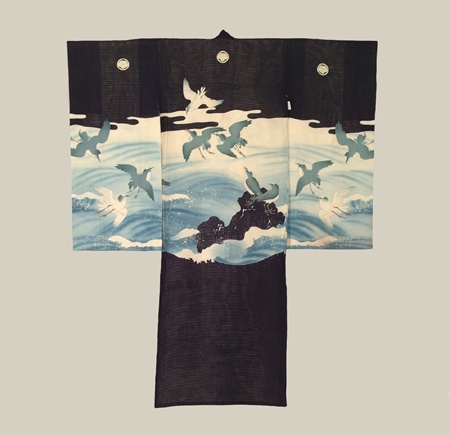
Kimono with graphic image sun. The picture on the right makes it clear how this association arises. 
Traditional kimono with the rising sun. 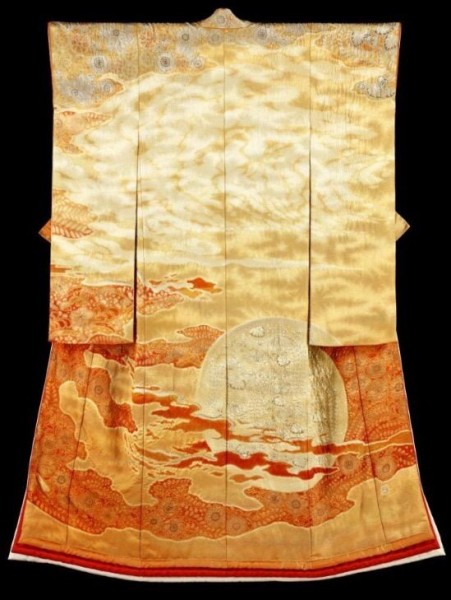
Each pattern also had to have favorable lex
ical expression. The Japanese believed in the magic of the word - kotodama, which is a Shinto phenomenon. They still believe that a word can bring trouble or, conversely, bring good luck.Ornaments associated with the words “open”, “begin”, “grow”, “continue”, “dance”, “rise”, “hide (in cover)”, “avoid (trouble)”, “have a future” were considered good .And the patterns associated with the words “fall”, “end”, “tear”, “shrink” are bad. For example, an open fan is associated with the word “to open, to reveal,” which has a favorable meaning, but it should not be completely open, otherwise the meaning appears that there is no future, there is nowhere for it to open further, this is the limit.
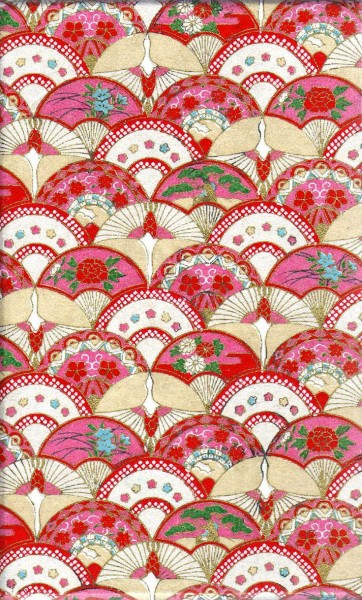
IN large quantities Various patterns with fans are presented: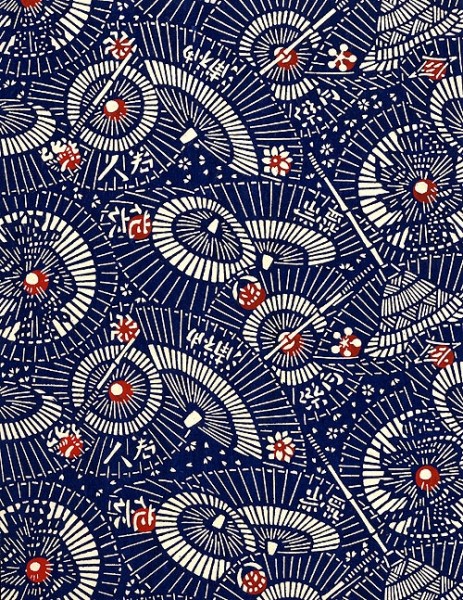
The vine - grapes and simply stylized plant script - is associated with the auspicious word "to continue."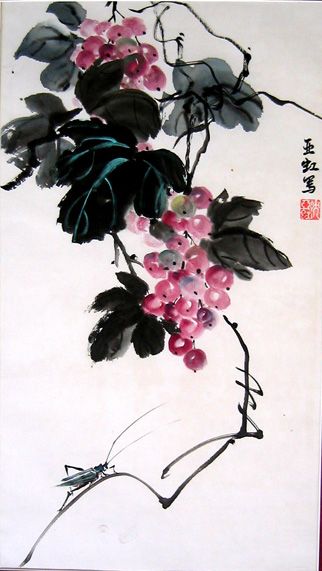

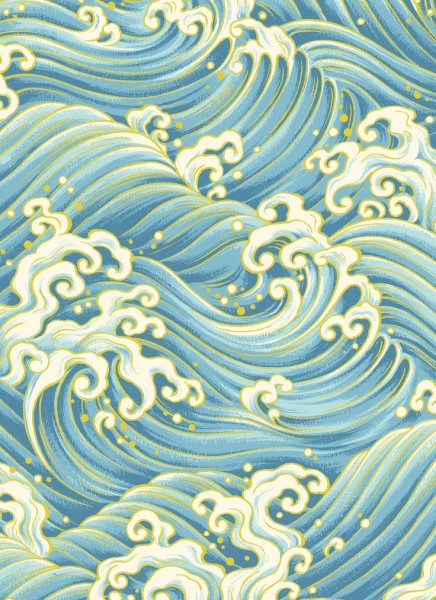
Water flow is associated with the word “flow, flow away,” which seems to speak of fragility, impermanence, when something is irretrievably gone. However, if the stream was depicted as smooth, calm, then it was like a wish for a “calmly flowing life,” and if the water was seething, the current was swift with waves rising on the surface, then this was already associated with a storm and disaster.![]()
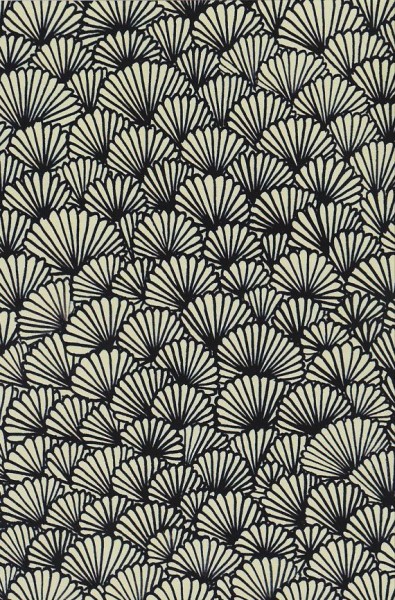
Sea bivalve shells - each shell is unique and only the valves of one shell can fit perfectly together and close tightly. Therefore, this ornamental motif received the lexical association “to match perfectly,” “to find the other half,” “harmony.”
One type of iris is called “shobu” in Japanese; the word “victory” sounds exactly the same, which allowed it to show off on the kimono of warriors.
The rose flower carries an unfavorable meaning, because... the thorns on its stems were associated with pain, which was much more important than the beauty and aroma of the flower itself.
In addition, the ornament may have favorable or unfavorable composition.
Yes, yesIf there are no buds on the branch or there is no free space in front of the bud where a flower could open, then this means that the plant has no future.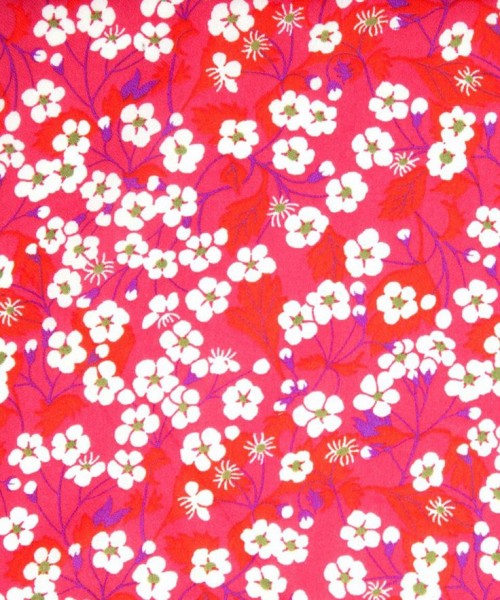
The number five has good value. There is an expression “Go-en ga aru”, the sound of which corresponds to two semantic contexts: “To have five yen” and “to have good luck”.
The word "en" also means "circle". Therefore, if there are five identical objects or five circles in the ornament, then this is considered a good sign.
Natural and plant codes
are important not only for the formation of subject topics, but as codes with the help of which the “essential features or the main “idea of the subject” are determined. This role of natural codes is determined by the fact that in the Far Eastern tradition “the measure of things was not man, but nature.”
So, for example, the essence of willow is in its flexibility, but in the rhythms weeping willow can depict the body of a young woman, so this pattern was often used in women's clothing.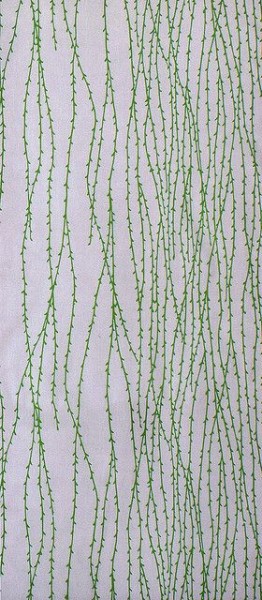

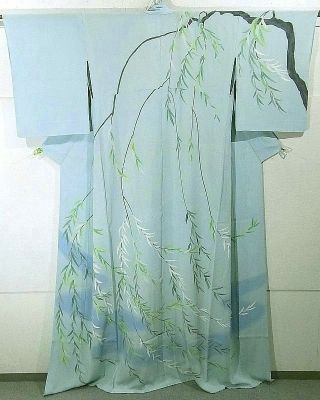
In Hokusai’s “Woman with a Book,” the woman’s figure is likened to an open shell, and the complex pattern of her clothes resembles the veins of plants and willow branches.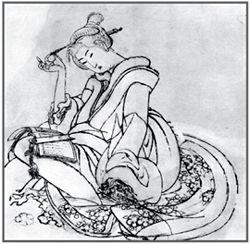
The essence of the crane and heron is in flight, accordingly the proportions of their bodies lengthen. Besides,the crane is considered lucky symbol, personifying love of freedom, loyalty, vigilance. In spring it symbolizes the return of warmth, in autumn it warns that winter is just around the corner. Meeting cranes is always a joyful event, but they are seen off with sadness.Tantyozuru - red-headed red-crowned crane- has been since ancient times an integral attribute Japanese culture, symbolizing longevity and prosperity. Cranes as an image and theme are found in almost all types of traditional Japanese arts. The Japanese have a popular saying and wish: “A crane lives a thousand years, a turtle lives ten thousand years.” It was reduced to the names of these animals, pronounced as one word - tsurukame, which means a wish for a long life.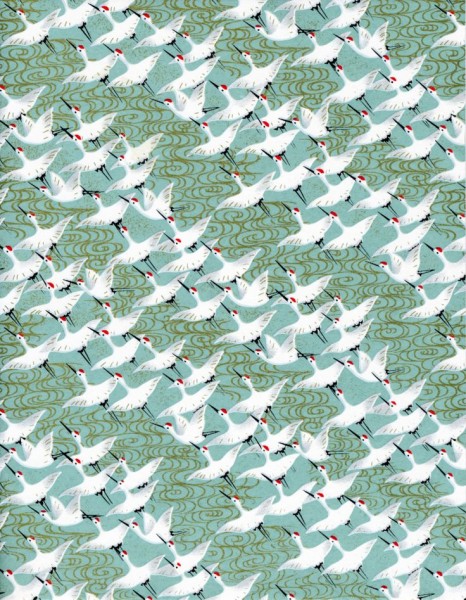
The essence of mountains is to be “supporting pillars that prevent the world from collapsing. Mountains were depicted on the clothes of clan heads, prominent politicians, sages and generals.
Mountain stamp.
Kimono - the road to the mountains. 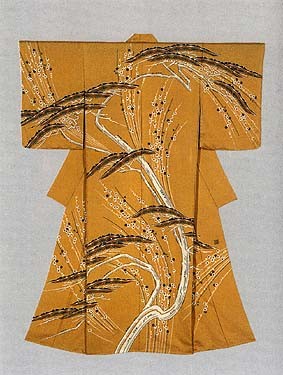
Principles seasonality of color and ornament took shape in the 9th - 14th centuries, when the Japanese decorative system was being formed. During this period, patterns acquired new meanings in accordance with Japanese traditions. Everyday objects, animals and plants surrounding a person began to be used as motifs - cherry blossoms, chrysanthemums, maples, sparrows, deer, huts, fences, etc. - which were depicted in a realistic manner. Each seasonal ornament had to anticipate the season to which it corresponded. It was considered tasteless to wear clothes, for example, with chrysanthemum patterns when they were already in full bloom.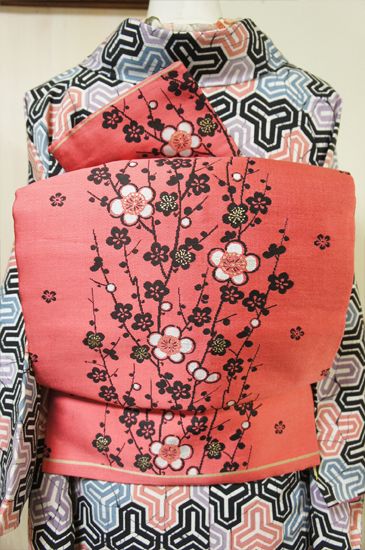
The easiest way to express the season is with any plant that blooms or remains in the most beautiful shape V certain time of the year.
Spring - plum, sakura, wisteria, seven spring herbs, peony, etc.
Summer - young maple, bamboo, irises, hydrangea, lily, carnation.
Autumn - bluebell, chrysanthemum, lespedeza, red maple leaves, fallen leaves.
Winter - snow, dry leaves and branches, daffodils, camellias, kerria, etc.
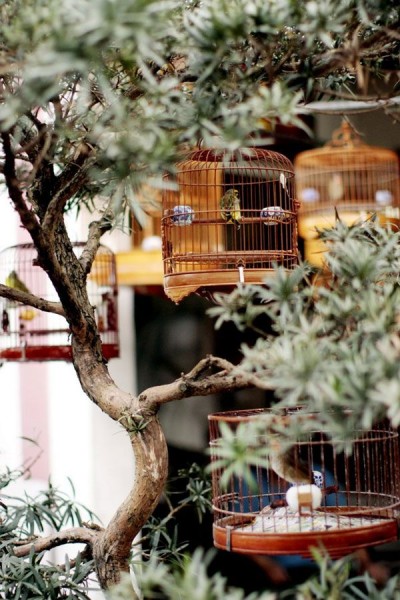
You can read more about the seasonality of color and corresponding plants here:The time of year could also be expressed by other ornaments and their combinations associated with any season. For example, insect cages are reminiscent of the time when crickets and cicadas sing - the end of summer.
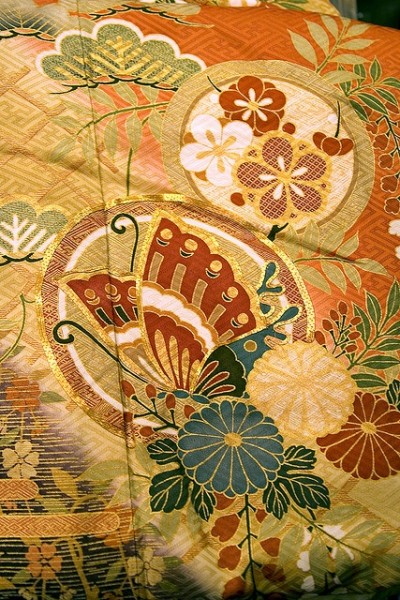
Flowers with butterflies represent the entire summer season.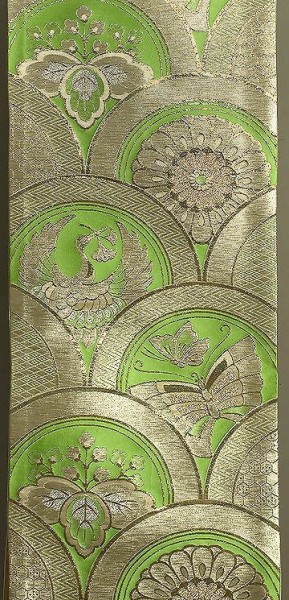
Horse harness and armor were associated with the celebration of boys and male strength.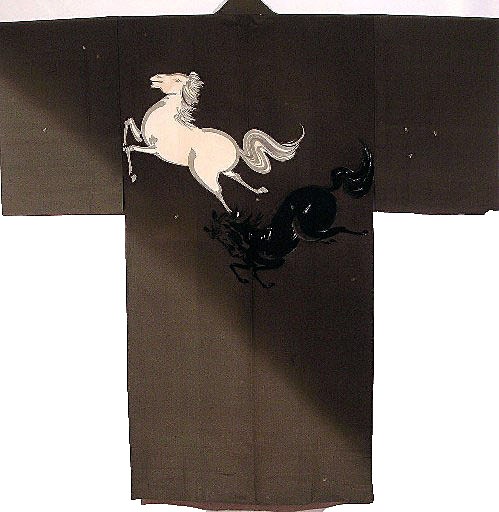
Combinations of ornaments are also important, V in which the plot conceived by the artist or client is formed. There are two main criteria in the use of patterns - seasonality and good wishes..
In the Edo era (17th-18th centuries), printed catalogs of kimono ornaments appeared - hinagata-bon, which replaced traditional books orders, where each order was described in detail according to the customer. Hinagata books and color prints became the first fashion magazines in Japan, on the basis of which city residents placed orders for clothing.
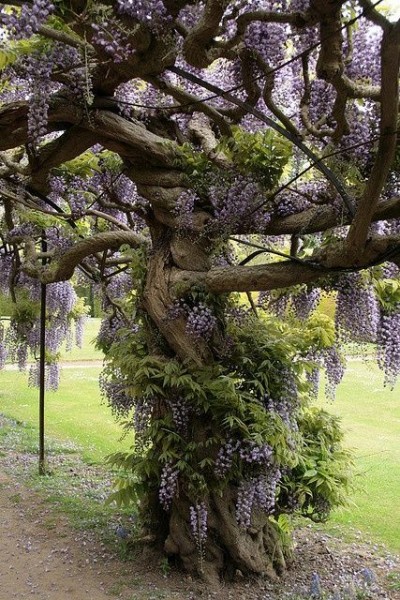
1. Wisteria is weaving on an old Chinese pine tree covered with moss. Its numerous clusters of flowers descend from the branches.
Pine is an evergreen plant that symbolizes longevity. Fabrics for clothing were made from wisteria fibers, which was important at all times and was associated with prosperity. This ornament can be interpreted as “Prosperity until the end of time,” i.e. until the centuries-old pines grow moss.
2. The "sakudo" motif is a small piece of turf, shaped like a hanging bell. Soil, turf - this is the top fertile layer land where plants take root. If it was necessary to replant a plant, it was removed from the ground along with part of the soil. In Japan, flowers and a hare were depicted against the background of "sakudo". Therefore, later this ornament also became known as “hare flowers.” According to legend, a hare and a frog on the moon are pounding an elixir in a mortar eternal youth. Horsetail was used to polish bronze mirrors. And the mirror, in turn, was associated with the lunar disk. Therefore, the combination of images of a hare and horsetail reminded the viewer of ancient legend. Sometimes, instead of a hare, only the “sakudo” motif, which was associated with this animal, was depicted.