Hand knitting hats for beginners description. Hats, berets, and other headwear
The secret of knitting a hat
Knitting is a painstaking process that requires patience, attention, and counting. After all, it is also important for us that the thing we perform is of impeccable execution. We don’t need the curly, careless, sloppy ones, it’s better not to start.
will be able to complete any set of headdress and scarf in 8-10 hours. Some people will need a little more time, but I think that in a couple of weekends, any of you can be congratulated on a new thing.
Model descriptions are usually designed for sizes 55-57. If you need a larger or smaller hat, the yarn you have chosen does not match the parameters of the yarn used in the model, or you have particular “knitting style” (tight or loose knitting), the knitting patterns given will need to be adjusted.
Typically, crocheting a headdress starts from the top of the head. To knit one headdress, I use tools of 2-3 sizes in order to tighten or loosen the knitting in some parts.
Before you start knitting, tie control sample main pattern (10-15 columns), count the number of columns for your head size. If the quantity does not match the knitting pattern in the main part, recalculate the pattern or use the little tricks described below.
If you knit a hat
Then after 6-9 rows the knitting should smoothly round, imitating the sector of the ball. You can attach the resulting “crown” to your head; it should lie flat, repeating the shape of the head.
If your knitting comes in waves, it means you are knitting too loosely. Unravel and start over, changing the hook to half the number smaller.
If the knitted “top” is rounded too early (small), you will also have to start over, changing the hook to half the number larger.
If more than a third is already knitted and it seems to you that the knitting is small in size, change the hook to half a size larger (it is no longer necessary to unravel). If connected part hats are too big, continue crocheting half a size smaller.
If it fits takes
That knitting is in the first part a bottom, a flat circle with a diameter of 25-30 cm, so the correctness of knitting is checked by placing it on a flat surface (a table, for example). The second part of the knitting is the walls, 3-10 cm, even, without additions. The third part, 2-4 cm - decreases. And the last one is the band, 1-10 cm. If the band turns out to be tight or too loose, change the tool.
Knitting a headdress with knitting needles usually starts from the bottom. Recommendations for knitting are similar.
Other subtleties.
An additional technique for reducing the size of a product is a stitch of loops, crocheted along the front or back side of the product.
I would also like to pay attention to the topic of “tails” that remain at the beginning and end of knitting and when changing threads. At the end of the work, all these remains should be trimmed to 3-4 cm and hidden inside the knitting. To do this, it is best to use a loop lifter tool, if you have one, or a thin lace hook.
When knitting scarves, change threads at the edge of the row. If you sew jewelry with a needle and thread, remove the beginning and end of the thread immediately at the beginning and end of the work.
Finishing
This is the best part. The connected product is only a form. It is decoration that fills a thing with content and life. Here your rich imagination should work to its fullest. At this stage, taste or bad taste, style or consumer goods, pattern or individuality are revealed.
Embroidery
can be classified as complex finishing. Not every needlewoman can handle such finishing on knitwear. Three-dimensional rococo embroidery, satin stitch, and cross stitch are also suitable. Over the entire surface or in spots. As a material for embroidery, you can use similar yarn, metallized thread (Lurex “silver”, “gold”), decorative yarn “grass”, “boucle”, other, contrasting or matching yarn.
You can use the method
pulling the threadThe decorative thread is pulled with simple stitches through the knitting holes: along, across, in a spiral, in the form geometric shapes. Finishing may be
stitchfrom loops, crocheted along the front side of the cap, also from any threads and in the form of any shapes.
Absolutely any jewelry is suitable for decoration: fashionable today
sequins, beads, beads, rhinestonessewn on with a needle and thin strong thread. Plastic buttons and heirloom diamonds will look especially good!
The decoration of the headdress can be
cords, straps, chains, ribbons, buckles,attached in several places. Finally, you can simply attach brooches, pins, or jewelry with clips. You can use several types of decoration in the product, for example: embroidery and beads, sequins and beads, stitching and beads... The main thing is not to overdo it, otherwise you will end up with a vinaigrette on your head instead of a hat.
Knitting hats and berets by knitting or crocheting is no longer considered a relic of the post-Soviet past, but on the contrary – fashionable and interesting hobby, thanks to which you can knit beautiful and warm accessories for yourself and your loved ones.
I bring to your attention the most modern models knitted hats, berets, headbands for women, made by knitting and crocheting. All knitting patterns for hats and berets are presented in Russian with detailed text explanations for the patterns.
I wish you easy loops!
If in previous seasons everyone dreamed of a sweater with deer, then this year attention will switch to a hat with deer. In general, the design of a deer on a hat focuses attention on winter season, in which this hat is usually worn. This hat will go perfectly with winter jackets, parks and even classic coat. Important …
09.07.2014
Hats with a voluminous pattern - perhaps best find designers of the fashion world. They are knitted with bulky threads, or regular threads in several folds with knitting needles large sizes. Hats of this style always look very stylish, but there is a small nuance. Such hats are usually worn by younger girls. Combine this hat with a trumpet scarf...
12.02.2014
This is a small hat, knitted in the round using stocking stitch and a butterfly pattern. Use plain or melange yarn bright colors. Size: adult (approx. 54 cm in girth) Materials: yarn with a weight/length ratio of 200 g, 100 m. Video master class on knitting the “Butterfly” pattern for a hat can be viewed HERE Tools: 4.5mm circular knitting needles 3.75mm ...
11.02.2014
If you are a supporter classic models hats, we recommend paying attention to two models of these knitted hats. The first hat has a cuff with a classic elastic band, and on the second hat the braids start from the very edge. The braids are not difficult to knit: just follow the pattern and description below. Patterns and descriptions of knitting hats:
20.01.2014 ,
Winter has fully entered into its domain, reminding us of its legal rights with real Epiphany frosts. It's time to get out the warm hats, scarves and mittens to properly enjoy the beautiful winter days on fresh air. If you haven’t had time to buy or knit yourself a fashionable hat, we suggest you pay attention to the “Snow-White…
13.12.2013
Winter is the time for knitted scarves, and to diversify your wardrobe with stylish and original things, you don’t have to spend a lot of money on it. We bring to your attention an interesting model of a scarf with a flower, which is secured with a decorative brooch or pin. You can be sure that in such a scarf you will not go unnoticed! Knitting description: Cast on...
12.12.2013
In that fashion season Braids are at the peak of popularity, and if you don’t already have a hat with braids, urgently fill this gap in your winter accessories! We bring to your attention the original model knitted hat knitting with voluminous braids, which will be relevant for more than one season. Pattern and description of knitting a hat.
Usually berets are knitted starting from the crown, but you can knit them in the reverse order. In this tutorial you will learn how to crochet a cute beret with an elastic band, which is often seen on hats. Also adding zest to this beret model are the lines connecting at the top of the head.

This beret is easy to knit. In addition, knitting does not take much time. Before you start knitting, remember how to crochet single crochets, double crochets, connecting stitches (they are also called half-stitches) and volumetric stitches.
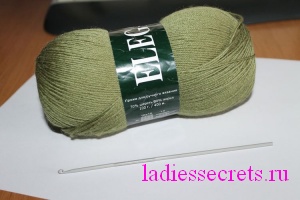
- a skein of fine yarn (this master class uses Elegant marsh-colored yarn)
- hook 2.5
1. We knit 120 rows with a width of 8 loops using single crochets.
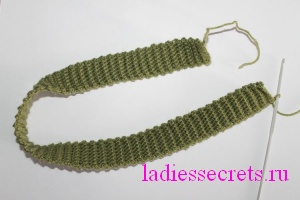
2. Connect the ends of the knitting with half-columns.
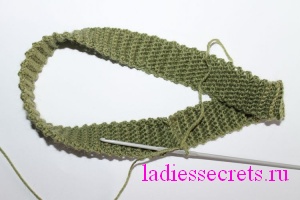
3. We knit one row along the edge with single crochets so that there are 3 loops per two vertical rows. The result should be 180 loops.
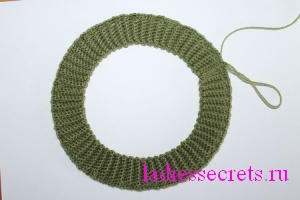
4. We knit the next rows with single crochets. Having closed the previous row, we collect 3 air loops. We knit 14 double crochets (including the chain stitch at the beginning of the row). Through the 15th loop we knit two volumetric stitches. We knit this way until the end of the row, making additional loops every 14 double crochets. We close the row with a half-column. We cast on 3 air loops and knit the next row in the same way as the previous one.

Add 12 stitches to each row. We knit only 3-4 rows with additional loops.
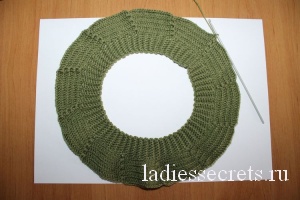
5. When the diameter of the outer circle is 21-23 cm, we proceed to knitting 4 rows without additional loops. Don’t forget to knit volumetric stitches every 17 (if you previously knitted 3 rows with double crochets) or 18 (if you knitted 4 double crochets) loops.
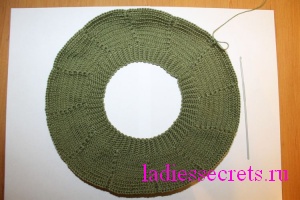
6. Now in each row we begin to decrease 12 loops. We knit the first row with decreases: we make 2 chain stitches and knit 17 double crochets (if you knitted 4 rows with additions, if 3, then we knit 16 chain stitches) including a chain stitch. On the 18th and 19th loops we make a decrease, knitting three-dimensional columns with a common top through them. We knit this way until the end of the row, then we connect the row with a half-column, grabbing the first loop of the new row, and we knit the next rows in the same way.


