Knitting density. How to knit a reference pattern
Briefly, for general development.Since 1965, the entire country of the USSR began to switch to new system conditional determination of yarn thickness.
To the TEX system (from the word TEXTILE). This is the word memorization version.
In general, the definition of TEX (from the Latin texo - weave, weave).
The thickness of the yarn is officially characterized by linear density.
The linear density of yarn is determined in the TEX system (tex), by mass in grams, this is the weight of one kilometer of thread.
What is tex yarn
TEX– a unit of linear density (gram/kilometer) used to measure the thickness of fibers and threads. Tex determines the weight of one kilometer of thread.
Formula: 1000/Nm=texFor example:
Tex (tex) = 1000*2 / 32 = 62 (or 31*2)
31*2 Tex (tex) means that the yarn consists of two twisted threads, and 1 km of each weighs 31g.
Thus, TEX shows the mass in grams of one kilometer of yarn.
What is metric number No. 32/2.
But we are interested metric number yarn for machine knitting № 32/2.
He's the one (metric yarn number) characterizes the length of the thread (m), the weight of which is 1 gram,
and also shows the number of single threads from which this yarn is twisted.
For example, for yarn No. 32/2:
32 is the length of a single thread whose weight is 1 g.
2 is the number of single threads twisted together.
The number 32/2 means that 1 gram of single thread is 32 meters long, but because... the yarn is twisted from two threads, it turns out 16 m per 1 g (or 1600 m / 100 g). The higher the number, the thinner and lighter the thread.
ATTENTION!In the lessons, all products are knitted from machine knitting yarn No. 32/2.
All weave patterns discussed in the lessons are knitted from this yarn.
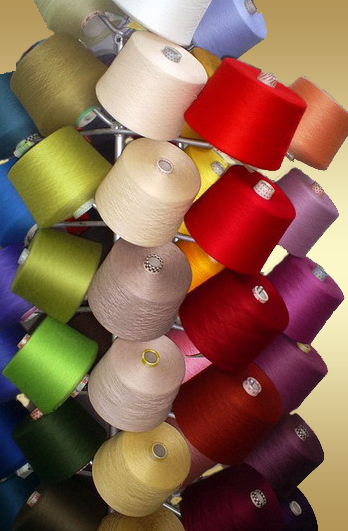
The yarn is sold in specialized stores and wound on a cone.
A cone with yarn wound around it is called a “bobbin”.
P.S. All experiments with other (non-machine knitting) yarn will be marked with the “Impossible is possible” label.
Yarn No. 32/2
If we take one thread of this yarn and untwist it, we will see that it consists of two threads.
And if we examine these two threads under a microscope, we will see that each thread also consists of 32 threads!
But, we count these 64 threads (32x2) as one addition of yarn!
 Yarn is a very thin, strong, long thread that is obtained by twisting short fibers together.
Yarn for machine knitting and yarn for knitting have different twist. The twist of the yarn is determined by the number of twists per 1 meter of thread length. The number of twists depends on the type, quality of the fiber, thickness and appointments yarn.
The thicker the yarn, all other things being equal, the less torsion there is per 1 meter of length.
Twisting changes the properties of the yarn.
As the twist increases, the yarn becomes more compact and stiffer, more elastic, the diameter decreases,
The friction between the fibers increases, the fibers in the yarn are fixed more firmly, as a result of which the strength of the yarn increases.
Yarn No. 32/2 - “mobile” yarn.
For example.
For the product we need yarn in three folds, and in order to beautifully sew a collar, we need thread in two folds.
If you play with the number of folds, you can achieve amazing effects in knitting.
Let's repeat and remember:TEX- this is a unit linear density(gram/kilometer) used to measure thickness fibers and threads.
A metric number No. 32/2 characterizes thread length(m), the weight of which is 1 gram,
and also shows number of single threads, from which this yarn is spun.
"Yarn number" is the number of meters of yarn in 1 gram.
The skein label indicates the yardage of yarn in 100 grams.
There are 1600 meters in 100 grams.
The ratio of yarn weight to length is determined by the "yarn number" and the number of threads.
For example, the manufacturer writes: “yarn 32/2”.
This means the single yarn number is 32.
Since there are two threads, the “total” number = 32 / 2 = 16
X = 16 x 1000 = 16000 meters per 1 kg.
or 1600 meters in 100 grams.
Do you want to see a kilometer of yarn No. 32/2 in volume?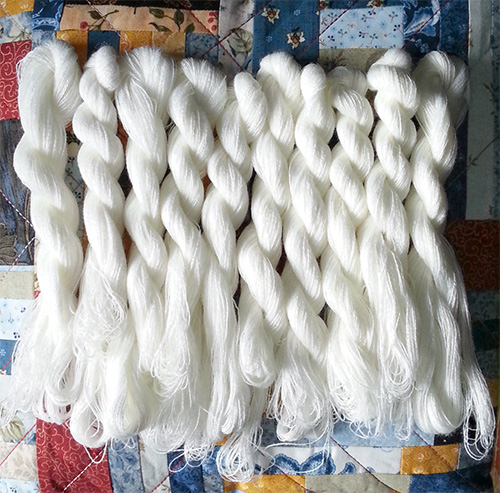 kilometer of yarn No. 32/2
This amount of yarn is enough for pompoms.
→ Knitting: how to work with a control sample and why it is needed at all
Opening any magazine or book dedicated to knitting, you will see not only photographs, diagrams and descriptions of knitting patterns, but also special instructions for choosing yarn, knitting needles and knitting density. To avoid having to redo the product several times, you need to carefully study these recommendations and knit a control sample.
Let's understand the terminology
Before we get into the details, let's understand some terminology that will help you better understand how to work with a test sample. There are few terms:
- The control sample is a small fragment knitted with the main pattern using the yarn and knitting needles with which you plan to knit the selected model. Usually the control sample does not exceed the size of 10x10 cm. Although here, depending on the situation, you can knit the sample by casting on 10 loops and knitting 10 rows. And the size in centimeters will depend on the thickness of the knitting needles and threads. And you can knit more tightly or, on the contrary, loosely, without tightening the loops too much. Usually, the descriptions of models immediately indicate the number of yarn and knitting needles.
- The main pattern is the pattern used to knit most of products (main fabric).
- Knitting density is a parameter showing the number of loops in a row and rows in height.
- Rapport is a fragment of a knitted pattern repeated horizontally.
- Symmetry loops - one or more loops that complete a pattern, or a repeat of a pattern in such a way that the pattern becomes symmetrical.
- Edge stitches are the first and last stitches of a knitted fabric. The first loop is not knitted, but simply transferred from the left knitting needle to the right one, and the last one is always knitted with a purl loop. Edge loops do not count towards the main pattern stitches unless otherwise stated in the model instructions.
Try to remember these terms, as you will often encounter them, not only in this article, but also in any sources devoted to knitting.
How to knit a reference pattern
Having decided on the yarn and knitting needles, carefully study the pattern and understand all the abbreviations and symbols to the model diagram. Then cast on 25-30 loops on the knitting needles or use the formula below to calculate the number of loops required for the control sample:
all loops of the pattern (or several repeats to make about 22-25 loops) + symmetry loops (if any) + 2 edge loops.
Then knit the control sample according to the pattern given for the model to a height of 12-15 cm. Close the loops and break the thread. The control sample is ready.
How to calculate knitting density using a control sample
Before starting calculations, the control sample should be steamed so that the knitted fabric acquires final form. To do this, place the sample on a soft surface face down, carefully straighten it and hold the iron with hot steam over it for 30-40 seconds, almost closely, but still without touching.
After steaming the sample, measure its width using a ruler. Then divide the number of loops that you cast on for knitting the sample by the value obtained when measuring the width of the sample - you received a value that shows how many loops fit into 1 cm of knitted fabric in width.
Example: number of control stitches cast on = 22 stitches, sample width = 16.2 cm.
22: 16,2 = 1,358…
1.358 is the number of loops that fit into 1 cm of knitted fabric in width.
If the number is a fraction, round it to two decimal places (here = 13.6). It remains to multiply the rounded number by 10, and you will get the number of loops in 10 cm of knitted fabric in width: 1.36 x 10 = 13.6 loops.
To calculate the knitting density by height, measure the control sample vertically with a ruler and count the number of edge loops. Divide the number of edge loops by the number of centimeters in height in the sample, and then divide the resulting number by two, since one edge loop falls on two rows.
Example: control sample height = 15 cm, number of edge loops = 18.
0.6 is the number of loops that fit into 1 cm of knitted fabric in height.
Now we multiply 0.6 by 10 and get the number of loops in 10 cm of knitted fabric in height:
0.6: 10 = 6 loops.
How to match the knitting density to the instructions for the chosen model
So, you have finished working with the control sample and made the necessary calculations. All that remains is to correlate the calculation results with the instructions for knitting density to the model that you plan to knit.
If the values coincide or are very close to those given in the model description, then you can safely move on to knitting! But what if the calculation results differ greatly from those indicated in the description? There are two solutions:
- Try using larger or smaller needles and knitting with them new sample and count the loops. There are many chances that the results will be closer to what you need.
- Knit the pattern as described in a different size than the one you originally planned. Calculate how many stitches at your knitting density you need to cast on to get the required width of the fabric, and knit according to the description of the size that most closely matches your calculations.
Knitting a control sample is an important stage of working on a product, especially if you are going to knit a large item. And no matter how much you would like to start knitting a sweater, jacket or hat, it is better to spend a couple of hours calculating the knitting density than to then spend days or even weeks knitting a failed item.
Knowing how to calculate knitting density is just as important as being able to cast on stitches correctly. Each person has their own knitting density, and that is why it is so important to knit control samples and make further calculations on them. If the knitting is initially loose, then a beautiful pattern will never work out, since the knitting density must be completely different to complete it. The same applies to the size of the figure. By accurately calculating the required number of loops, you can knit something that matches your figure. If the knitting is too loose or too tight, the product will not be wearable and will have to be re-knitted.
Before you start making the test sample, finally decide on the pattern, knitting needles and yarn. The main point in relation to the knitting density is that the knitting needles when knitting the parts of the product must be the same as when knitting the control sample, otherwise the patterns will turn out different. Next, measure your figure and write down the exact dimensions. This will help you knit the item that is right for you. Using the sample, you can find out not only the required number of loops, but also see what the selected pattern will look like.
When calculating the required number of loops for a particular pattern, knit a small square fabric measuring 15 x 15 cm. After this, pin it with needles to some soft bedding and iron it so that it becomes smooth and soft. Then hold the ruler upright to count the number of rows. This calculation is especially important when knitting openwork patterns. The number of rows on the sample must exactly match the number of loops given in the instructions for knitting the pattern you have chosen.
After you have counted the number of rows, you need to find out the number of loops in 10 cm. In the presented photo there are 20 loops in 10 cm. Having received the number of loops per 1 cm (2 loops), you can make the appropriate calculations. So, when knitting a men's jumper, first measure the volume of the hips and divide the value in half. For example, the volume is 110 cm, dividing in half, you get 55 cm. Multiply this number by the number of loops in 1 cm (2 loops). As a result, it turns out that to knit a jumper of sizes 50–52, you need to cast on 110 loops on the front half of the product. If knitting will be done with circular knitting needles, then you need to cast on loops according to volume, i.e. 220 loops. If the sample turns out to be too loose or too dense, then try changing the knitting needles to thinner or thicker ones, depending on the desired result.
Based on materials from Larisa Viktorovna Pushilina’s book “Knitting”


