Pattern of a leather sack bag with your own hands. DIY leather bag: patterns and photos for working with complex materials.
1 actual leather, or any other wear-resistant material (pieces of tapestry, jeans, raincoats, fur) lining material
2 tools: knives, scissors, scalpel, ruler, square, erasable marker, hole punching pliers, sewing machine, leather needles, Teflon foot
3 hard adhesive dublerin used for lambrequins of curtains or collars in men's shirts.
4 accessories: 2 half rings, 5 pcs., zipper at least 40 cm, zipper 18-20 cm for the lining pocket, threads contrasting with the skin and threads to match.
5 glue moment-crystal
In the article “Working with Leather,” I talked in detail about the tools I use and some of the working techniques, so I won’t go into detail here.
The bag pattern looks something like this:
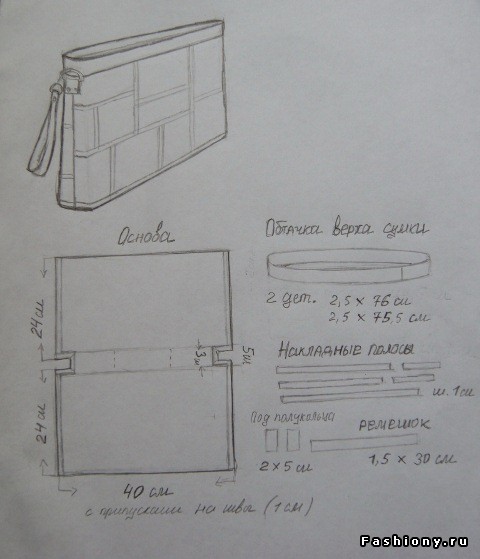
We make a template from newspaper. It is convenient to use newspaper because the direction of the lines makes it easier to achieve parallelism of the lines. It's even easier to use graph paper. We draw the template into rectangles as we please, but try not to adhere to symmetry.
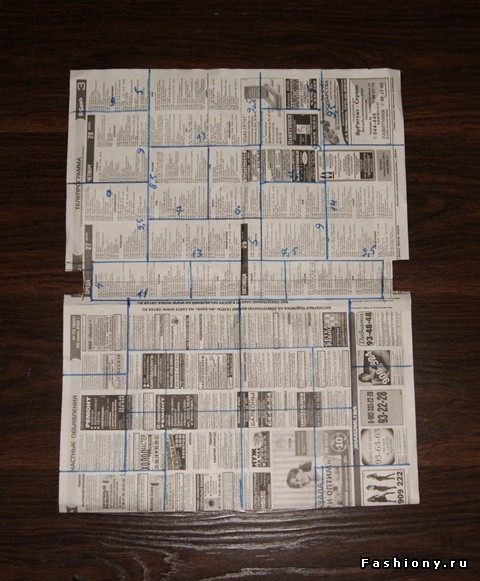
TIP: You can put tracing paper on the template and transfer all the lines onto it, then cut it into rectangles and use it as a pattern for cutting out rectangles from leather.
I used a different method, marked the dimensions on a template, and then built rectangles directly on the pieces of leather. One way or another, our task is to assemble a kind of puzzle on a template.
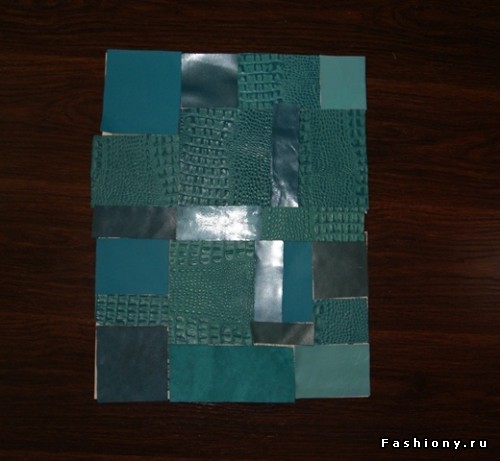
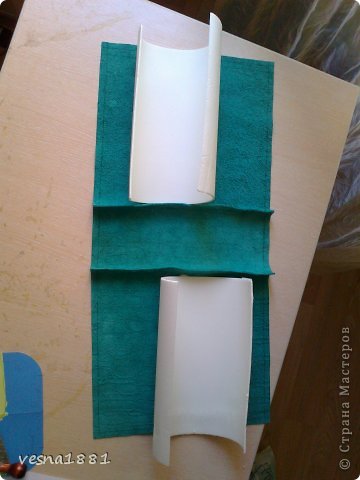
Then we cut strips of leather 1 cm wide, these strips will cover the joints of the rectangles. We also cut strips 2.5 cm wide for lining the top of the bag.

TIP: It is more convenient to cut leather on a piece of linoleum with an ordinary stationery knife along a metal ruler.
Since my pieces of leather were small, and for edging, for example, a strip 75 cm long is required, my edging turned out to be a composite of 3 strips. But the joints are almost invisible, to achieve this it is necessary to sand the jointed sections, then glue them together. In my previous publications there is a photo example of how to join sections and rough leather.
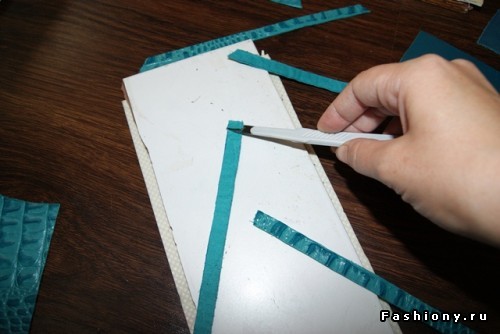
TIP: stock up on a disposable scalpel and removable blades for it, this will allow you to easily and effortlessly cut off excess thickness from the skin
Then we cover the joints of the rectangles with strips, gluing them on top. We use moment-crystal glue. We don’t glue the bottom of the bag yet.
TIP: in order to place the strips exactly in the middle of the joint, draw a line on one of the joined pieces at a distance of 0.5 cm from the edge and apply the strip to this line
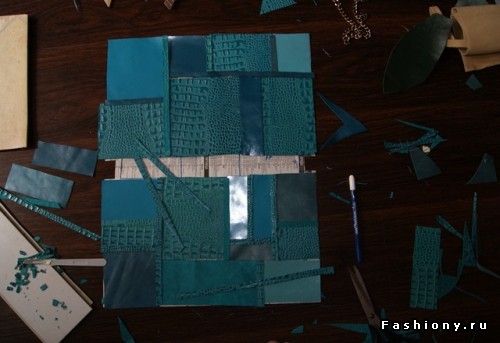
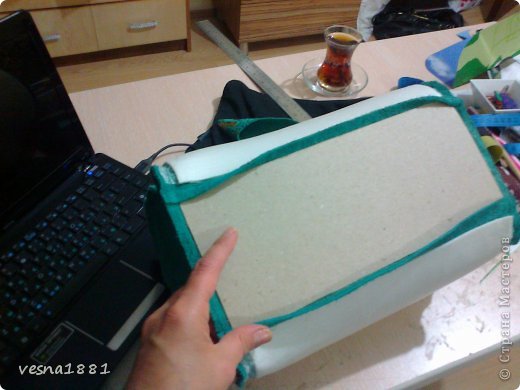
After gluing, the inside looks like this: (bottom)
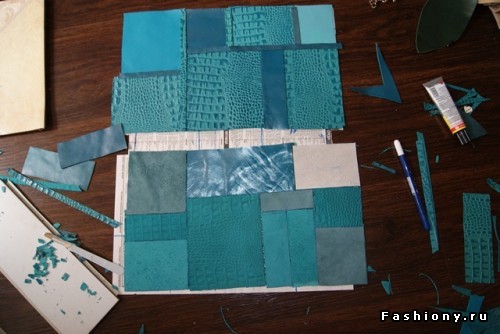
TIP: before putting our base under the machine, cut off the excess thickness of the leather on the wrong side in those places where the patch strip goes, this will later help us when assembling the bag itself.
Practicality has long ceased to be the main requirement that a woman’s bag must meet. The right accessory should not only be spacious, but also aesthetically pleasing. The ideal handbag should attract attention, while harmoniously combining with the rest of the outfit. Leather remains the most popular material for making bags, because things made from it are beautiful and easy to care for. However, prices for leather accessories They grow every day, but you always want to be stylish and attractive. That is why more and more fashionistas are asking the question of how to sew a leather bag; a DIY leather bag will look even better.
Leather is a little more difficult to work with than other materials. Leather is a dense and capricious raw material, which makes the sewing process labor-intensive. But the result obtained will far exceed all expectations, so the work is worth it. Let's try to take a closer look at the creation process and understand how to sew a bag with your own hands from leather or dermantine.
What might you need to create a bag?
The main thing to do before starting work is to evaluate the capabilities of your sewing machine. The device must be able to stitch through thick leather, sometimes folded into several layers. Special attention it is worth paying attention to the choice of needle , both in the machine and in ordinary darning. The needle must be sharp and strong, otherwise it may simply break during sewing.
For working with leather materials it is better to choose threads made of nylon, silk or nylon . Simple sewing threads will not work, because such seams will quickly come apart. When stitching individual parts It’s better to do two or three lines instead of one, this way you can eliminate the possibility of holes appearing.
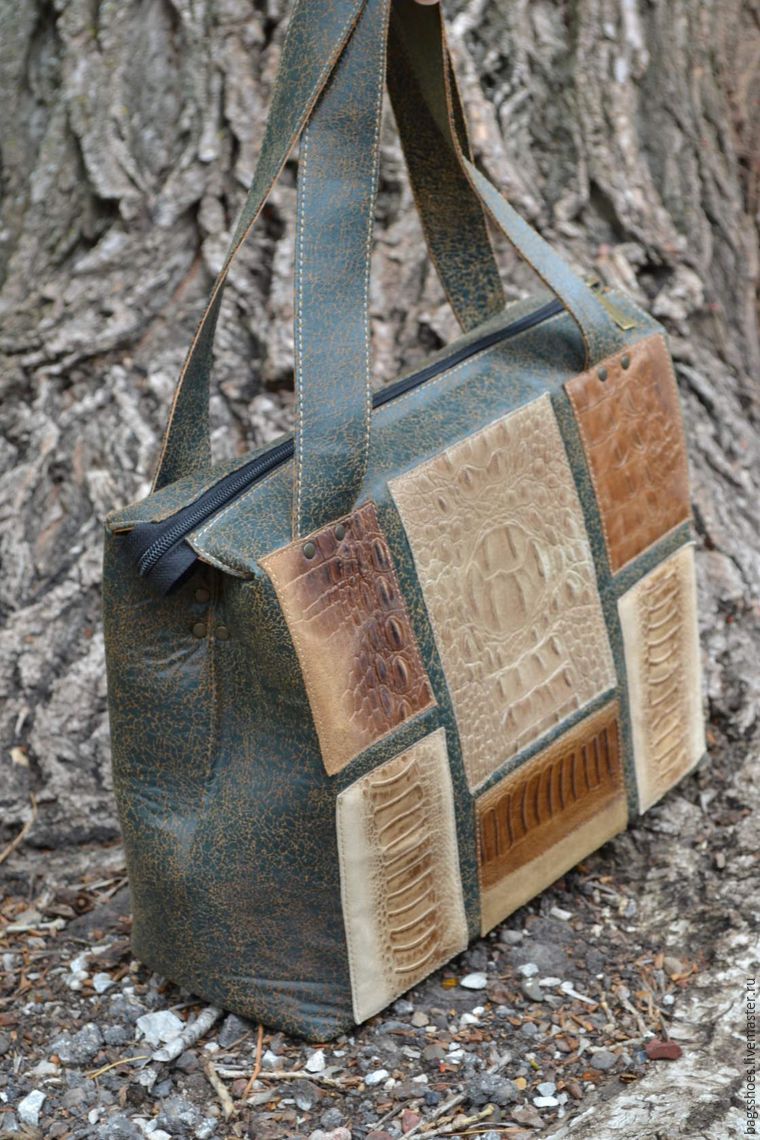
For the main part, it is better to take high-quality leather or dermantin, made as a whole cloth. But for some models it is used patchwork technique when many pieces of leather are sewn together before starting work different colors and sizes. You can also make original decorations from unnecessary scraps to decorate your bag. You should stock up on rivets, zippers, braid and chains from a sewing accessories store. If desired, the bag can be decorated with rhinestones, beads and sequins.
You definitely need to prepare paper for making a pattern; you will need a measuring tape, scissors, pins and a knife for cutting leather.
Manufacturing process
Let's look at an example of making a leather bag self made. Execution principle different models the same, only the pattern of the leather bag will be different. Let's consider the simplest option, from which you can build on in the future. We draw a pattern on a regular newspaper or special paper according to the following scheme:

In the corners of the base we draw as follows if we want to achieve rounded edges.
The bottom of the bag is cut out exactly according to these details. Calculate the length using the formula: add its height to the length of the base and multiply by two. It is better to make indents for seams when transferring from paper to skin, adding one and a half to two centimeters around the perimeter.
To make the handles, you need to sew two rectangles, folding them in half. Do not forget about a reserve of three to four centimeters for sewing to the bag.
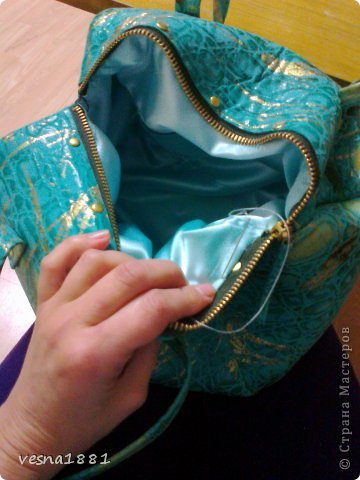
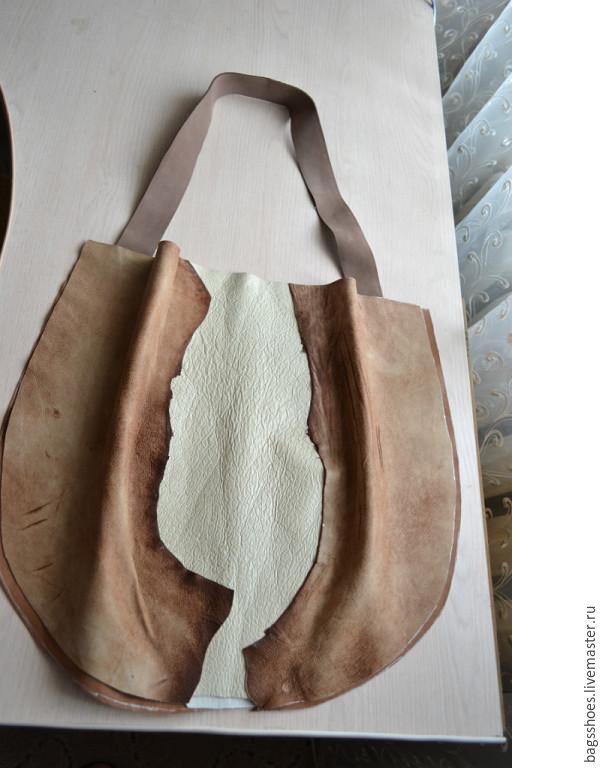
Using the same pattern we make the lining for the bag. Can be achieved interesting effect when used for lining material contrasting color, for example, as in the photo below.

Product assembly
Once the cutting is completed, you can proceed to assembly. It is necessary to assemble the product and pin it with pins. To make stitching easier, it is better to tap the folds with a hammer.

It is better to sew with special ribbed needles. After assembly, you can sew on the zippers and start decorating.

This way you can create a wide variety of models. It’s worth looking through fashion magazines, choosing the appropriate option and starting cutting.
Often to give the desired shape Thick cardboard or a special seal is sewn between the lining and the base.
With a little practice, you can easily reproduce any pattern yourself. When transferring to the skin, every millimeter should be carefully measured, otherwise final result it will turn out skewed.
Using a special sealant is convenient because an adhesive layer is already applied to it.
But an additional layer of thick cardboard should be attached to the bottom of the bag.
The seams from the inside must be carefully glued with glue to avoid fraying.
![]()
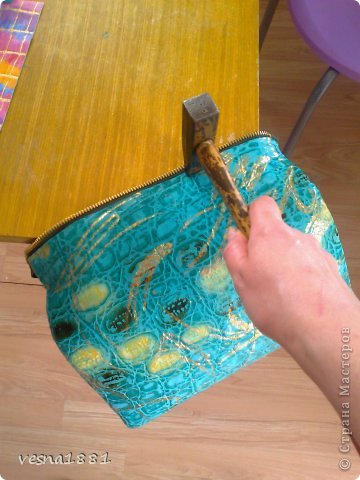
It is better to glue the zipper first and tap it with a hammer, and then stitch it.
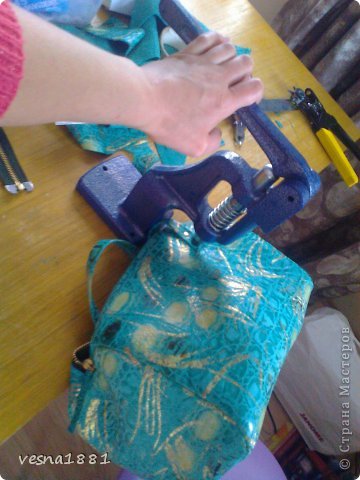
A special riveting device can greatly facilitate the work.
It is better to sew the lining by hand, otherwise unnecessary creases may appear on the skin.
Video on the topic of the article
A bunch of useful tips can be found in our video collection. After watching the videos, you can confidently start making bags. It’s always nice to create an original thing with your own hands!
Where to start?
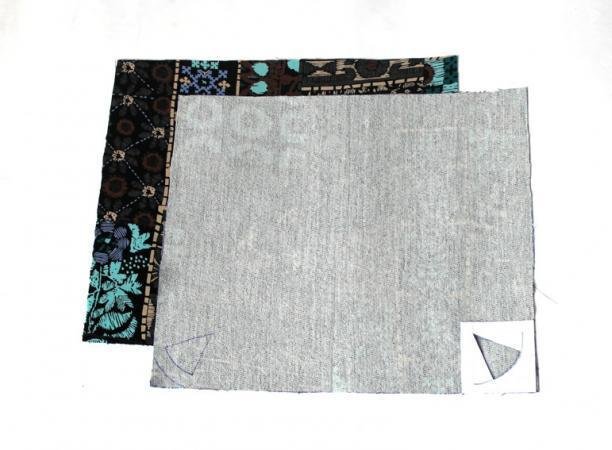
So, you got the idea to sew a leather bag. Where can I get the material? I'm at the very beginning creative path there were two options: a sadly hanging leather raincoat, which I would definitely never wear again, but it would be a pity to throw it away. And the second is to buy leather or trim. Don’t delude yourself that a super-duper will come colored leather in large pieces. Everything could be much more prosaic. 5 gk of black-brown pieces about the size of your palm. Don't get upset and don't despair! We simply change the direction of the vector towards our dream. Cut out a template from cardboard. We cut a huge mound (we use a silver handle that can be easily erased). We buy fabric that will serve as the basis for the bag, thick and non-stretch, or we use thin leather for the same purpose.
Material and aids
To work on a leather bag you will need:
- scissors (knife, if available);
- glue;
- silver handle;
- hammer;
- better nylon threads and a brush.
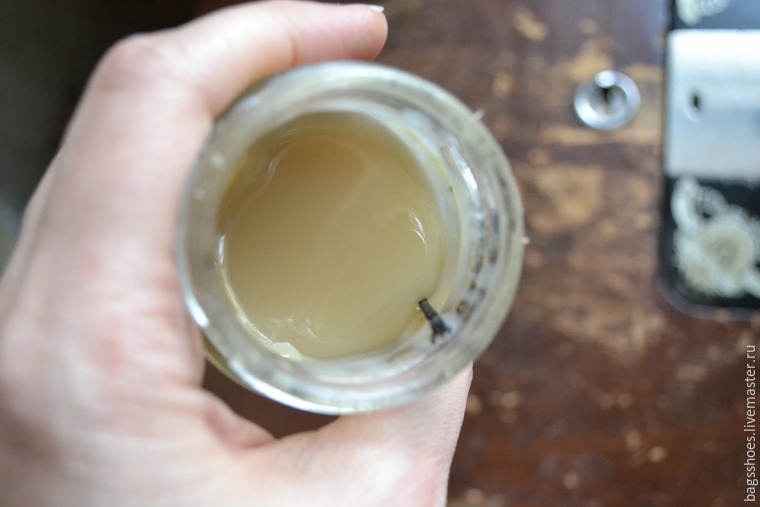
Glue is a must! Rubber or Moment. I will explain in detail why glue is used. Most people at home have a regular sewing machine with one moving teeth device and a fixed foot. If the part is not glued, it will simply move off during stitching. The skin does not like unnecessary punctures.
Where to buy thread, scissors and fabric, this is understandable. Rubber glue can be purchased at shoe repair stores. You can ask any shoemaker where he buys glue; they use it to glue the locks when replacing them. I’m writing all this in such detail, because 90% claim that they don’t have such stores in their city :) There are, you just don’t know about them :) This is what this glue looks like. It has only one drawback - it does not store for a long time, it dries out, but it is inexpensive.
How to make a pattern
Since this publication is mainly for beginners, I’ll tell you where I got the patterns from when I was new to this business.
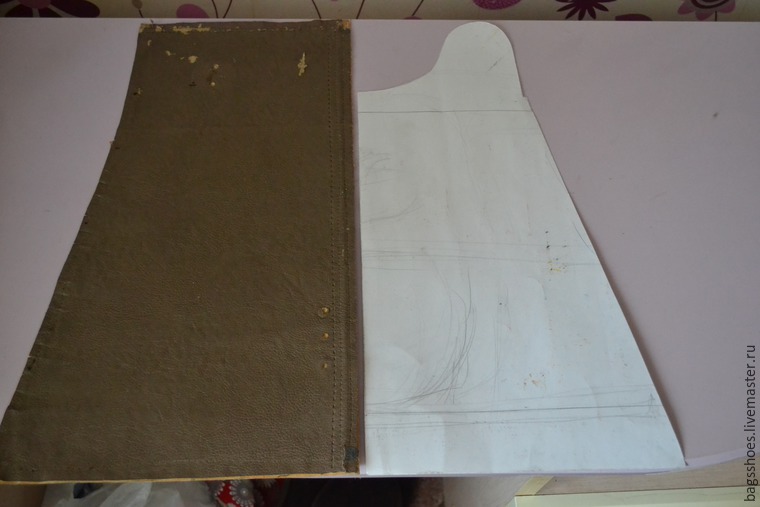
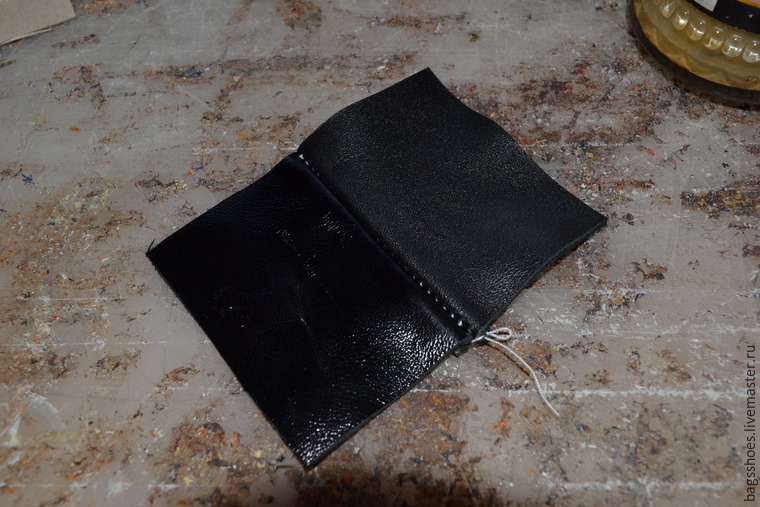
I tore open an old, beloved, but outdated bag. Little advice: if the bag consists of more than 5 parts, cut it in half, rip one half apart and glue it onto whatman paper. We align the details and make them symmetrical.
When the pattern is tight it is easier to cut. We leave the second half for clarity of the assembly. I started with simple patterns.
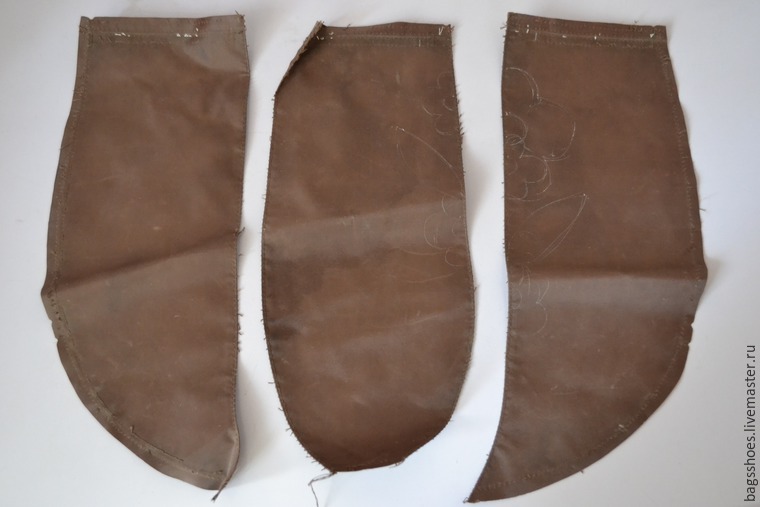
Despite its simplicity, even three details are an unplowed field for imagination.
![]()
![]()
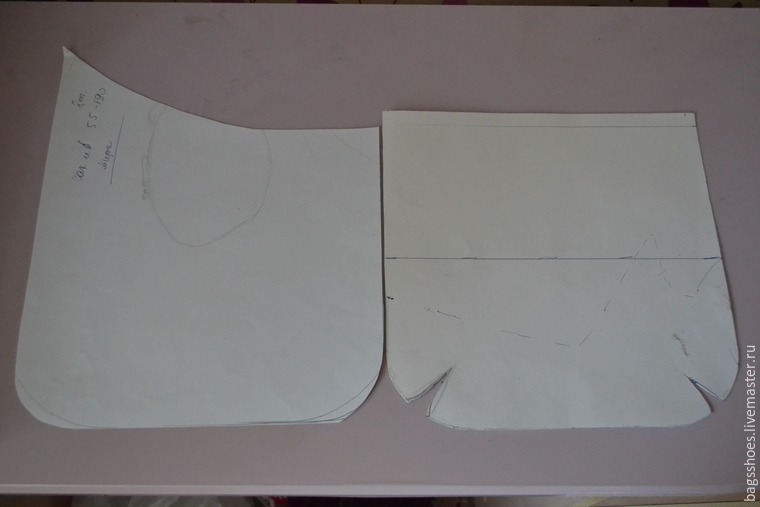
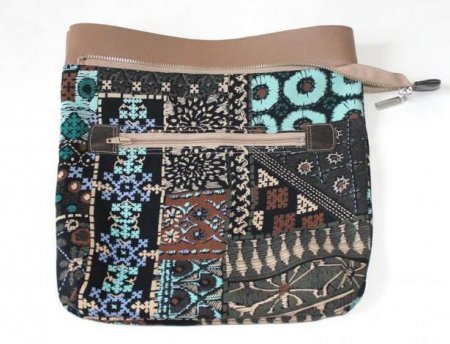
And another one simple pattern in the photo there is a pattern for a pocket bag, it is just a square measuring 26 by 26 cm, with rounded edges and grooves for volume. A small nuance: a sewn bag visually looks smaller. And even if it doesn’t have details for the sides and bottom, you can create them with darts.
The formula for this pattern is simple: the required size of the bag (for example, to fit A4 format) + 3 cm (for a zipper with a lining) + 0.8 cm for the fold, if any. Sides: to the desired size +1.5 -2 cm (this will be the side to create volume) +0.8 for the seam.
When you have a foundation, it's much easier to experiment. You can’t try on patterns from the Internet, you can’t figure it out, but here you can even figure it out for yourself :) I made a medium one from a large bag, decorating it with an eyelet for a handle. If you're making a new pattern, don't forget about seam allowances and folds!
If you have figured out the material, made a pattern, let's start assembling.
Assembling the bag
1) Before cutting all the parts, you need to iron them, if necessary. Preferably on a hard surface with a not very hot iron. There is a lot of information on this matter.
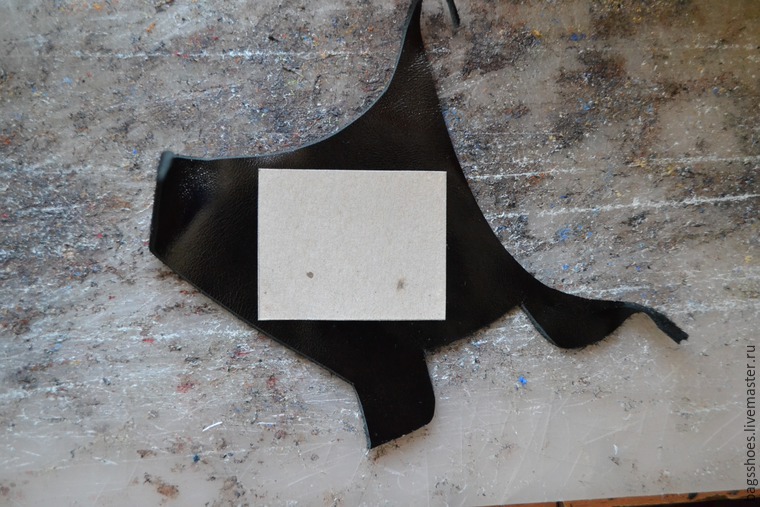
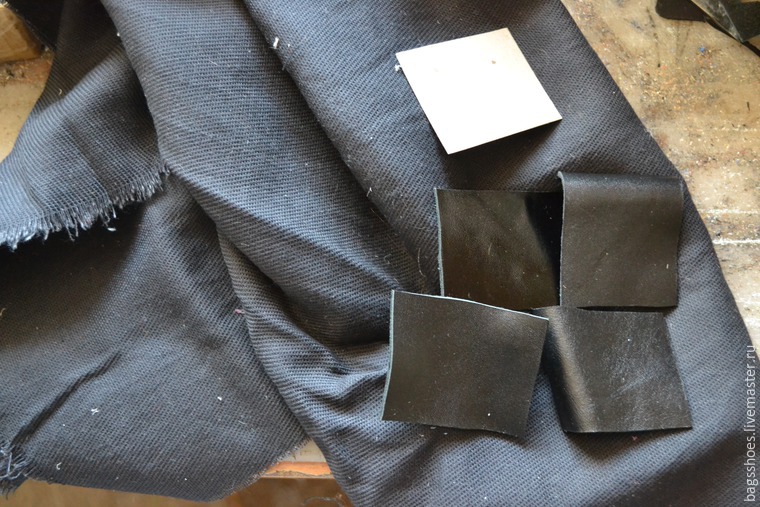
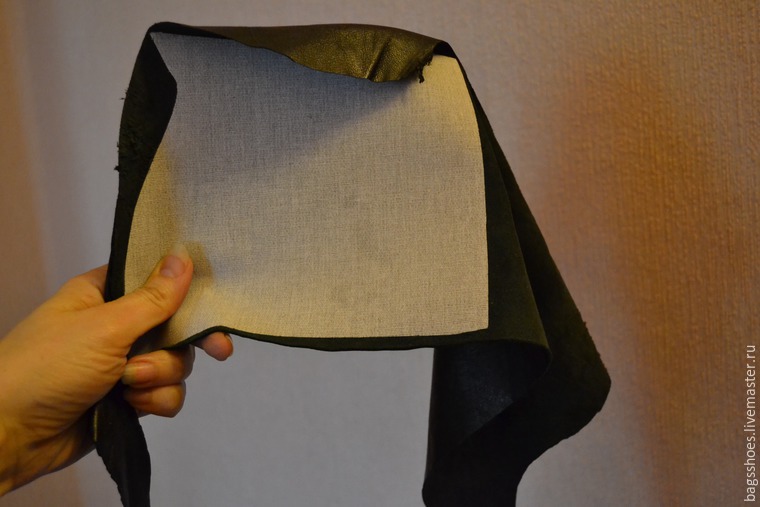
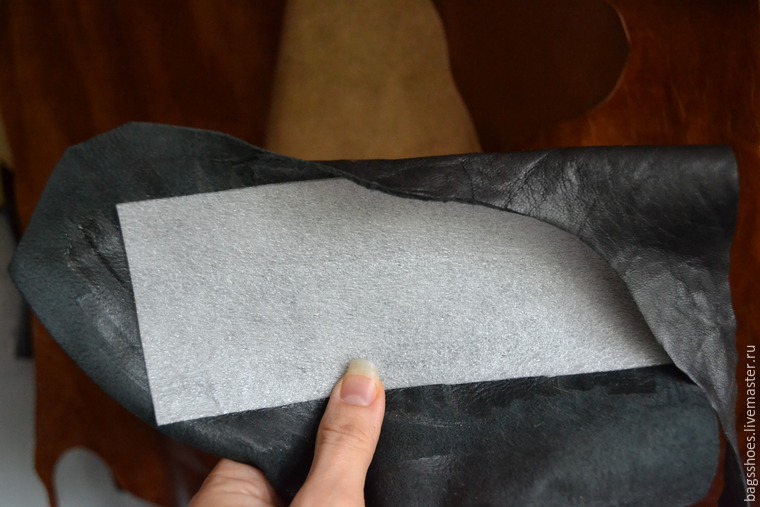
2) Duplicate. What is it for? And what to duplicate? I will not talk about special materials; we use what is available. It is not always necessary to duplicate the leather, but if you have sheepskin or pigskin, that is, it is thin and does not hold its shape, we will definitely duplicate it.
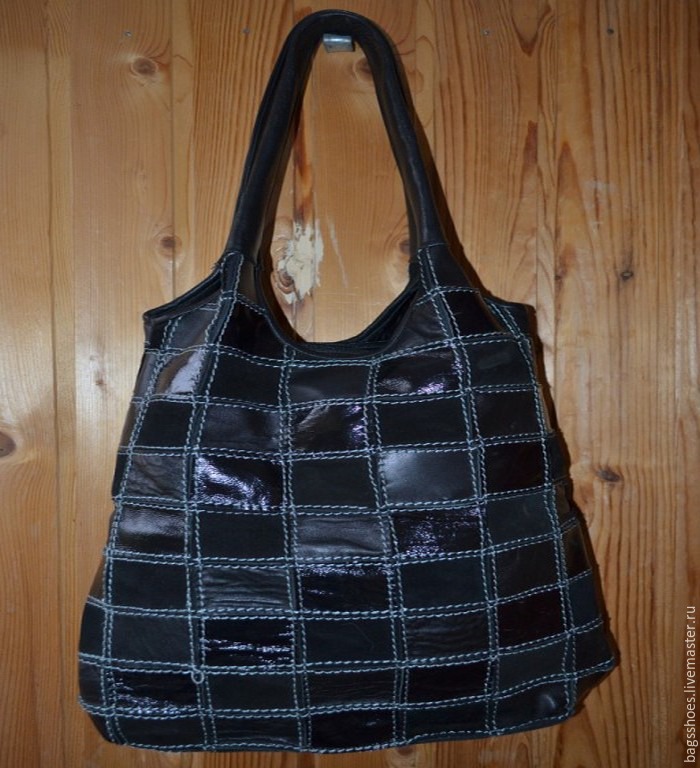
1) Non-woven fabric. Layer by layer we achieve the desired thickness. I then use all sorts of appliques, which I sew onto the duplicated part of the bag, thereby sewing on the interlining and it will never peel off. Cons - you can’t carry heavy things in such a bag, well, after all, we’re not going to carry potatoes in it. Bag on non-woven fabric in 7 layers with a sewn applique. The base is thin pigskin with a thickness of 0.4 mm, it is clear that without non-woven fabric the bag will not keep its shape.
2) Doublerin for curtains. This bag will be like on a frame. Minus - if the dublinin breaks, you can’t fix the crease on the bag; in general, you don’t need to fold the bag in half :) A nuance - the pattern of the dublirin should not fall under the tack seams, otherwise the seam will not be smoothed out.
3) Thermal insulation material for construction. The bags turn out to be simply weightless, very light. Here you will need the same rubber glue to duplicate. The bag can be wrinkled and folded, nothing will happen to it.
The only downside is that it doesn’t like weights and doesn’t keep its shape. More suitable for small bags such as clutches.

Handles and straps
The optimal width is 3 cm; we must duplicate the inside either with a sling, sewing leather onto it, or with regular tape, inserting it inside the handle between two layers of leather. It is necessary to glue everything, otherwise the handles will form bubbles.
Seam processing
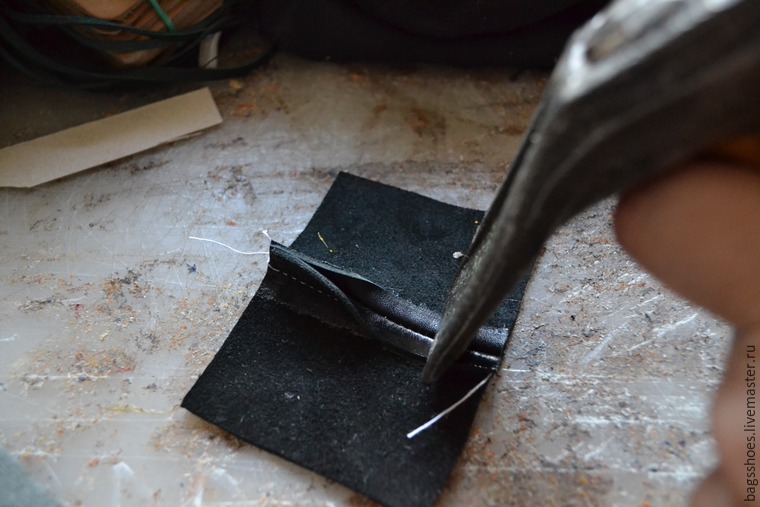
On a leather bag, the seams are processed with a hammer, this is a kind of iron. By the way, when connecting the parts, I glue them with rubber glue on the front side (you can’t glue velor and suede, you won’t rub off the glue) so that nothing moves anywhere during the stitching process. Then I coat the seam with glue from the inside out and smooth it with a hammer, the seam no longer bristles.
A few words about this tool: it’s good if it’s a shoe hammer with a round head, but you can also use a regular one. But carefully! One careless blow and you will make a hole in the skin.
 I deliberately do not focus on how to sew this or that bag, because when I embarked on this path of creativity, the available leather did not fit the patterns I found on the Internet, and the patterns were far from being the bags of my dreams. In general, the puzzles did not fit :)
So, it adapts what we have to what we want.
If there are small pieces available, we assemble the canvas; I wrote about this at the very beginning of my publication. To do this, glue the cut out parts onto leather or fabric and attach them. Then everything is according to your idea according to the pattern. And, of course, we decorate. There is no bad material. There's a new idea!
And one more thing - don’t be afraid of holes, imperfections and other imperfections, this is just the place where you need to make a belt, stitching or other decorative element. Any skin imperfection is a chance to create a masterpiece. This is what will make your bag unique! And remember - even the simplest leather bag is a hundred times cooler than any dermantin one.
Be patient, the bag will not sew together quickly. From one pattern you can sew many bags of different styles.
I hope I shared useful information and maybe someone found a solution to their problem in this article.
Don’t be afraid or intimidated by your unprofessionalism, try, experiment. A hobby that generates income is very nice :) Everything ingenious is simple.
We all love quality in things. However, more often than not you have to pay dearly for quality. Thus, we end up paying a lot of money for goods that we could have gotten at a lower price. Most often this problem concerns accessories. Products from genuine leather are highly valued in the accessories market. Therefore, it is very difficult to find a handbag made of genuine leather that is well-made and will suit any of your looks. But if you have some sewing skills, making such a handbag yourself will not be too difficult. In our article we will tell you in detail how to sew a leather bag with your own hands. Detailed Descriptions works and master classes will make the process of creating a leather bag with your own hands relaxed and exciting.
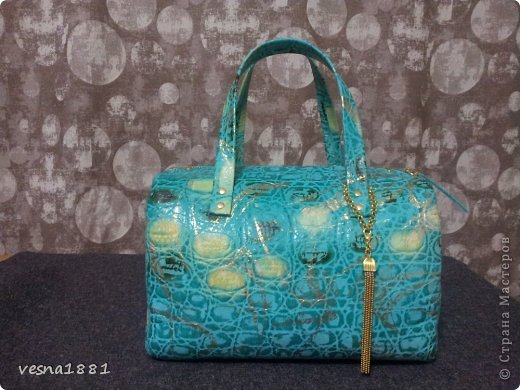
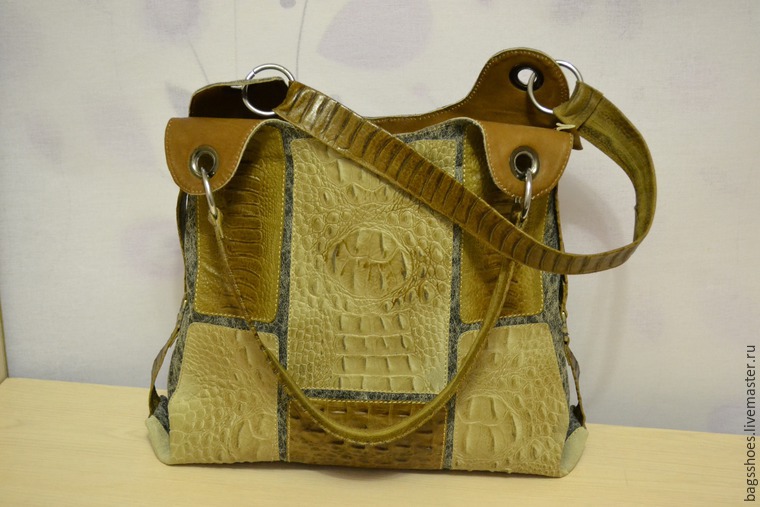
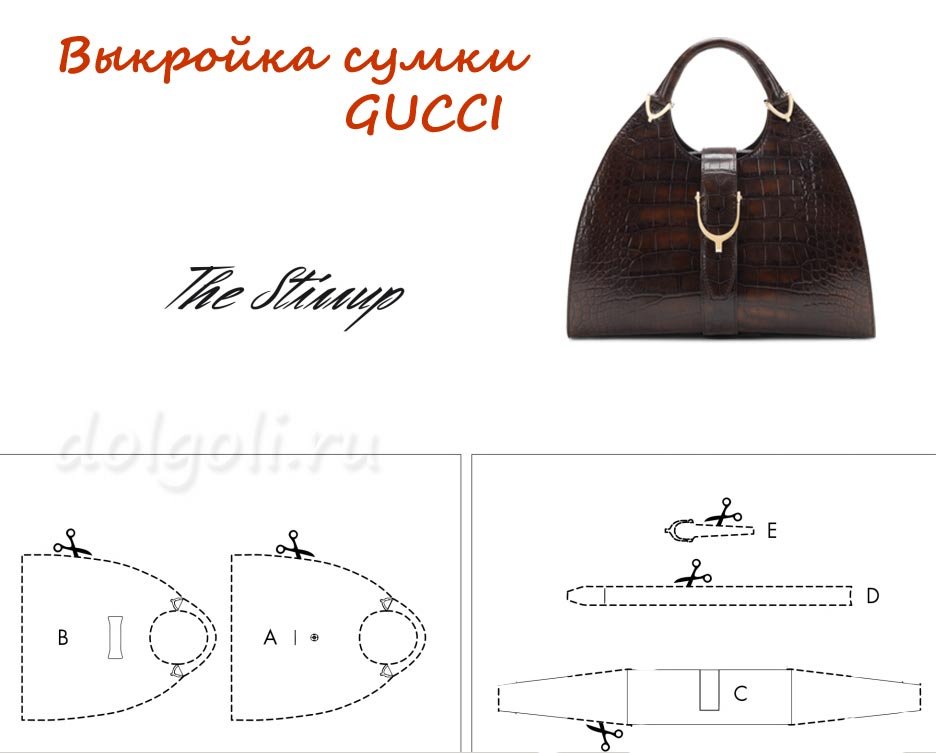
Variant of Furla candy bauletto
This handmade leather bag is made in the same style as the famous furla candy bauletto handbag. To complete it, we will need 5 m 2 of genuine pigskin with crocodile embossing (can be purchased at any online fabric store), 30 cm of thin woolen fabric for the lining (width 1.5 m), a metal zipper 30 cm long, 4 half rings for handles, waxed threads (black and beige).
If you have a sewing machine and have tried sewing genuine leather on it, then it will be easier for you. However, not all machines can pierce thick material the first time. In addition, if the machine cannot completely pierce the leather folded 2-3 times, then holes from needles will remain on the surface of the material, which will ultimately bring all your efforts to naught. Therefore, if you are not confident in the capabilities of your machine, then it is better to sew by hand. This will, of course, increase the sewing time, but then you will be able to brag that you sewed the handbag “with these very hands.”
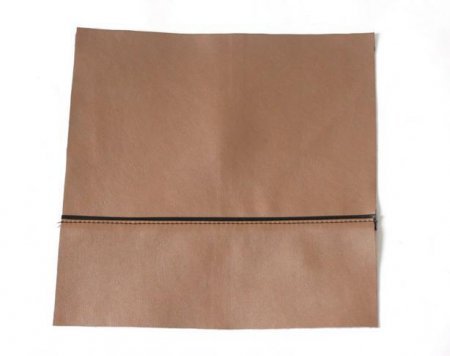
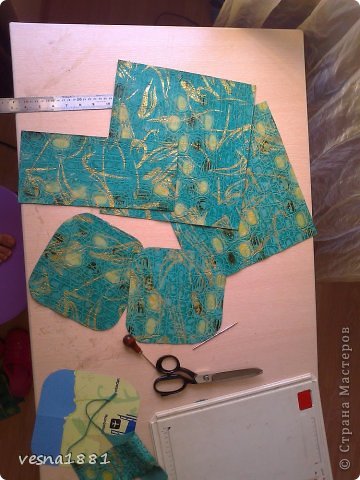
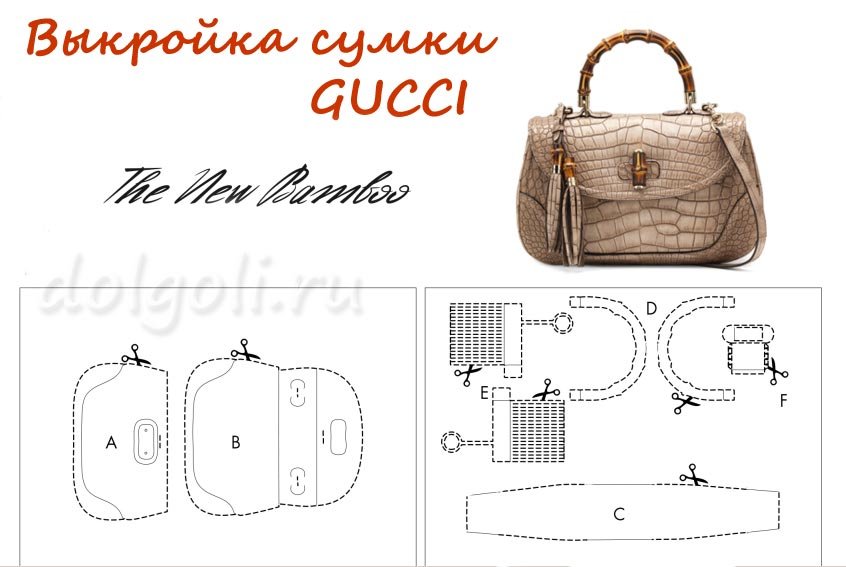
So, we start as usual - with a pattern. The pattern diagram is presented below. One cell of the diagram is equal to 1 cm.
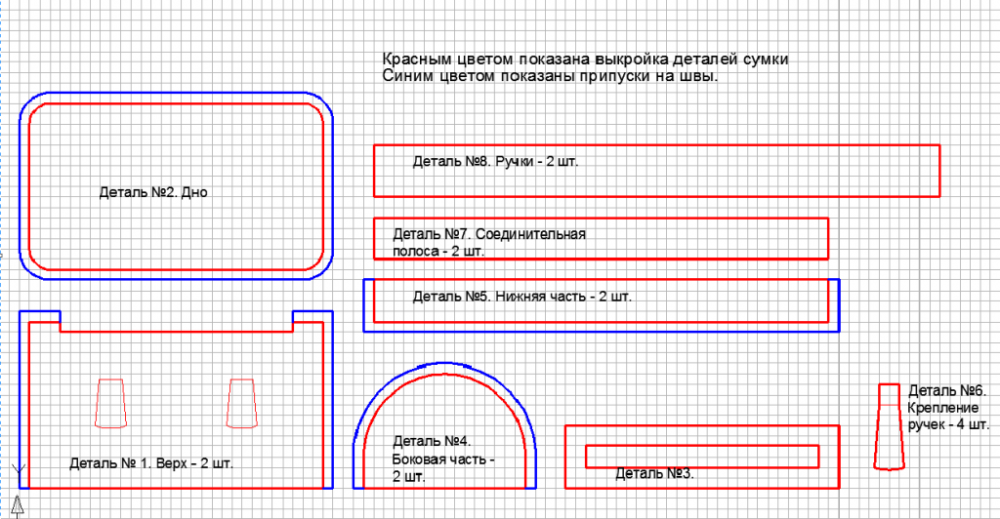
After we have cut out all the details from durable paper or cardboard, we apply the pattern to the skin and cut out all the details we need. Then we start assembling the bag.
Let's start with the most difficult one - small parts, namely mounts for handles. We attach them to the main part of the bag with glue, “Moment” glue is perfect. After the glue has set, you need to perform decorative stitching as follows: make the markings with a special marking tool, then use an awl to pierce the skin along the applied markings, then take a waxed thread, put needles on both ends of it and stitch the part. 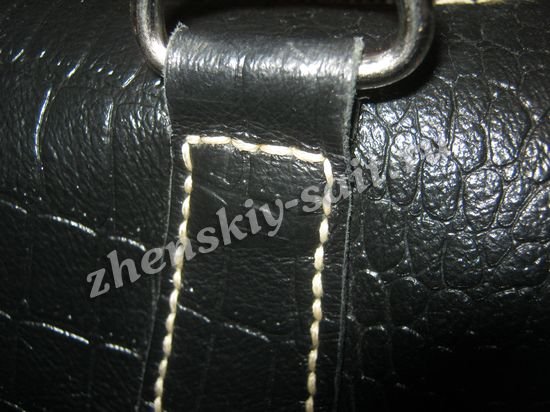
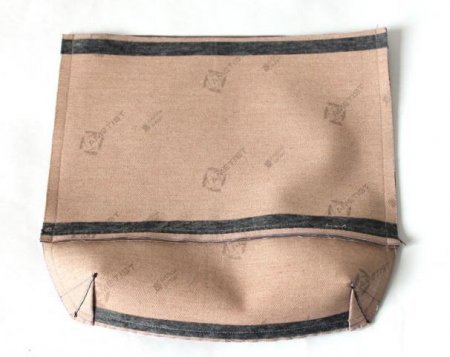
Then we connect the top parts together, as shown in the photo. 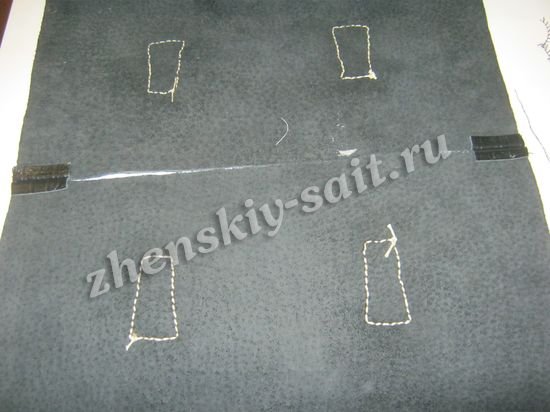
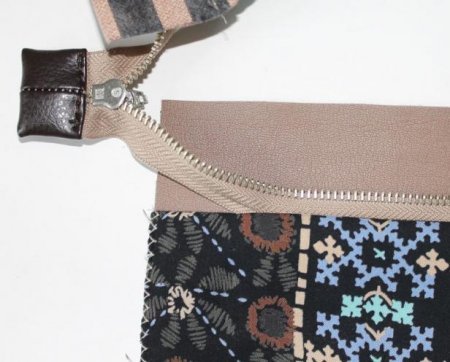
Lightning burst. We will also glue it first, and then sew it with threads. The whole process can be described as follows: along the perimeter of the stitching we make the markings that are already familiar to us and use an awl to punch holes for the threads, we do the same with part No. 3, then we glue the zipper to the top parts and sew everything together.
After working with the zipper, we connect the top and side parts. We wrap and glue the seam allowances on the top parts, and then do decorative stitching.
In the same way we connect the lower part leather bag, namely parts No. 2 and No. 5.
Now it's time to put everything together. Along the perimeter of the upper part we pierce holes for stitching, then with inside glue the leather strip and stitch it with decorative thread. The lower part is also sewn on. 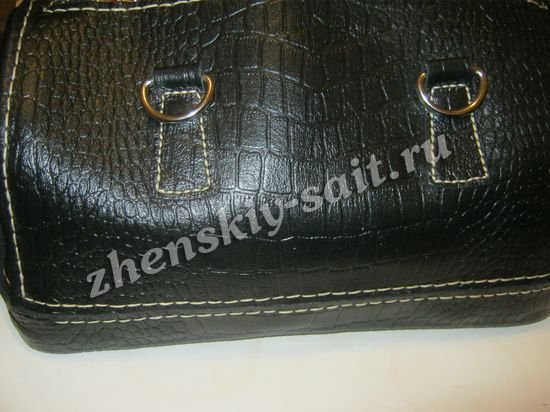
The only thing left to do is handles and lining. Let's start with the handles. In order for the handles to have volume and shape, it is necessary to make an internal insert. For insertion, long thin strips of leather, rolled into a tube and glued so that they do not unwind, are well suited. We place the handle part on the resulting insert and stitch it with decorative stitching.
Then we insert metal half rings and attach the handles to the bag.
We take woolen fabric for the lining and cut it inner part products according to basic patterns. The number of pockets and compartments depends on your needs and desires, the main thing is that the bag is functional and comfortable for you.
Finally, final stage- glue in the lining. We carry out gluing in the following places: in the area of the zipper (so that part No. 3 covers the gluing area) in the area of the bottom of the bag (gluing the seam allowances together). 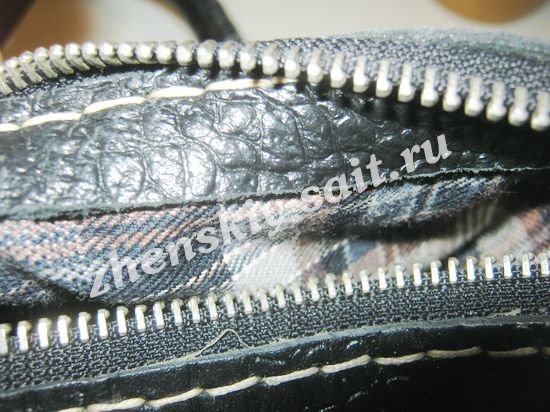
That's all. The genuine leather bag is ready!
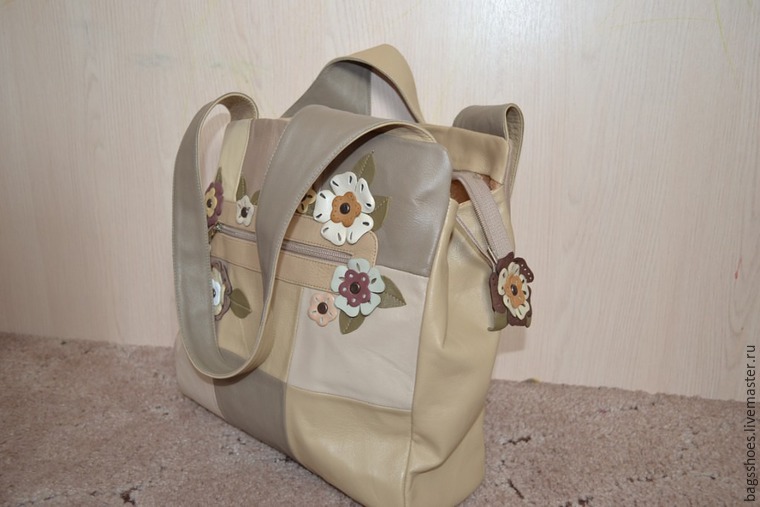
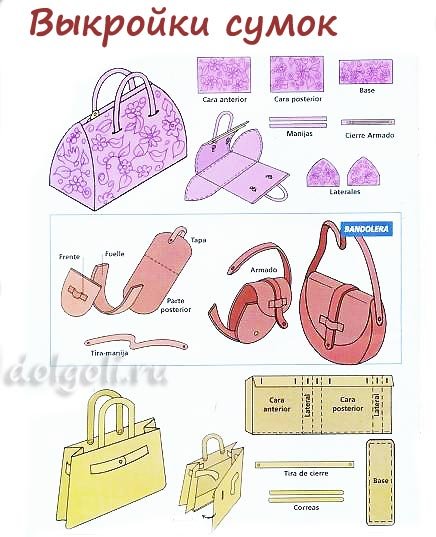
Here are some more leather bag patterns

So, using the example of a master class, we showed you how to sew a leather bag. In making such a handbag, the main thing is not the ability to sew, but rather brute force, because it is very difficult to pierce the skin. If you have a sewing machine that can perform this kind of procedure, then making a leather bag with your own hands will be a piece of cake. And when you finish your handbag, you can safely brag to your friends that you completed such a beauty yourself, got a lot of pleasure from the work and spent a minimum of money on everything. Perhaps you will even receive several orders for fashionable leather handbags from your friends and then you can not only do what you love, but also earn good money. All in your hands!
A selection of video master classes
The bag is a stylish modern accessory, which, in addition to its practical functions, also complements the aesthetic qualities of the person wearing it. Observant people can learn a lot about its owner from a bag. This especially applies to things that are made by hand. For example, a DIY leather bag shows that you are developing your own style by creating wardrobe items that match your look.
Of course, a handmade leather bag is a little more difficult to sew than one made from jeans or other materials, since the material is denser. The sewing machine must be suitable for sewing leather goods. Let's look at the work in detail, then it will be easier to make changes and additions.
We need high-quality materials and threads, from them correct selection The quality of the future leather bag also depends. Patterning a leather bag and cutting out the details is not all the work. It is necessary to sew the parts so that the seams do not separate and the bag is durable. For sewing on leather, the best threads are nylon threads, as well as silk or nylon threads. For greater reliability, do not do a single stitch, but two or three times.
After directly sewing the bag, we move on to decorating it; for this, scraps of material other than the main color, decorative seams, braid, laces, metal inserts and rivets are suitable. Beads, rhinestones and fringe are also used. You can find photos of finished bags and create something similar. Attention to the video:
Fabric and accessories stores sell various parts for decorating bags. You can use them to make your product look much more impressive.
When making a handmade leather bag, you will definitely need material to add rigidity. This could be cardboard or thick lining fabric. The lining for the bag can be selected either to match the bag or to contrast with it, or with various designs and patterns.
Before you sew a leather bag, you will have to thoroughly prepare in terms of materials and tools.
Patterns also need to be made independently, so you need paper for the pattern; in the absence of it, you can use newspapers. You will also need a measuring tape, ruler, pins, chalk, pencil and scissors. When cutting leather, you will need a roller knife and a cutting mat.
Let's get started
How exactly is the work of creating a leather bag done? The pattern can be constructed as follows:

We determine what shape the bag should have - rectangle, oval or square. We draw one side of the product of the expected size on the newspaper, and use it to cut out two parts, that is, both sides.

You need to cut the bottom of the bag exactly to these dimensions. Its length should be equal to: the length of the base plus the height multiplied by two. If desired, it can be made rectangular, tapered, etc. Seam allowances are made when the pattern is transferred to the material, otherwise it is easy to get confused. For allowances, the length is 1.5-2 centimeters.

Patterning a leather bag is not as difficult as it seems. As for the pattern of handles, it is quite simple: you need to sew two rectangles, folding them along their length, leaving a margin for sewing to the bag. This reserve is 3-4 centimeters.

Finally, the bag lining. The simplest option: a rectangle of the required width and length with allowances on the sides and bottom.
Assembling the product
If all the patterns are ready, the parts are cut out, start assembling them using pins, while estimating mutual arrangement bag details. You can tap the folds with a hammer to make bending easier, but this must be done through the fabric.
It will be more convenient to sew with ribbed rather than round needles. Having assembled the main part, baste the lining, sew on the handles, insert a zipper, and if necessary, start decorating.