Sew a bag with your own hands, patterns of different models. DIY men's leather bag
For work we will need:
Leather
- lining fabric approximately 0.5 m.
- zipper No. 3 40 cm
- glue "Moment"
- sewing machine
This is what I have listed that you cannot do without. And here’s something else that you can do without, but if you still have it, then it’s MUCH more convenient for you to work:
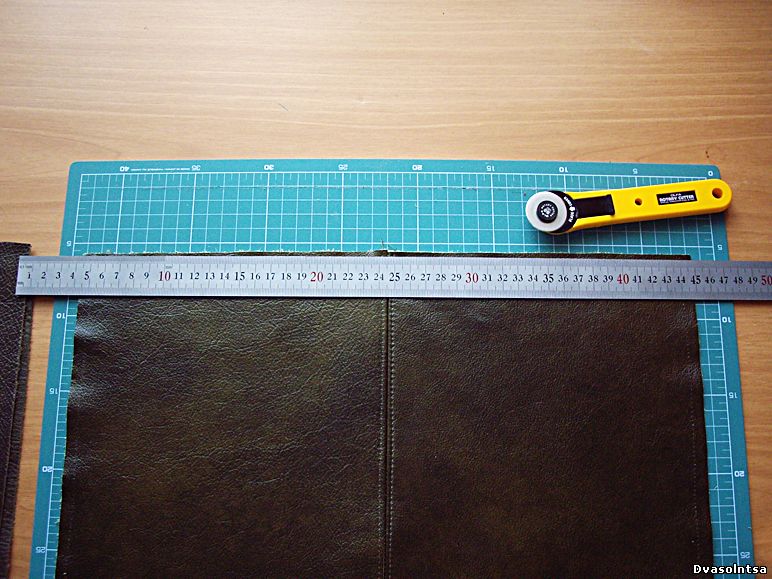
These are roller knives and a cutting mat. How did I live without them before? I don’t know... But now I know for sure - if you like to sew, and especially when it comes to working with leather or patchwork, then you can’t live without it. Just believe it.
Leather bags can also be purchased from stores offering new products. This solution is more expensive, but no worse than buying an environmentally friendly handbag. It's better to spend more money once rather than replacing your wallet every few months. Also, if you need a bag for everyday use, it is better to play it safe and buy a bag made from a high-quality material such as leather or suede.
Higher automatic tension. Includes a great extensions table. Great results every time. The touch sensor and keypad allow you to enter the number of stitches you want to use. Multi-directional transport - multi-directional transport for sewing in four directions.
So, back to the bag.
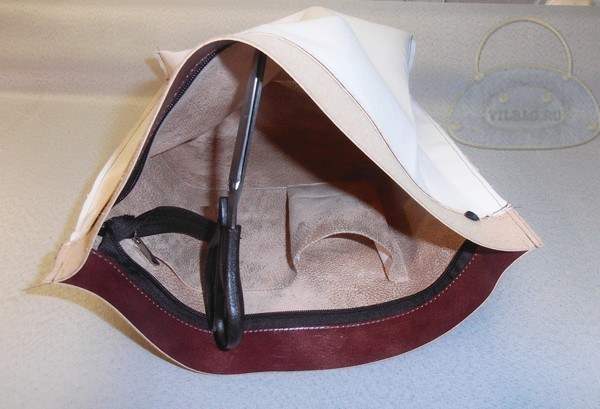
We will sew a string like this with a pocket in the side seam:
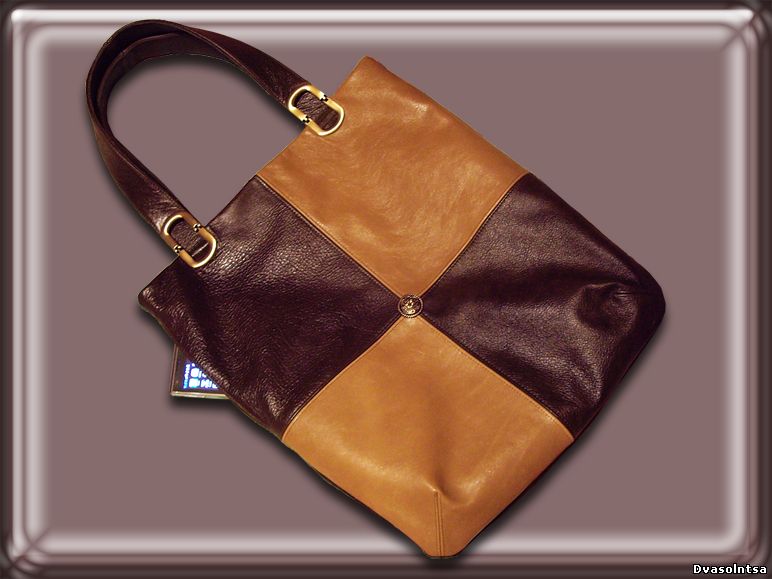

It’s clear that you can easily think through the design of your bag yourself, based on the available material. I’ll tell you about mine, and you decide what suits you and what doesn’t.
Thanks to the multi-directional feed, you can sew large decorative stitches up to 40 mm wide. Ideal for working on larger projects such as quilting caps. Rubbing the semi-automatic upper needle into the needle only by lowering the support. It's never been easier. Speed slider to help you easily select the speed you want from slow to fast. This slider can also be set to adjust the stitch width and length while the sewing machine is sewing.
Stitching button - with one press of a button, stitching can be done at the beginning and end of a stitch. When you press the stitch tightening button when sewing decorative stitches, the sewing machine will automatically stop after the pattern is completed. A button to raise or lower your leg has never been easier. Extensive Extension Table - Ideal for big projects quilting and patchwork.
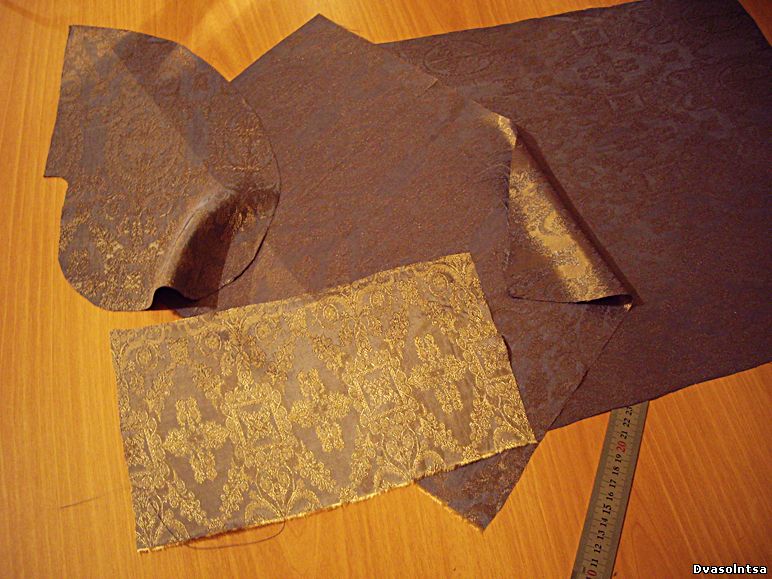
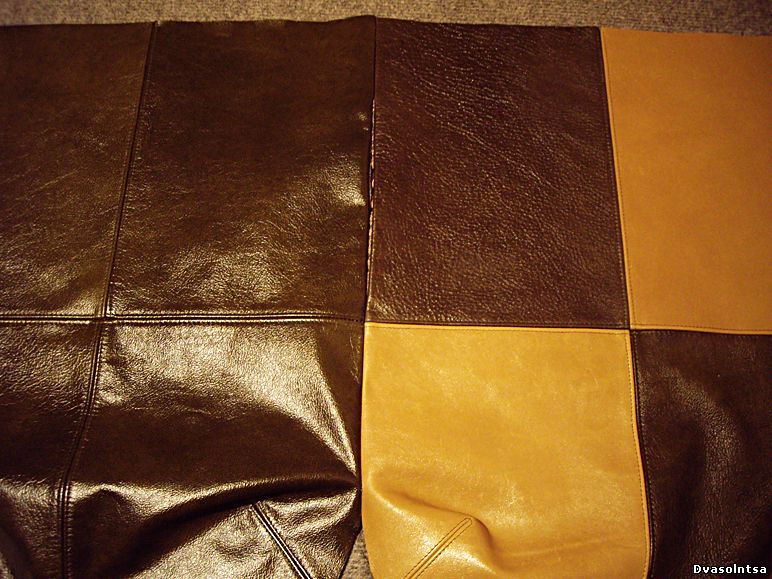
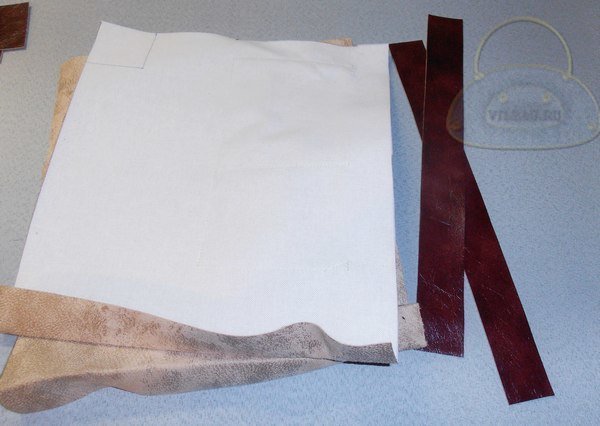
The size of my bag is 36x42 cm. It is sewn from the following two parts:
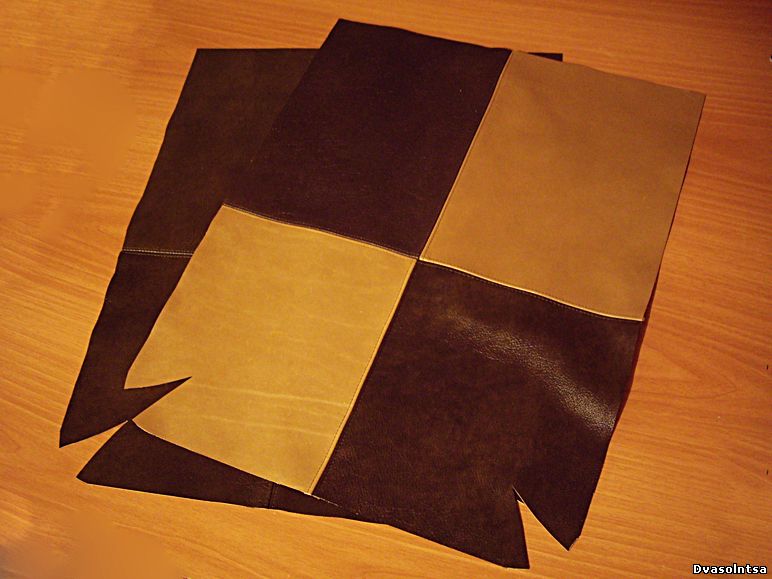
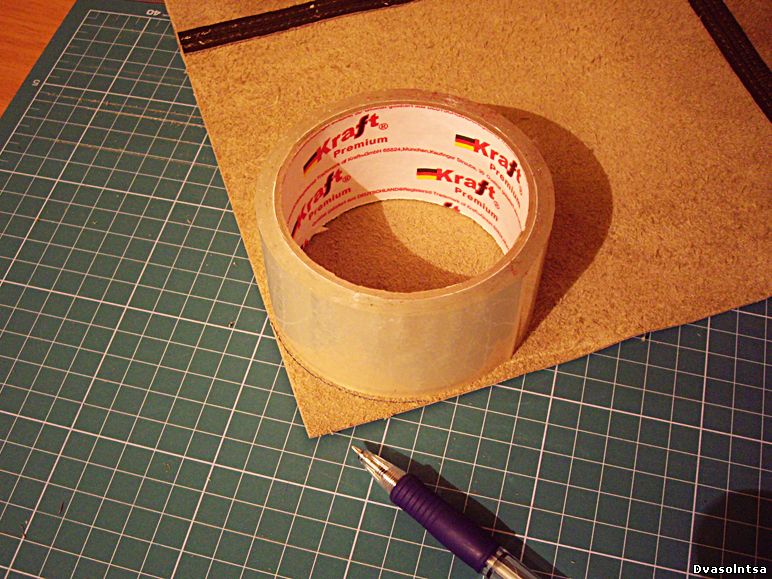
The size of each part is 38x50 cm. One centimeter on each side will go into the seams, and plus 5 cm on top for the hem. The parts are ordinary rectangles with rounded bottom corners. By the way, I’m sharing secret information. Know-how)))) How to quickly and easily make an even rounding of a corner? Yes, very simple! Quickly find any object with a suitable radius (saucer, glass, hairspray, etc.), apply it and trace it. In my case, the appropriate item was a large roll of tape:
The site team makes continuous efforts to ensure the accuracy of the information provided on this site. However, it cannot guarantee and cannot accept responsibility for the correct, complete or up-to-date information. Prices, offers, stock status, specifications and images, product colors are subject to change without notice. Photos of products listed are for informational purposes only, product colors may vary in some shades and packages shipped may contain accessories not included in standard packages.
We also need to draw and cut out darts in the rounded corners so that the bag is not completely flat (although it is possible without them, but when the bag is too filled with contents, it will be unsightly deformed). It was very easy for me to draw a dart, since my rug has markings with which I can easily draw a 45 degree diagonal.

On this diagonal we build a dart approximately 5-6 cm long, a tuck opening of 2-3 cm (1 - 1.5 cm in each direction from the diagonal). We draw the dart not with straight lines, but with slightly concave lines, so that the shape of the bag is softer. Cut out the dart along the drawn lines. Now we apply this dart to the other three rounded corners, trace it and cut it out too.
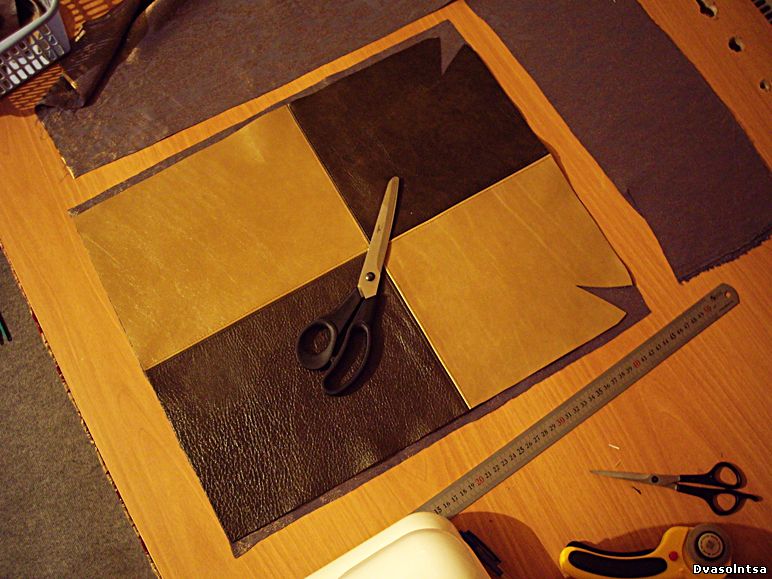
For me, each piece of burlap consists of four rectangles. Perhaps you are the happy owner of huge pieces of leather and the parts will be cut out in one piece. And it is possible that they will be sewn from a larger number of pieces. Perhaps you will sew them the same way as I did - the seams are pressed and topstitched. Can be sewn genuine leather seams out. You can butt in a zigzag. Doesn't matter. Some techniques for working with leather will be useful to you in any case.
First - not a step without glue! Leather is a wonderful material, but it slides, runs away, and stretches. We cannot sweep it away, naturally. What remains? Right! Glue it together! The glue should be elastic, not particularly corrosive to the paint and, if necessary, easy to peel off. I use Moment, although rubber glue is probably better. Another good thing is that if a little glue accidentally gets on the front side of the product, it can be easily removed with a regular eraser.
Apply glue thinly to the very edge of the part so that after stitching you can easily separate the seam allowances. Let the glue set a little and sew. And nothing from us runs away or gets pulled out). If you then need to stitch on both sides of the seam, then immediately after stitching, the allowances must be separated, otherwise the glue will dry out and it will not be easy to tear the allowances.

Secondly, you need to sew leather with special needles for leather. They differ from ordinary ones in that the needle point is not round in cross-section, like a regular needle, but has sharp edges that do not push the skin fibers apart (which is very difficult), but simply cut through them. Previously, craftsmen sharpened ordinary needles No. 110-120, but now these needles can be bought in any department with sewing accessories.
Third, you might like a special foot for the machine - Teflon or roller. I personally prefer Teflon. Although some types of leather can be sewn quite well with a regular foot. A special one is needed for leathers with a “sticky” surface, on which a regular foot would slow down.

Fourth - hammer. Don't be surprised))) Yes, a hammer. Rubber is better, but regular one will do. It is needed to tap thick places (for example, seam joints) and make them thinner and flatter:

And after the hammer there is glue again:

They pressed it well, tapped it a little more and stitched it on the front side. This is what happened:

Try combining the seams this way without glue and a hammer. If it works out, you are simply a super master of aerobatics and you have nothing to do here)))
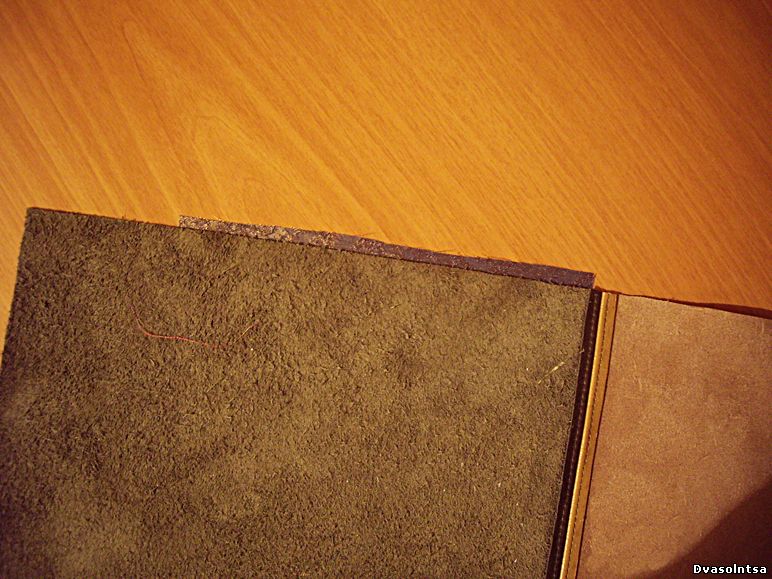
Fifth - after each seam, do not forget to trim the parts so as not to bend the line of the next seam:

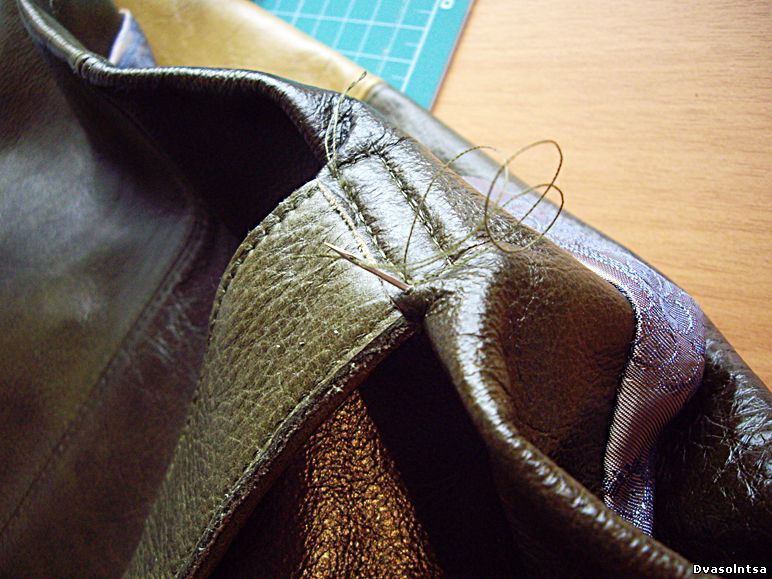
And sixth - all knots and ends of threads - inside out! To remove the ends of the threads, you can do this: take a machine needle and make a puncture on the wrong side so that the needle comes out right next to the thread, thread the end of the thread into the eye of the needle and pull it back. It is advisable not to throw the needle at your feet after this, but stick it into the needle bed, and pull the thread so that it all goes away from the front side and there are no loops left:
When you assemble the part from the pieces, you may find that the seams still “bubble”. Don't be alarmed. Most likely everything can be fixed with an iron. You need to iron it through a cloth (possibly with steaming) on a single or double setting (depending on the thickness and density of the skin). Practice first on an unnecessary piece of skin - if the temperature is too high, the skin will “shrink”.
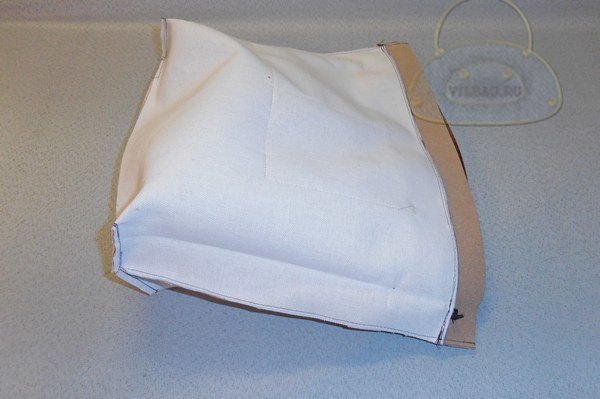
Well, here we go... Our rectangular parts are ready.
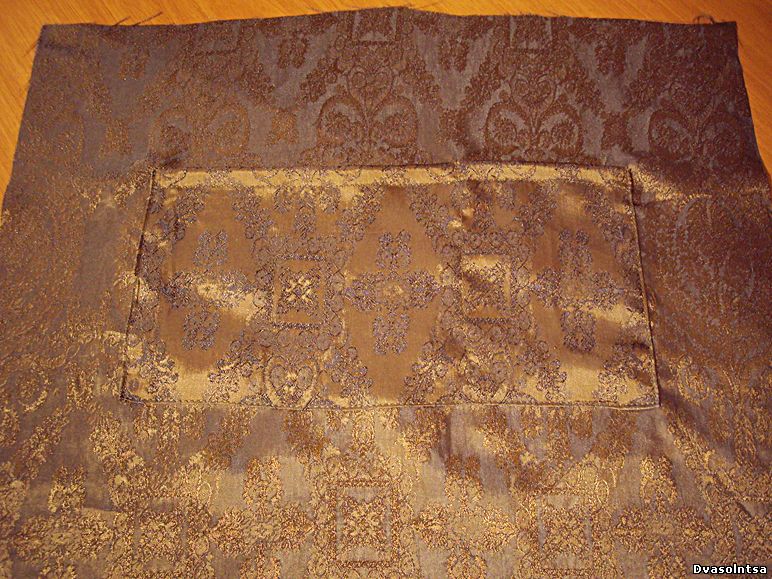
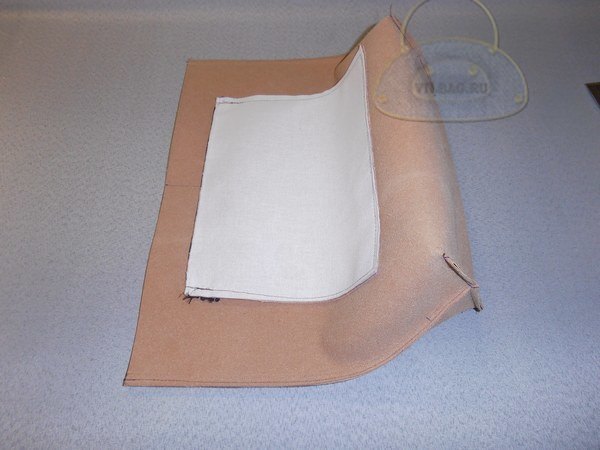
Now you need to cut out the lining. Lay one piece in two layers lining fabric and cut along the contour. We do not make allowances at the top and bottom, but add centimeters at each side:
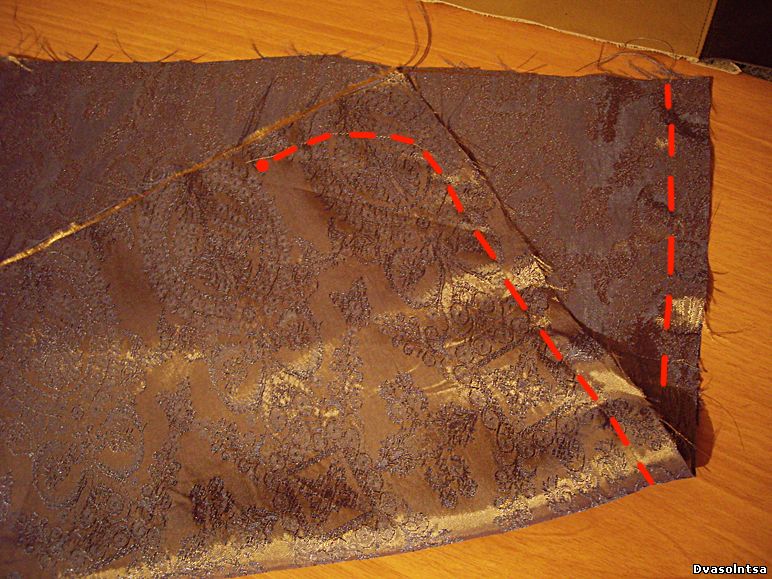
And let's immediately cut out the rest of the details for the lining so that we don't have to return to this later. We will need another rectangle of the same width as the main part of the lining, but 15 centimeters shorter than it. Plus another rectangle about 25x15 cm. And two more parts of this drop-shaped shape:
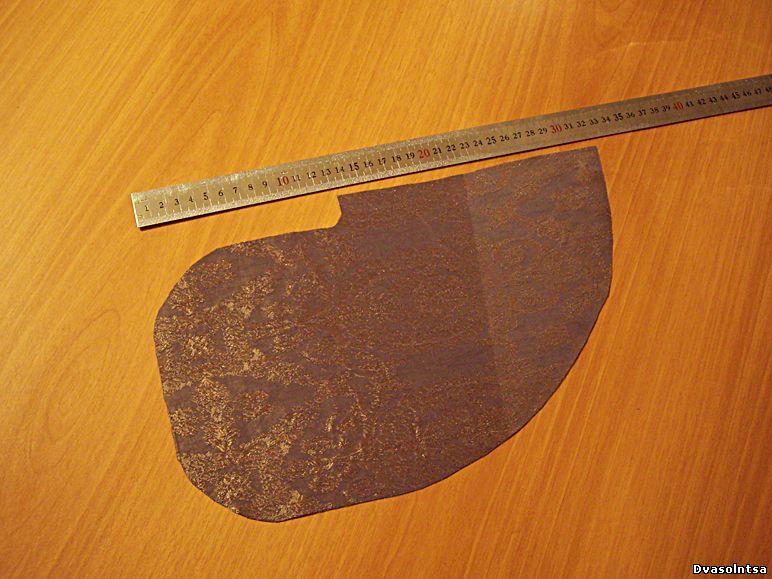
This is the side pocket burlap. Its total length is about 32-35 cm, width is about 20 cm. The length of the straight side is the line of entry into the pocket - about 18 cm. But check your hand just in case - put your hand on the table and ask someone (or yourself) Place a measuring tape across your palm. Create a “gap” from the tape and table surface and see how long it needs to be for your hand to fit through. Add 3 cm to this value - this is the length the straight side of your “drop” for the pocket should be.
So, here's what we cut from the lining fabric: two large rectangles; one of the same width, but shorter; one small rectangle and two droplets.
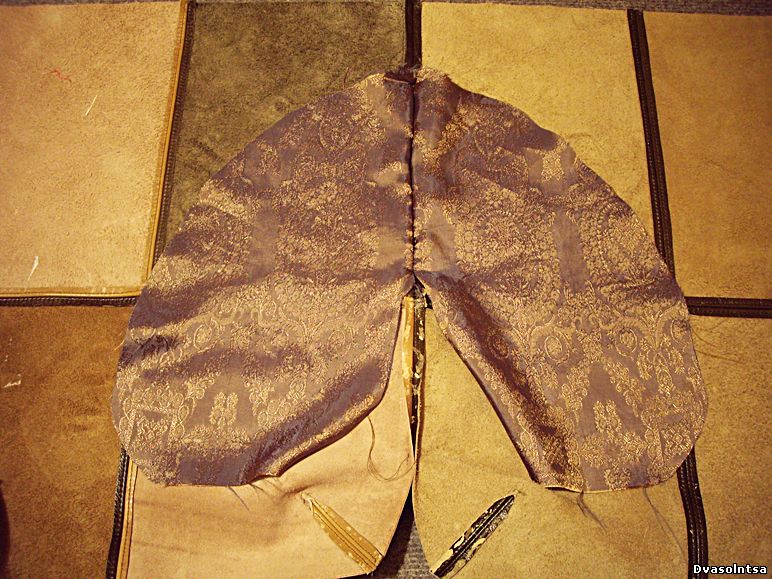
Let’s put all this aside for now and move on to the main leather parts. As you remember, darts were cut out there. We glue them (darts) and stitch them. Then we carefully cut the tip of the dart almost all the way to the seam, bend the seam allowances in different directions, glue them, tap them with a hammer and stitch them from the front side:

Let's take onside pocket. Fold the main parts together and attach the burlap piece to the side, stepping back about 10 cm from the top edge. Use a pen or felt-tip pen to mark the line for sewing the burlap to the main parts, taking into account that about one and a half centimeters should be left for the seam allowances of the burlap pocket. Make small notches on these points on the skin on both parts (the point may not be visible, the notch is more reliable).

Lubricate the very edge of the leather from notch to notch with glue and glue the burlap (the front side of the lining fabric to the front side of the leather). Please note that the seam allowance on the leather is about 7-10 mm, and on the lining fabric it needs to be at least 1.5 cm. Therefore, it should look like this:

We sew a line exactly from notch to notch and make fastenings at the ends of the seams:

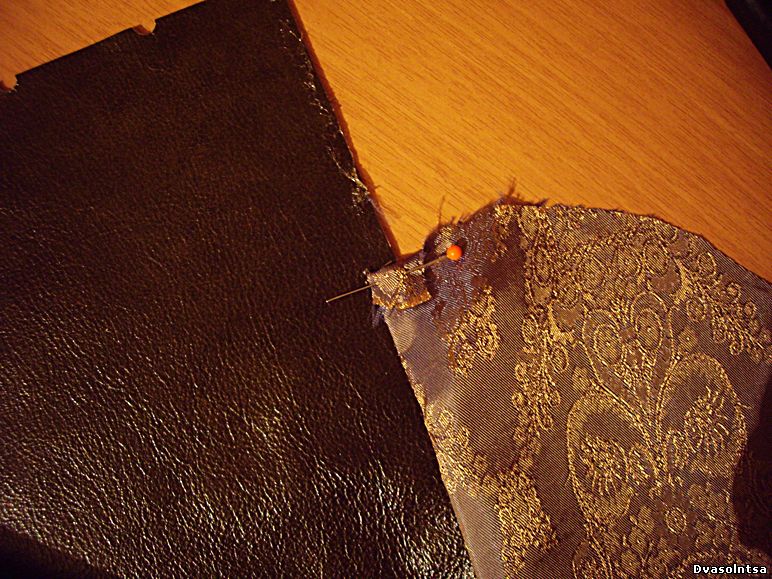
We bend the burlap pocket, bend the unsewn edge (burlap seam allowance) and secure it with a pin. We do the same with the other three edges.
We glue and sew the side seam of the bag from the pocket to the top edge and from the pocket down, but not reaching the rounding of the bottom corner, which has a dart. The seams begin and end with bartacks. The main trick here is that the seams end near the pocket at exactly the same points to which the burlap was sewn. It will not be difficult for you to do this if you have long ago developed the habit of maintaining the same width of allowances in the product (for example, along the width of the foot).

We unfold the parts of the bag, bend the seam allowances in different directions, glue them and tap them with a hammer:
Now you need to try to beautifully stitch along the edge the line of entry into the pocket, making stronger fastenings at the ends of the “slot” - the load here will be constant, so the extra strength will not hurt):


All that remains is to fold the pocket burlap together and stitch at a distance of 1.5 cm from the edge.

The pocket is ready.
We glue and stitch the bottom and second side of the bag. We lay out the seam on the second side in different directions, glue and tap:

Turn the bag inside out, straighten the seams and gently tap, especially the thick seam junctions:

It's time to remember about the lining. Rectangles.
We take the smallest of them, bend its long side twice and stitch it. Pin to one of the large burlap at a distance of approximately 7-8 cm from the top edge and sew, folding the seam allowances:

We add one more line - we make a compartment for the phone. Don't forget about the bartacks at the ends of the seams. Well, it wouldn’t hurt to stroke it.
Now let's try to make a large pocket with a zipper on the second part. To do this, take a rectangle that was the same as the main ones, only shorter. We sew a zipper to its upper edge. It’s better to pin together first, but I did without it:

Pin the pocket to the main piece, aligning the bottom and sides. Stitch and trim the excess length of the zipper:

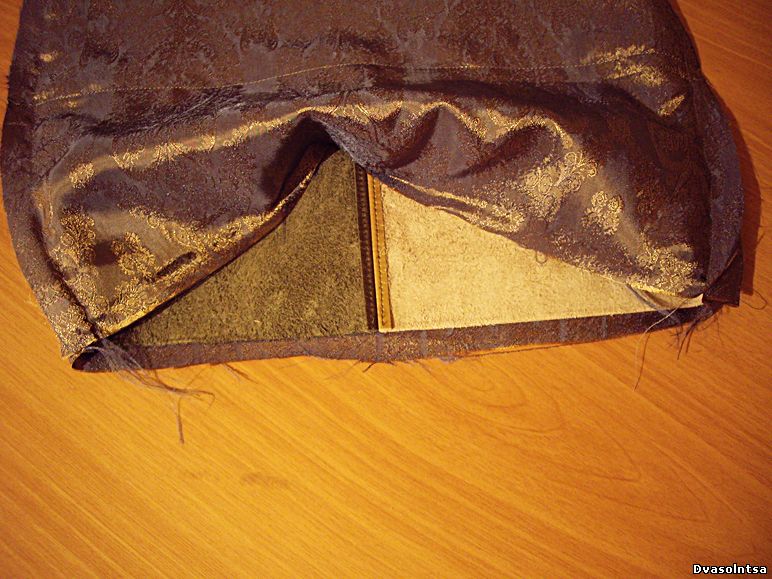
We fold the lining pieces face to face, that is, with the pockets inward, and put stitches along the side seams, rounding the bottom corners and making fastenings immediately after the rounding. That is, we do not sew up the bottom of the burlap lining - we still need this hole to penetrate inside the bag. Seam allowances are 1.5-2 cm. Do not skimp on them. Let them be wide, because we are not overlapping the edge of the fabric.
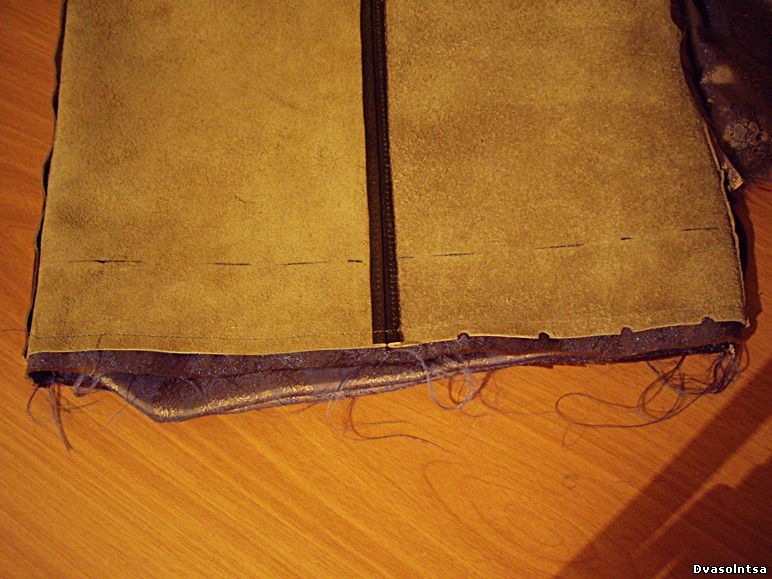
Without turning the lining inside out, insert the bag into it and glue the top edge of the bag to the top edge of the lining. Again, don’t forget that the seam allowance on the lining is larger than on the leather:

If we wanted to make a bag with a clasp, then a zipper would have to be sewn in between the lining and the leather in this place.

We sew a line along the entire top. Then we turn it all out through the same unstitched hole at the bottom of the lining. We fold the top edge of the leather inside the bag (you can mark it in advance with a line on the inside) and fix it with glue only at the seams.
I don’t recommend gluing the entire hem - even on thick leather, the glued area on the front side of the product will most likely be visible later. It is enough to simply fix several points where there are seams, and then tap the fold with a hammer. If the leather is very soft, you will have to stitch along the top edge. Then there is a risk of stretching the edge. I advise you to lay a braid inside the fold or strengthen the hem with an adhesive pad, practicing on an unnecessary piece with an iron temperature.
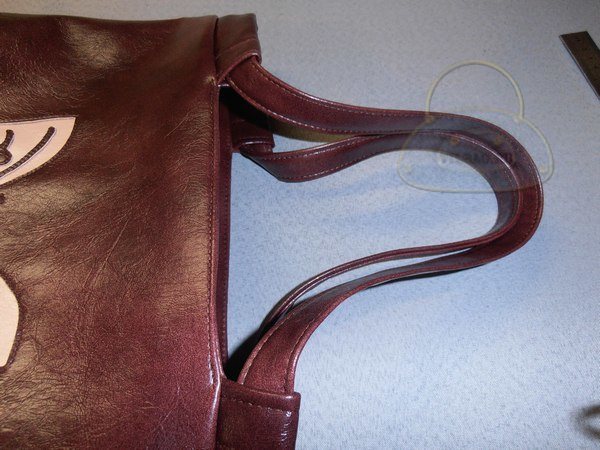
Let's take on pens.
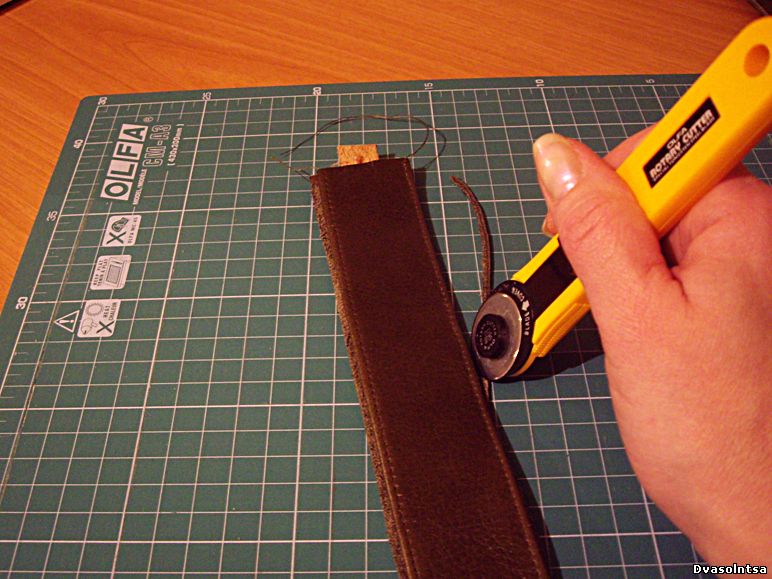
I really hope that you had long strips of leather, from which you cut out 4 solid parts approximately 60 cm long - two of them 3-4 cm wide, and two twice as wide, that is, 6-8 cm. I don’t really think so I was lucky and therefore had to make sewn handles. If you are unlucky like me, then one secret will come in handy. We don’t need extra thick seams on the handles - it’s both unsightly and it will be quite difficult to sew these places on the machine. Therefore, it would be better to “lower” the edge of the skin, that is, to make it thinner. Of course, you don’t have a special knife for leather? Me too. But there are regular blades. Only new, sharp! The old ones can't do anything. Place the strip of leather on a flat surface (board, cardboard). Using a blade, carefully and carefully cut off the mezra (the furry underside of the skin), reducing the thickness to zero at the very edge. Cut into small pieces, moving towards the edge. Practice first on an unnecessary piece, as it is quite easy to cut through the skin, and this would be extremely undesirable)

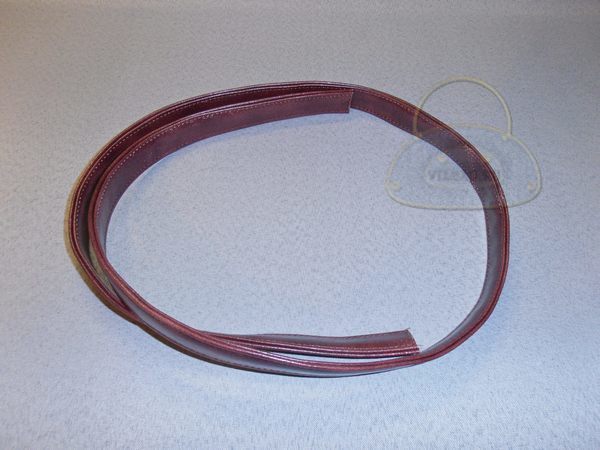
After this, we sew the halves of the parts together and glue the seam allowances in different directions. We coat the wide parts with glue along the long side and bend the edges towards the center, connecting them end-to-end. I was sorely lacking skin. Therefore, it didn’t work out end-to-end - there wasn’t enough width. To ensure that the thickness of the finished handle was still uniform, I cut out strips of leather of a different color and glued them into the middle:

We tap the thick places of the connecting seams with a hammer and glue the curved parts to the narrow strips:

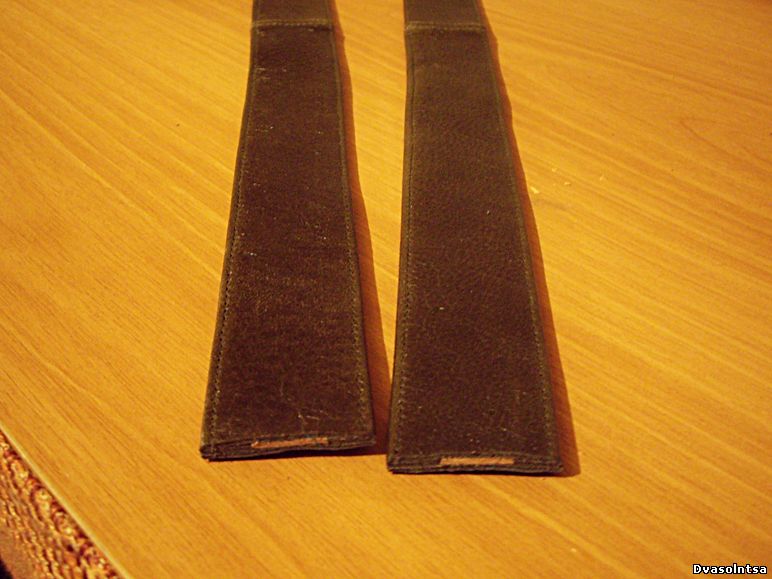
Sew along the edge. As you can see in the photo, my lower parts are cut a little wider than the upper ones. I did this on purpose so that I could later cut off the excess with a knife - this way the handle turns out smoother and neater. But you can cut them out to the desired width right away. We trim the length of the handles so that they are the same and symmetrical.
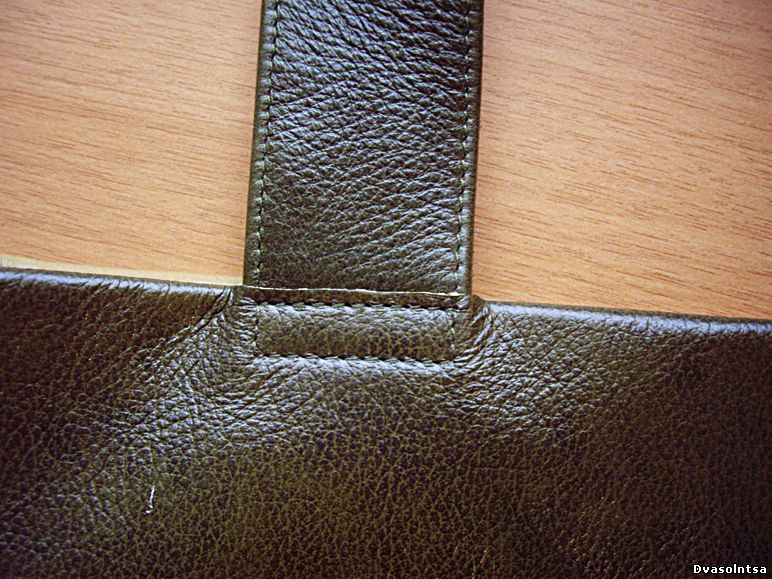
Sew the handle into the fold of the top edge of the bag. To do this, use a sharp knife to cut holes in the fold line, having, of course, previously measured and marked their position and the exact size of the holes, equal to the width of the handles. Glue the edges of the handles into the holes and stitch them. It should look like this:
I don’t know how your machine will react to this idea. Still, five layers of skin! Mine told me everything she thought about me, about the bag, about the leather, about the delivery service that brought it to my house and about all my handicrafts in general... But she missed it! My clever!)))
If this number does not work, I offer you several more options for attaching handles:


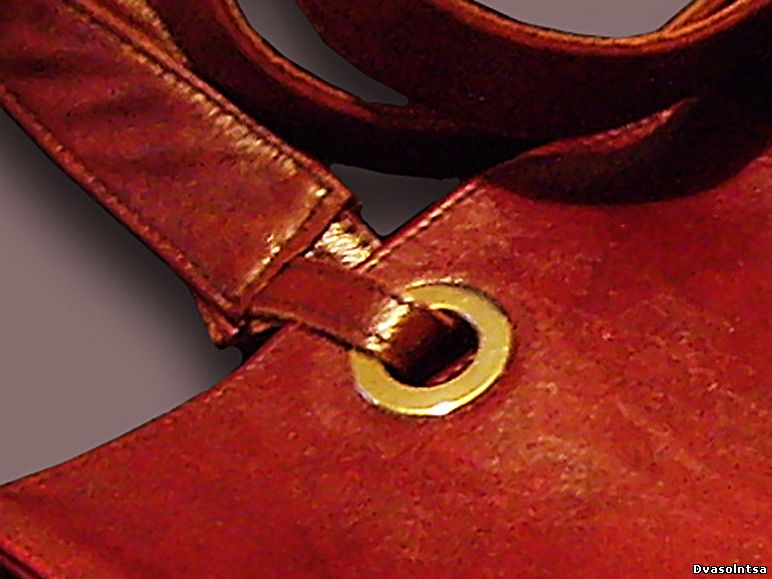
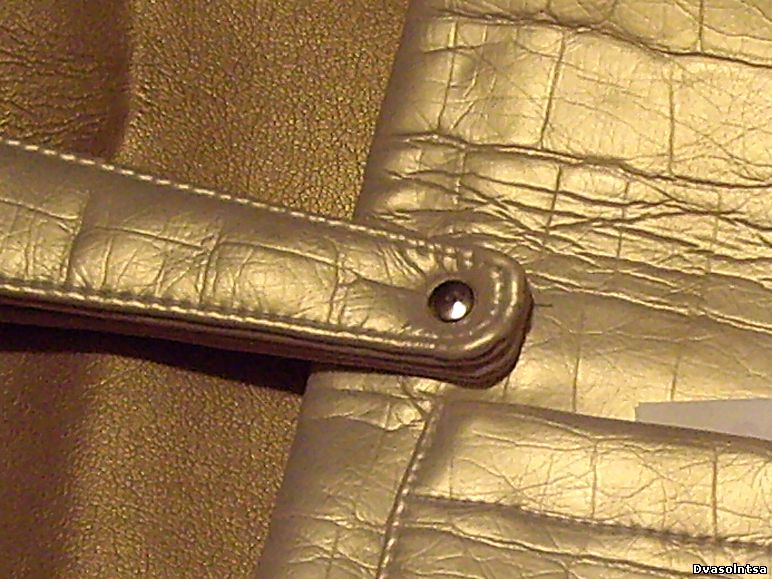
I sewed a handle only on the back side of the bag, and on the front the handle is attached with beautiful pieces of iron.
The most pleasant - finishing touch))) Sew up the hole in the lining. Having folded the allowances inwards, pinned the edges and stitched very close to the edge.

Well, actually, that's all)
A young pretty bag is looking for the same owner for pleasant walks together)


Hello Craftswoman!
On this page I will tell you about my inspiration, which, oddly enough, came from a shopping bag I saw on the “weird moms” website.
I make this butterfly using the reverse appliqué technique in different handbags; my clients and my mother loved it. I also wanted a faux leather bag like this.
I share the dimensions, pattern of the bag and the stages of its creation:
The size of the finished bag is height 31.5 cm, width at the top 36 cm, width at the bottom 25 cm, bottom depth 12 cm.
We need faux leather, fabric for lining, zipper for back pocket, zipper for bag.
Cut:
1. Top parts 2 pieces, size 38*35 cm (mark the corners of the bottom 6*6 cm).
2. Top bar 2 pieces, size 38*4 cm.
3. Lining 2 parts, size 38*32 cm (mark the corners of the bottom 6*6 cm).
4. Handle part 115*6 cm.
5. Bar for handle – 2 parts, size 26*7cm.
6. Back pocket lining, 2 parts, size 24*18cm and 24*20cm
7. Pocket for lining, size as desired.
Detailed pattern of my bag, how I made it.
On the main part we mark all the necessary marks and lines:
- Corners of the future bottom
- Middle line for future application
- Line of the future pocket (from the top edge 5-6 cm, 20 cm long)
- Along the top edge we mark marks for the bar into which the handle will be pulled. When finished, it is 22 cm, which means we set aside the width from the side edge by the side seam allowance + 11 cm (1\2 strips).
We sew pockets onto the lining if desired. I have a double, open pocket + cell phone pocket.
Sew the zipper to the back pocket lining details.


We make appliqué on the outer part of the leather bag. I have a butterfly made using the reverse appliqué technique.


We sew the upper strips of leatherette to the upper edges of the lining, inserting a zipper.

Connect the sides and bottom, leaving an opening for turning. We stitch in the corners to form the bottom.
Prepare the hole for the back pocket. Insert the pocket lining with a zipper.


We connect the sides of the top part of the bag, stitch the corners, forming the bottom.

In my version, the handle did not turn out to be one-piece and I will join 2 parts together, the seams will be hidden in the upper strips. Forming a handle

We wrap the edges of the handle bar 2 cm towards the wrong side, laying a fastening one. A line. Fold it across and attach it to the top strip of the lining, keeping the middle of the strip piece aligned with the side seam of the lining.


We turn the outer part of the bag inside out and put it inside the lining face to face, matching the sides and middle of the parts. We stitch connecting them.
Turn the bag inside out through the hole left when stitching the lining.
We lay a finishing stitch and thread the handle into special strips. We connect the handle into a ring and hide the seam inside the bar.
Sew up the hole in the lining.