What do you need for chokers? An easy way to make a choker tattoo from beads. Choker is the fashion trend of the season.
This wardrobe item has a long history and many of you remember the charming velvet ribbons that ladies wore in past centuries. They were also called “velvet flowers”. Now this accessory is made from a variety of and sometimes unusual materials, therefore it can not always be called velvet.
More than common name V English version. IN literal translation, it means "strangler". The word is not very pleasant, but essentially true, since this necklace is worn exclusively on the neck. I will make a choker from ribbon. So let's get started.
MATERIALS FOR MANUFACTURING A CHOKER
Rep tape
Locks (2 pcs.)
Rings (2 pcs.)
Fasteners (2 pcs.)
Pliers
Decoration
As I said above, chokers are made from different materials, so different parts may be needed for each case. In particular, the clasps with which the necklace is held on the neck. For the tape, I took clamps, the length of which is equal to the width of the tape 2.7 cm, connecting rings and the lock itself, which consists of two parts.
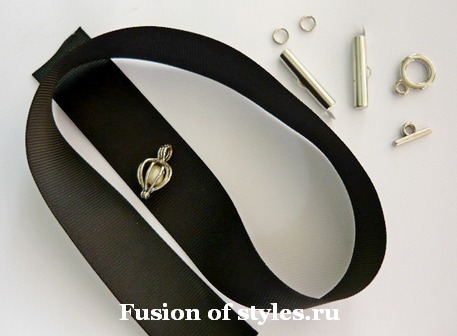
At the beginning, I assembled the metal parts together. To do this, I had to put in some effort and use pliers and a screwdriver to separate the spiral rings.
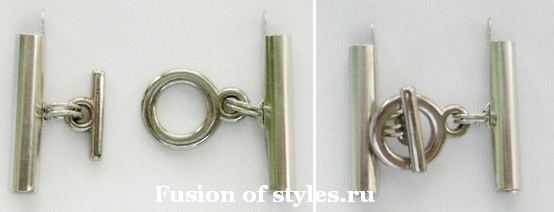
After this, you need to correctly measure the length of the tape. To do this, measure the circumference of the neck in the place where the choker will be worn. In my case it is 34 cm. We fasten the clasp and stretch it as it will be on the neck. We measure its total length and subtract it from the OR. I got 34 cm – 3 cm = 31 cm.
This is the net length of the tape. But it must be fixed in the holders. They have grooves where the tape will be inserted. To be honest, I don’t know how to do it any other way, so I came up with my own way. I added an inch to each end and folded it in several times. Secure it with a needle and thread. In a word, you need to create thickness at the ends so that the tape does not jump out.
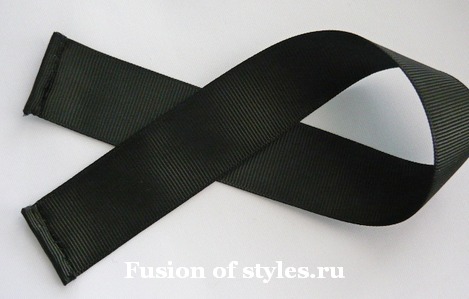
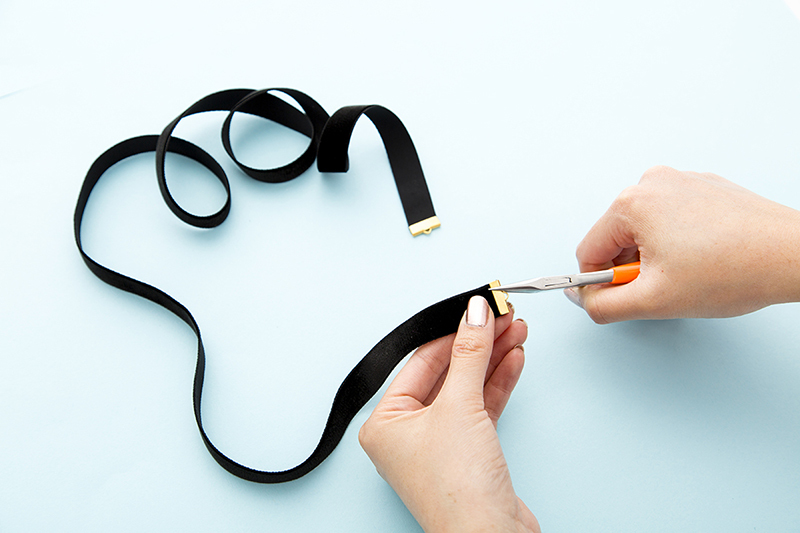
After that, we insert it into the clamps and seal them. As you can see in the photo, they are only open on one side. This is where it needs to be closed.
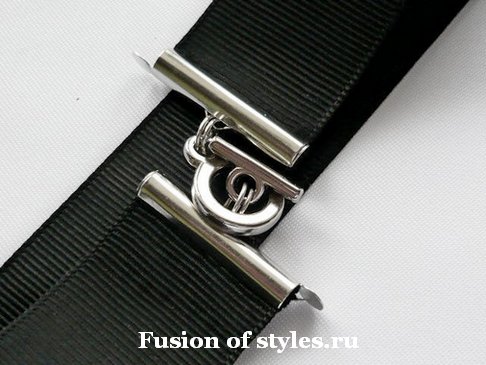
In principle, the choker at this stage is already ready and can be worn. But if you add decoration to it, it will become even more attractive. I used a small pink pearl pendant for this. Having determined the middle of the ribbon, I carefully sewed it on with thread. Methods of connecting to the tape can also be different. This is the accessory I got.
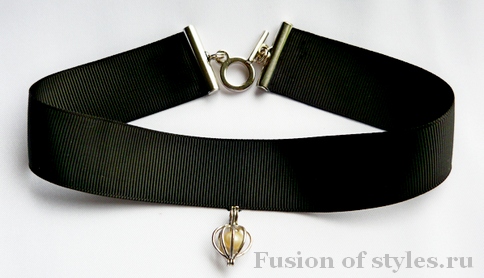
Now you know how to make a choker with your own hands. It is simple, but looks quite elegant and sophisticated. Some believe that it can only be used in romantic images, or . But, the choker will fit perfectly into a modern wardrobe, even if you wear it with and.
If you don’t have this cute necklace yet, but you don’t mind making your look more seductive, come up with your own model and make a choker for your neck with your own hands. It's not difficult at all.
I will be glad if this master class will help you update your collection of accessories. Stay beautiful and charming always and everywhere!
Feminine nature gravitates towards cute trinkets with which you can easily create individual image. One of these things is . Translated from English, “choker” means “strangler”, in other words: it is a necklace or necklace that fits very, very tightly to the neck. Is it beautiful? Many people think yes!
History of creation: who invented the choker?
Initially, chokers were exclusively men's jewelry. Indians North America made them with their own hands. To do this they used:
- bird feathers;
- animal bones and skin;
- stones and shells.
Decoration choker on the neck in this case carried a certain function - a talisman for protection against evil spirits and an assistant in hunting.
In the Middle Ages, fashion accessory became the prerogative of the weaker sex. The decorations were made from precious metals and inlaid with precious stones. Only wealthy ladies could afford such a necklace.
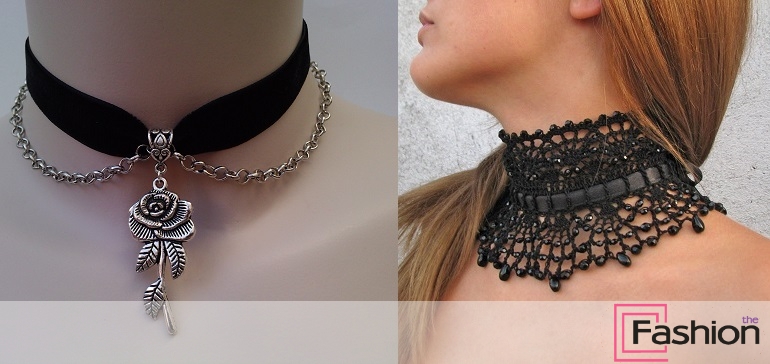
Then I liked the choker necklace royal families and celebrities of our time. The decoration was often worn by Princess Diana and. With the help of an exquisite accessory, women skillfully hid the wrinkles that inevitably appear on the neck with age.
The next peak in the popularity of jewelry fell in the 90s. Inexpensive models made from fishing line appeared that created the feeling of a tattoo. Almost every schoolgirl had a set of necklace and bracelet.
And finally, the latest return of the choker to the world of fashion accessories! year 2014. Since then, the women's choker has confidently held trend positions and to this day has not left the pedestal of spectacular jewelry. Stylists willingly use chokers at fashion shows. Moreover, it has become an indispensable adornment for women in Everyday life and at social events.

Choker around the neck - how to make a stylish decoration with your own hands
Today, many options have been invented for how to weave a choker. Before you start work, you need to decide on the material from which the unique decoration will be made. The following are suitable as improvised means:
- wires from old headphones;
- lace and ribbons;
- floss threads;
- fishing line;
- beads and wire;
- chains.
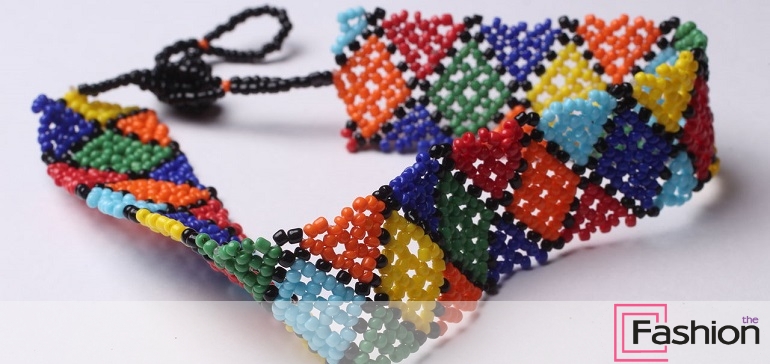
The most popular and easiest to make is a choker made from headphones. To create it you will need two wires, a clamp and a book. The upper ends of the wires are attached to the cover using a clamp. Then knots are made alternately at each end. They should not be too tight so that they look like an openwork mesh. When the work is finished, to finished product a lock is attached.
Choker - a photo of weaving will help you cope with the task of creating it - you can make it plain or multi-colored, decorate it with beads. A similar scheme is used to make jewelry from fishing line.
IN last years Weaving from rubber bands has gained relevance - children, teenagers and even many adults are “sick” of this. To create a real braided choker masterpiece, you will need a set of elastic bands with hooks and a machine. Using the diagram that comes with the kit, you can easily make a fashionable neck accessory.
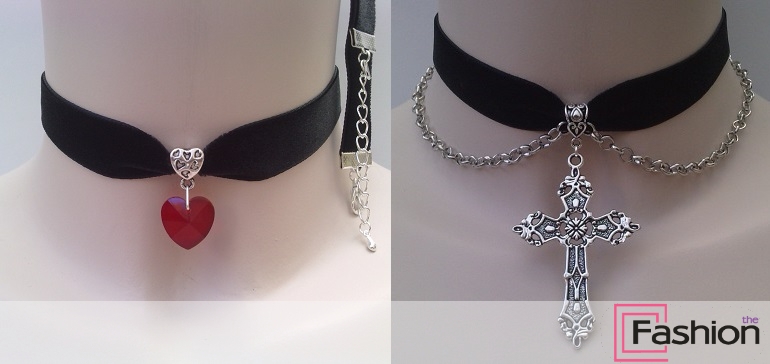
What is appropriate to wear jewelry with: a choker in fashionable looks
The variety of modern chokers is amazing. The stores offer expensive items with pearls and precious stones, as well as budget options made of metal and fabric. What to wear with a choker depends on the chosen model - it can become an expensive, sophisticated look:
- Products made of metal wire, chains, steel, fishing line, leather, headphone wires can be combined with jeans, youth blouses, tops and leather jackets.
- Jewelry made of beads, pearls, lace and ribbons will suit feminine blouses, blouses and dresses. Necklaces can be decorated with beads, rhinestones, bugles and pendants.
- Choker necklaces - photos of models with long pendants and sparkling stones look very elegant - will become an elegant addition for an evening dress with a deep neckline.
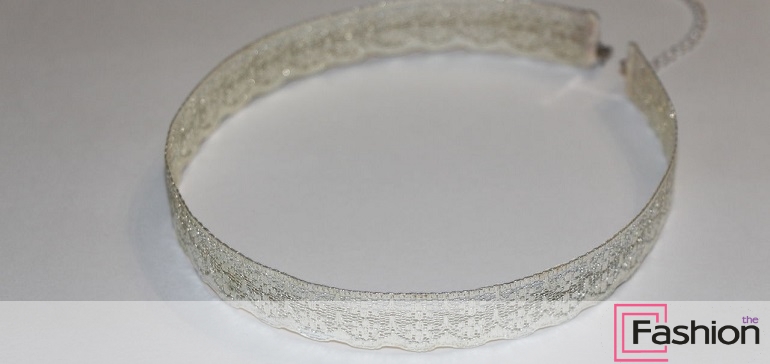
A neck choker can be worn with almost any clothing, except turtleneck sweaters, turtlenecks, formal and business suits.
If you like to make neck jewelry with your own hands, then read the article. In it you will learn how to make original chokers for your neck from various materials.
Now jewelry that fits tightly around the neck—chokers—has come back into fashion again. Thanks to them, the thin neck of girls looks elegant and attractive. A choker can be matched with any outfit, both for everyday wear and for a chic evening dress.
You can buy chokers in online stores, but sometimes finding the right one to match a certain style can be problematic. But making such a decoration with your own hands is not so difficult, and if you show your imagination, the product will not only be unique, but will also look gorgeous on you. It is how to make a choker yourself that will be discussed further.
How to make a choker with your own hands from satin and velvet ribbon?
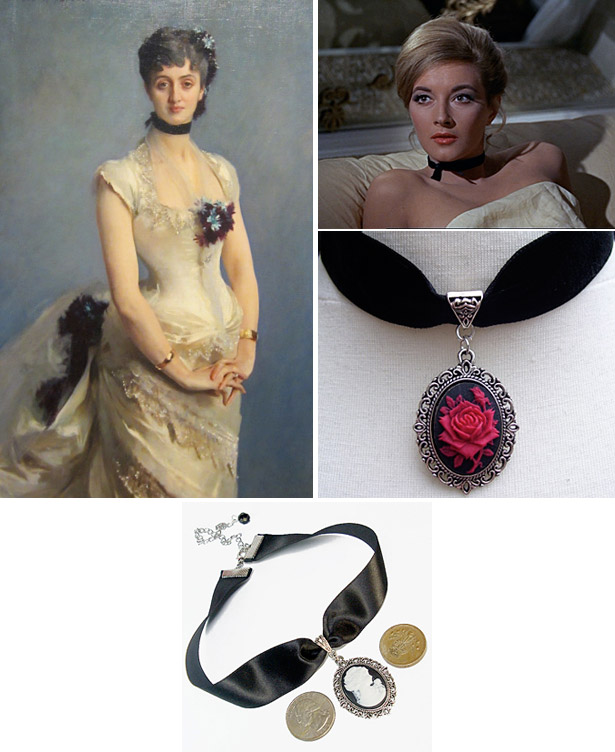
Back in 1870, girls instead of expensive massive jewelry They preferred chokers made of velvet and satin ribbons with rather voluminous pendants with precious stones for daily wear. Such products go well with any dress.
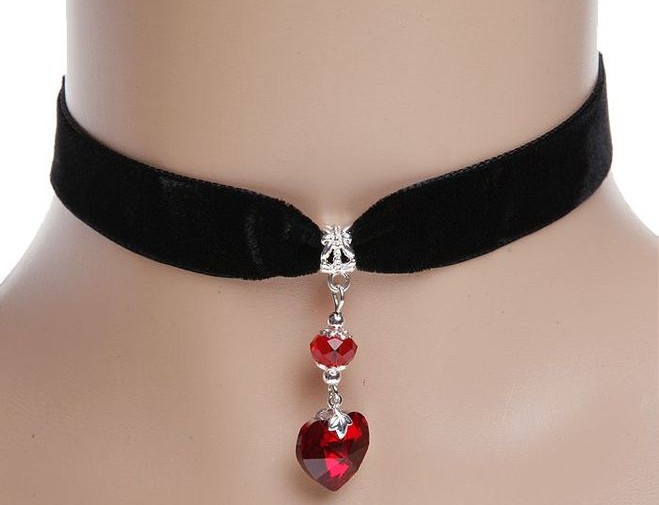
How to make a decoration from ribbon?
Materials:
- For decoration you will need a regular satin or velvet ribbon (50 centimeters), which can be bought at a fabric store
- Also buy a beautiful pendant or gold ring, brooch, glue
- The only tools you need are scissors
Operating procedure:
- Take the ribbon and thread the pendant through. Fix it in the middle with glue or clamp the ring on which it hangs
- If you are using a small ring as decoration, cut the ribbon into two parts. Then thread these parts from different sides into the ring and bend the ends of the ribbons, having previously coated them with glue, so that the ring fits tightly between them
- To keep the choker on your neck, tie ribbons in a bow at the back. You can also buy special fasteners and cut off the extra centimeters on the tape, and then fix them at the ends
How to make a velvet neck choker?
“Velvets” look very expensive and original on women’s necks. You can make it yourself from any color of fabric. It will look a little bulkier than a choker from velvet ribbon.
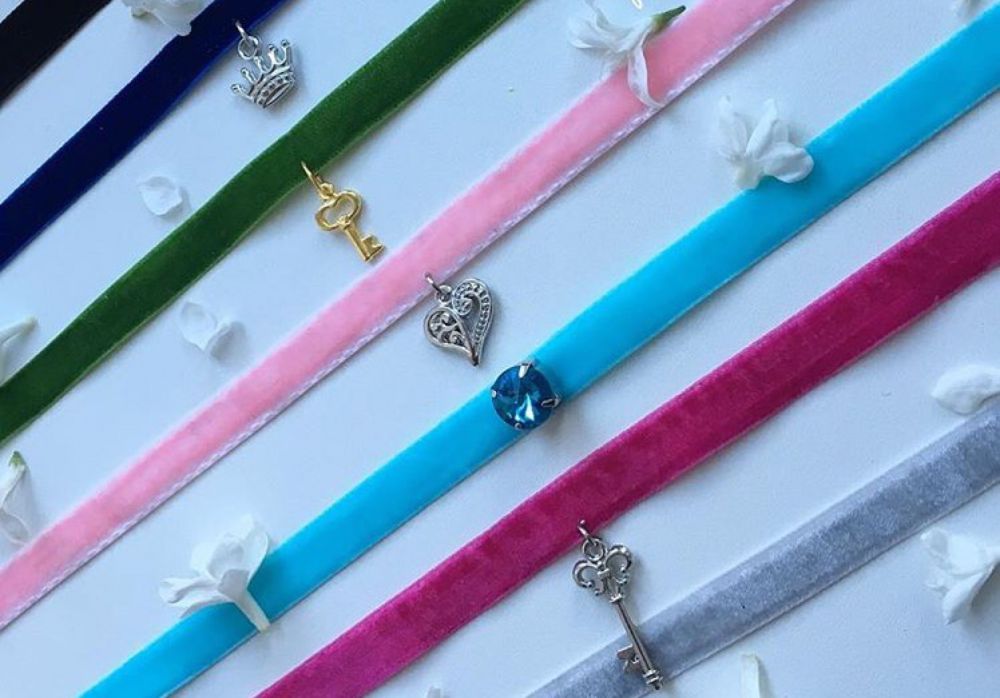
It’s good that you can choose this decoration in any color scheme. After all, there are a great many varieties of velvet fabric in stores. If you wish, you can make marigold purple, black, cherry, green, bright red, of blue color. To do this, it is enough to buy only six to seven centimeters of the required shade of fabric. From this cut you will get three or four chokers per neck (with a material width of 150 centimeters).
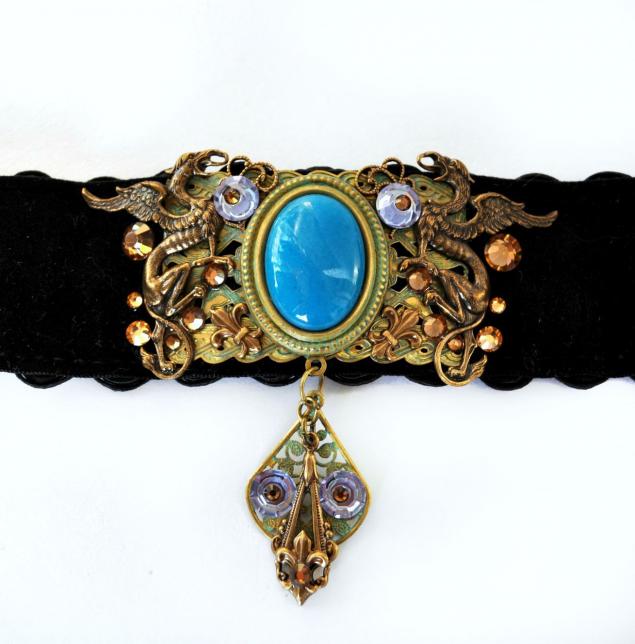
Velvet with brooch and pendant - do it yourself
How to sew a velvet choker?
Materials, tools:
- Velvet fabric according to neck size (30-35 centimeters). You can choose any width of the product. So, if you want a choker 2 centimeters wide, then you will need 4 centimeters of fabric plus 1 centimeter for folding the edges on both sides
- Threads Same color range same as fabric
- Scissors
- Sewing machine
- Clasps for choker
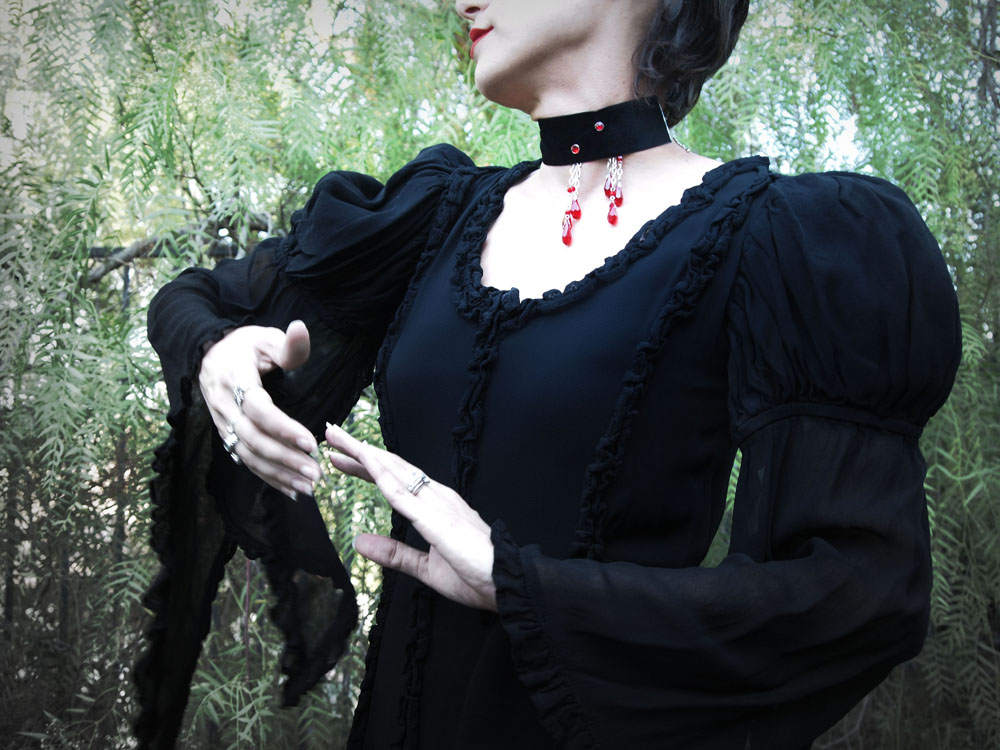
Velvet sewing technology
- Cut a strip of velvet to the required size
- Fold the cut in half along the split line
- Iron the fabric
- Fold the edges of the fabric inward 0.5 centimeters on both sides
- Iron the folds
- Sew the velvet carefully with an even seam
- Attach a clasp to the ends of the choker
- The velvet is ready, all that remains is to decorate it with accessories
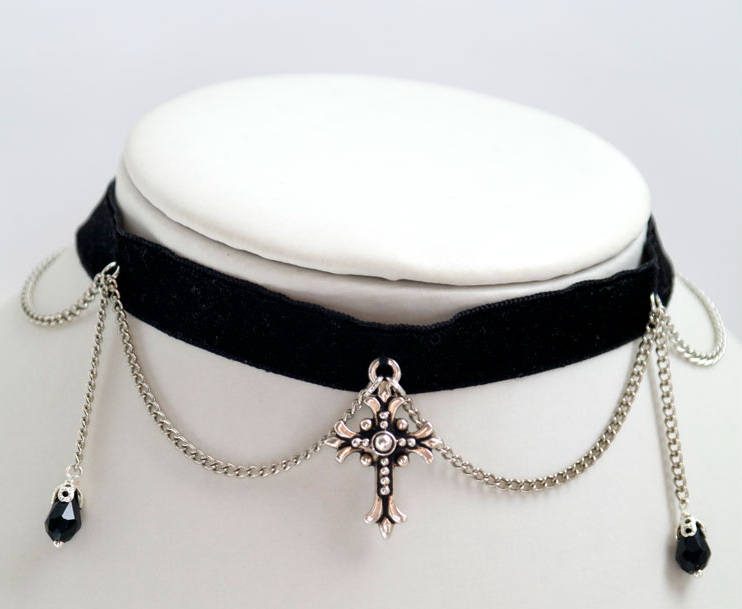
Original velvet - do it yourself
How to make a black velvet neck choker?
As a rule, fashionistas prefer black chokers. Because they look good with any clothes, be it - Evening Dress or your favorite comfortable jeans and T-shirt. The classic version Making marigolds with your own hands is not at all difficult if you know how to make an even stitch on a sewing machine and hold scissors in your hands. Read about the process of making the accessory in the previous paragraph.
![]()
How to make a black velvet choker with a pendant?
The main decoration of a marigold is an accessory in the form of a brooch or pendant. These small parts give a special charm to the choker. The pendant can be ordered on online portals or bought in jewelry stores.
In order for the pendant to hang securely on a velvet choker, it must be carefully hung on a small ring attached to the fabric. Before doing this, first make a small hole in the material.
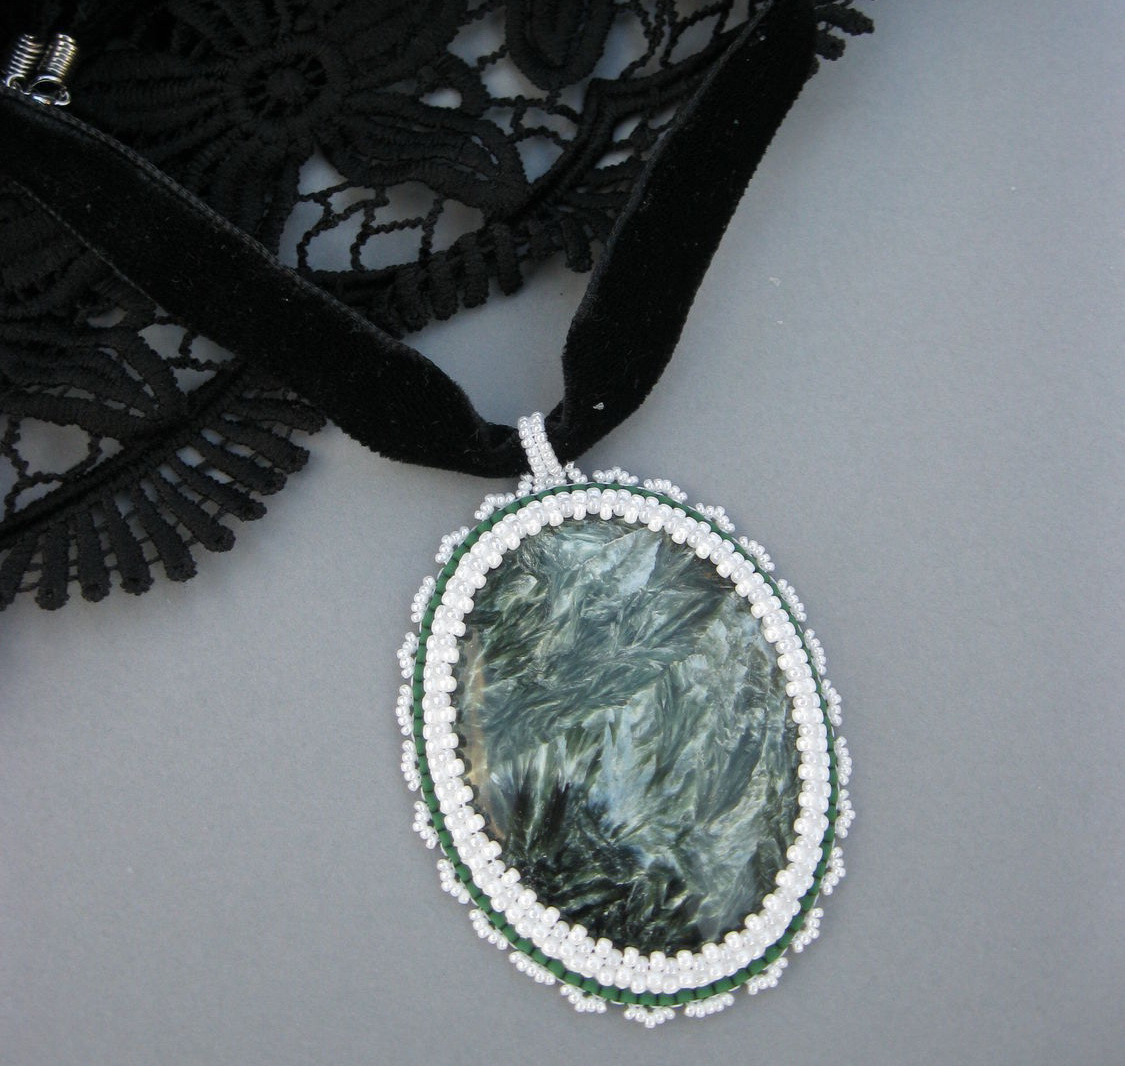
How to make a black choker tattoo?
Such decoration on the neck will resemble a tattoo. After all, it fits tightly to the neck and should be woven from a thin fishing line, which, in turn, is very similar to the lines of the tattoo design.
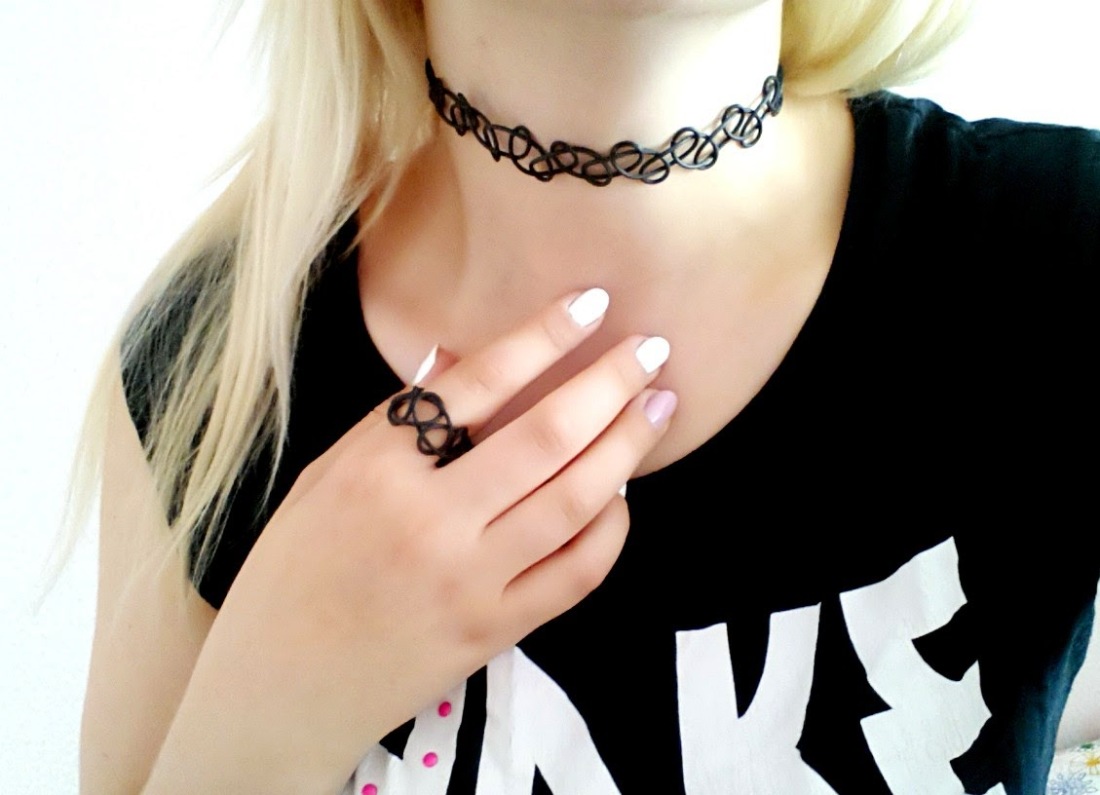
Black choker tattoo - do it yourself
If you like this choker, then let’s look further at how you can make it yourself.
Materials:
- Black fishing line- usually about two and a half meters of fishing line is enough for one choker
- Prepare regular paper clip to hold the weaving later
- Cardboard or a book for fixing the fishing line
- Lighter to burn the ends
Method for making a choker from fishing line
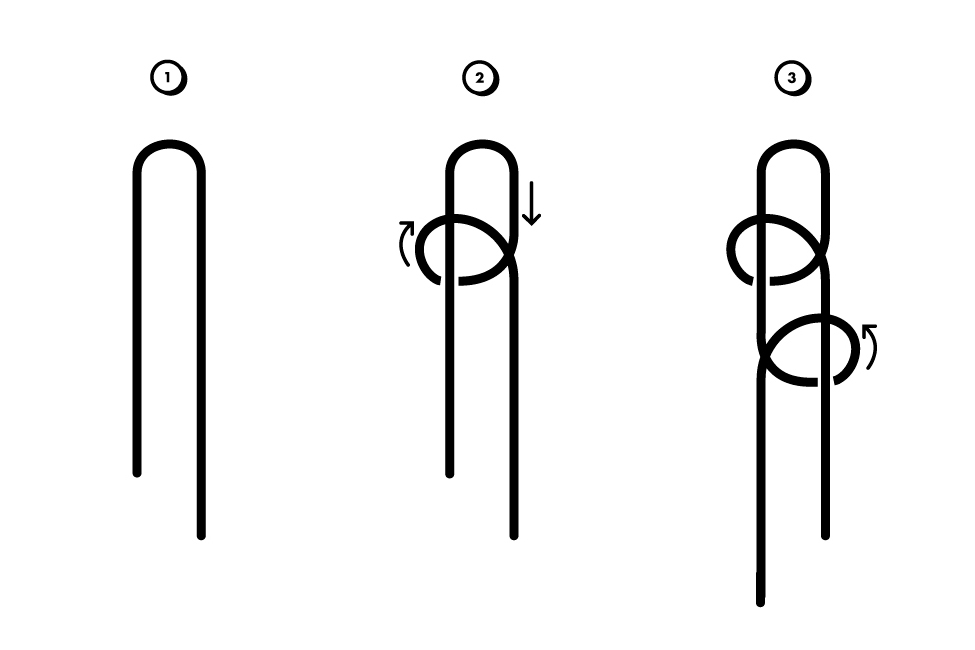
- Fold the fishing line in half
- Secure the resulting loop with a clamp to cardboard or the hard cover of a book.
- Now we carefully begin to weave the pattern. For this right side Place the fishing line under the left one. Place the end of the right fishing line on the right side
- Now we make a loop with the left fishing line in the same way, only on the other side
- We continue to alternately make loops on one side and then on the other.
- The weaving should be uniform. To make everything work, tighten the loops equally
- To prevent fraying, secure the edges of the choker with special fasteners
IMPORTANT: A fishing line that is too thin will not hold the shape of the choker nicely. Choose a line of medium thickness.
How to make a choker from beads: weaving pattern
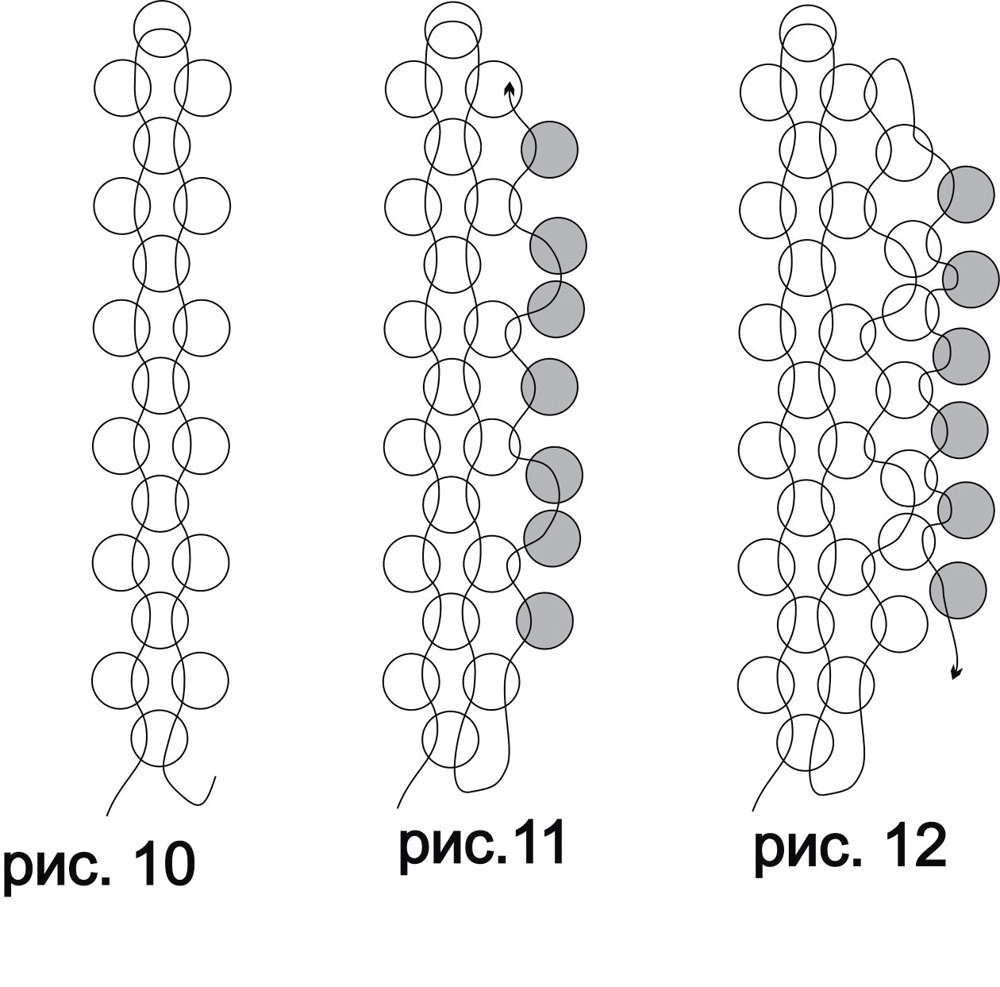
A finely woven choker made from small beads will look very neat and stylish. Moreover, there are a lot of schemes for creating a masterpiece. Below you can choose the model you like. The only thing that will then be required is perseverance and required material(beads, fishing line, clasp), tool (scissors).
Weaving pattern No. 1
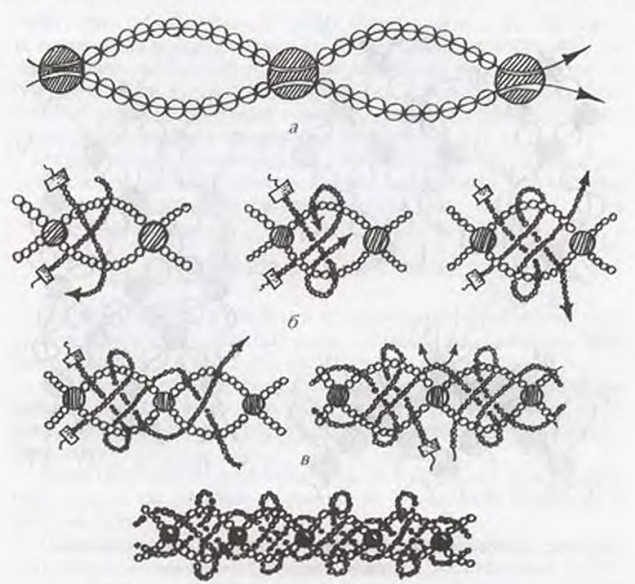
Weaving pattern No. 2
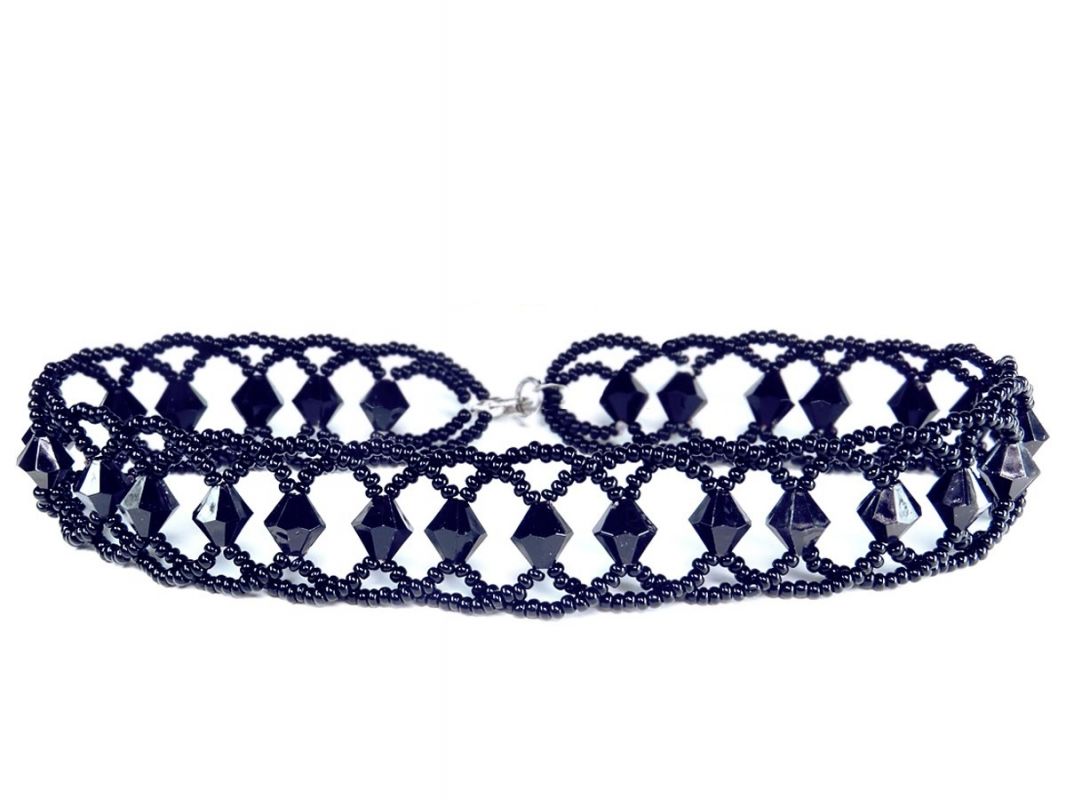
DIY beaded choker tattoo
How to make a choker tattoo from beads?
If you prefer to wear a choker tattoo made of beads on your neck, then watch the video on how you can make it yourself. We have already mentioned above how you can weave this kind of product from fishing line. The principle of operation for a beaded choker is the same, only there is one difference. You will need to string a lot of black small beads onto the fishing line.
Video on how to weave a choker tattoo yourself from small beads?
How to make a choker from lace?
Delicate lace weaving will give the choker a special romanticism. This accessory will come in handy with an evening outfit. So girls, if you don't have jewelry under elegant dress, then you can make a beautiful neck decoration yourself from a small piece of openwork lace.
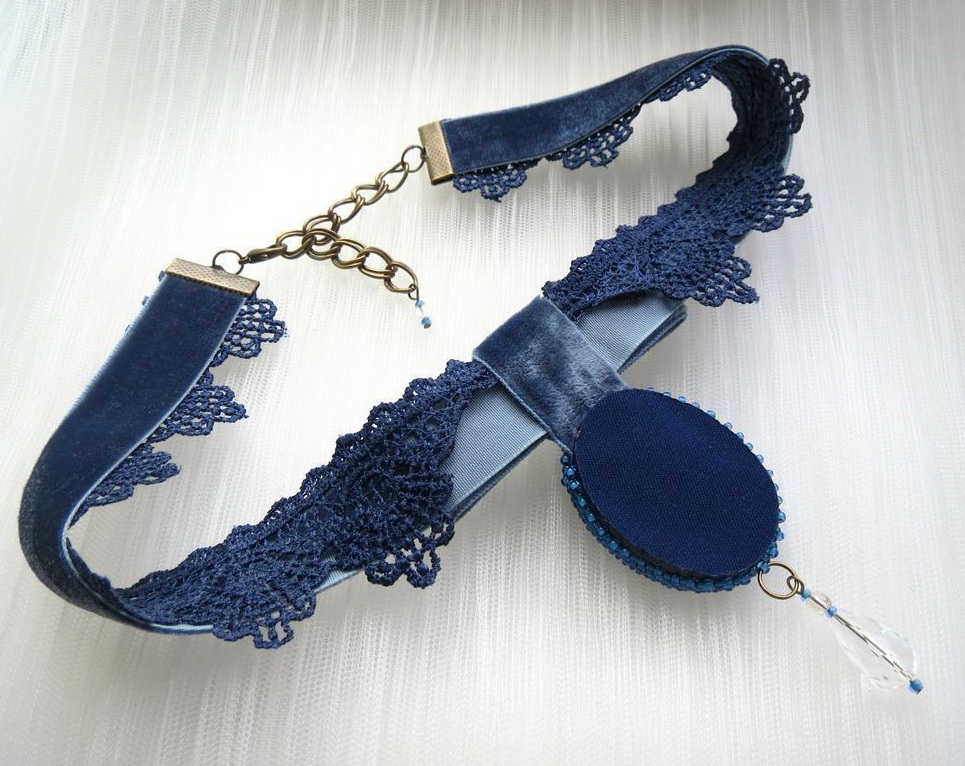
DIY lace choker
How to make a black lace choker?
To make a black lace choker, you will need:
- Black lace strip
- Devices for fixing the choker
- Pendant, medallion or other decorations to make the choker original
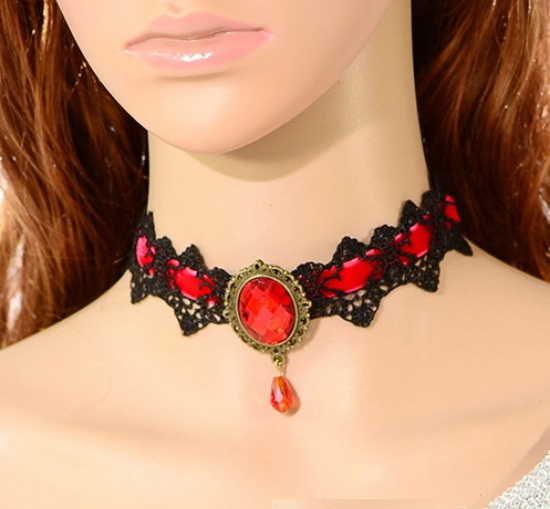
How to make a lace choker?
- First measure the volume of your neck and cut the required amount of lace tape
- Attach a pendant or other accessory to the ribbon in the middle
- Lock the choker clasp device
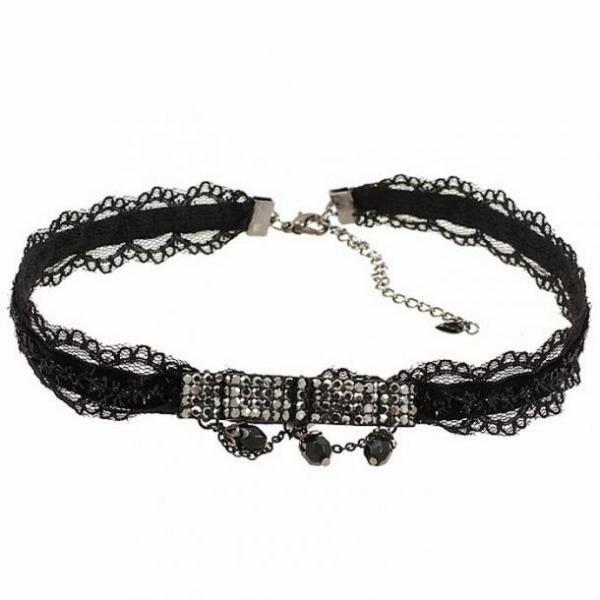
Beautiful lace choker - do it yourself
IMPORTANT: If the lace (guipure) for the choker is too delicate and does not hold its shape, then sew a ribbon of a suitable color to it under the bottom.
How to make a white lace choker?
A white lace choker will suit even wedding dress. Therefore, when choosing fabric for such an accessory, be picky about the quality of lace and appearance. Pearl beads or white gems.
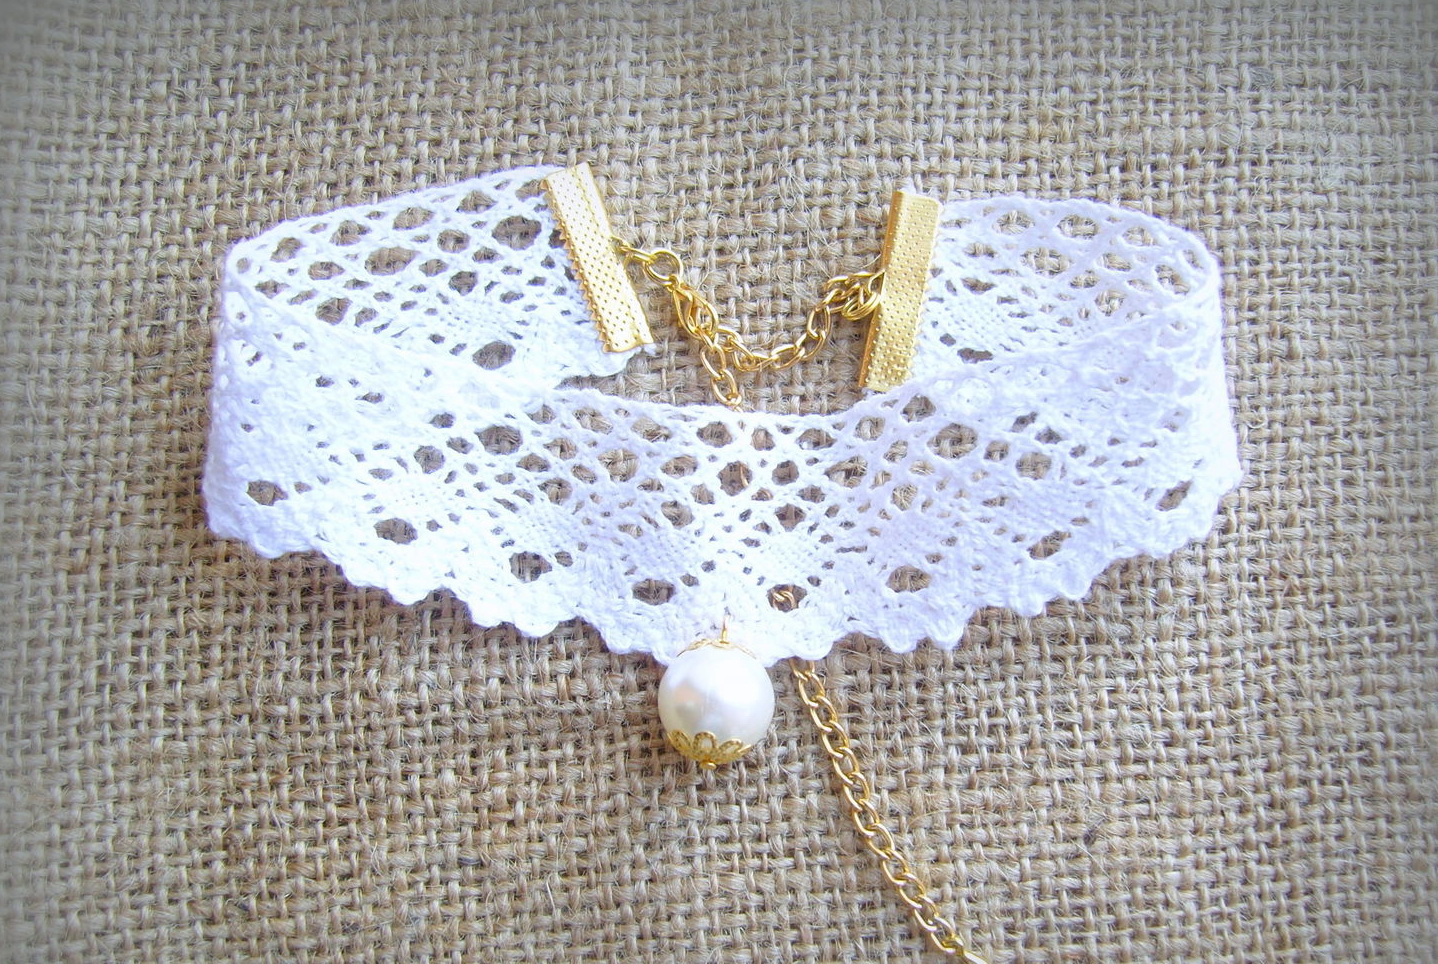
Beautiful Crochet Lace Choker Necklace
How to make a choker for a neck from fabric?
One of the most simple options for daily wear - a choker around the neck made of any fabric. What's interesting is that it can be made from any material. Moreover, it is easy to match it with your favorite blouse or sundress. After studying the photo below, you will special effort You can make a choker from fabric yourself.

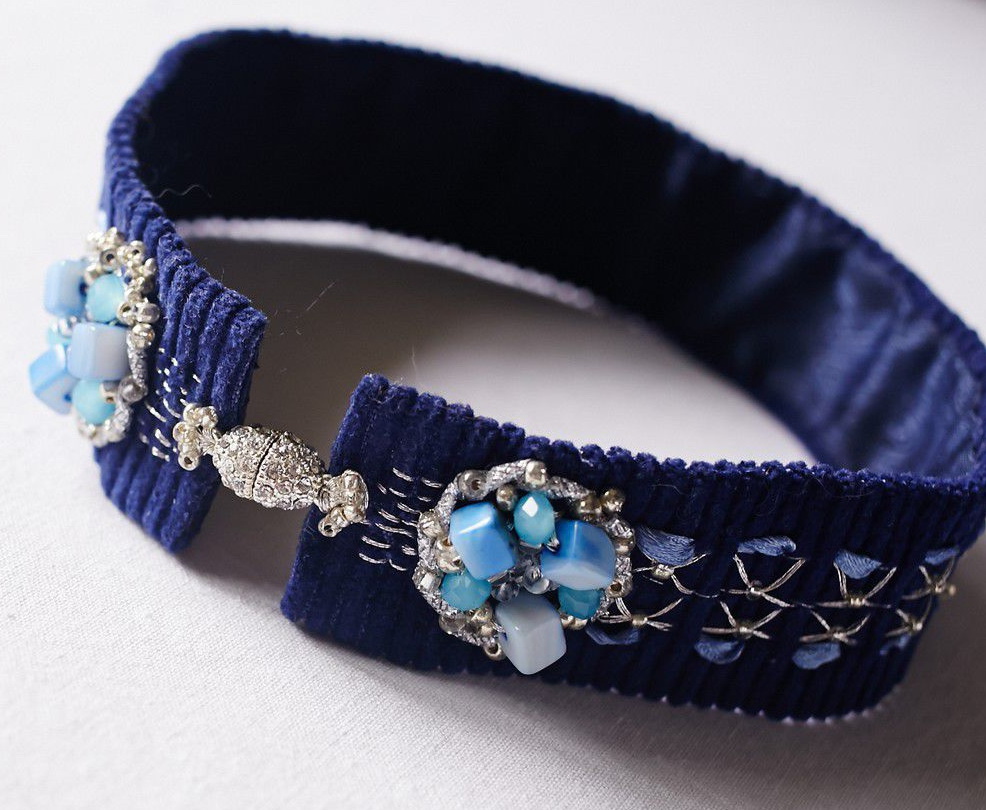
Stylish, fashionable neck choker for girls
How to make a leather choker with your own hands?
If you have pieces of leather at home, then making a choker will not be difficult for you. Moreover, now even on the market you can buy beautiful rivets, fasteners and other accessories.
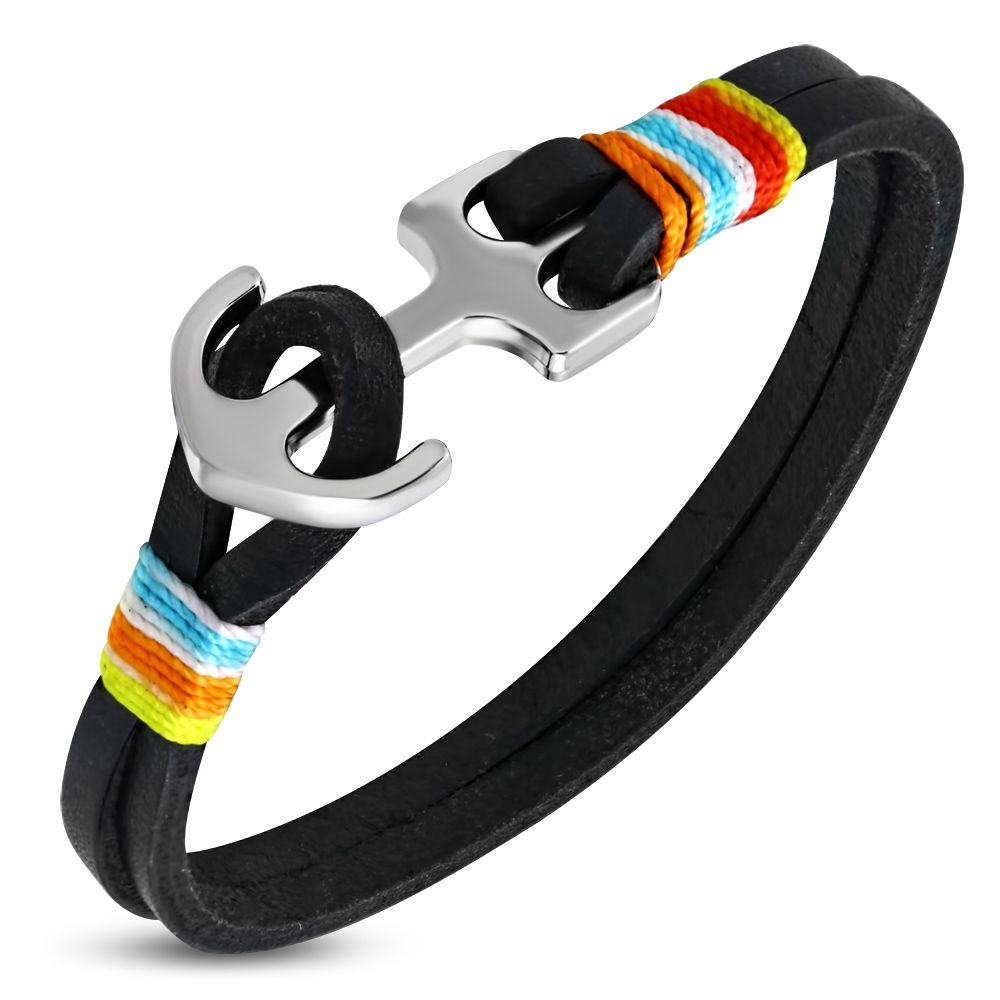
DIY leather choker
![]()
Now, having looked at almost all the options for making chokers at home, you can choose the one that suits you. Also, if you carefully make such a product with your own hands and give it to someone close to you, then the person will like this gift.
Probably every girl wants to look unique, elegant and be remembered. To do this, she goes to any lengths. Selects and alters clothes, shoes, accessories. One such accessory that emphasizes individuality is a choker. So, let's get acquainted with this decoration and understand its types, as well as what to wear with a choker on your neck.
Decoration choker on the neck - history of appearance
A choker is a necklace that fits tightly around the neck. Translated from English, choker means “strangle”, “strangler”. But, despite this translation, such decoration is absolutely safe and very popular.
Such decorations are not a modern invention. They have been known about them for a very long time. The first people to make and wear chokers were the Indians of North America. They made them from wood, leather, and decorated them with bird feathers and animal fur. Such decoration was considered a talisman against evil spirits and at the same time was a distinctive sign of the leader. Accordingly, chokers were worn by both men and women (but very rarely).
Later this decoration became of interest to noble people in Europe. The Queen of England was also favorable to such decoration. These necklaces visually lengthened the neck and hid wrinkles. Chokers were made from expensive materials, namely silver, gold, plate, and therefore only wealthy ladies could afford them.
With the advent of Queen Victoria to the throne, this decoration went out of fashion, as it did not fit with the classic designs of that time.
Again past glory The necklace was brought by the Princess of Denmark, who had a scar on her neck since childhood. It was impossible to hide this with a thin choker, so several layers of precious stones and metals. 
Later, the choker became popular with designers. Irreplaceable made the choker the main decoration of her collection. They were very diverse: made of leather, silk, velvet, pearls. Coco Chanel's innovation was an insert in a choker. She made it from precious stones. Subsequently, such a choker was very popular among famous and rich ladies. An example of this is Princess Diana, who wore a pearl choker with a precious stone insert. 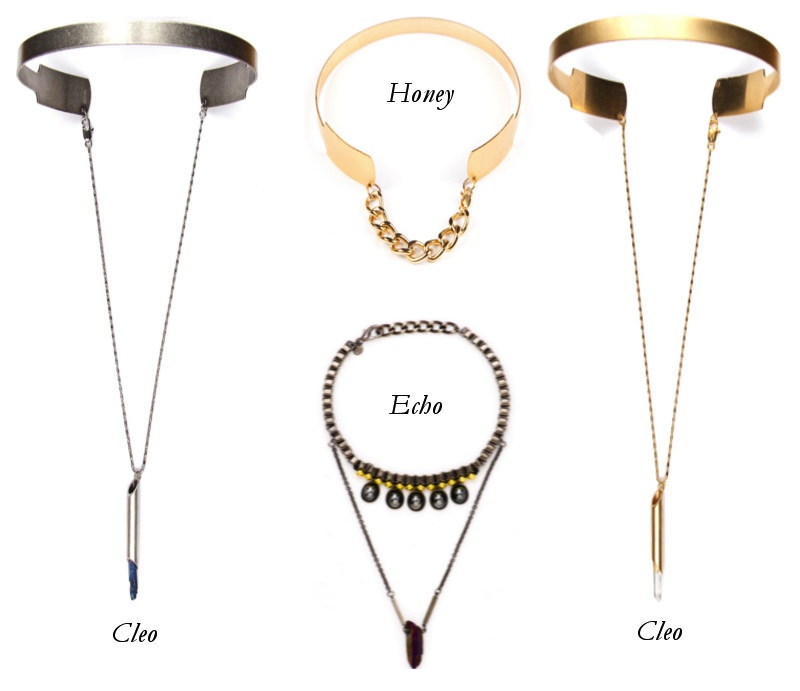
And only in the late 90s this type of jewelry became the most popular and accessible, even schoolgirls began to wear them.
A choker is a piece of jewelry that has no boundaries of wear, either by age or gender. This decoration is ideal for both young fashionistas and older ladies, both men and women.
By the way, you can find a lot of controversy online about what does a choker on a girl's neck mean, our answer is nothing! It is a common piece of jewelry like bracelets, necklaces and chains. Unfortunately, there is an opinion that chokers on girls’ necks position them as persons of easy virtue or, simply put, prostitutes, but fortunately this is not the case.
Types of chokers
With this decoration you can create your own individual, unique style. A variety of chokers will help with this. So, what types of neck chokers are there?
Neck choker for men
A men's choker, which is basically a lace or thin thread, consisting of one, less often several rows. This choker is decorated to a minimum. 

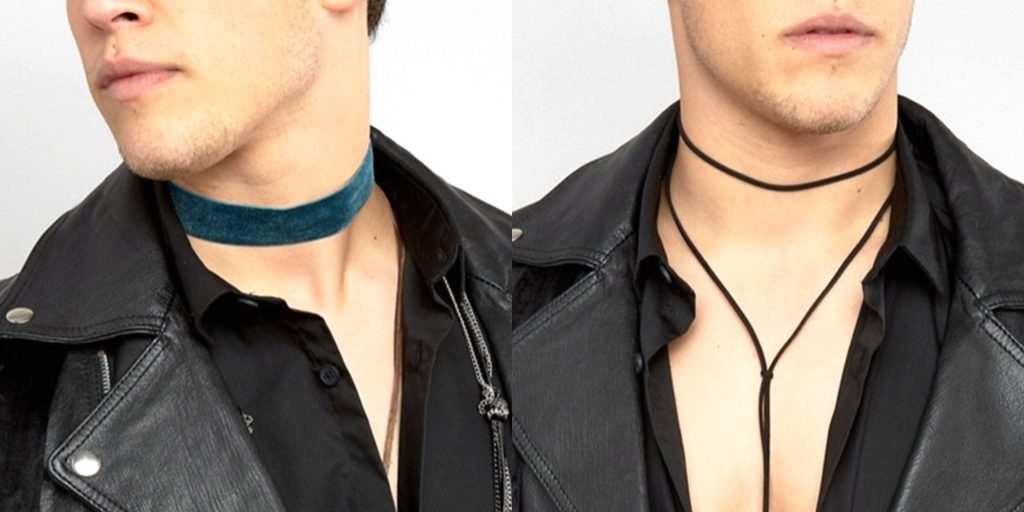


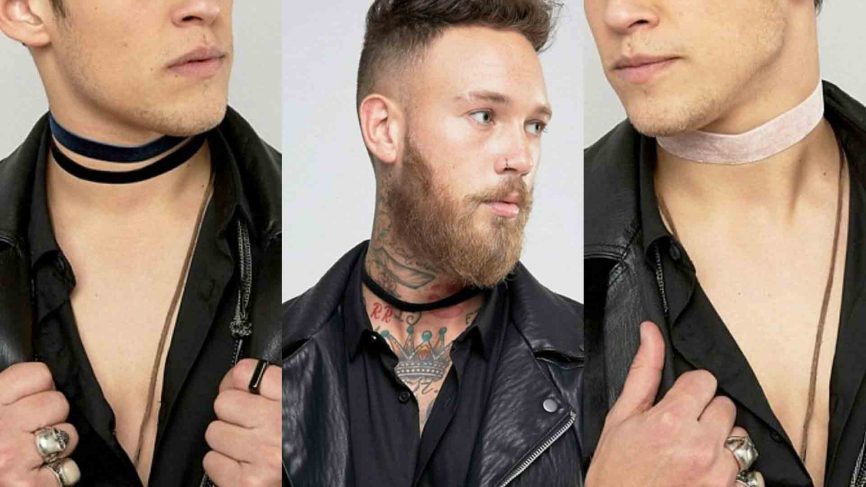
Braided chokers
A braided choker is more elegant. This choker consists of weaving beads, rhinestones, chains, and beads. 
Yarn choker
A knitted choker, this decoration performs two functions at once: for beauty and for warmth. They are knitted from warm, soft yarn. Additionally, they can be decorated with beads, rhinestones, and lace.
Lace neck choker and collar chokers
They are made from openwork ribbons and lace. These chokers are reminiscent of the stand-up collars that were in fashion a century ago. 


Leather neck choker
Leather choker. This choker does not leave marks on the skin and does not rub it, so it is especially suitable for beginners. 
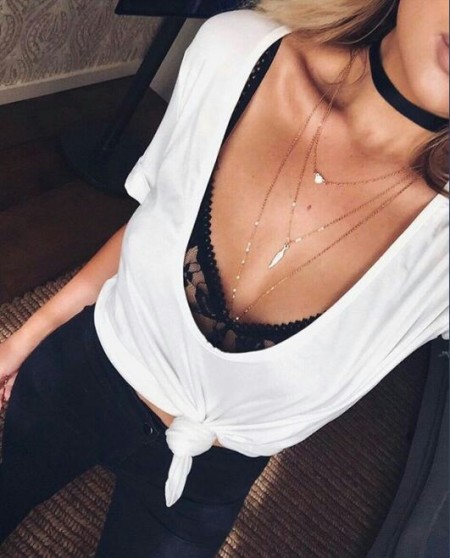
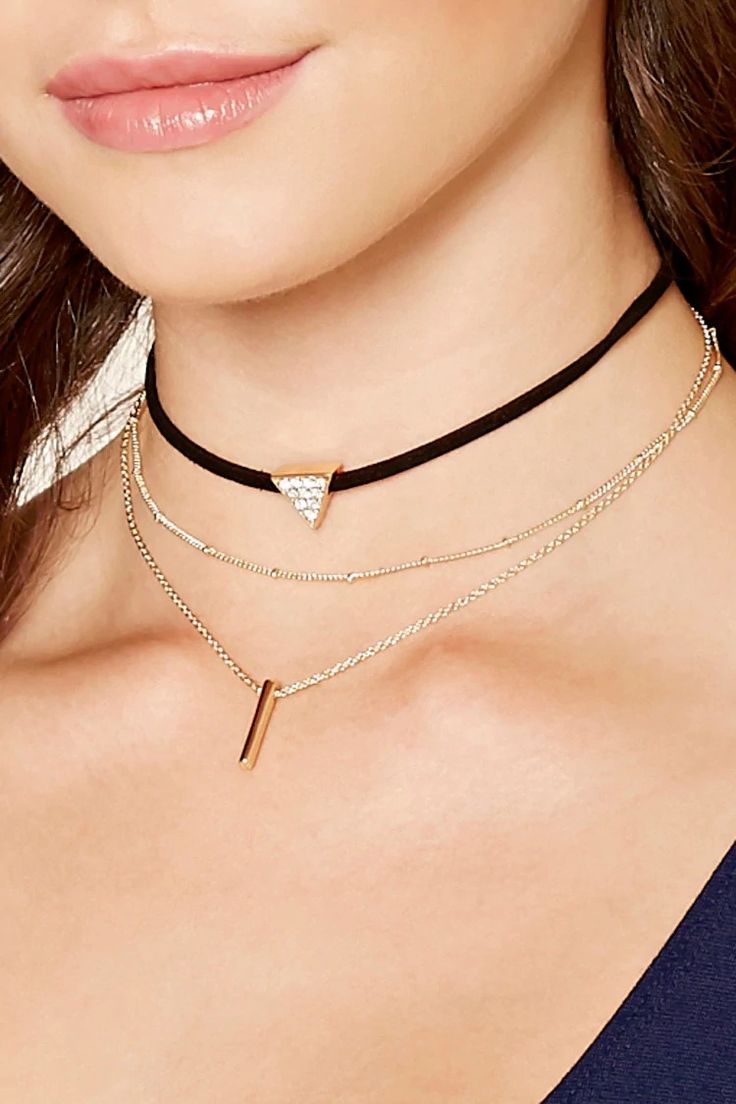
Punk style chokers
It is mainly decorated with spikes and decorative metal objects. The choker itself is made of leather or fabric. 
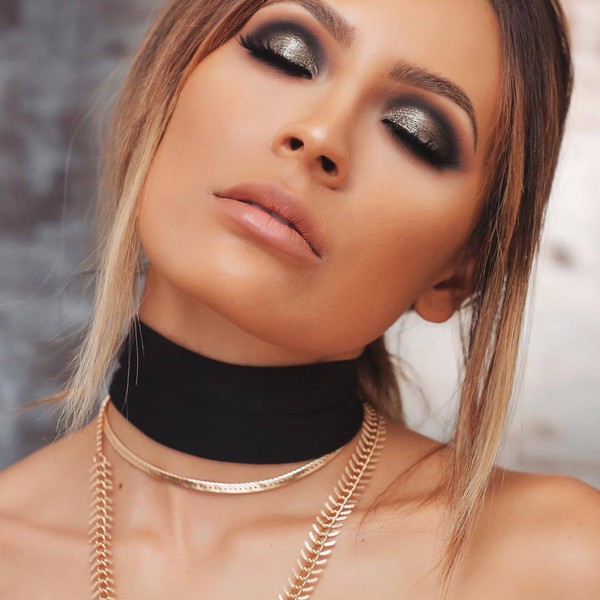
Wide choker
It is usually made of fabric (the most popular are satin and silk). It is very similar to the collar of a sweater. IN Lately A velvet choker around the neck has become at the peak of popularity; it looks very simple, but if it is complemented by a beautiful pendant, this decoration will suit many styles of clothing.


Beaded choker
It is mainly woven from small and large beads. This decoration will add shine and grace to your outfit.
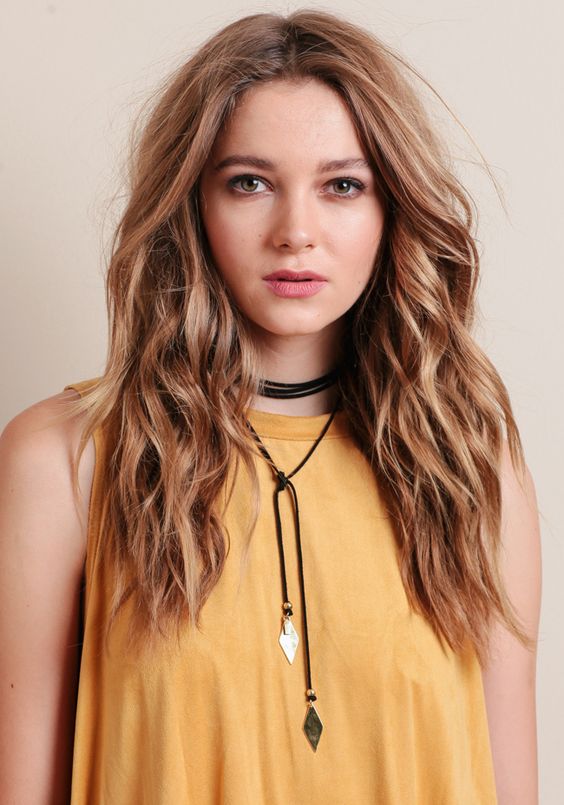
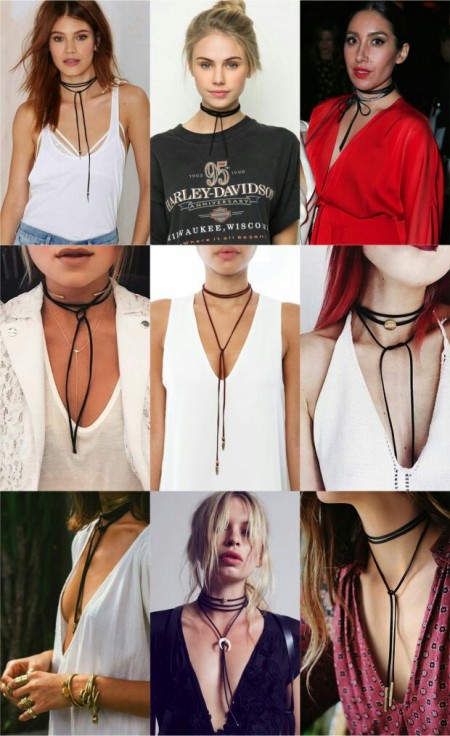
Choker cord
Lately, the choker necklace has been gaining momentum; this type of decoration has become the latest trend, so take a closer look at it. 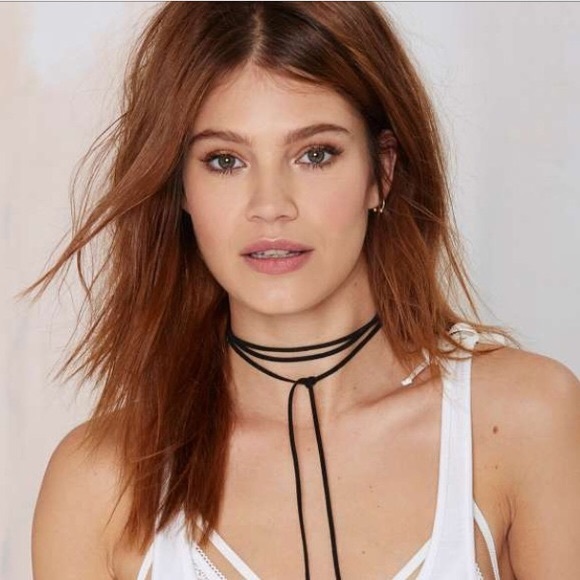

Metal choker
Tempting and not ordinary, but most importantly a trendy decoration, many variations, from a collar and a thin strip to an open choker with massive beads on the decoration. It is better to choose such a choker to match other jewelry or clothing. 


What to wear with a choker around your neck?
Despite the fact that this decoration fits many looks and styles, it cannot be called universal. For example, not a single type of choker can be combined with a business jacket or blouse. That is why it is necessary to carefully select a choker so that it harmonizes with the outfit.
Here, for example, are ideas on what you can wear a choker with around your neck, photos: 
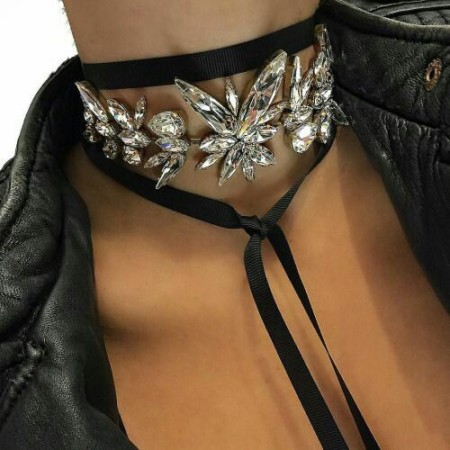
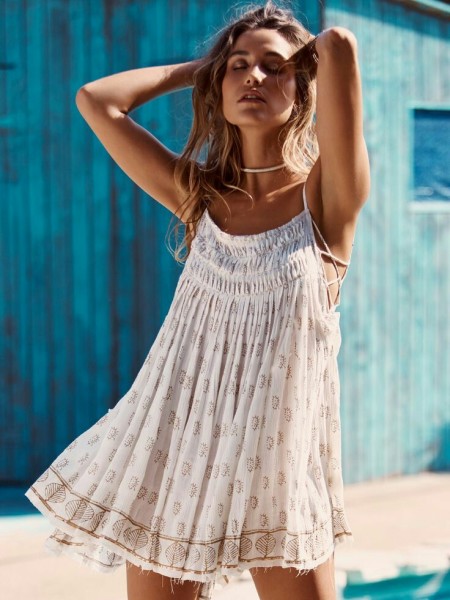


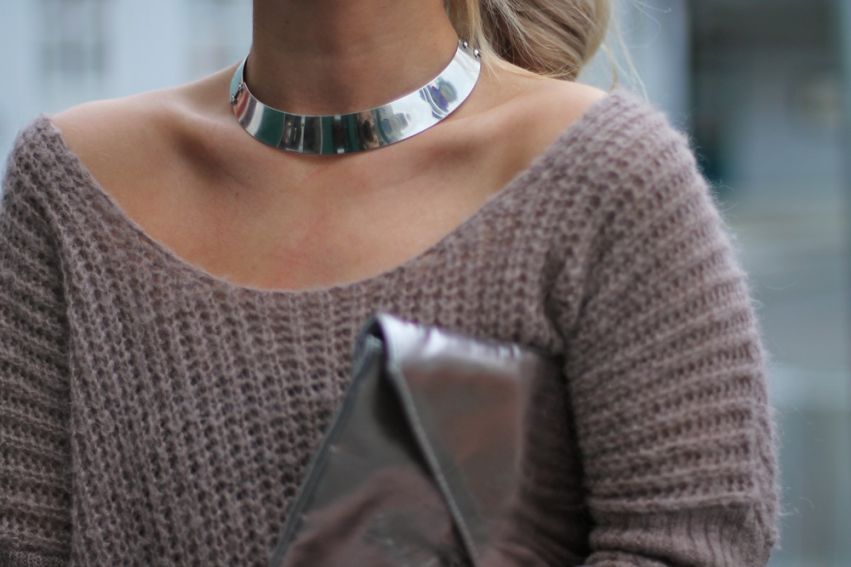

What clothing styles does a choker go with?


An important rule when wearing a choker is not to overload your neck with additional jewelry. Unless these are thin chains that are longer than the choker.
If you suddenly want changes in your wardrobe, but you either don’t have time or money for drastic changes, then an original choker jewelry will help out. It will highlight your individuality and create a unique image.
By the way, here is a video in which the stylist gives practical advice about what to wear with a choker around the neck for girls and women, as well as how to choose jewelry depending on your appearance:
Choker necklaces come in different varieties. If a tattoo choker is firmly associated with shockingness and rebellion, then an elegant velvet on a lady’s neck or a ribbon choker is stylish and very fashionable. What is important is that a choker around the neck is easy to make with your own hands. Study the choker making tutorials presented in the article and create jewelry that will highlight your individuality.
This is perhaps the simplest choker of all the possible options.
Materials and tools
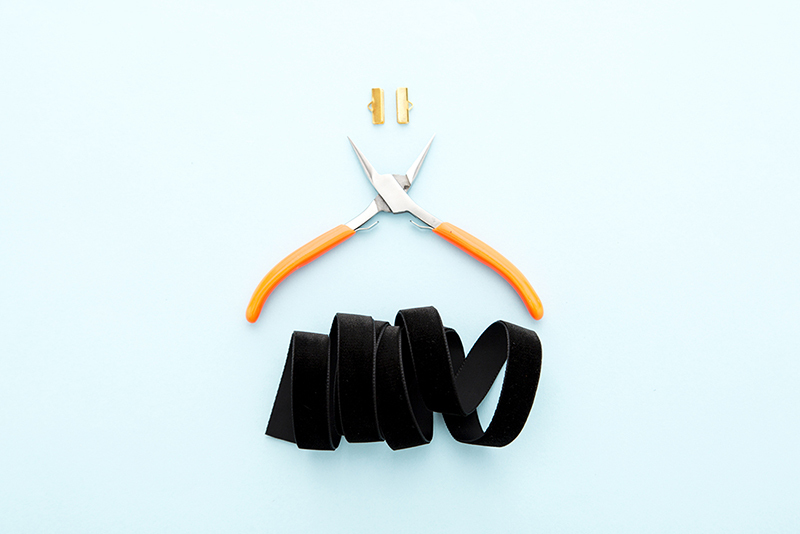
- velvet ribbon 50-60 cm long. Can be purchased at stores selling handicraft materials
Tip: if you prefer velvet tape with a tight hold, buy an elastic velvet tape
- end caps - special clamps for the ends of tapes - allow you to beautifully and neatly design sections without resorting to glue or a needle. As a rule, such accessories are sold in stores with materials for needlework / jewelry
- pliers and scissors
Manufacturing instructions:
- Cut the required length of tape
- Lock the limit switches
Wear a choker while tying it beautiful bow behind
How to make a black velvet neck choker?
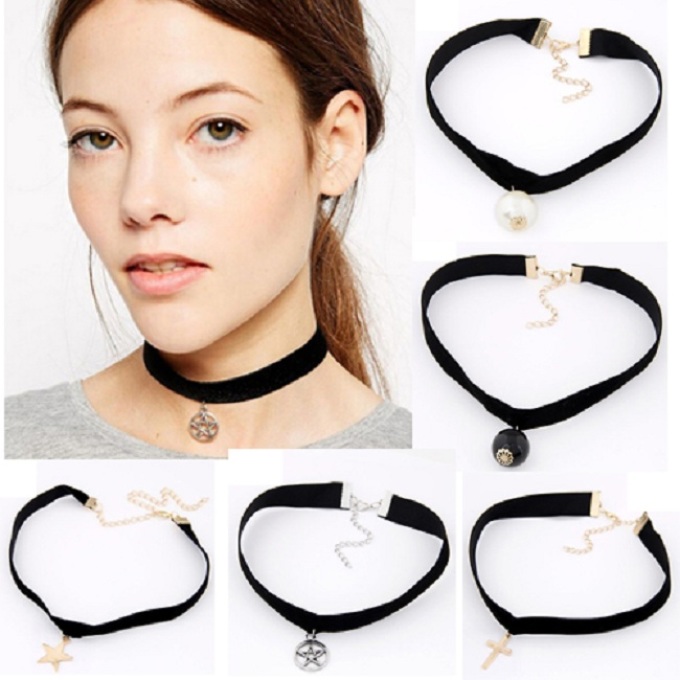
Materials and tools
- velvet ribbon
- limit switches
- connecting rings
- clasp with chain to help adjust neck circumference
- pendant or medallion (optional)
- pliers and scissors
- sewing needle, sewing thread (to match the ribbon)
Manufacturing instructions
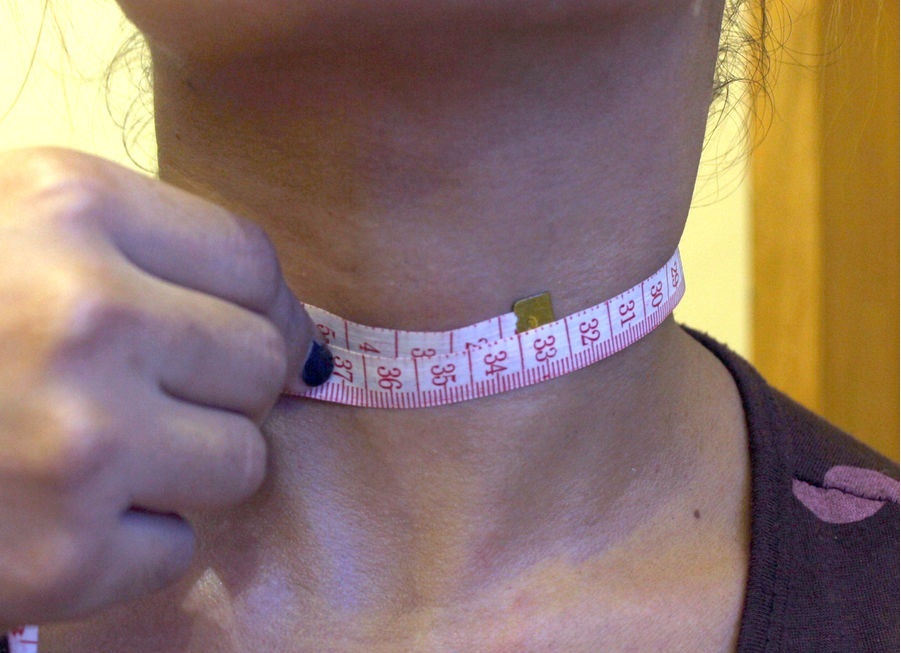
- Measure your neck volume (NC). For example, OR was 33 cm
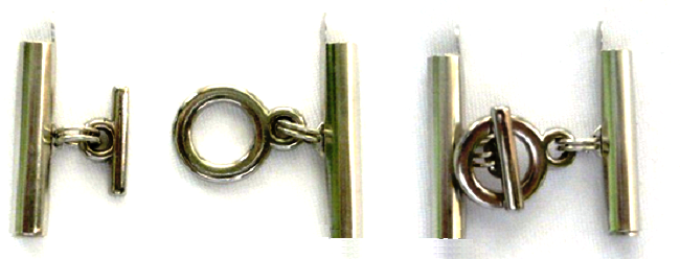
- Assemble the castle. Using connecting rings, attach the limit switches to the lock. You should receive the assembled velvet fixing element
- Place the resulting mount on any hard and flat surface. Measure its length (L). For example, the length of the assembled fixing element (see photo) is 3 cm
- Taking into account the length of the fixing element, the net length of the tape (BL) should be
BH=OSH-DZ or BH= 33-3=30 (cm)
- Be sure to make allowances for attaching the end switches (1 cm on both sides). As a result, the length of the tape will be 30+2=32 cm
- Cut the required length of tape. If you plan to decorate your choker with a pendant that has a special eyelet, put it on a ribbon
- Lock the limit switches
- If the pendant/pendant/medallion you have chosen does not have an eyelet, sew or attach a decorative element using a connecting ring (after marking the middle of the ribbon)
Fashionable choker necklace is ready. Both as a daytime decoration and as an evening accessory
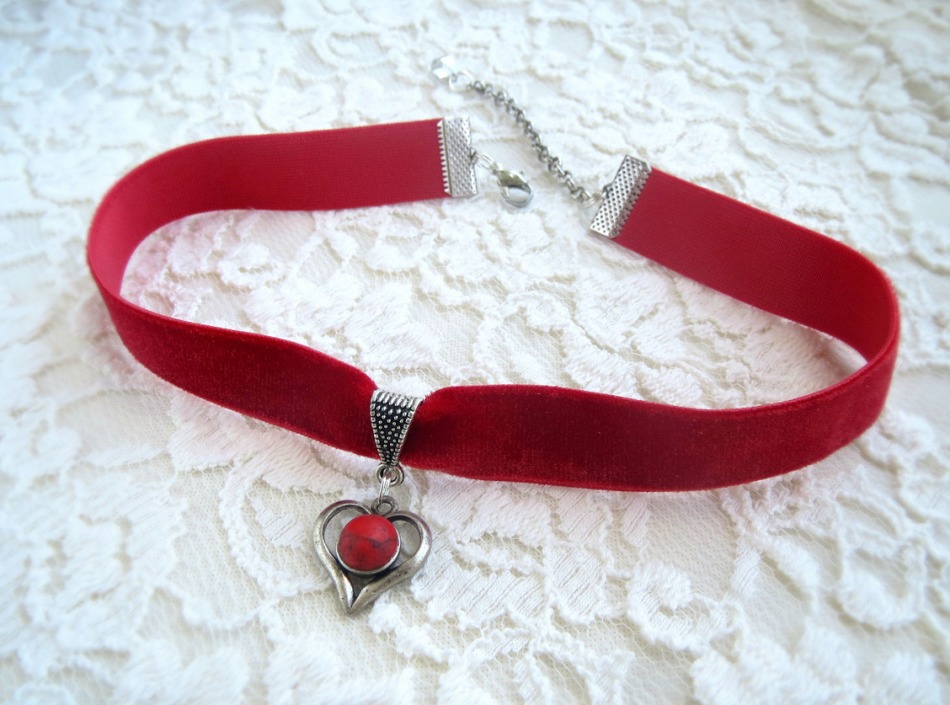 Choker design option. The following were used in production: velvet ribbon (width - 1.5 cm); pendant with a wide eye (the color of the stone matches the color of the ribbon); lobster lock with adjustable chain
 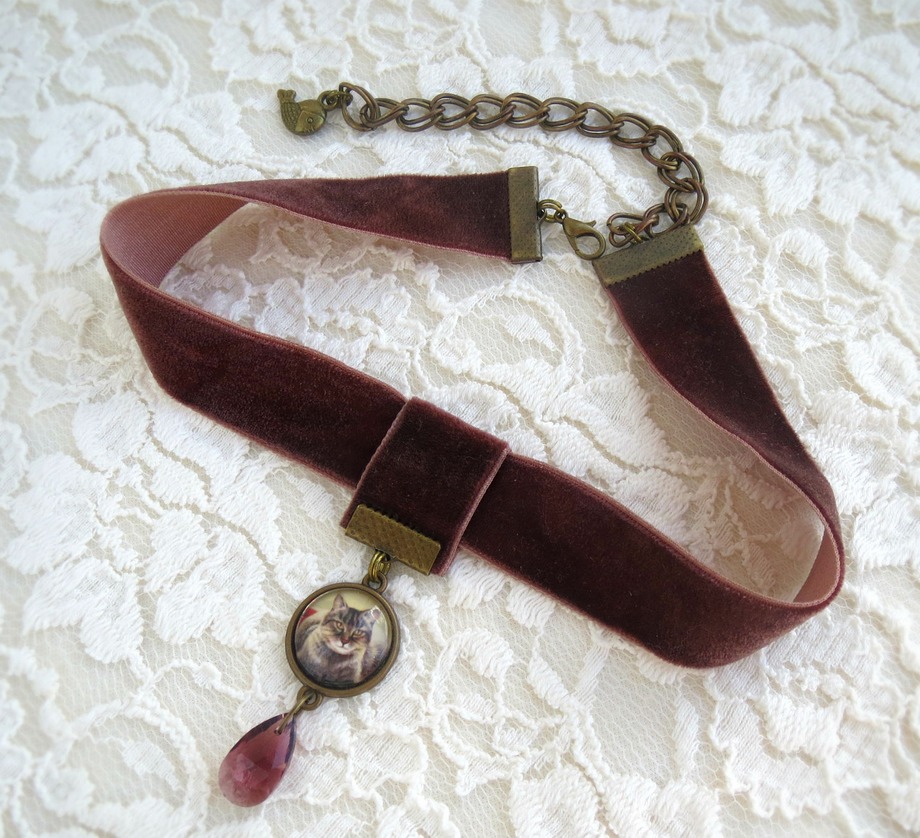 Choker design option. The following were used in production: velvet ribbon (width - 1.7 cm); cabochon pendant ( handmade) and drop-shaped glass beads; lobster lock with adjustable chain
 How to make a choker with your own hands from satin and velvet ribbon?

Materials and tools
- velvet/satin ribbon 50-60 cm long
- limit switches
- large connecting ring (the diameter of the ring should exceed the width of the tape by 1 cm)
- pliers and scissors
- fabric glue
Manufacturing instructions
- Place the tape on a flat, hard surface
- Cut into two equal halves
- Place the connecting ring over the middle cut
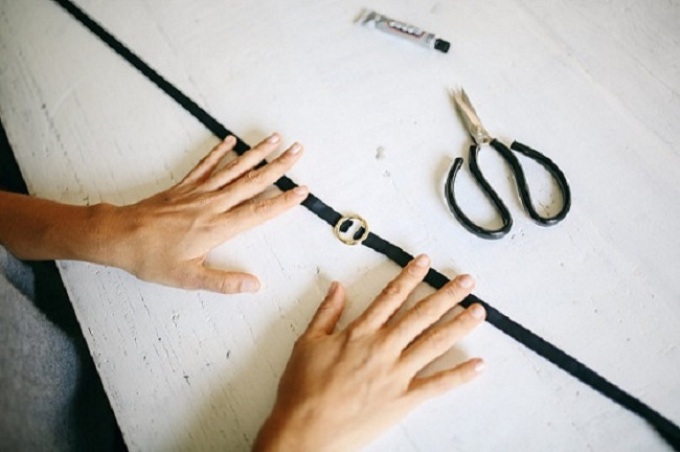 Jump ring location
 - Wrap the free ends of the ribbon, forming ring holder loops. Secure the loops with glue
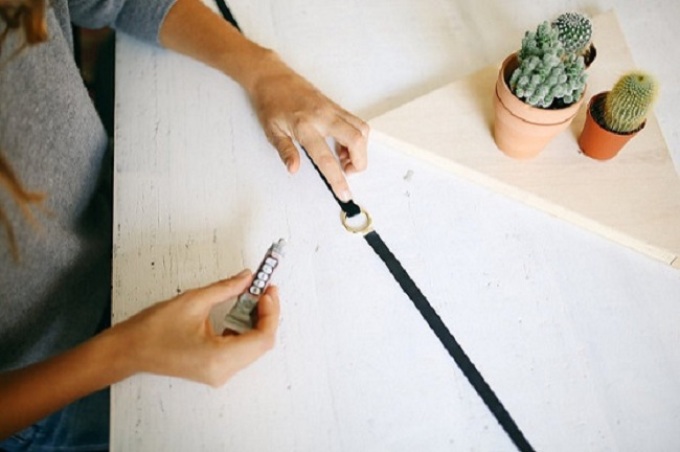
Tip #1: if you don’t have special glue at hand, don’t despair. The loops can be secured by making a few neat stitches using a needle and thread
Tip #2: If the needle and thread stitches are not your thing best friends, decorate the edges of the ribbon with beautiful end caps. Be sure to make sure that the ends have loops for attaching connecting rings. Secure the ring using connecting rings
Unusual idea: a transparent choker with a ring looks interesting
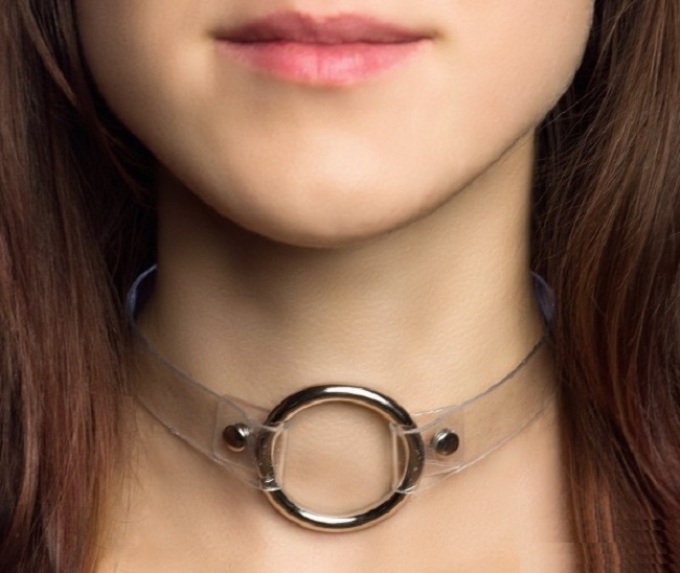
To make such a necklace, use silicone straps of suitable width. You can buy them in stores selling handicraft materials. Secure the ring with rivets. The choker is fixed on the neck using regular buttons. Rivets and buttons can be installed in a clothing/shoe/bag repair shop.
How to make a black velvet choker with a pendant? DIY choker with pendant
Agree, it is the pendant that determines the character of the choker.
Suspension can be
- purchase at a jewelry store if you like expensive jewelry
- buy in the “Everything for Jewelry” department if you prefer a democratic style
- found at a flea market or antique shop(for lovers of jewelry with history)
- do it yourself. Handmade pendant - great way stand out from the crowd and even get a little rowdy
To make an original choker pendant you will need
- tin bottle cap (for example, beer bottle). The cover must not be deformed
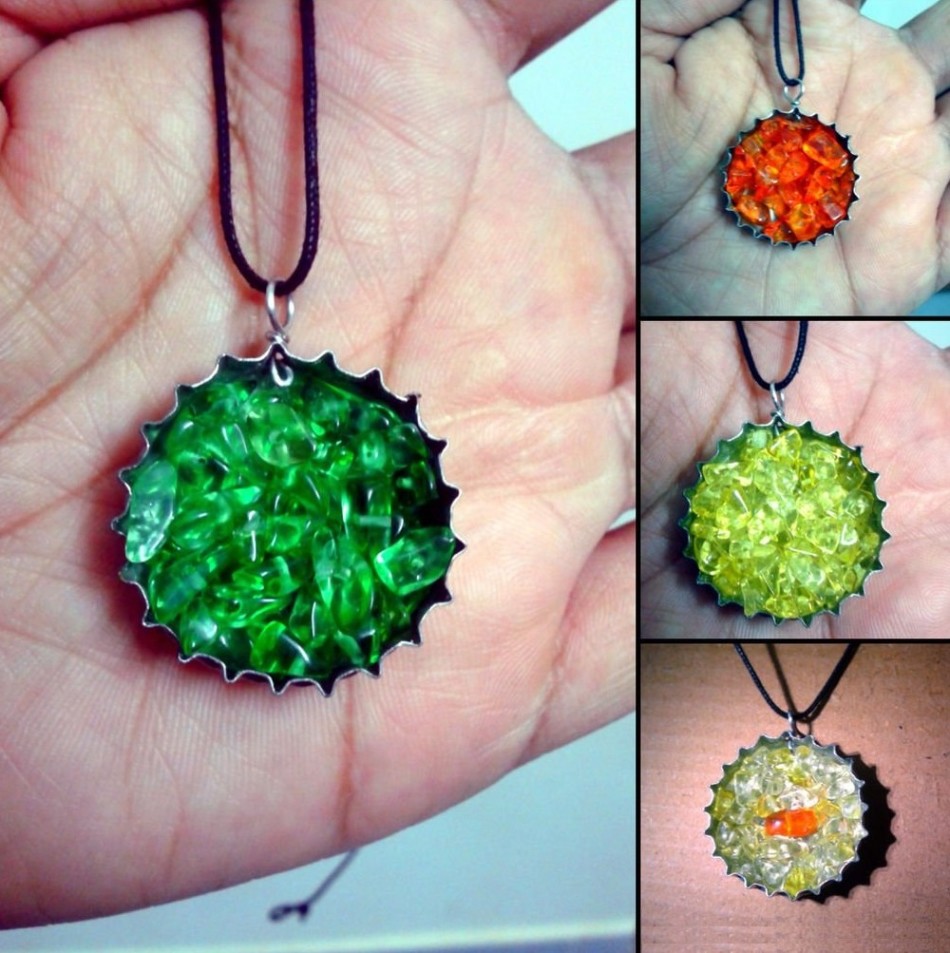
- decorative elements: beads, seed beads, stone chips for jewelry, cords, etc.
- quick-drying glue. In this case, it is convenient to use a glue gun, which can be purchased in building materials departments.
- jewelry wire (5 cm) or connecting ring
- pliers
- file
Instructions for making a choker pendant
- Using an awl, make a through hole in the side of the lid
- File away metal burrs with a file
- Form a loop from the wire using pliers. If you decide to use a jump ring, skip this step
- Fix the loop in the lid hole / insert the connecting ring
Tip: You can also paint the outside of the lid at this stage. acrylic paint
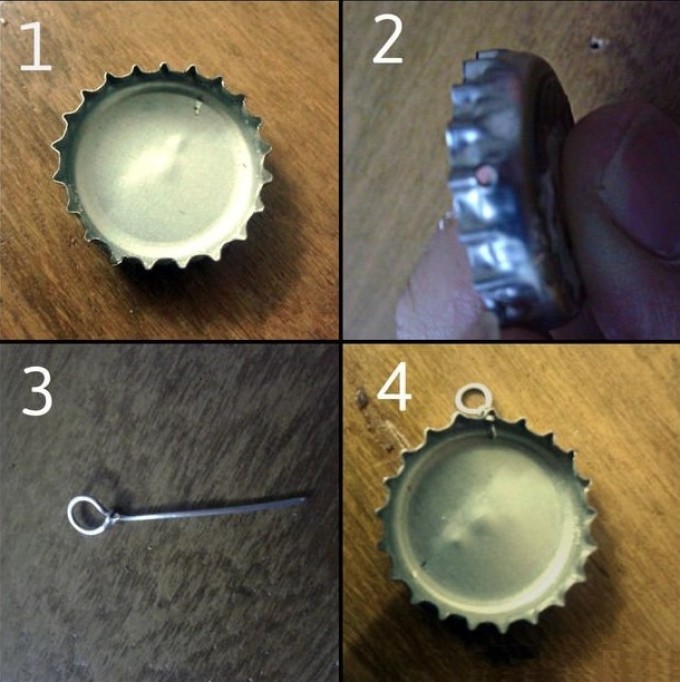
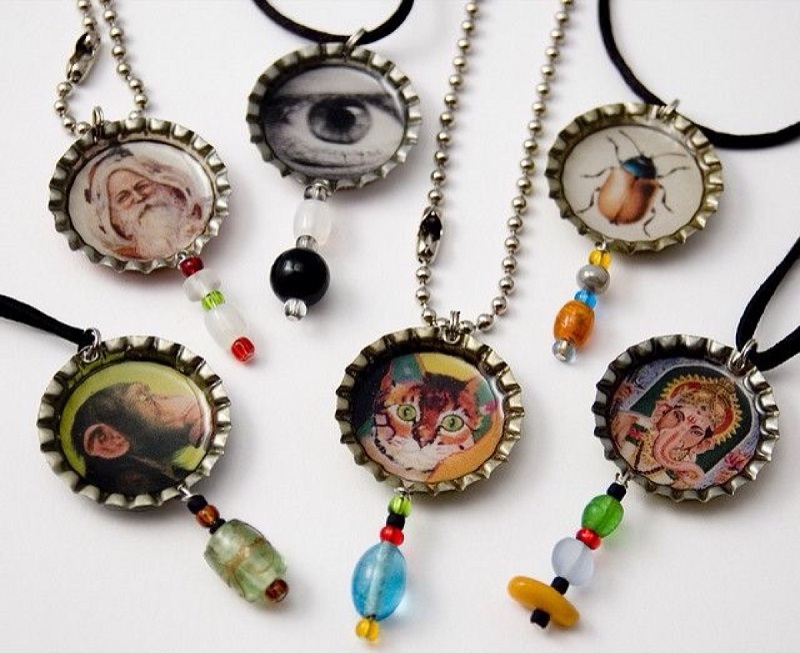
- Decorate the pendant using decorative elements and glue. If using sequins or drawings/photos to decorate the pendant, use clear epoxy jewelry resin to fill the void and create a protective screen
How to make a black choker tattoo
So many
The simplest pattern for weaving a choker tattoo is shown in the photo below.
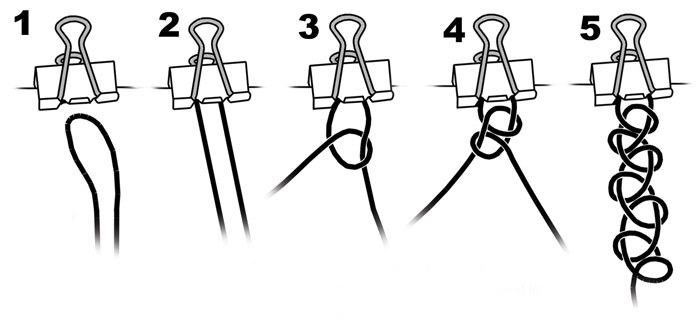
Step-by-step photo instructions will tell you the main stages of making jewelry
1. Start by preparing your materials
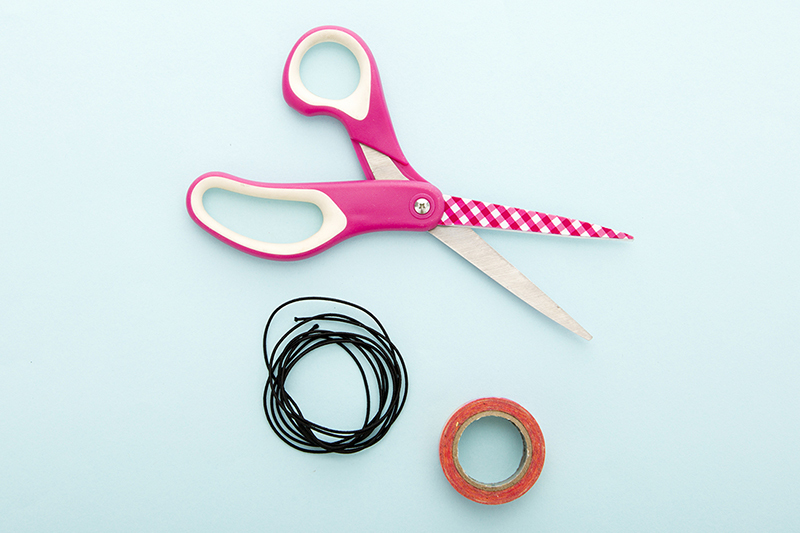
Tip: you will need spandex 1 mm thick and 3 m long. You can buy a special fishing line for weaving chokers in stores with handicraft materials
2. Fold the vein in half and secure with tape or a large paper clip
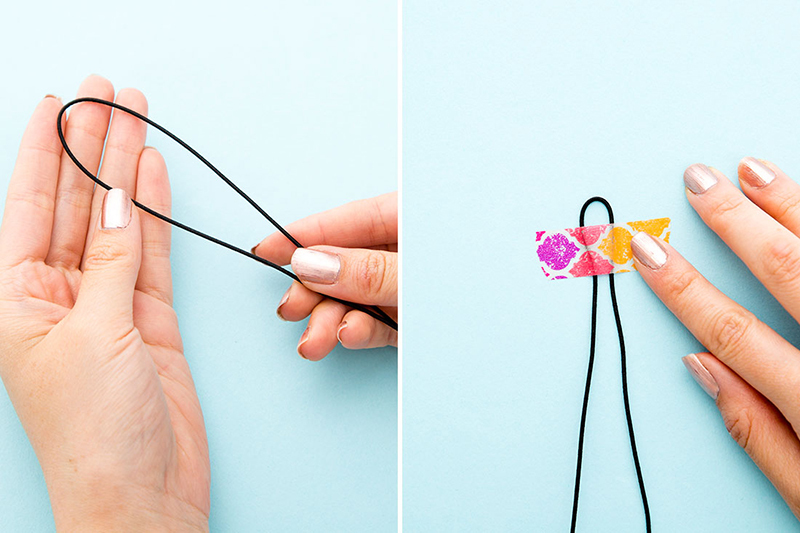
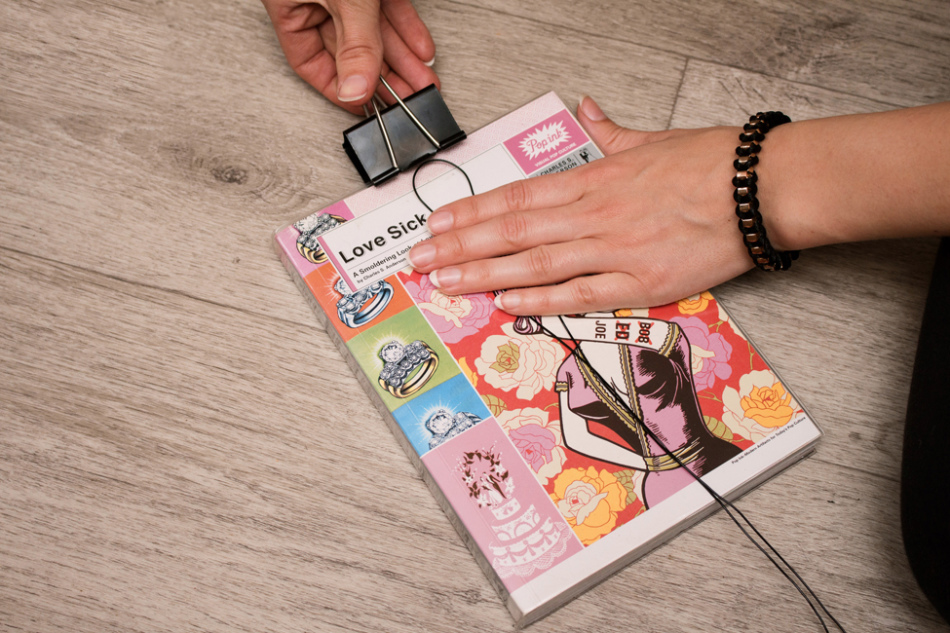
 Weaving a tattoo choker
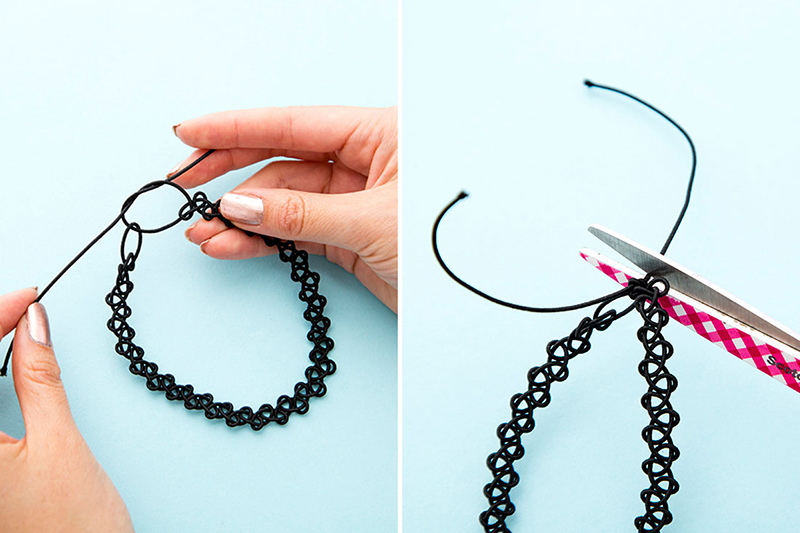
The tattoo choker stretches well, so there is no need to use a special lock for the choker. Many choker braids attach the last knot to the first loop of the snake. This decoration is worn over the head
If there is a need to adjust the length of the jewelry, use jewelry locks with chains and special ends for decorative cords
How to make a choker tattoo from beads?
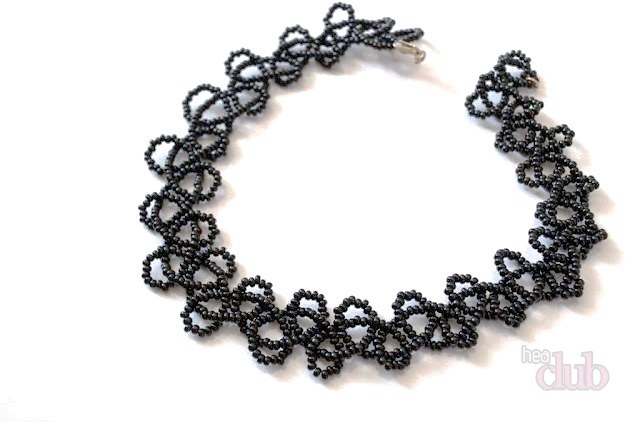
Beaded tattoo choke combines elegance and originality
An easy way to make a choker tattoo from beads
- Take two strong threads (fishing lines) 1.5 m each
- String beads onto each thread
- Tie a choker using beaded threads instead of spandex (you will find a knitting pattern in the section “How to make a black choker tattoo”)
Advice. should be secured with a special locking lock
Choker tattoo made of beads (schemes)
For beginner needlewomen, these are suitable simple circuits
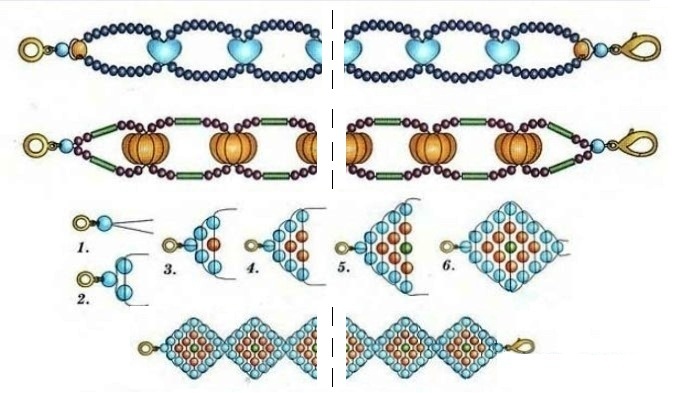
The technique of bead weaving is quite simple, and the techniques are repeated. After reading the description of the work according to the first scheme, you can easily create many beautiful accessories
You will need
- beading line - 3 m
- large beads different shapes and colors (blue hearts or other curly beads - 10-15 pcs., round blue beads - 2 pcs., round brown beads - 2 pcs.)
- clasp for jewelry
- scissors
Manufacturing instructions
- Place the clasp on the fishing line and secure it with a knot in the middle of the fishing line. This way you will get two working threads of equal length
- String blue and then brown beads on both threads
- Separate the threads and string 9 beads on each
- Connect the threads and string a figured bead (heart)
- Continue knitting, alternating steps 3 and 4
- Once the choker reaches the required length, string first brown and then blue beads onto both threads
- Secure the lock ring with a double knot. To ensure secure fixation, tuck the ends of the fishing line into a figured bead
The third pattern can be challenging because it uses a parallel weaving technique. More detailed diagram techniques are presented below
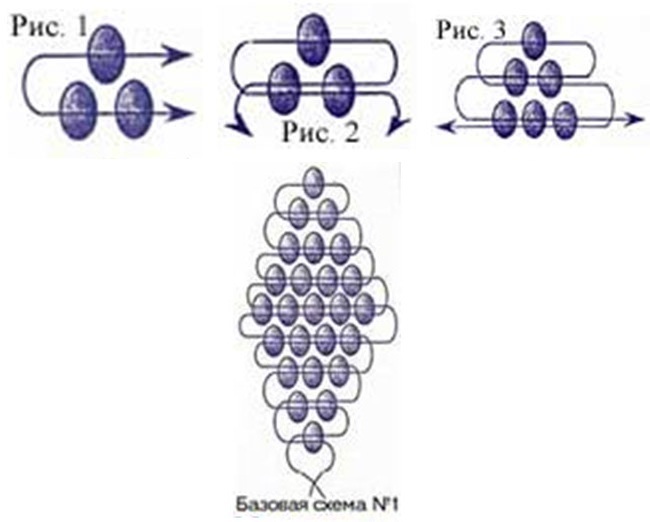
How to make a choker from beads: weaving pattern
The bead necklace pattern presented below is for experienced bead weavers. However, for the sake of such beauty it is worth a little effort

How to make a choker from lace?
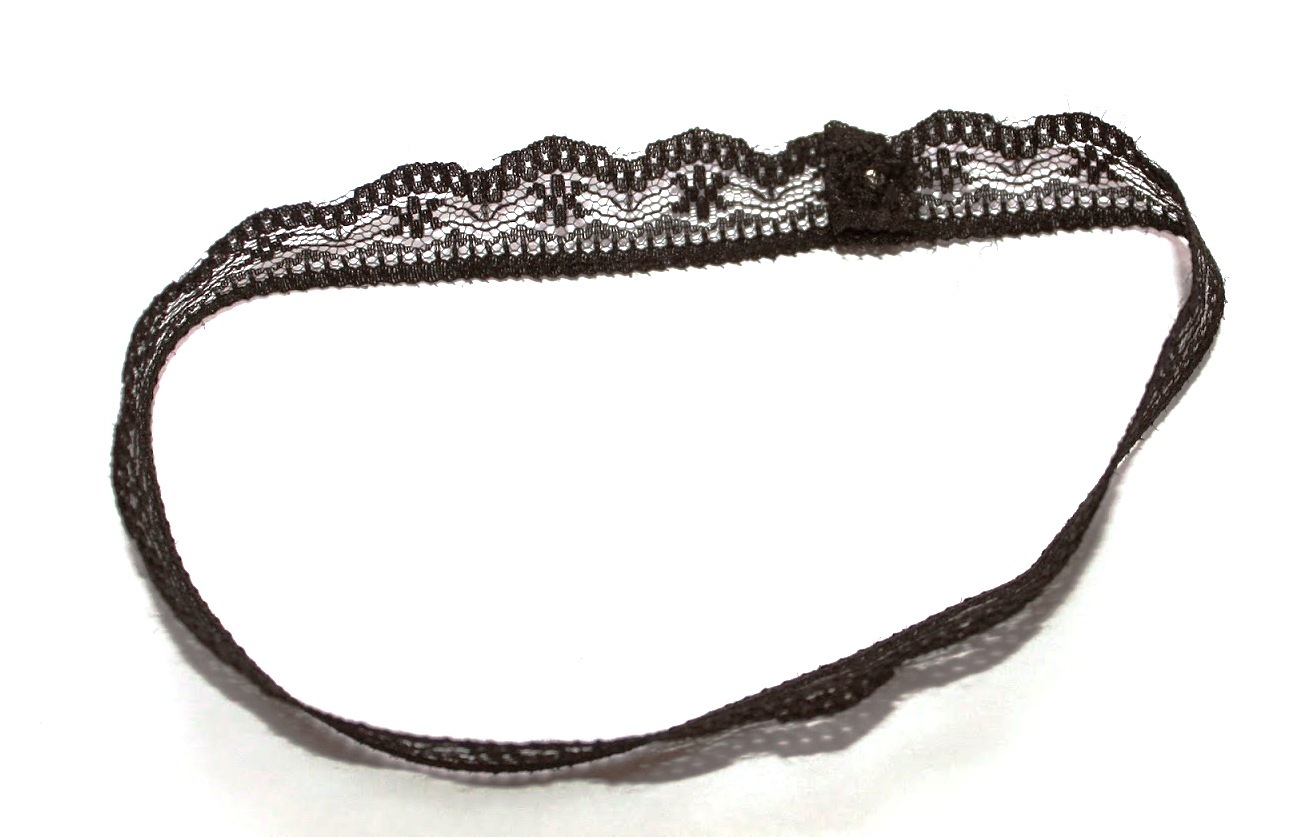
- Buy a lace ribbon of the required length. How to determine the length of a ribbon (lace or velvet) is described in the section “How to make a black choker for a neck from velvet?”
- Fix the end switches, attach a jewelry lock or sew on buttons
The decoration is ready. If desired, the choker can be decorated with beautiful beads or a medallion
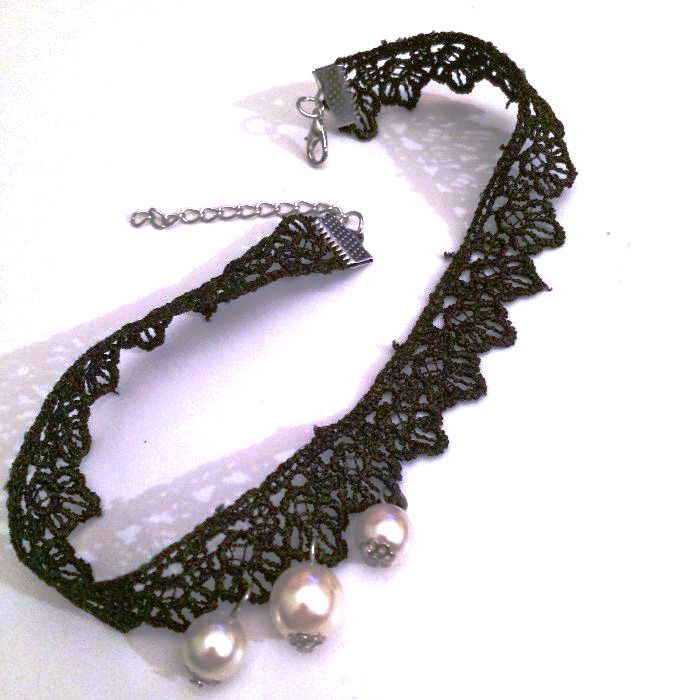
How to make a white lace choker?
A delicate choker will fit well into a summer wardrobe
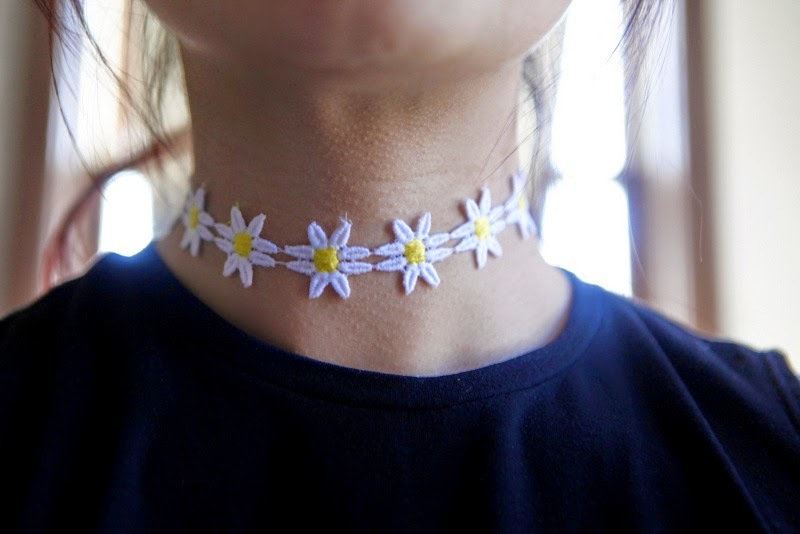
- Cut the lace to the required length
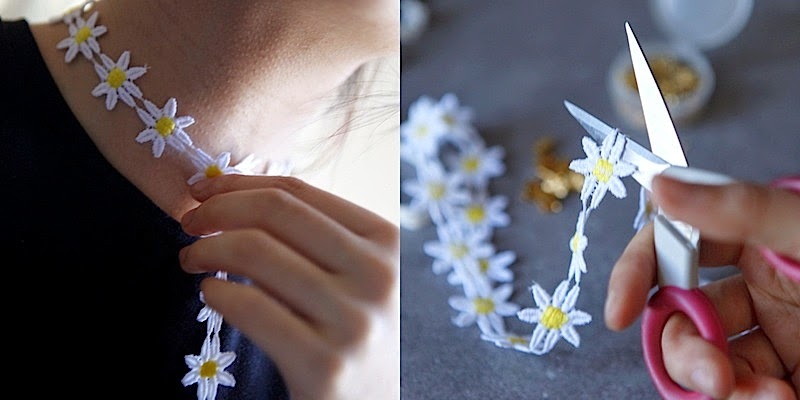
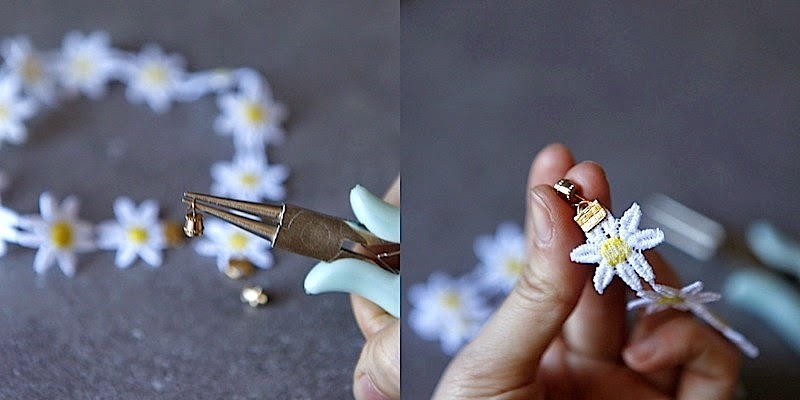
- Secure the limit switches
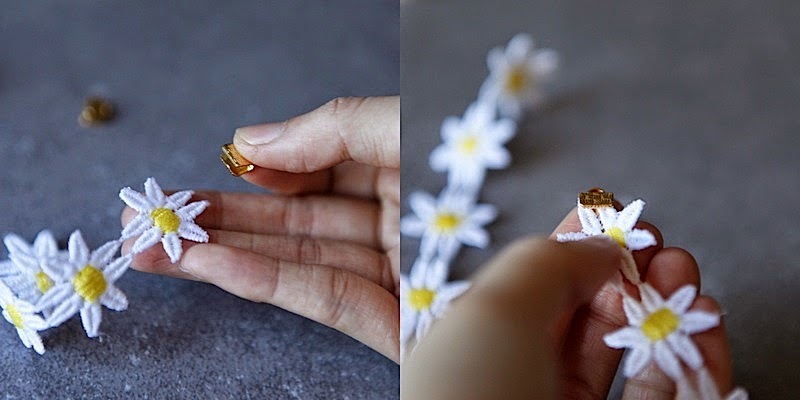
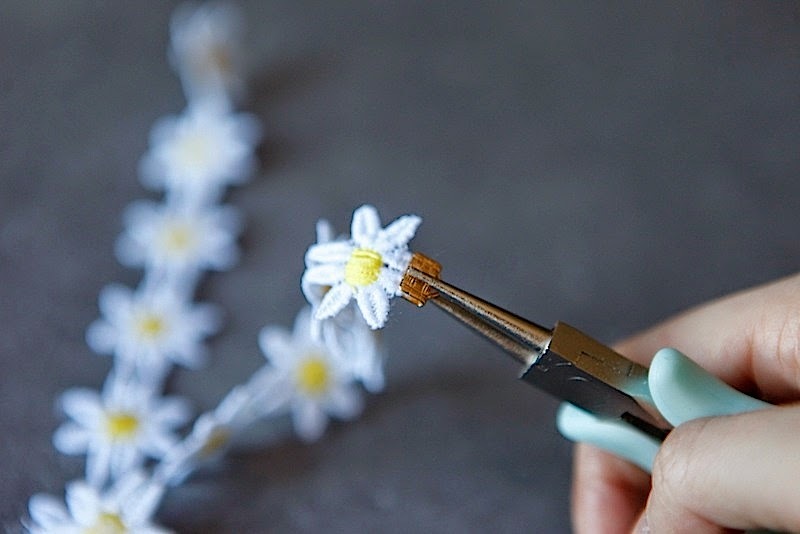
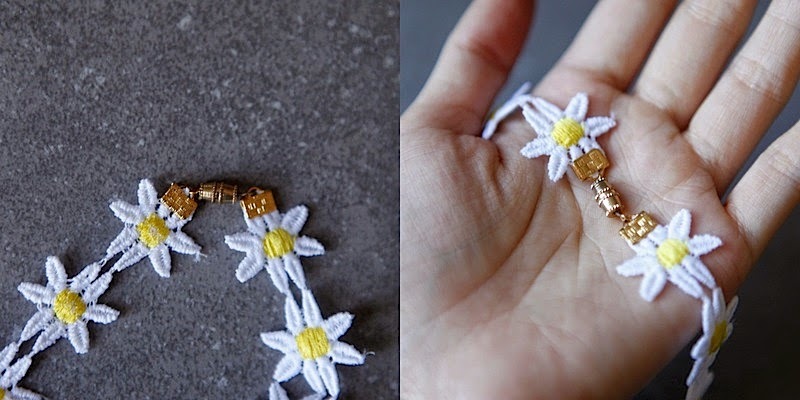
- Secure the jump ring and lock
Your decoration is ready
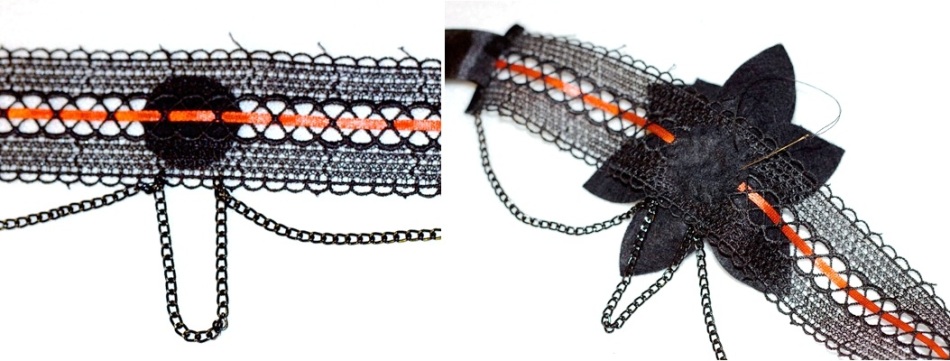
How to make a black lace choker?
Making this choker will require some effort, but look how beautiful this accessory is!
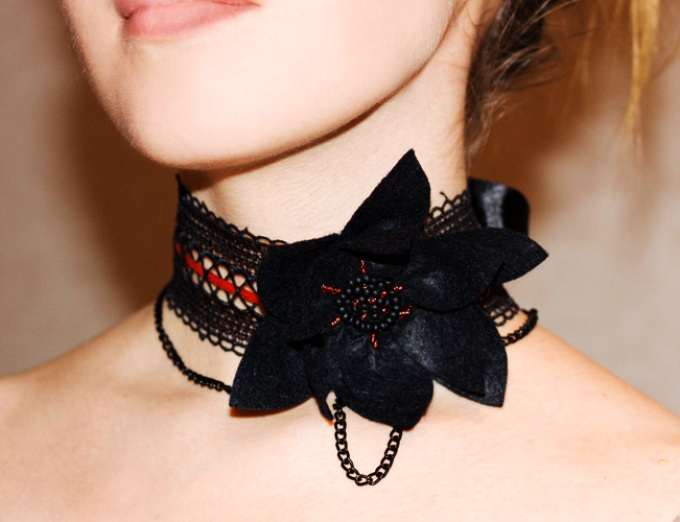
Materials and tools
- black felt (for flower)
- black lace ribbon (choker base)
- thin red braid (for decorating the base)
- black braid 1 cm wide (for ties and cutting edges)
- black chain (for decoration)
- scissors
- pins
- needle and thread
Manufacturing instructions
- Make a flower template
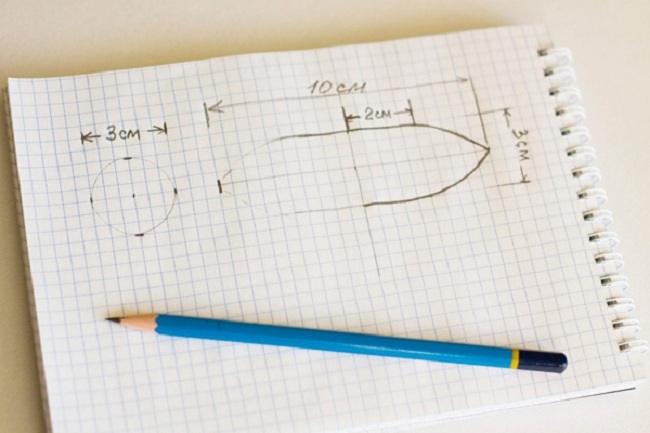
- Cut from felt
- 6 elongated elements (for petals)
- 2 circles (for the middle)
Fold the elongated elements so that the bottom part is slightly longer than the top, and secure with pins
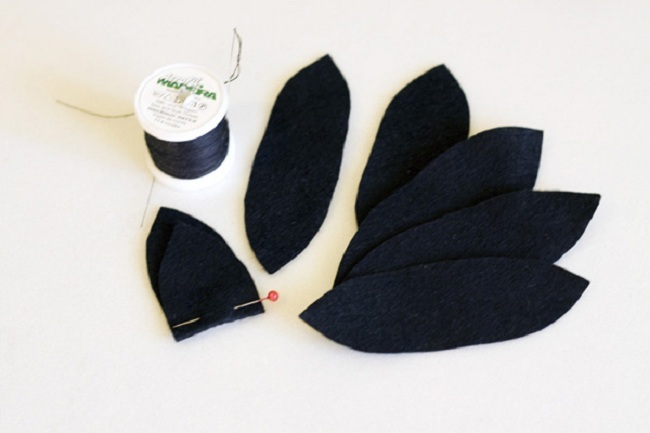
- Take one of the blanks for future petals and stitch along the fold line
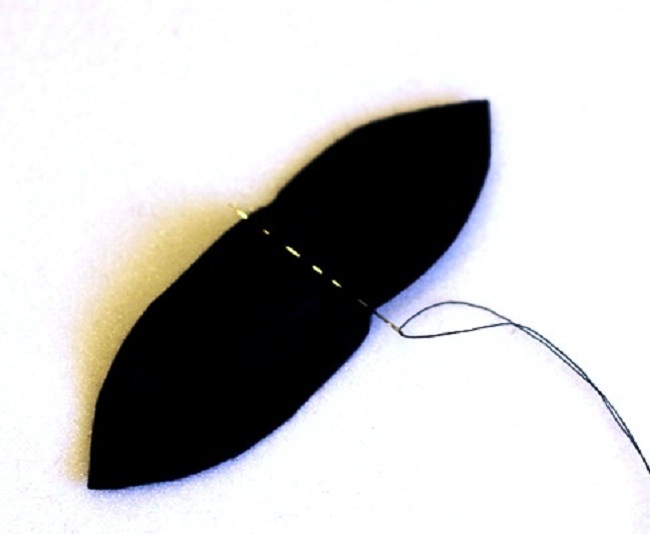
- Pull the thread a little: a small fold will form on the fabric. Without breaking the thread, do the same manipulation with all the workpieces
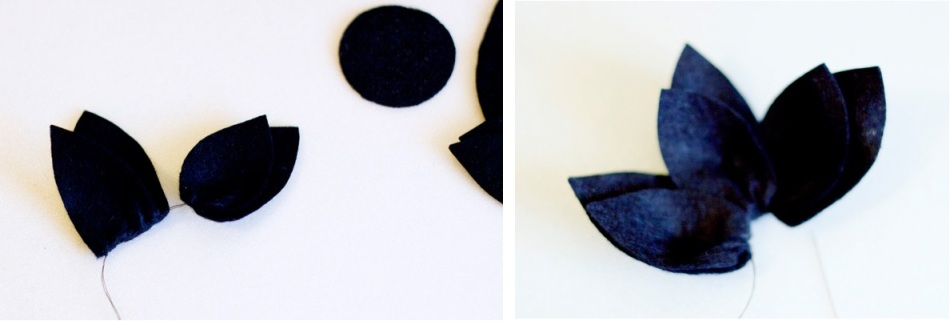
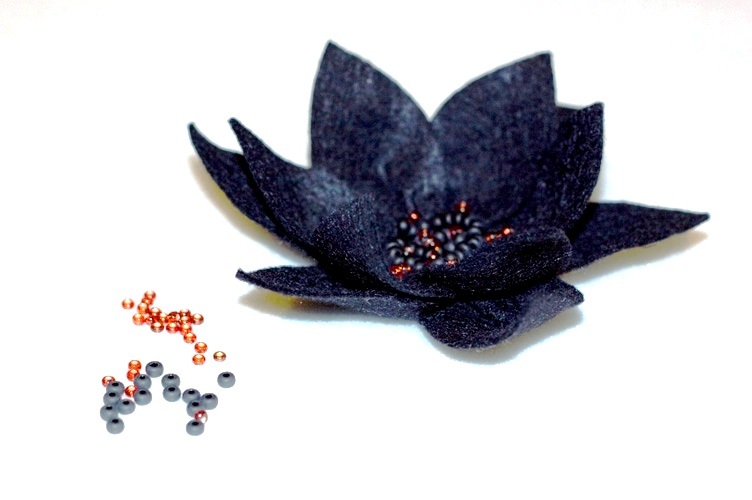
- Collect all the petals to form a flower. Sew a circle on top. Decorate the middle circle with beads (black and red) or sequins
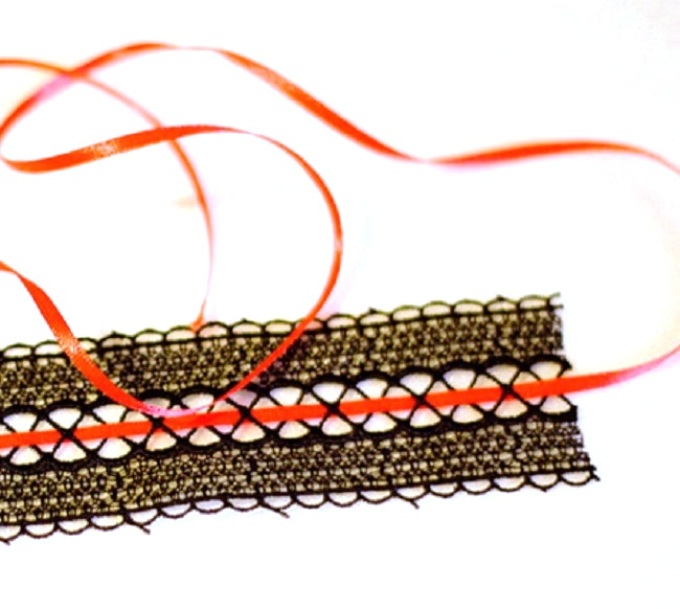
- Decorate black lace red braid
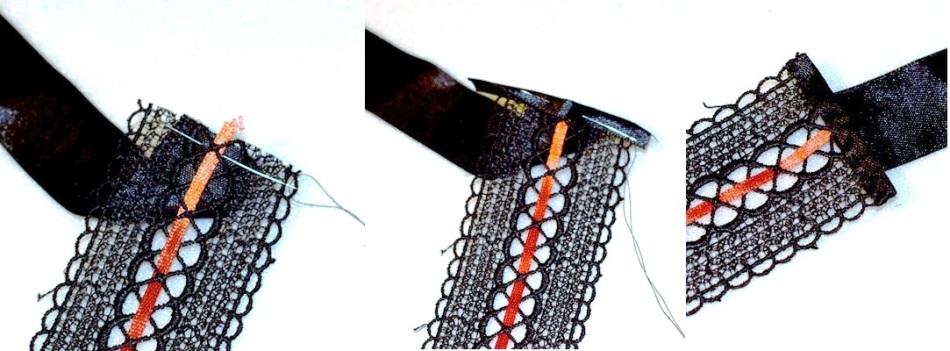
- Secure the red ribbon while sewing on the black ribbon. Decorate the cut by lining the entire length with braid
- Measure your choker. Sew the flower at the point that roughly divides the ribbon into 2/3 and 1/3. Sew the remaining circle to the place where the flower is attached from the wrong side. Attach a decorative chain if desired
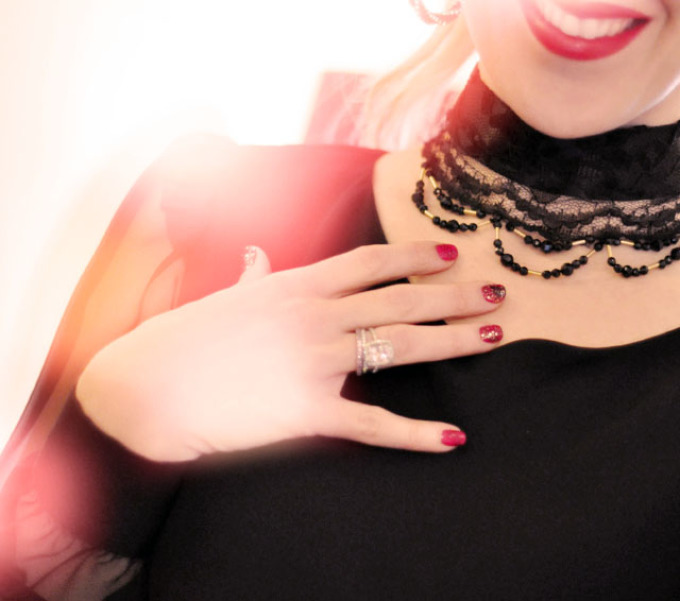
How to make a fabric neck choker
This vintage choker looks incredibly elegant
Materials and tools
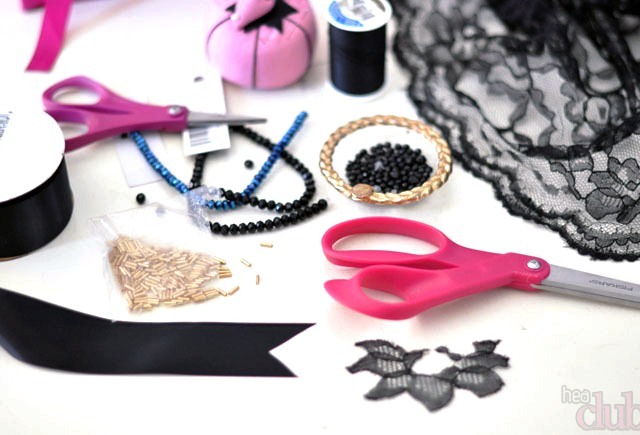
- wide lace (the length of the lace is equal to the circumference of the neck)
- black ribbon 1.5-1.7 cm wide. Length as desired, but not less than 60-70 cm
- beads or beads for decoration
- scissors
- needle and thread
Manufacturing instructions
- Create curly cuts at the end of the black ribbon
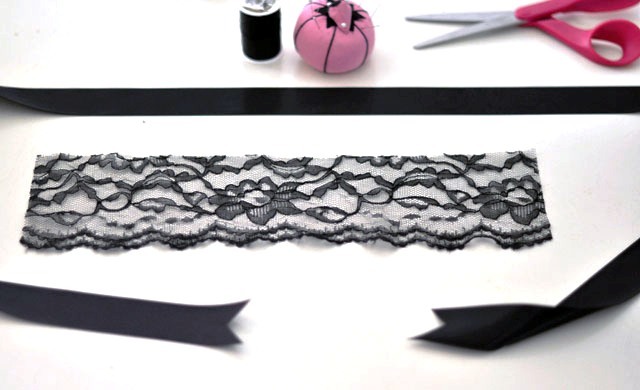
- Mark the middle of the ribbon and lace cut. Align these points by placing the tape on the wrong side of the lace. Secure with a pin. Moving from the center, fasten the ribbon and lace along the entire length of the lace element
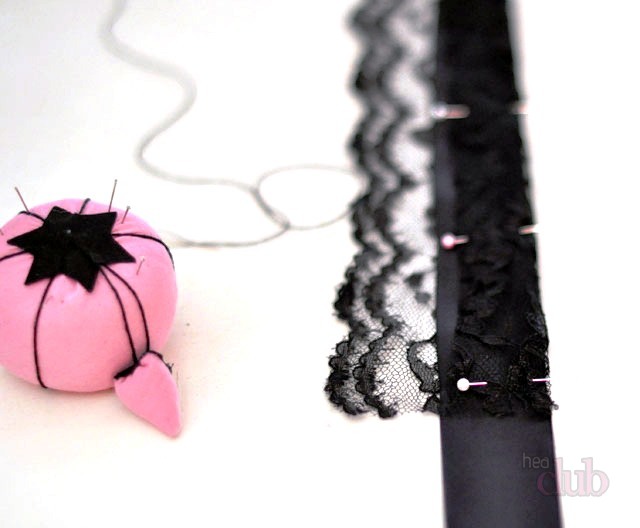
- Carefully sew the ribbon and lace
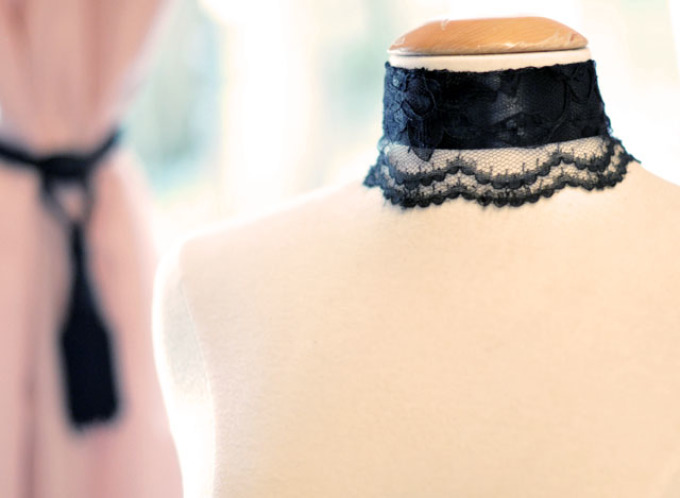
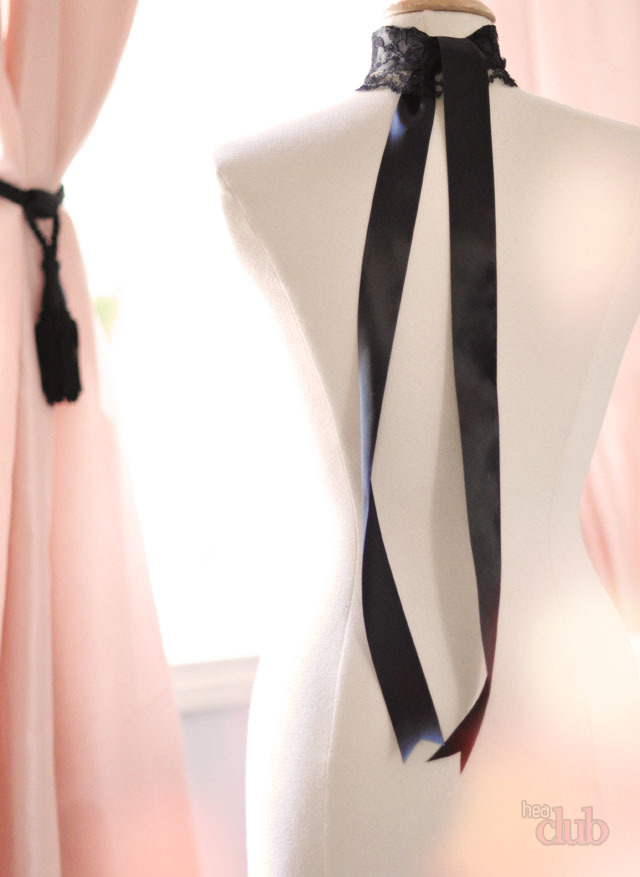
The long ends of the ribbon will give the accessory a special charm
- Decorate the choker with beads
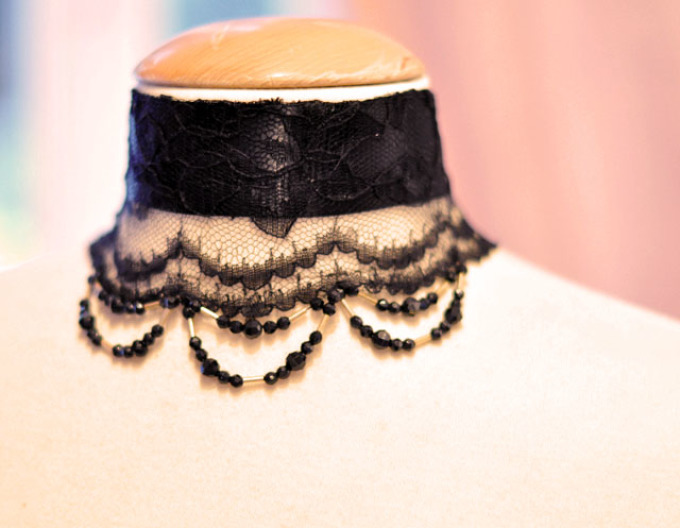
How to make a leather choker with your own hands?
This outrageous decoration is suitable for real rebels, and it’s so easy to make
- Choose the right belt width
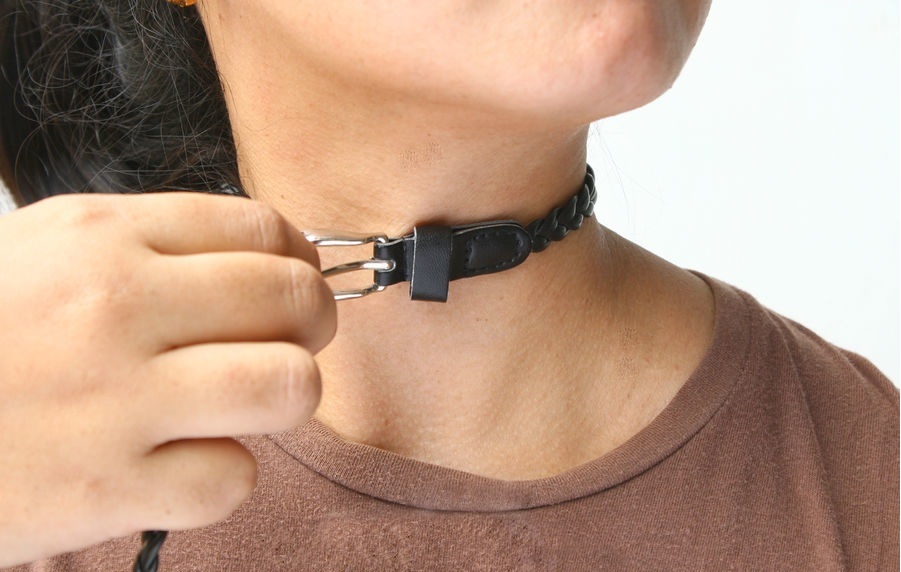
- Try the belt around your neck
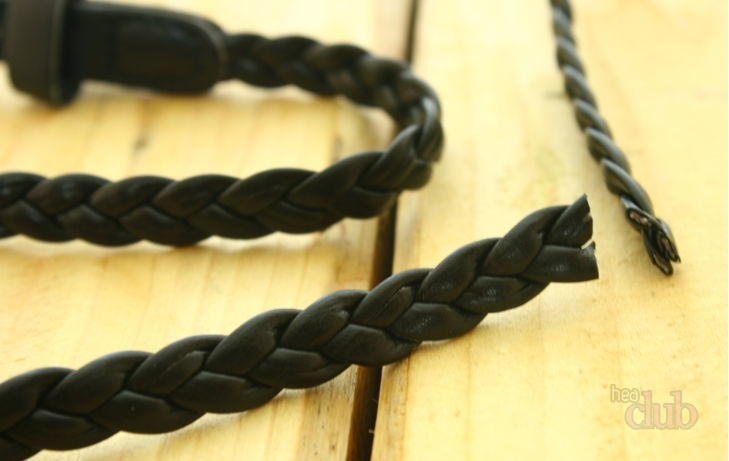
- Trim off the excess. Decorate the cutting area with a suitable end cap
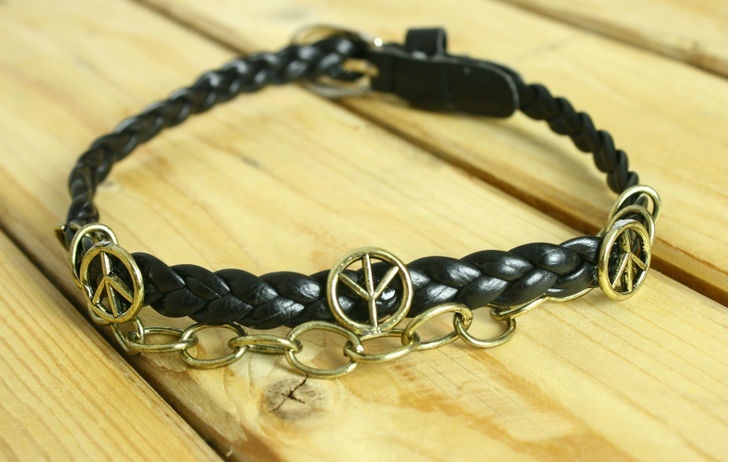
- Decorate the choker at your own discretion
Advice. Medallions made from lightning will look good on a leather choker


