Sew a removable collar. How to sew a round patch collar
Shirts with a round collar have entered our wardrobe reliably and for a long time. If you decide to sew blouses or dresses and are faced with a round collar, then it will be useful to know the rules for sewing it. So, how to sew a round collar with your own hands.
And for sewing lovers, lessons and master classes:
How to prepare fabric
We will need tracing paper, scissors, fabric, pencil, chalk, pins and a sewing machine. It is advisable to pre-wash and dry the fabric so that the collar does not shrink later.
The cut of the round collar must correspond to the shape of the neck of the product. Therefore, you need to attach the dress or blouse to tracing paper and draw the lines of the neckline.
Based on this line, draw a drawing of the collar. Its dimensions depend on the size of the shirt. So, for example, the width of the round collar for a size 42 blouse will be 5.5 cm. Don’t forget to leave a seam allowance of 0.5 cm.
Constructing a collar pattern
We make a pattern for the undercut part. With its help we will attach the collar to the product. Its base corresponds to the shape of the base of the collar, and its height is 1.5-2 cm.
We cut out the collar along the warp thread. We gather in the collar if your model requires it (then the pattern of the collar and the hem should be made smaller than the armhole by the size of the gather). We seal the collar with non-woven fabric. Sew on a decorative overlay if desired.

How to sew a collar to a shirt or dress
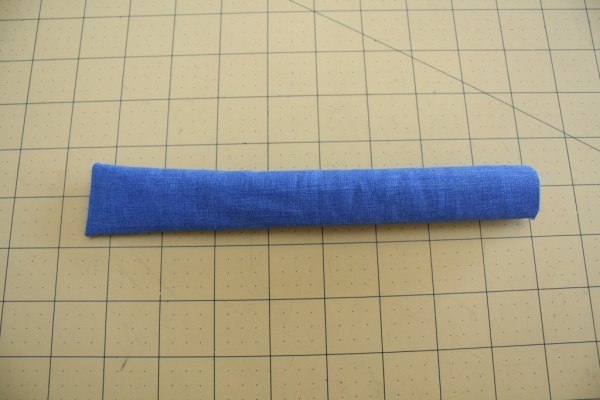
Place the two collar pieces together, right sides facing inward. Place a non-woven lining on top. Baste the collar with a needle-forward stitch, leaving a 1.5-2 cm hole in the center of the lower base of the collar so that the collar can then be turned out.
Sew the piece on a sewing machine and turn it right side out. Sew the remaining hole closed using a blanket stitch. Iron and steam the collar.
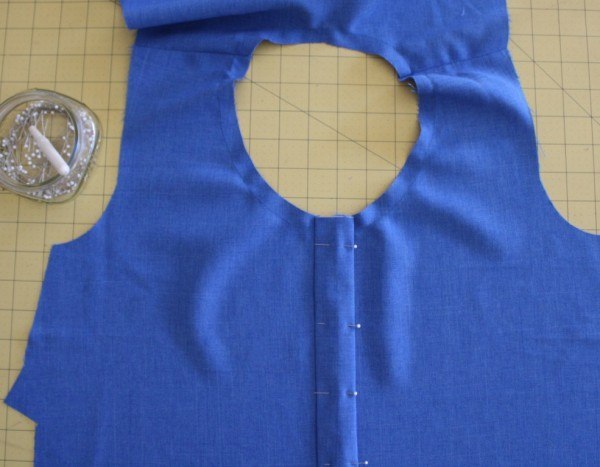
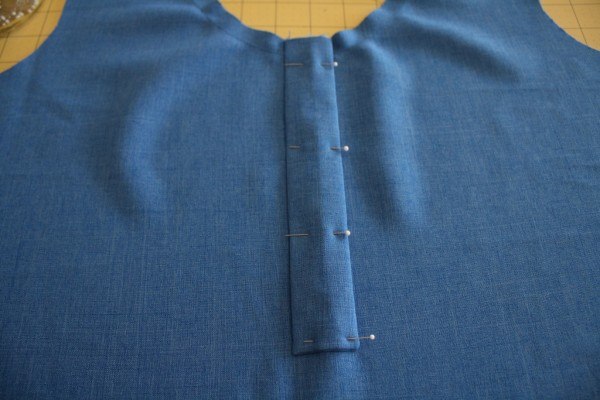
Turn over and stitch the bottom and sides (i.e. those that do not meet the neckline and collar) of the hem piece.
Attach the collar to the blouse, on top of it, face down, place the hem piece. Baste all the pieces and then topstitch them.
What interesting things do we have left from last season? There's a lot to note here, but let's start with the collars.
It is called differently - removable, overhead, detachable or separate, but the essence does not change from this - this is a detachable collar. He is not new to our wardrobe; he was invented, so to speak, a long time ago. Who? I will not elaborate, since there are several versions on this matter, and therefore, each of us can carry out an excursion into history, if desired, on our own; now this is easy and simple to do.
A modern detachable collar is an independent accessory, especially for a woman’s suit.
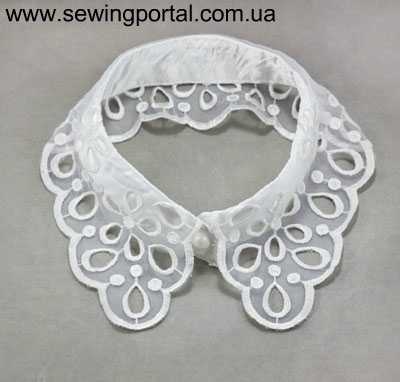
How to transform a boring outfit? A collar will come to the rescue. Today we turn our attention to a lace collar, or a collar with embroidery, or just a collar made of fabric with beautiful design, for example, with floral ornament etc.
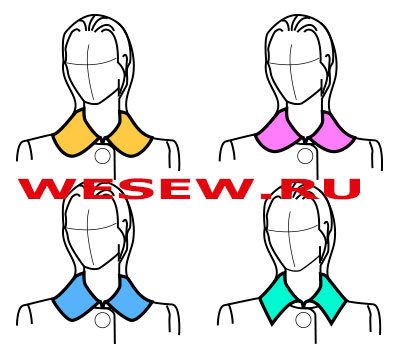
We offer a pattern of three models of collars, or rather, these are ready-made patterns in three designs.
This type of collar belongs to turn-down flat collars.
Before cutting the collar, specify the neck of the product, bring it in line with the collar pattern or, conversely, adjust the collar pattern in accordance with the neck of the product and only after that you can start cutting.
Collars - small and large, straight and curly, classic and fancy, modest and elegant. There are a lot of them, they are so different!
Very convenient to have on hand ready-made patterns different types collars.
After specifying the neck line of the product, we take a ready-made template for a collar of the desired style, check the stitching line for compliance, adjust it if necessary, and you can cut it. It's convenient, simple and fast.
Try it, I hope you like this approach.
Valentina Nivina Alexander Nivin
This is the final part of the topic “Constructing a shirt pattern for a boy.” The back, front and sleeve are already ready, all that remains is to create the collar pattern.
The collar style for this shirt may vary. This is determined by you, guided by the client’s wishes, the model of the product or the suit as a whole.
As an example, we will show how to build a pattern for a shirt-type stand-up collar with a one-piece stand-up.
The collar pattern can be constructed according to the principle of constructing a collar to men's shirt, but here we maintain the originality of this technique and follow all its recommendations.
We use the same measurements as in two.
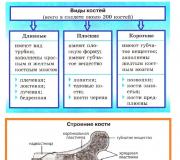
Stand collars are one of the simplest collars.
However, despite their simplicity of construction, stand-up collars are very diverse. This diversity is expressed in the width (height) of the stand, in the configuration of the top line, in the design of the ends, as well as in the degree of fit to the neck.
This group of collars can be divided into two subgroups:
1 – cut-off stand-up collars;
2 - one-piece stand-up collars with shelves and backs.
In this article we will look at several designs of this type collars related to cut-off stands, which differ in varying degrees of fit to the neck.
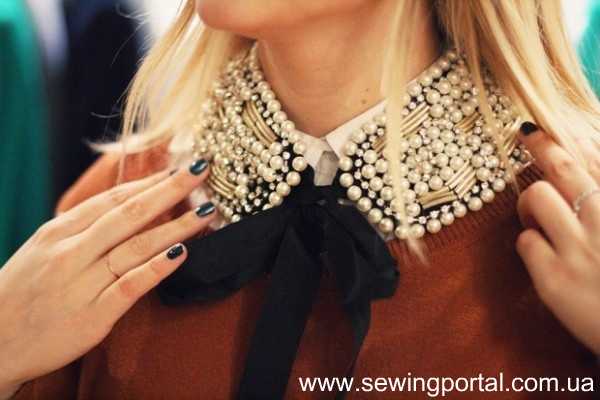
I can’t help but touch on the topic of such sensational false collars this season.
Today there is a huge variety of all kinds of collars and collars =). Let's discuss the basic principles of making such beauty.
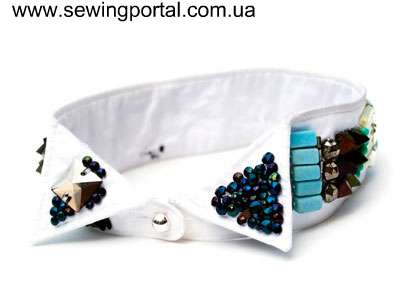
Of course you can cut it out detachable collar from an old or unnecessary shirt, for example, like this:
It is very simple to build such a collar on fabric (without ruining the shirt =)). You can, of course, use ready-made pattern a shirt collar from a magazine, but if you don’t have one, then you can build a pattern like this...
(Feel free to click on the pictures to enlarge)
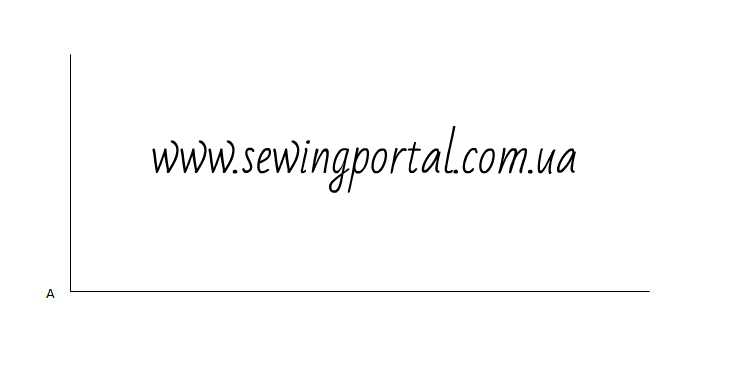
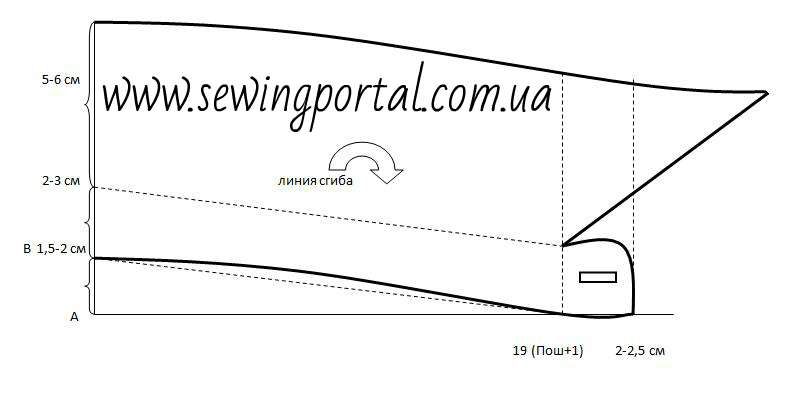
1 . We build two lines from point A.
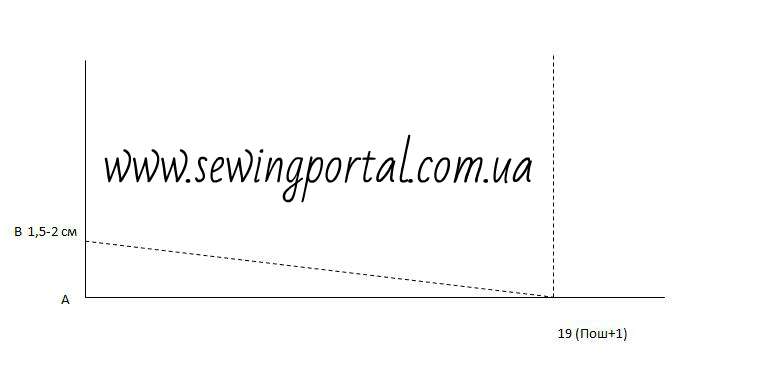
2 . From point A upward we set aside 1.5-2 cm for the rise of the neck - this is point B. To the right we set aside point Posh + 1 cm (this is the half-circle of the neck plus an increase). Connect points B and 19+1.
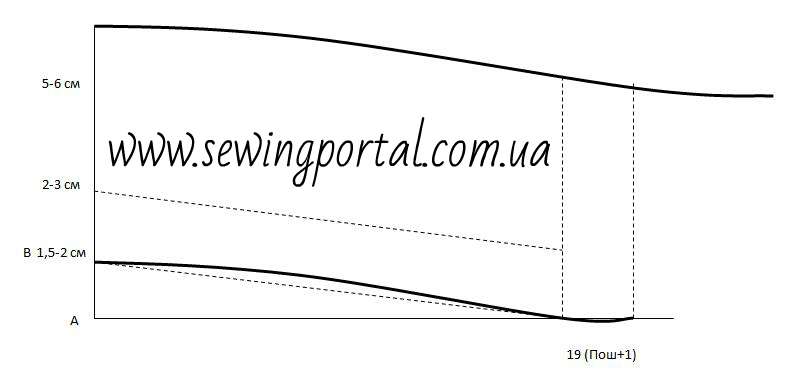
3 . From point B up, set aside 2-3 cm and draw a parallel line (this is the fold line of the collar). Also, from point 19+1 to the right, set aside 2-2.5 cm for the fastener (button and loop). We draw a perpendicular.

4 . We draw the bottom line (B\19+1) with a deflection (about 0.5 cm). From the point 2-3 cm up, set aside 5-6 cm (this is the width of the collar). The top line (collar rise) repeats the bottom line with a continuation (size to suit your taste).
5 . This is what the finished pattern looks like.
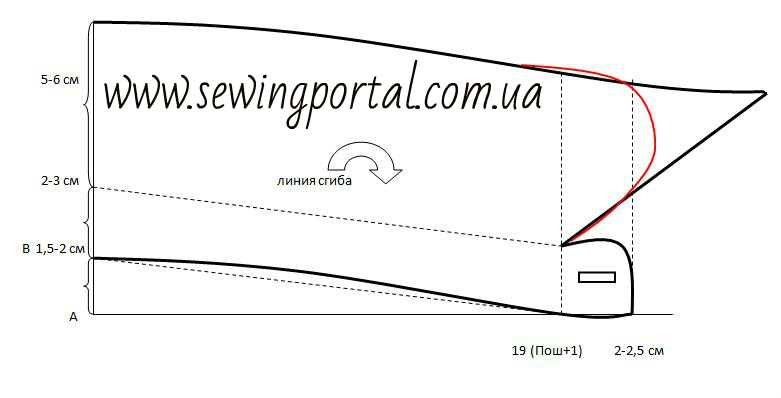
6 . The end of the collar can be designed in different ways. For example, a rounded end.
7 . Or dumber.
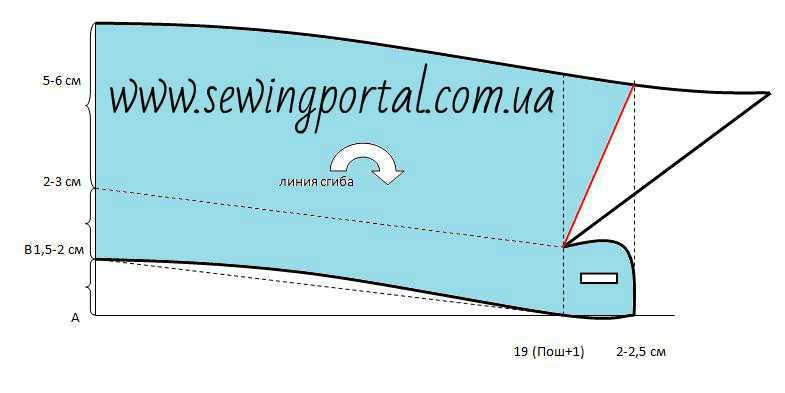
We get a collar like this.
That's all. Everything is very simple.
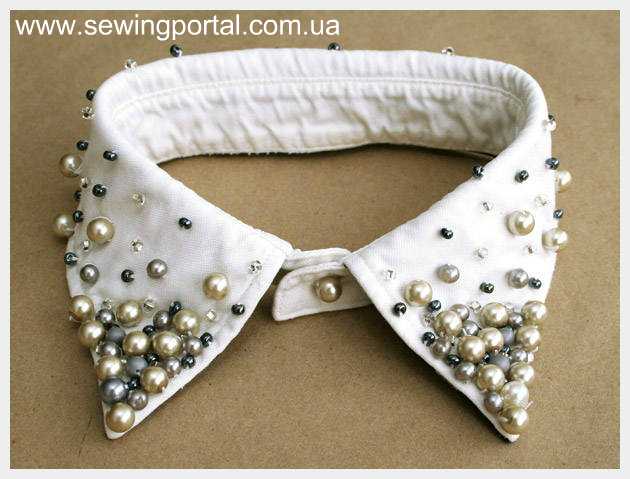
You can decorate such collars with anything you like. To your taste and imagination. Here are some ideas for your inspiration. So, patch collar photo…