Building the base of a children's overalls. Winter overalls for boys with a zipper and warm fleece.
I will sew online, that is, together with everyone, taking my time, gradually laying out the sewing process, and answering questions along the way. I will post each stage in a new post, leaving links to previous and subsequent stages. Girls, you can do the same on your blog (magazine, topic, or just in my comments), post your steps with explanations or questions, clarifications, etc.
I warn you that there will be a lot of writings and photos. That’s why, most likely, I leaned towards step-by-step sewing rather than immediately ready-made volumetric MK. I don’t promise to photograph everything beautifully and colorfully, but I’ll try to make it clear and not completely dirty and blurry)))))
In general, I will sew a jumpsuit in the same image and likeness for my Ksyusha. I’m not sure about the fur yet, but if there are a lot of people who want to attach the fur, I’ll show you.
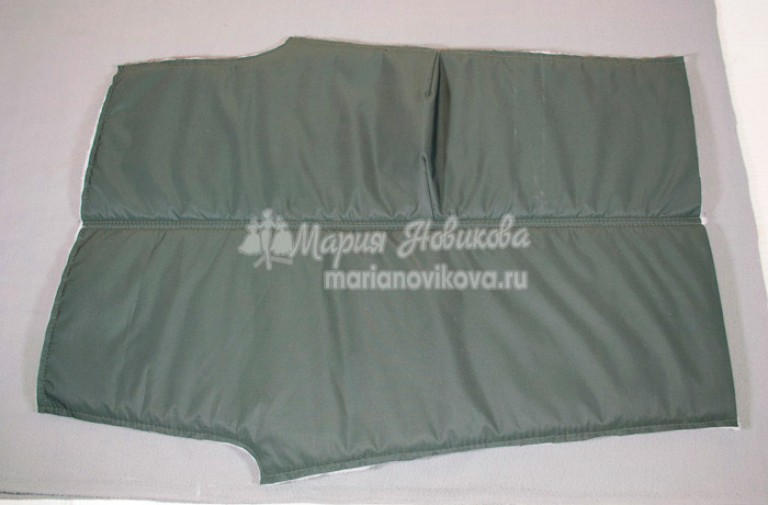
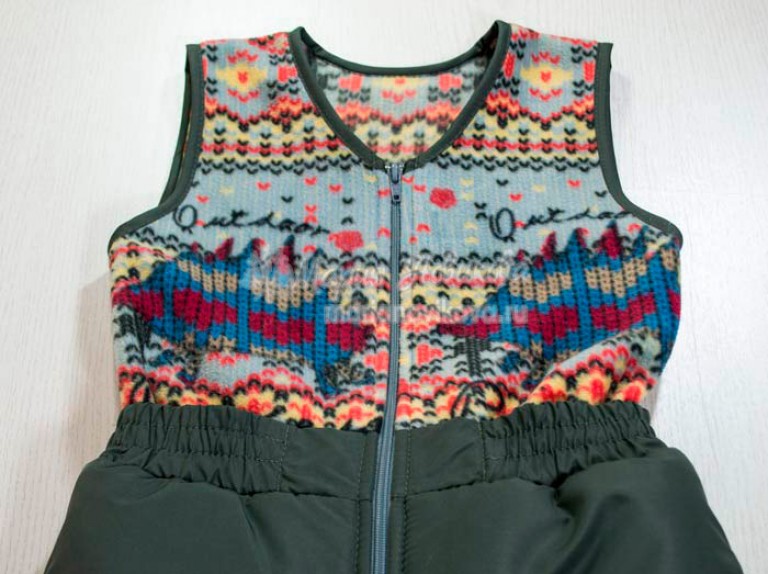
There are few details in it. Quite a simple model. There will be no inserts or decor. All from the same printed fabric. I have this jacket fabric with a membrane coating with the image of rainbow zyobers))))
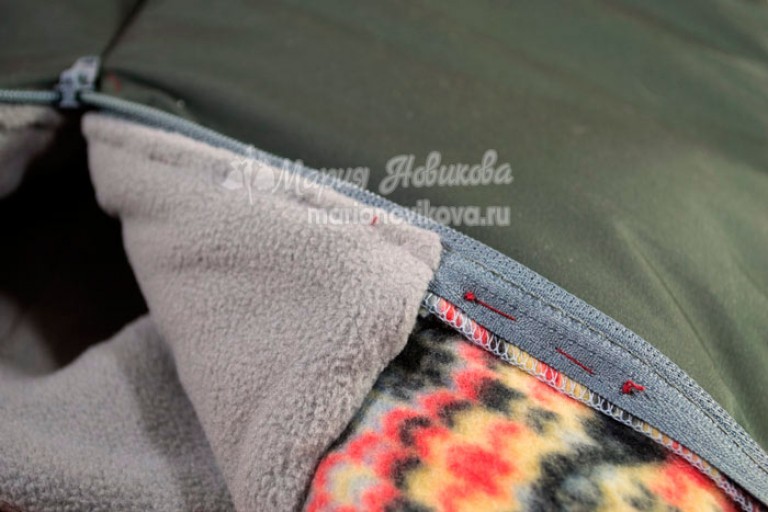
The lining will be fleece and omnikhite. You can take a regular lining, or you can make one lining for the entire height. But full-length fleece will not be very comfortable, I think. That's why I only put it on the front and back up to the butt. Below will be the Slidsky Omnihit, and it will also be in the sleeves. There will be fleece on the collar and hood. I took the TricotBrush, which I had previously put in my other overalls, but it’s out of stock, unfortunately.
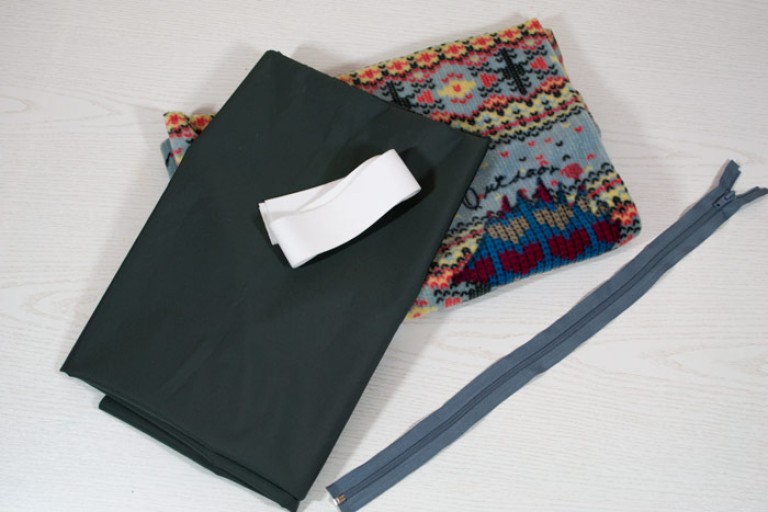
And so, my list necessary materials for insulated overalls size 98-104.
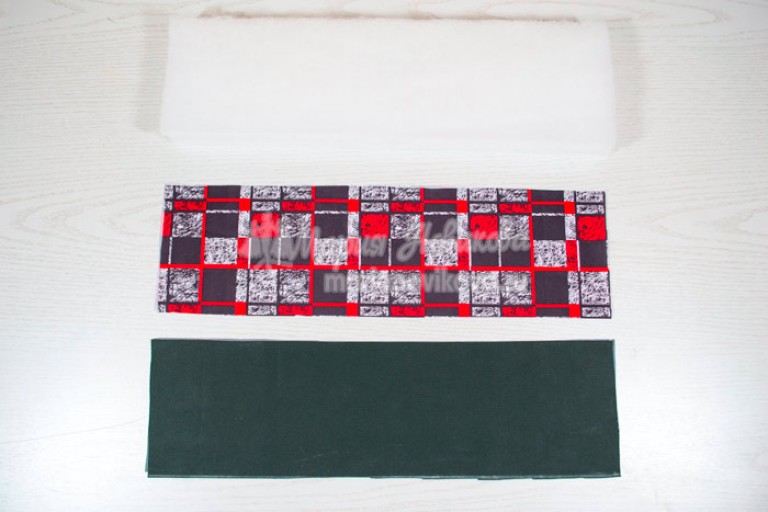
Raincoat - 1.5m
fleece - 0.5m
omnihit (lining) - approximately 1m
insulation (I have Alpolux 200 for winter) - approximately 1m
zippers:
- main - 1 PC
- on the pockets - 2 pcs
- on the fastened hood - 1 PC
wide elastic band 3cm for cuffs - 80cm is enough
decorative elastic band for straps - approximately 1m
hat elastic for tightening - approximately 1m
Velcro
threads
fasteners for drawstring - I have found two things that match the color so far, maybe I’ll take others and make a drawstring on the hood, I don’t know yet...
In my photo I also have an additional gray raincoat fabric for the pocket and frames. Perhaps it won’t be needed, it’s just that the pattern of my main fabric is directed, you can’t turn it anyhow, in case it’s not enough, so I played it safe. But it should be enough for the main details.
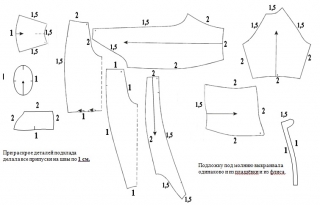
I take the pattern from Ottobre magazine 2014-4, model 14. For my daughter’s height of 94 cm, I take the size of this pattern 104. As the practice of sewing this pattern has shown, for winter insulation it is good to take a size one larger than the child’s own. That is, Ksyusha’s native size is 98, one more - 104. This is quite enough, the pattern is good, in my opinion, the width is sufficient.
The changes I make to it are very minor: for reserve for growth, and in general for some convenience I increase the length of the legs and sleeves by 4cm! How larger size, the greater the increase. Well, you also need to look at what is planned for the legs and sleeves. I have cuffs, my formula is +4cm. The growth margin turns out to be exactly 10 centimeters. That is, a child with a height of 92 to 102 cm can fit well in this size.
I make the collar 1.5 cm higher. I measured this clearly today. Before that I somehow added it by eye))
Well I'm converting the hood into a two-seam one. This is my personal preference. Not necessary.
I don’t touch the armhole, sleeves or neckline. But perhaps someone will need to lower the armhole a little and widen the sleeve. Girls, look at your children. These narrow sleeves suit me quite well. And, unfortunately, I can’t tell you how to change the armhole...
Almost every baby has a onesie in their wardrobe. It is comfortable to put on and wear. It does not restrict movement. They are sewn from lightweight fabrics and quilted with almost weightless fillings. Last factor makes such clothes more comfortable to wear in autumn-spring and winter time compared to heavy sheepskin coats. Pattern baby onesie with a hood will allow you to sew it at home.
Winter coveralls
Let's look at children's patterns winter overalls.
This option can be taken as a basis, adjusted to the desired size, or sewn for a height of 110 cm and a chest circumference of 56 cm. This pattern provides:
- Hood. It can be made detachable or sewn in.
- The fastener is used in the form of a zipper.
- A stand-up collar made from fleece, fur or other materials.
- Belt with clasp.
Working with the pattern:
- Redraw or print the drawing.
- Be sure to check compliance taken measurements pattern.
- The jumpsuit can be decorated with finishing trim, as indicated on the pattern, or you can come up with your own version of the decoration.
- The drawing does not include seam allowances.
- Cut the lining and insulation according to the main pattern.
This option is suitable for girls and boys.
Watch videos on sewing winter overalls below:
Here are more patterns:


Large selection of patterns different sizes presented in Burda magazines.
Pattern for babies in the first months of life
Let's continue the topic winter clothes. Below is a pattern for a baby jumpsuit for a newborn.
Selecting fabric
It is better to choose a material that is durable, waterproof and breathable at the same time. Such fabrics are made on the basis of polyamide.
Beginning of work
Transfer the pattern to the fabric, being sure to take into account the seam allowances.
- on the sides and shoulders - 2 cm;
- for the neckline, armholes and double elements - 7 mm each;
- on the front - 3 cm;
- For processing seams, leave 1.5 cm.
Sequence of actions
- First, the pockets are sewn on, then the front piece is connected to the side pieces.
- Preparing the collar, sewing the seams on the shoulders.
- Baste the collar to the neckline and finish the fastener.
- At the waist, sew the fabric in the form of a strip in order to insert an elastic band.
- Sew on the sleeves.
- Sew on the bottom.
The overalls are sewn with lining and insulation. Below is a pattern for a height of 110 cm. Usually such clothes last up to a year, then you need a larger size.
Half of the pattern from the back:
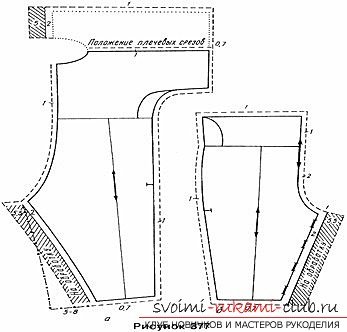
From the front side the pattern looks like this:

Cutting and sewing techniques
- Make a drawing on paper taking into account the size. Cut out the details and transfer them to the fabric, immediately marking the allowances.
- Cut out the details of the sleeves, back and front from the fabric.
- First sew the sleeves, trim the bottom.
- Connect the back and front along the sides and along the inner edge of the legs. Or, as an option, make a zipper on inside pants for easy diaper changing.
- Connect the sleeves to the main part.
- Sew on a zipper, Velcro or buttons.
- Finish the seams of the neckline and sleeve joining lines.
Pattern for fur overalls
To sew a fur jumpsuit, a base pattern is also used. You can use the drawings given above. Fur is often used to trim the hood, sleeves, and collar.
Overalls
The pattern for children's overalls for winter is presented here:
Take seam allowances of 3 cm, except for the neck (1 cm). To make it easier for the child to remove warm overalls, a zipper or buttons are sewn at the bottom.
The next pattern is for denim overalls.


It is made with straps.
You can make a cute applique on the front.

Option for denim overalls.

To sew the overalls I needed:
- (we are 6.5 months old, but I sewed a size 74 overalls for growth);
- 1.2 m of main fabric (I used raincoat fabric);
- 1.2 m of fabric for lining (as lining fabric I used fleece);
- 2 m of insulation (our winters are cold, so I made two layers of double synthetic padding);
- 2 permanent zippers 50 cm long;
- 1 cord 80 cm;
- elastic cord 1.5 m;
- 6 clamps and 6 cord ends.
I added boots and mittens to the overalls pattern (patterns are given in actual size):

![]()
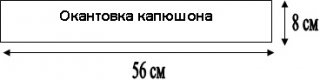
I also changed the edging of the hood and the backing for the zipper (see below)

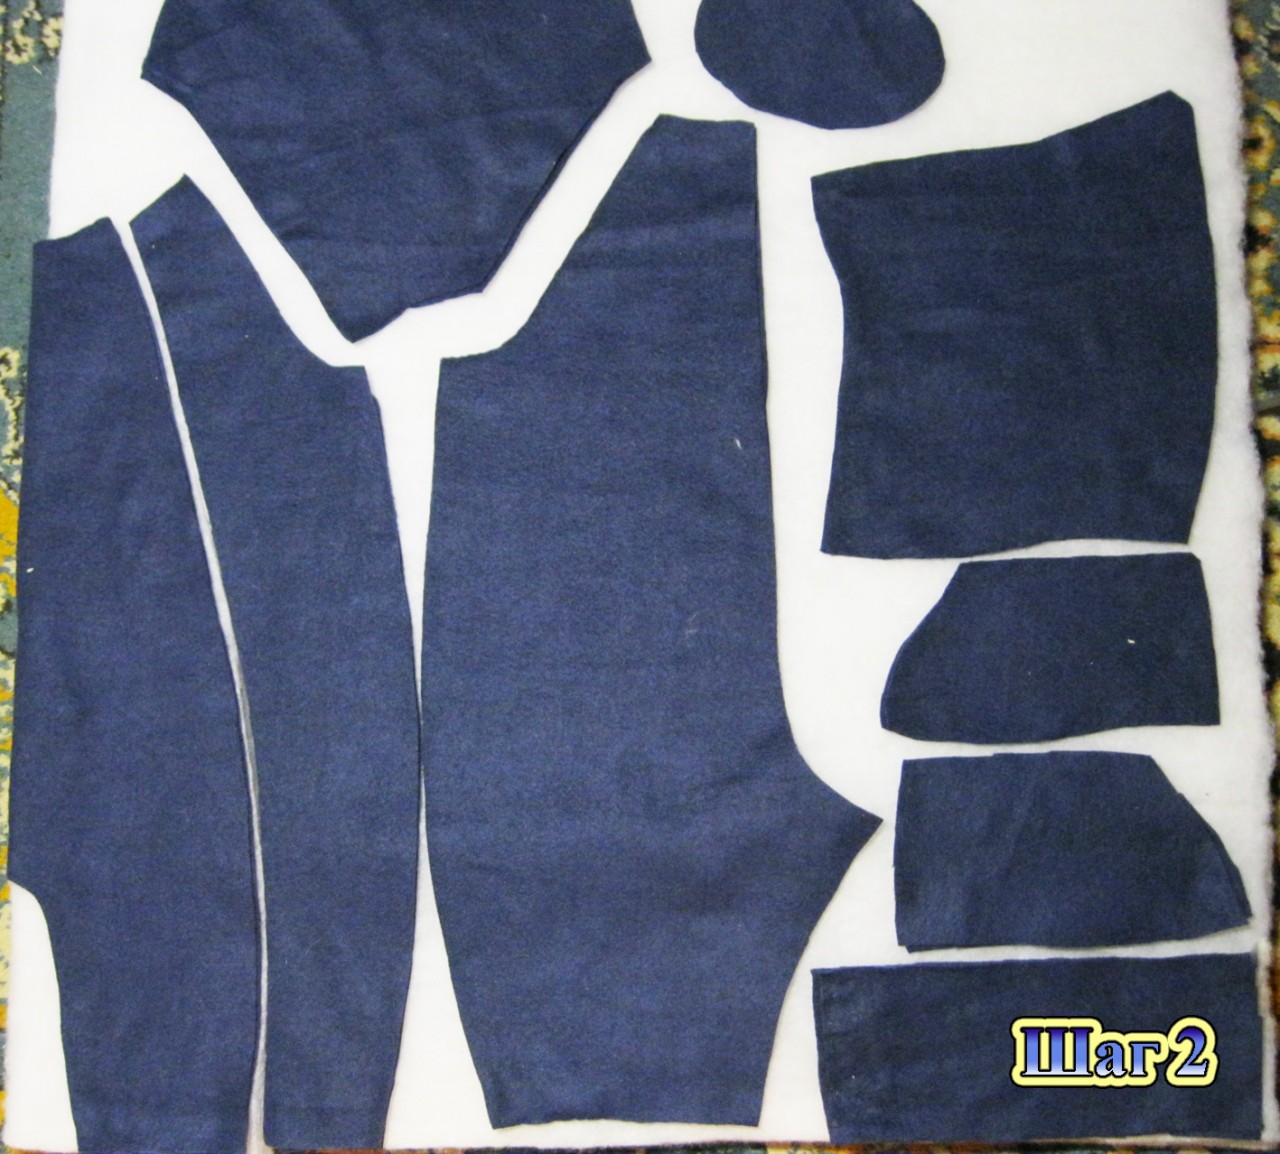
Step 1. When cutting parts from the main fabric, I made the following seam allowances (allowances are given in cm)
When cutting out the lining parts, I made all seam allowances according to 1 cm
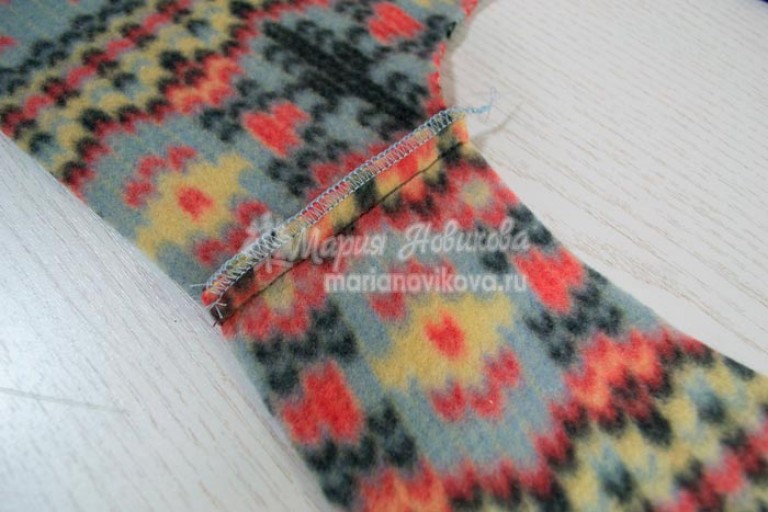
I cut out the backing for the zipper the same way from both raincoat fabric and fleece.

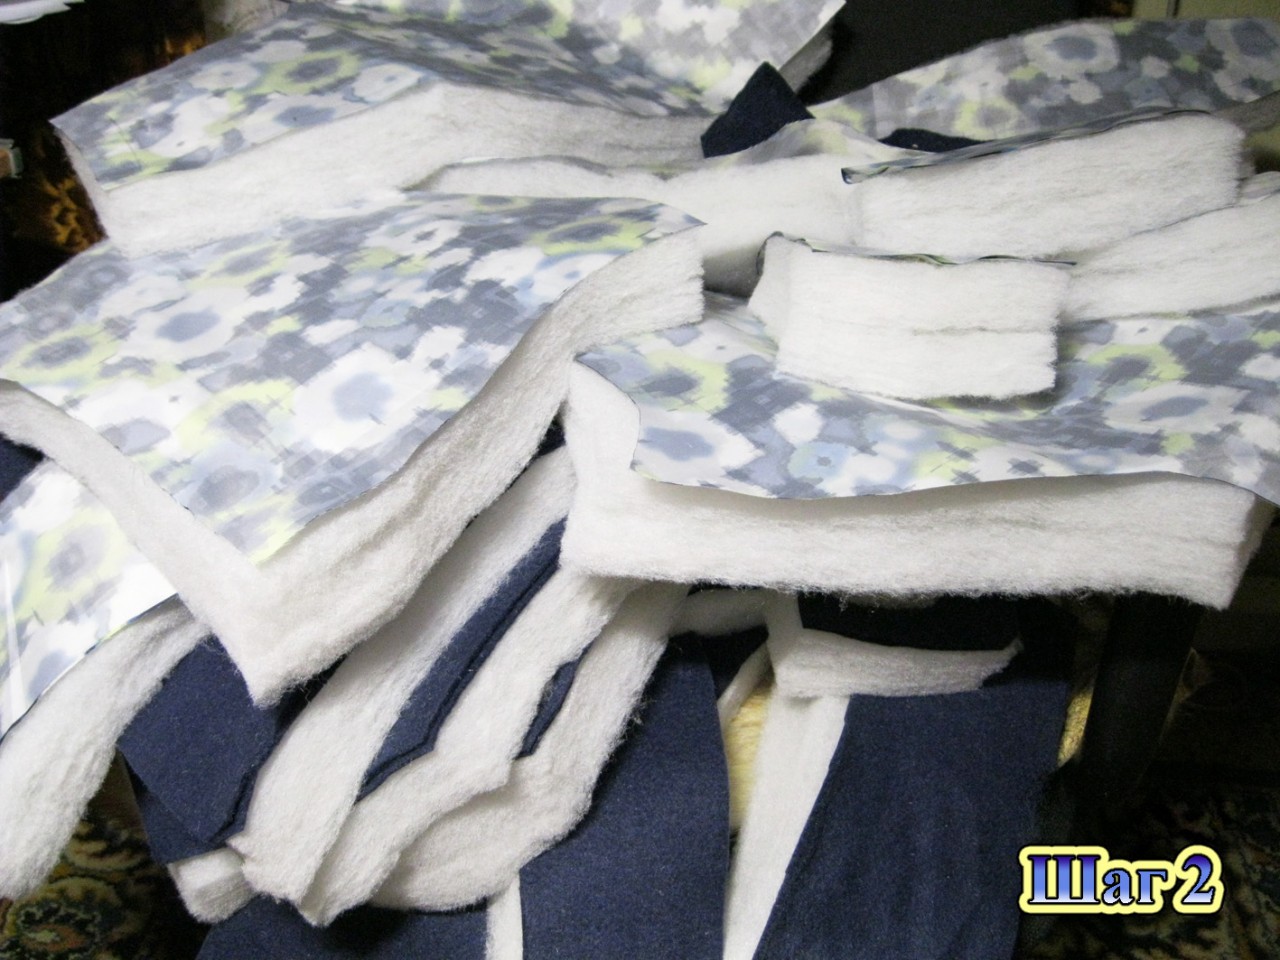
Step 2. At the next step, I placed the cut out parts (both from the main fabric and the lining parts) onto the padding polyester and cut them out exactly along the contour. Each detail was insulated with synthetic padding. For the convenience of sewing in the zipper, I did not cut out the backing for the zipper from padding polyester; it is better to fill it with padding polyester later.


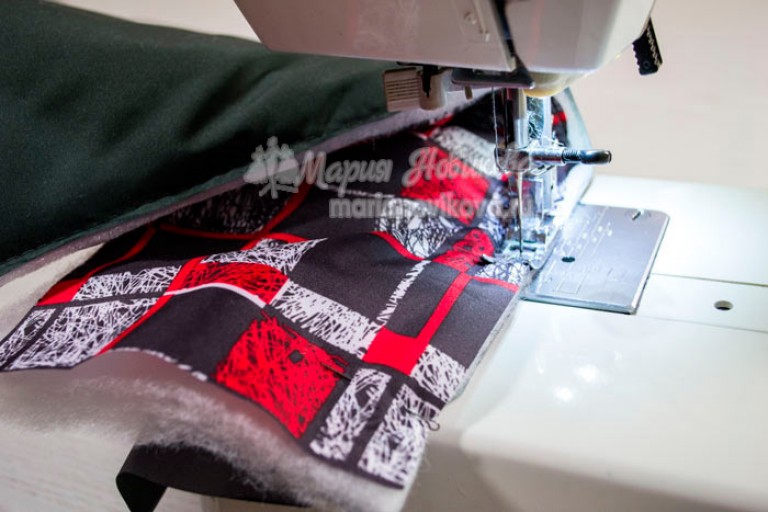
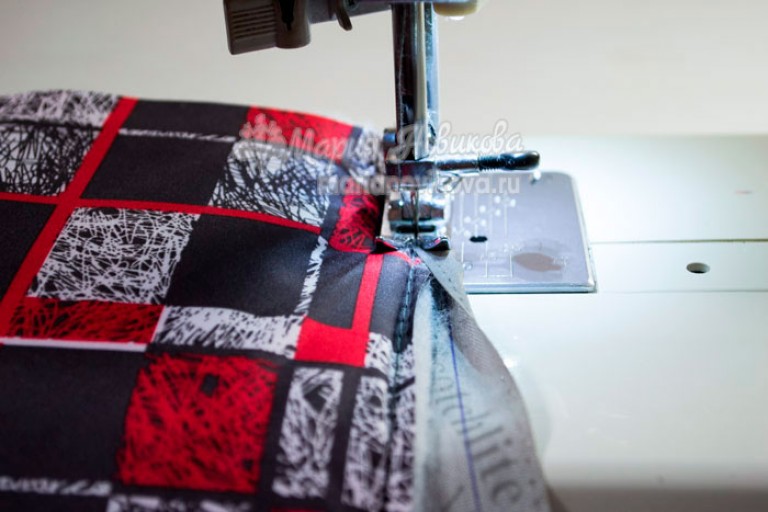
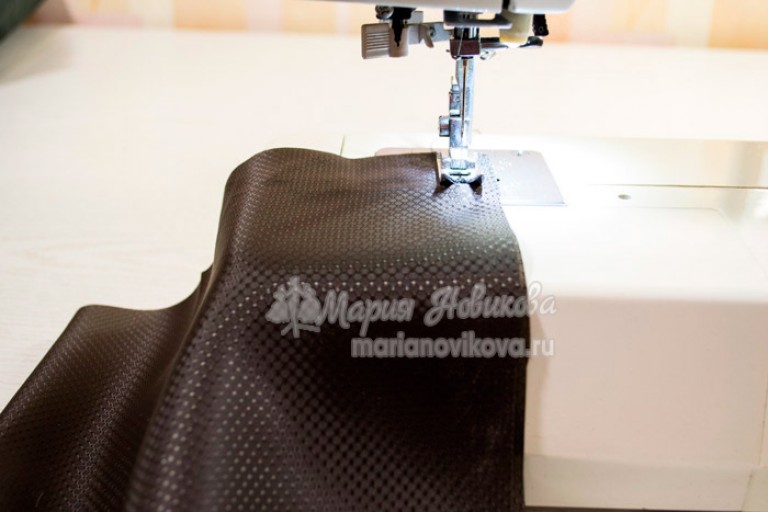
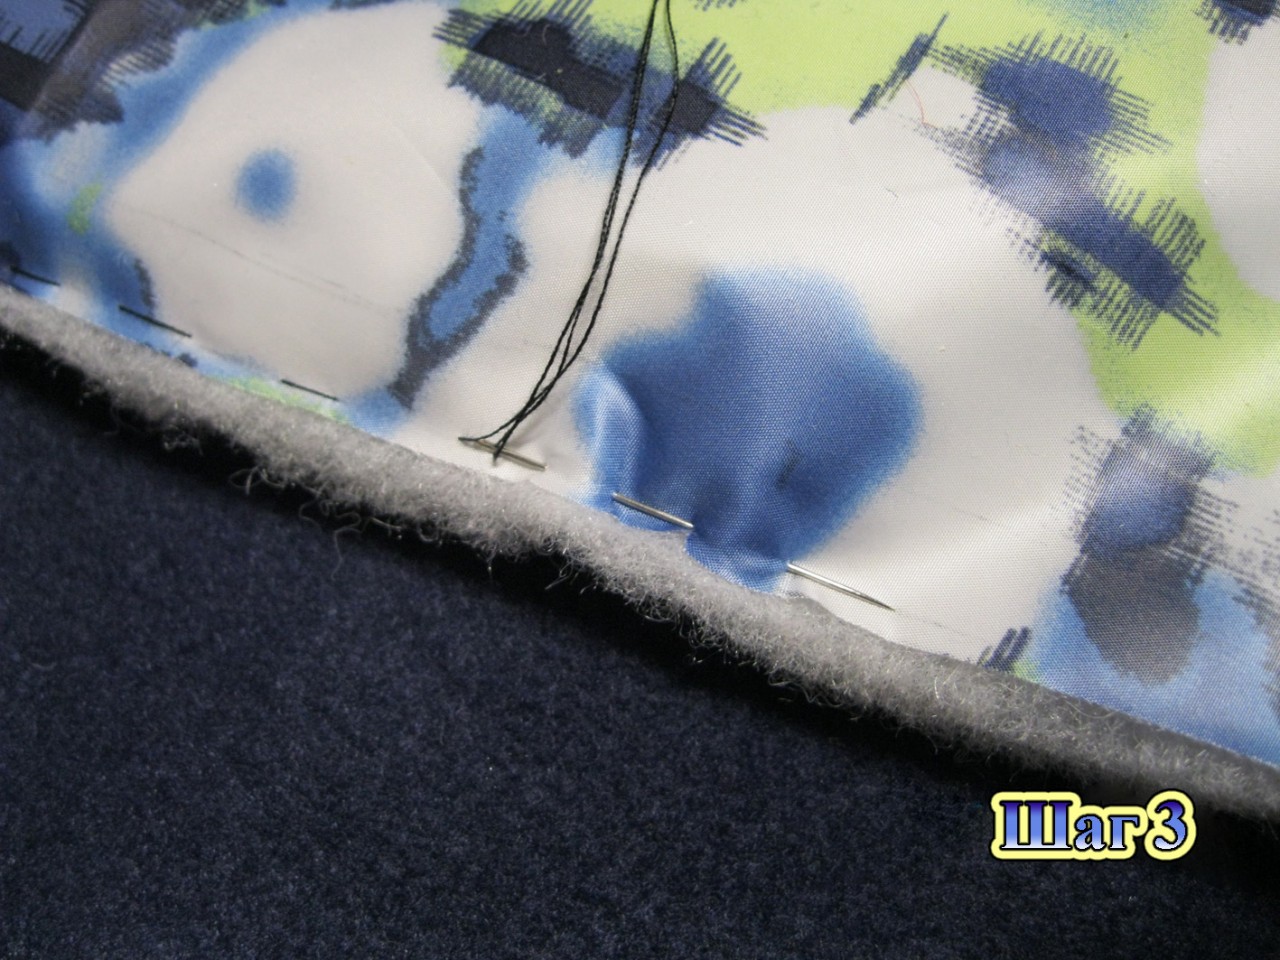
Step 3. Since I used raincoat fabric as the main fabric, and it slides over the padding polyester, it is necessary to baste all the parts from the raincoat fabric along the edge so that the padding polyester does not get lost when sewing.
![]()
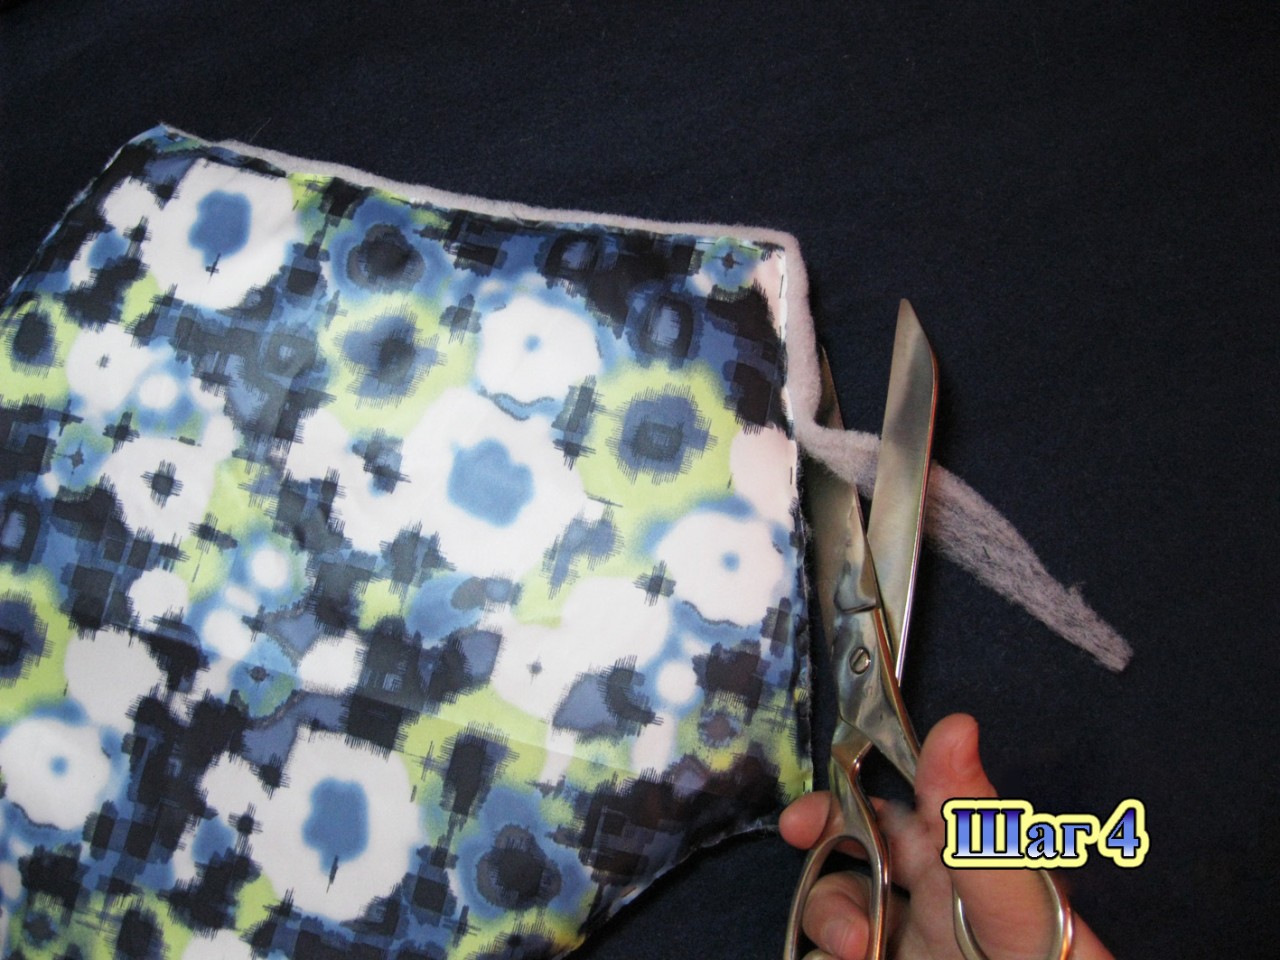
Step 4. Now you need to cut off the excess padding polyester on each part.

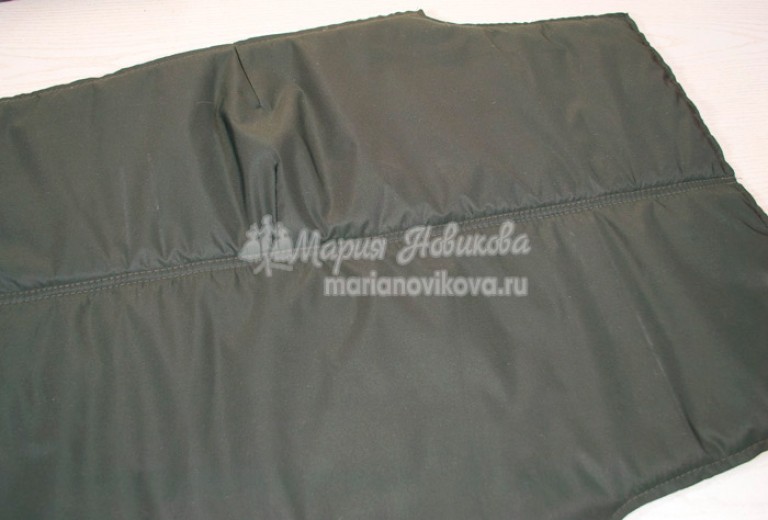
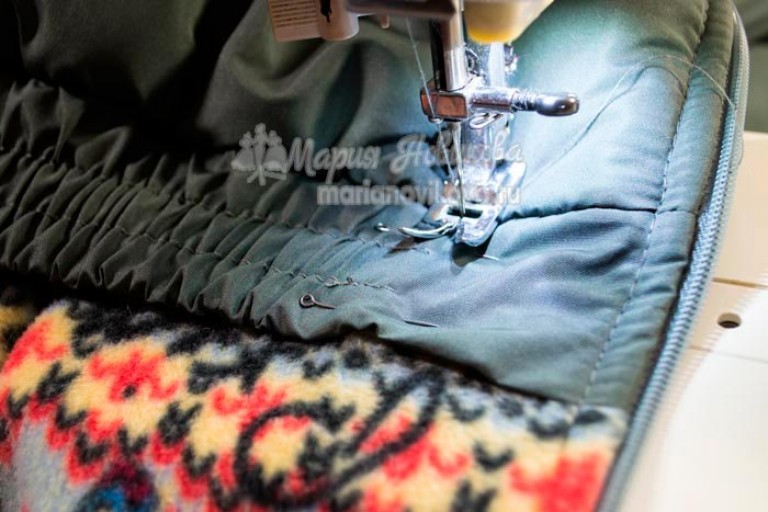
Step 5. We lay and baste the folds on the central lower part of the front with a fold, connect this part with the front yoke.

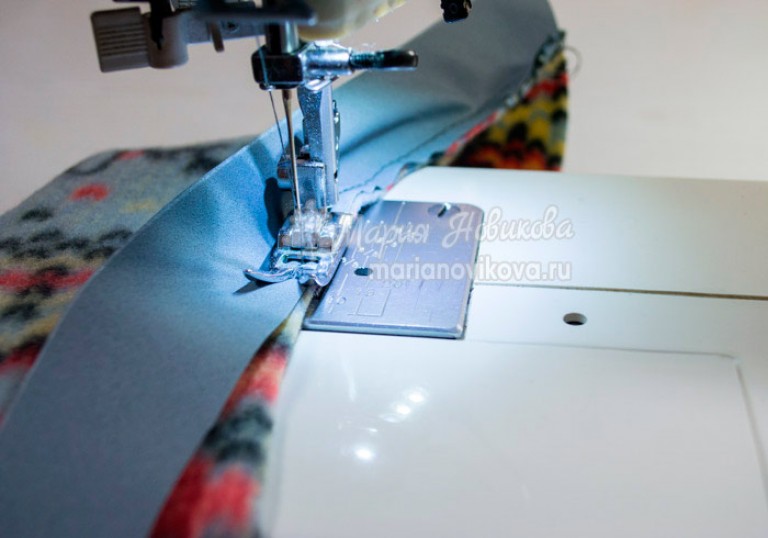
Step 6. We attach strips of fleece to the resulting central front part to the edges (where the zipper will be located) (the length of the strip is slightly longer than the length of the zipper, the width is 3.5 -4 cm). I did this for the convenience of inserting the zipper, and then to close the zipper so that the heat does not escape from the overalls.
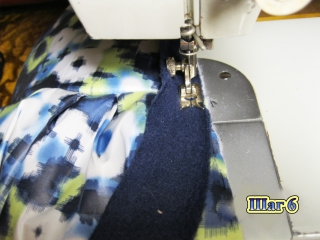
Step 7 Similarly, we attach the same strips of fleece to the sides of the front to the edges (where the zipper will be located)

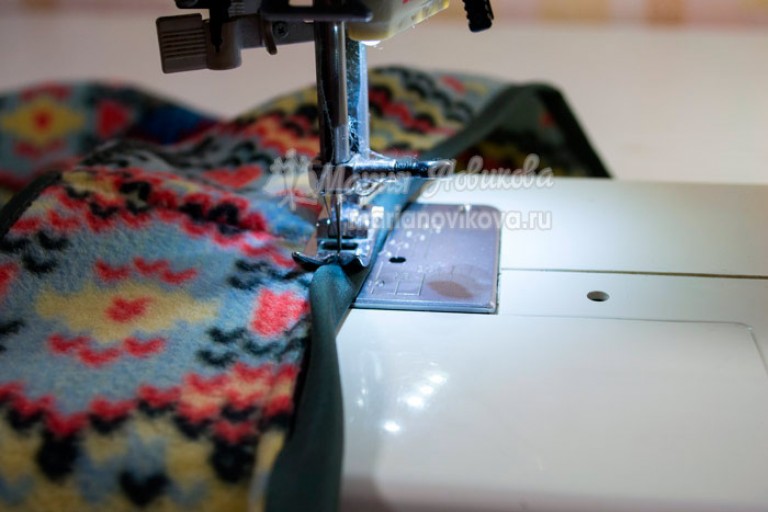
Step 8 Now we connect the sides of the front and the central front part (along the seams that are located below the cut for the zipper, they are marked in red in the photo). Here's what happens:

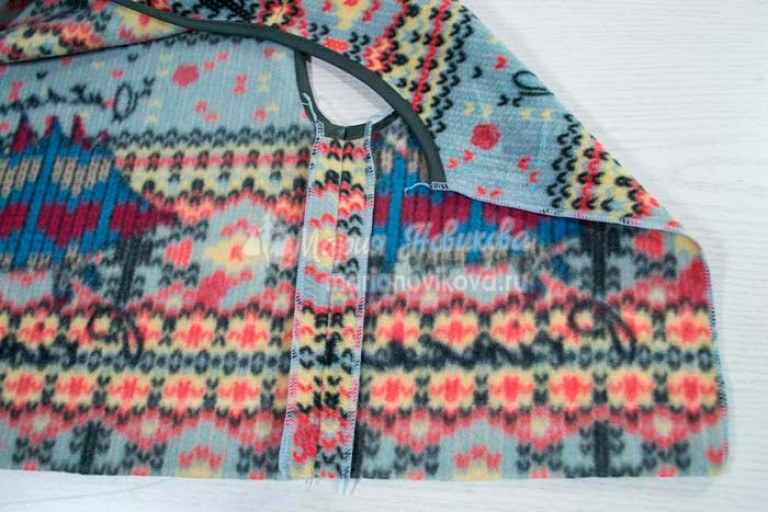
Step 9 We make cuts for the zipper. In the photo I put a zipper into the cut to show how it will be sewn in.

Step 10 Sew the back pieces along the middle seam. I stitched an elastic band to the back, stepping back from the edge of the armhole about 2-2.5 cm. The length of the elastic is 25 cm. Then you can connect the front and back parts of the overalls along the middle seam between the legs.

Step 11 We sew the sleeves to the front and back parts of the overalls. We fold the overalls and sew the sleeve seam and the side seam of the overalls (in one seam). Unfortunately, I didn’t take a photo of this stage.
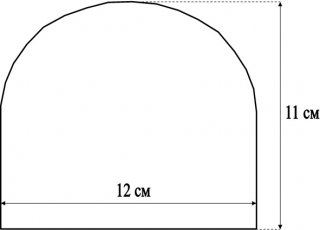
Step 12 Let's start sewing the hood. We cut out the edging of the hood (the pattern is given above). I cut it out of faux white fur and used fleece for the lining.
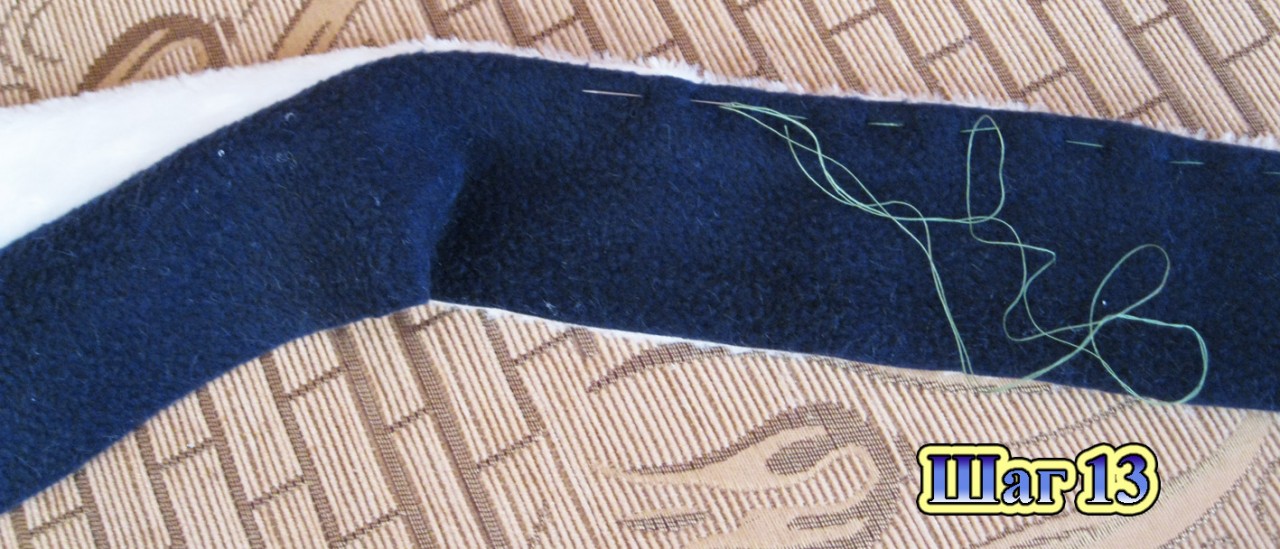
Step 13 We sew out the edging of the hood.

Step 14 We sew up the seam of the hood and attach the edging to it (as shown in the photo).

Step 15 We lay a machine seam, but not where we just basted, but at a distance of about 1.5 cm from the basting seam. This is necessary in order to then insert a cord into this drawstring to tighten the hood. You can make the drawstring for the lace in a different way, as it will be more convenient for you or as you think will be more rational.
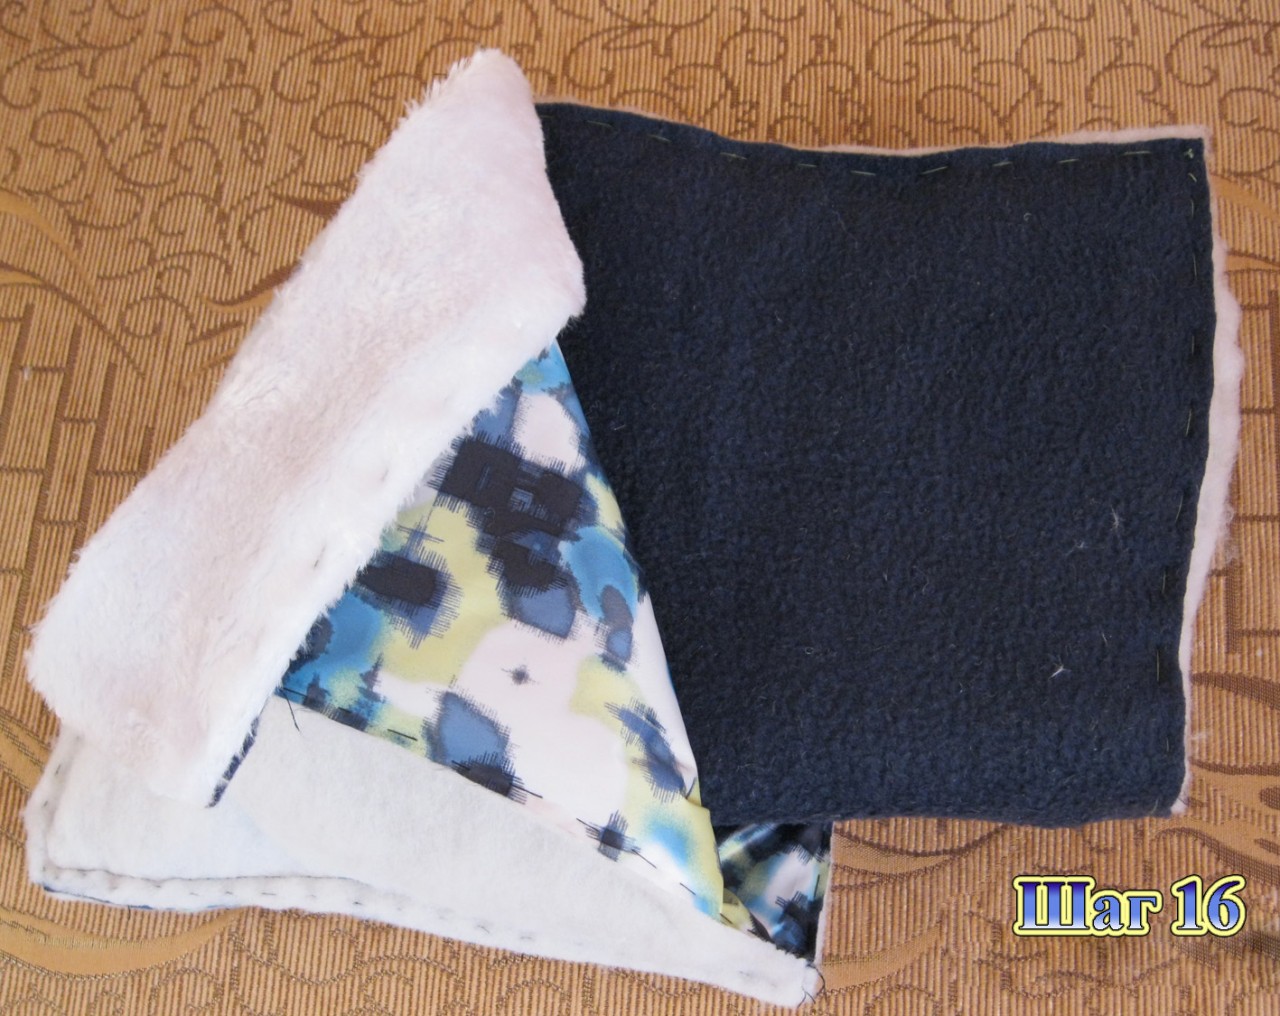
Step 16 We sew down the details of the hood, cut from fleece. We place the hoods from the main fabric and from the lining one into the other with the right side inward (as shown in the photo).

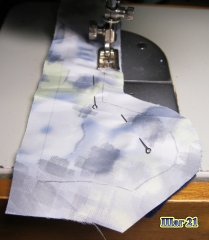
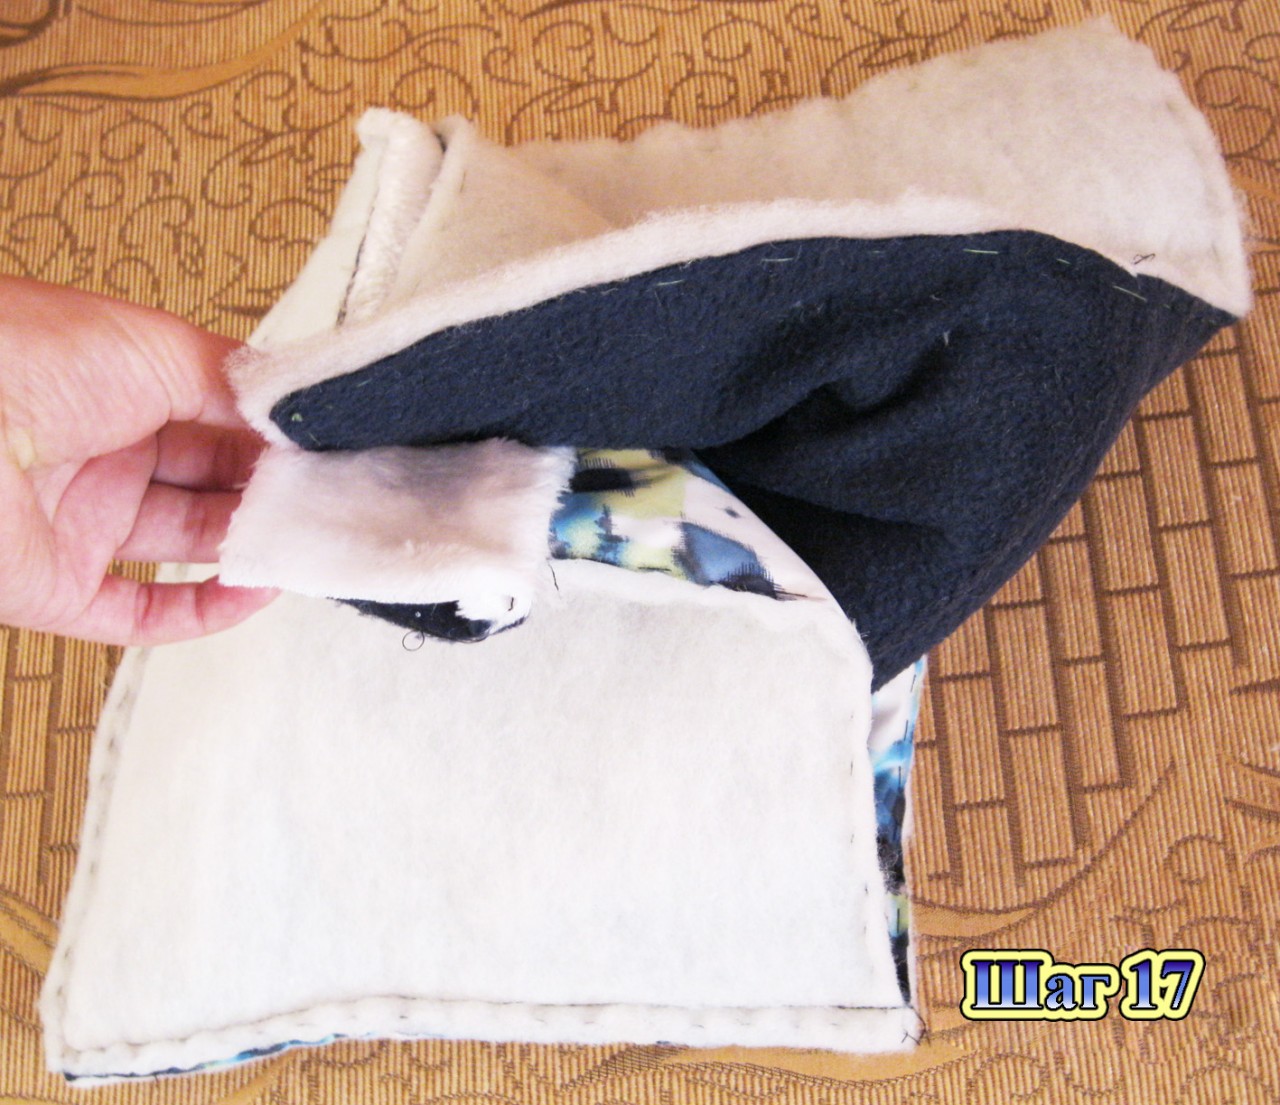
Step 17 We sweep away the details of the hood along the front edge (in the photo I am holding this place with my hand).

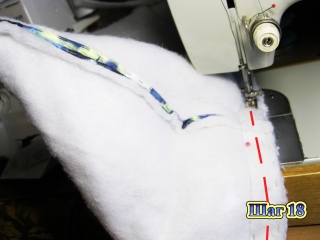
Step 18 Then you need to stitch this seam (shown in the photo with a red dotted line).
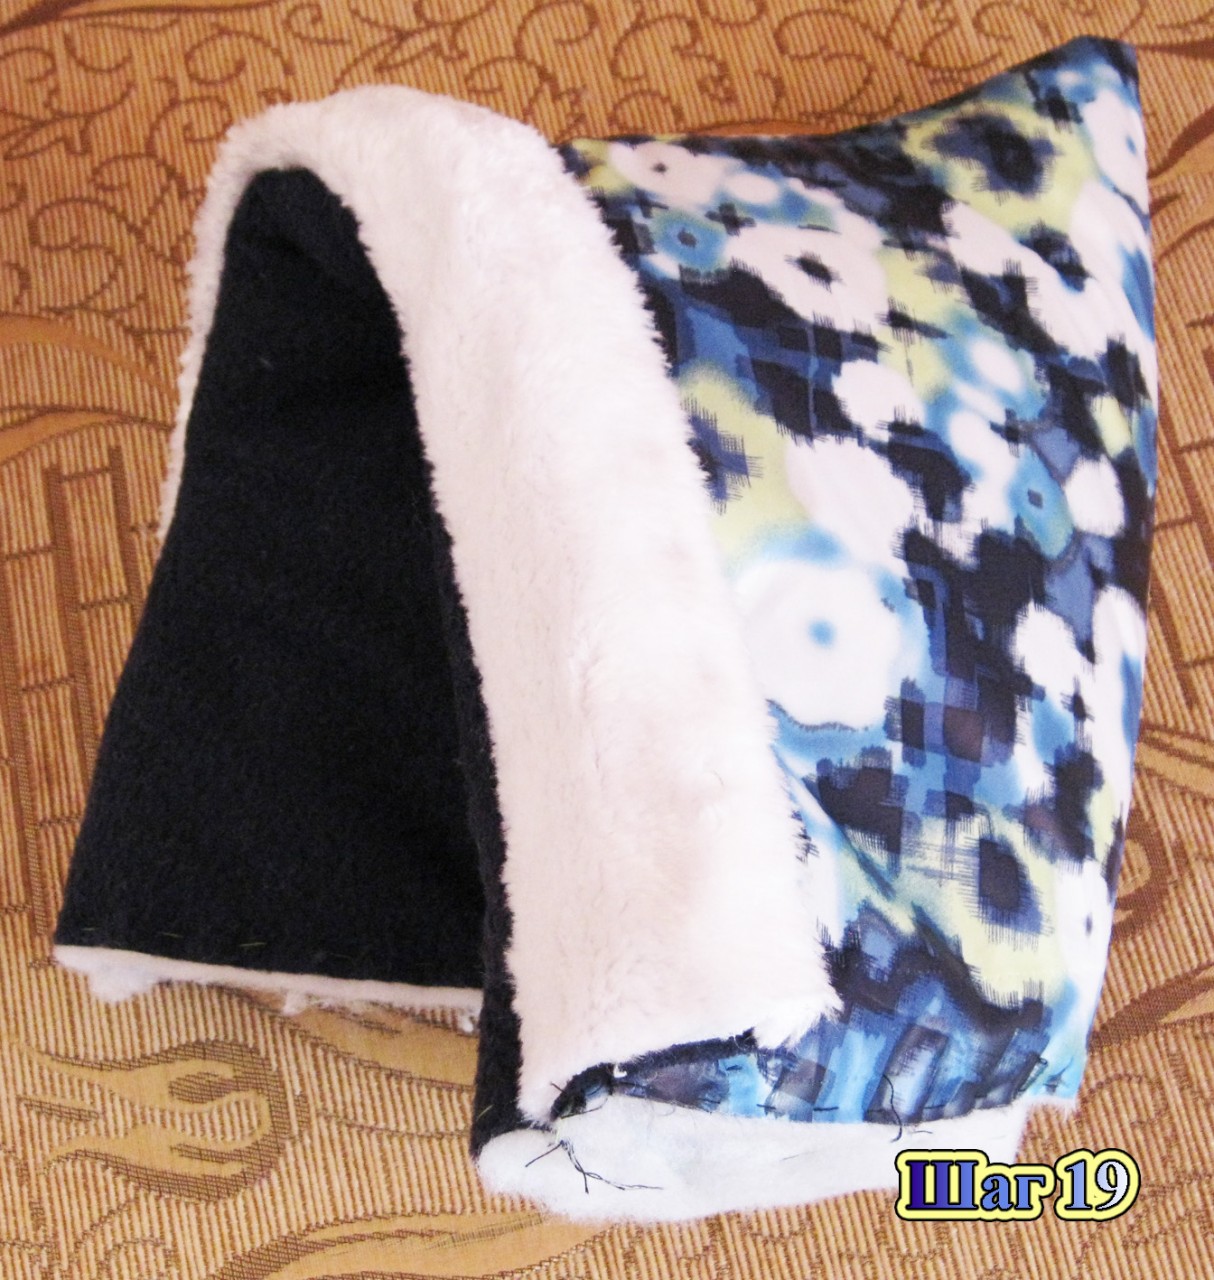
Step 19 We turn the hood inside out and this is what we got.

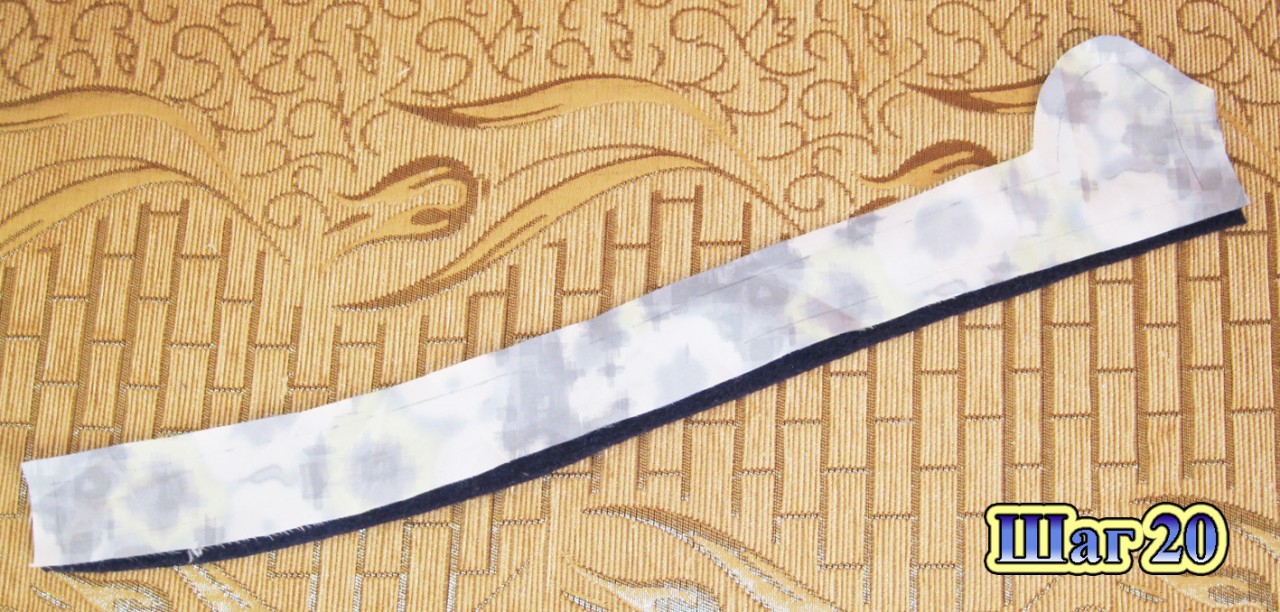
Step 20. Place the zipper backing pieces right sides together.


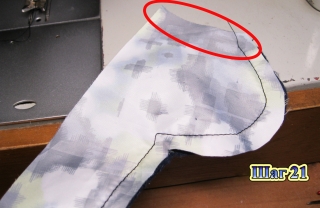
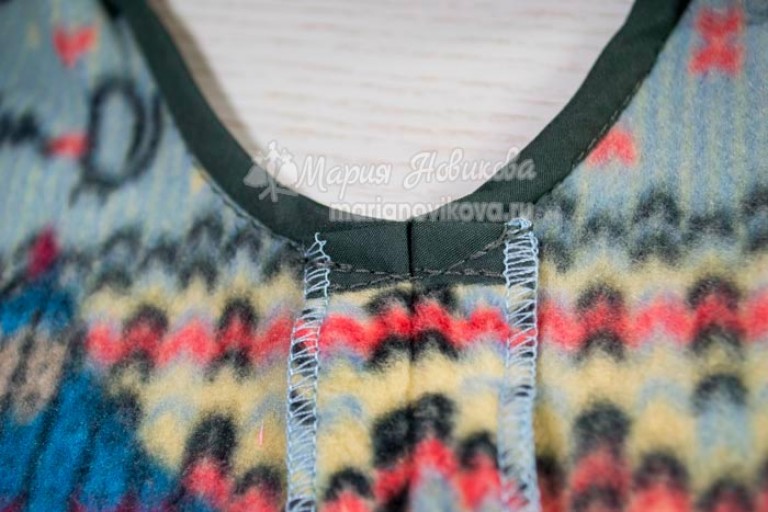
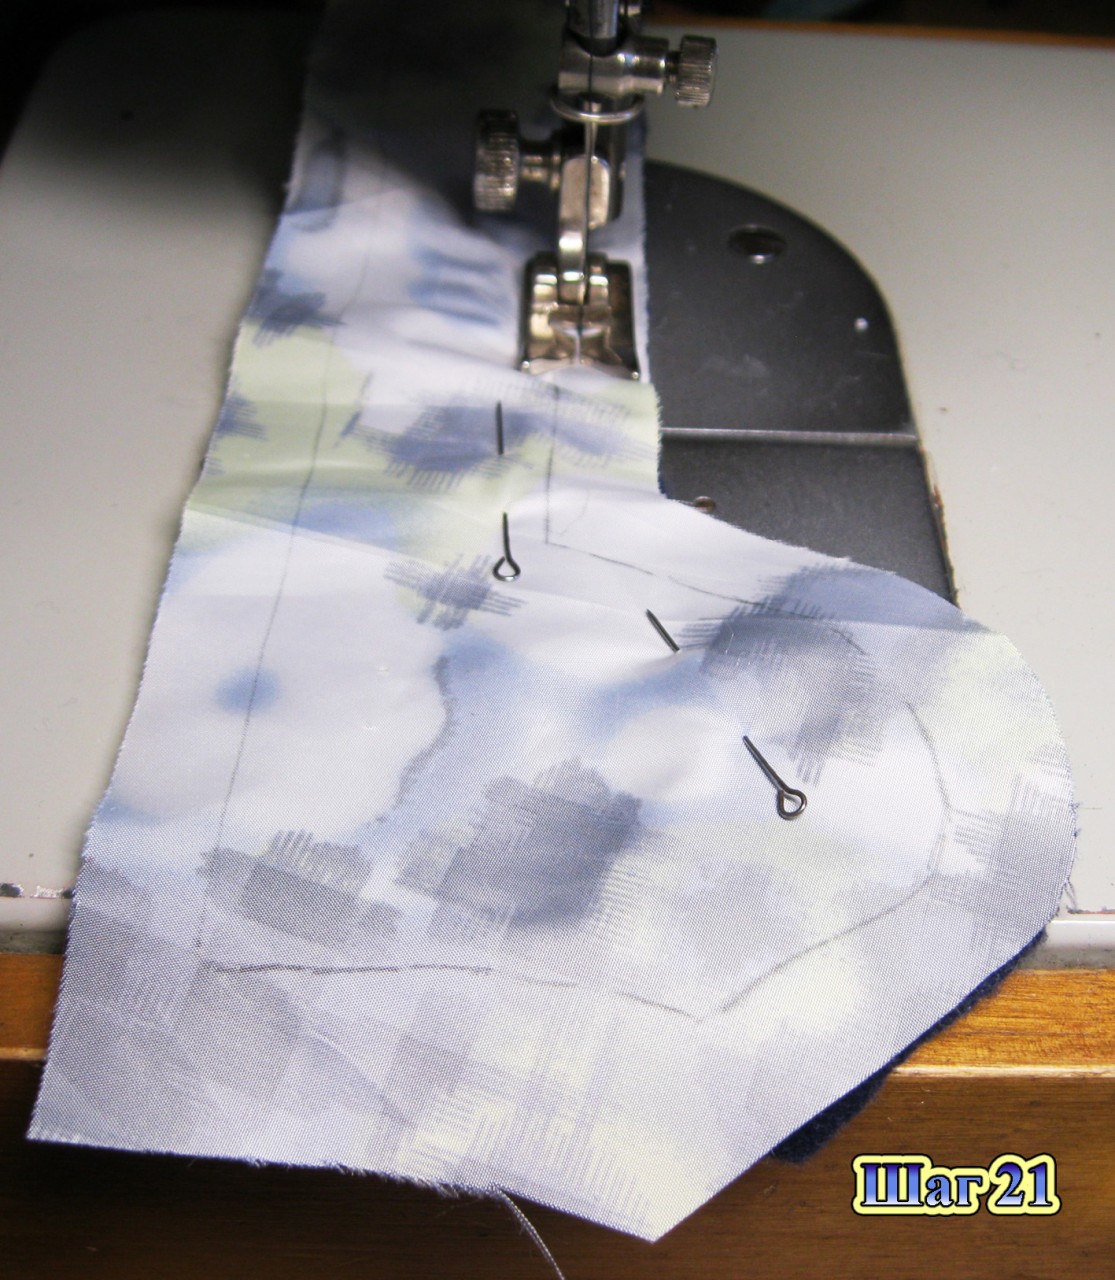
Step 21 We sew the backing for the zipper. Just don’t put a seam at the junction with the neckline; we will sew the hood there (in the photo this place is circled in red).
Step 22 We cut the seam allowance so that we can carefully turn it inside out.
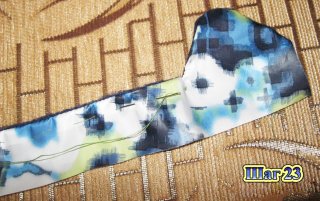
Step 23 Turn the backing right side out and baste the edge.
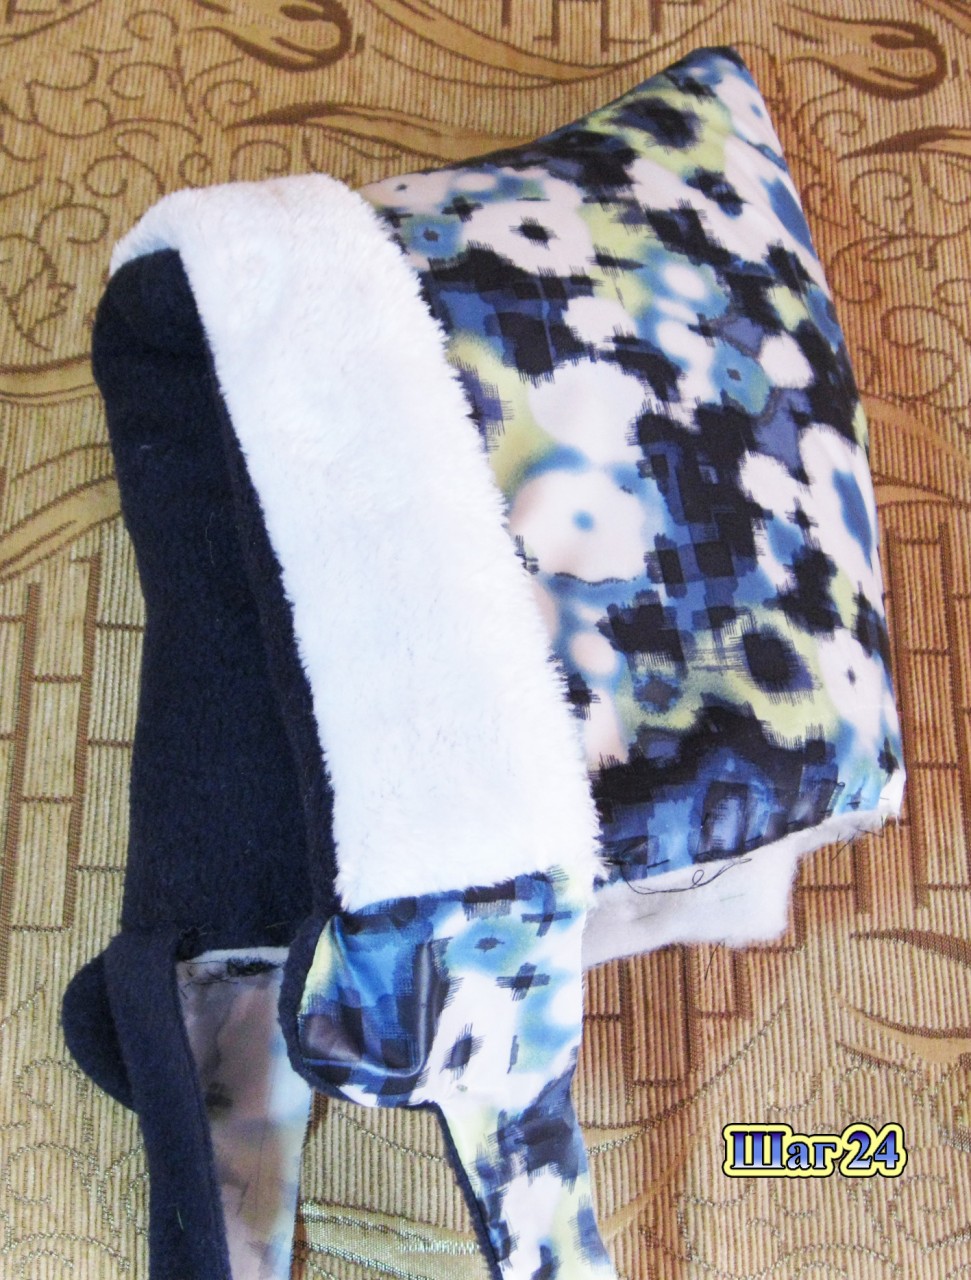
Step 24 We combine the backing for the zipper with the hood: the front side of the backing is to the front side of the hood, the hood lining is to the backing lining. We baste the backing to the hood and stitch it together.
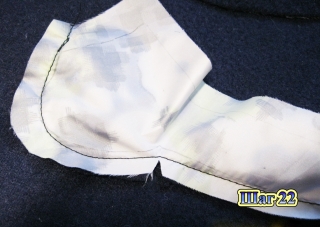
The result should be:

Step 25 Now we apply the front side of the hood to the front side of the overalls and baste them, then stitch them together (in the photo the seam is indicated by a red dotted line).
The junction of the hood, zipper backing and overalls:

Step 26 At this step the overalls look like this:
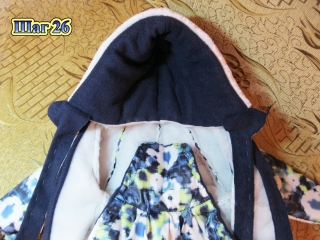
This is how the zipper will be sewn:

Step 27 Let's start sewing down the details of the lining of the overalls. I did not baste the fleece parts along the edges, since the fleece does not slip on the padding polyester.
The grinding algorithm is similar:
- 1. We connect the front side panels and the central front part.
- 2. We cover the cuts for the zipper.
- 3. Sew the back pieces along the middle seam. There is no need to sharpen the elastic!
- 4. We connect the front and back parts of the lining along the middle seam between the legs. There is no need to sew the side seams yet, they will be sewn together with the sleeve!
- 5. We sew the sleeves to the front and back parts of the lining. Fold the lining and sew the sleeve seam and the side seam of the lining (in one seam).
This is what happens at this step:
![]()
Step 28 I made drawstrings for elastic on the sleeves and legs. To do this, you need to cut out strips from the main fabric, the width of the strip is 4-5 cm, to determine the length, measure the length of the cut of the sleeve and trouser leg with a centimeter tape and add an increase for the seam (I hope I expressed myself clearly, maybe it will be clearer in the photo). We sew it on the sides so that there are neat edges at the drawstring.
2015-12-29 Maria Novikova
How to sew a children's overalls with your own hands? Where can I get the pattern? Store-bought clothes are not always suitable for children. For example, my nephew, who has a very difficult time choosing clothes. At 5.5 years old, he is as tall as a 7-year-old child. Therefore, I decided to sew him a winter overall that is warm, comfortable and practical. Since my aunt sews with her own hands, it means it will be better than store-bought.
Advantages of a DIY baby onesie:
- Originality of the model.
- High quality fabric.
- Meets personal preferences.
- Always made with soul.
Watch the master class below and you will find out that the pattern of children's overalls is not at all difficult.
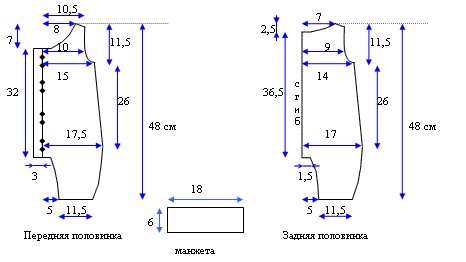
You will need:
- Jacket fabric (pants length + 10.0 cm.
- Fleece fabric (pants length + 20.0 cm)
- Lining fabric 25.0 cm.
- Trim fabric (cuff width + 2.0 cm)
- Reflective tape
- Sintepon (pants length + 10 cm)
- Zipper 40.0 - 50.0 cm.
- Linen elastic
- Wide elastic = waist
- Threads in the color of the fabric
- Tailor's chalk
- Sewing machine
- Machine needle No. 100
- Overlock
- Tape measure
- Tailor's scissors
- Curly patterns and a long ruler
Beginning of work
Preparing for cutting
On the front side, check the fabric for defects. Iron the fabric from the wrong side, adding steam. Place the fabric on a flat surface along the edge with right sides facing in.
Cutting overalls
The overalls consist of an upper part - the bodice and a lower part - the trousers, so first start cutting the trousers, and then the bodice.
Cutting the trousers
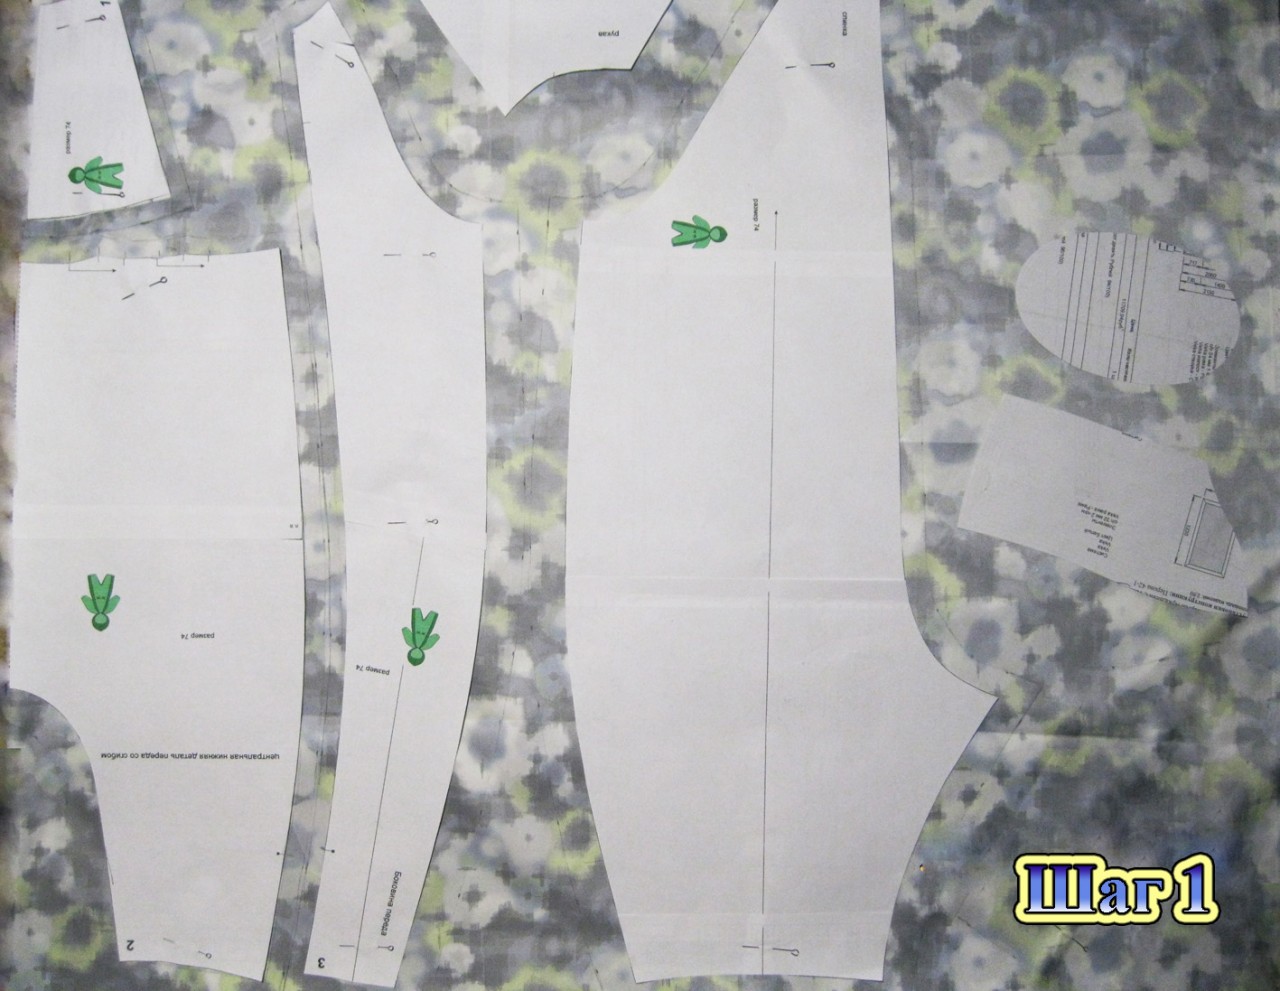
Lay out the pattern pieces on the fabric. If you don't have finished pattern, then take a look here:
Attention! Try to cut as close to the edge as possible, this way you will save fabric and get solid scraps for future products.
According to the model, the front halves of the trousers have darts in the knee area. To do this, lengthen the front half along the bottom by 2.0 cm. In the knee area, make horizontal darts, the length of the darts is 8.0 - 10.0 cm. Add an increase of 5.0 cm at the waist and hips (if necessary). Measure the circumference of your leg at the bottom, taking into account winter boot, as well as freedom of movement, make these changes to the pattern. Add seam allowances at the side, crotch, middle seams and bottom 1.0 cm, at the waist 0.5 - 0.7 cm. 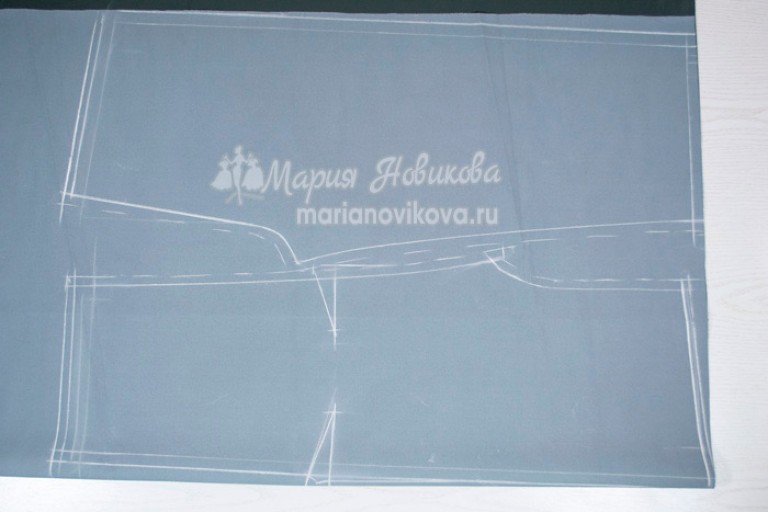
Cut out the trouser pieces taking into account the seam allowances. Using the received details, cut out the trouser legs from padding polyester.

Cut out the bodice
Trace the pattern of the front and back onto the fleece, taking into account the pattern or direction of the pile. Don't have a ready-made pattern?! Then watch the video master class: The length of the bodice corresponds to the measurement: the length of the front front from the shoulder to the waist. Deepen the armholes and neckline. Add allowances for: side 2.0 cm, shoulder 1.0 cm, bottom 1.0 cm, (you can add 4.0 - 5.0 cm for growth) center shelf 1.0 - 1.5 cm .


Sewing trousers
Connection with insulation
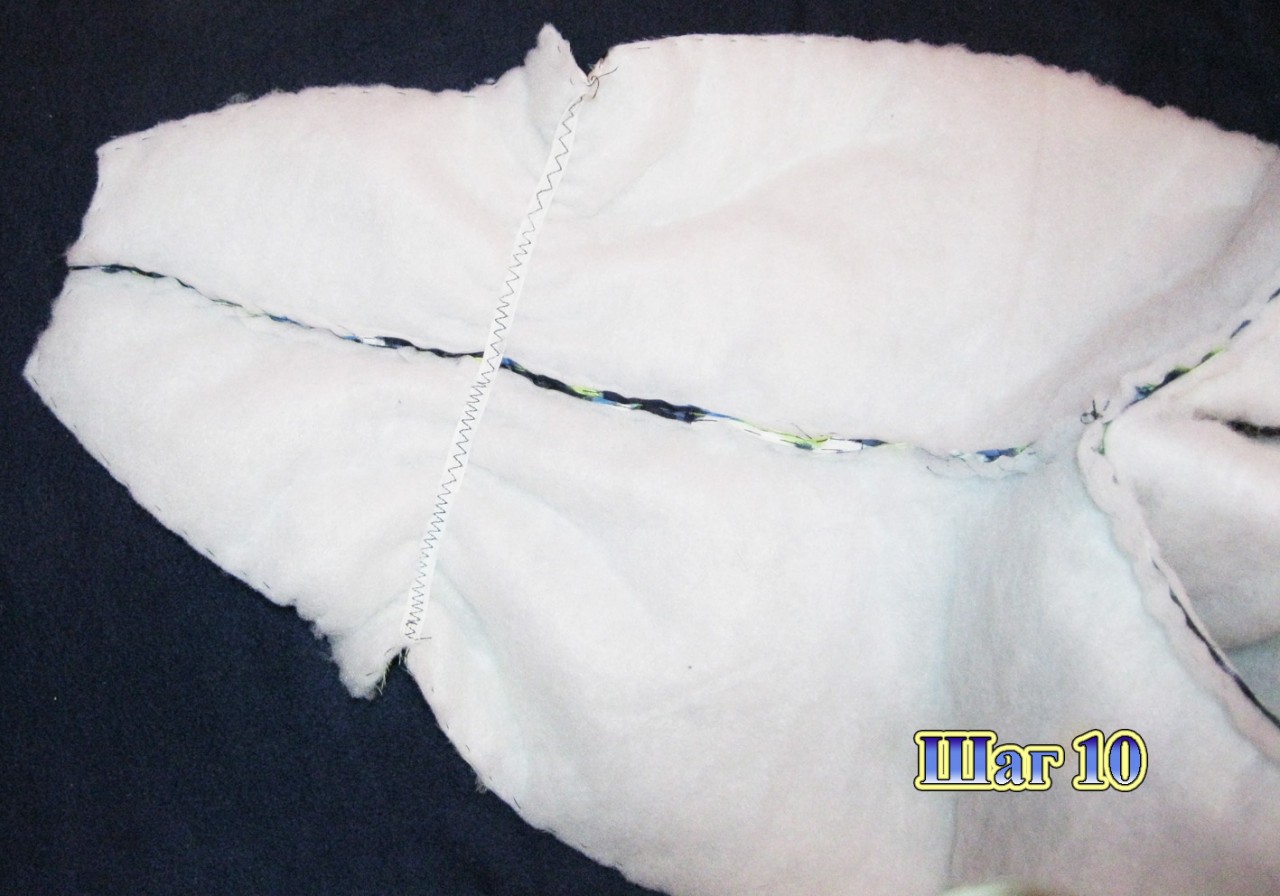
Transfer the darts to the other half of the trousers and stitch them.

Connect the parts of the padding polyester with the parts of the main fabric along all cuts, departing from the cut 0.5 - 0.7 cm.

To avoid thickening in the knee area, cut the darts on the insulation parts along the contour.

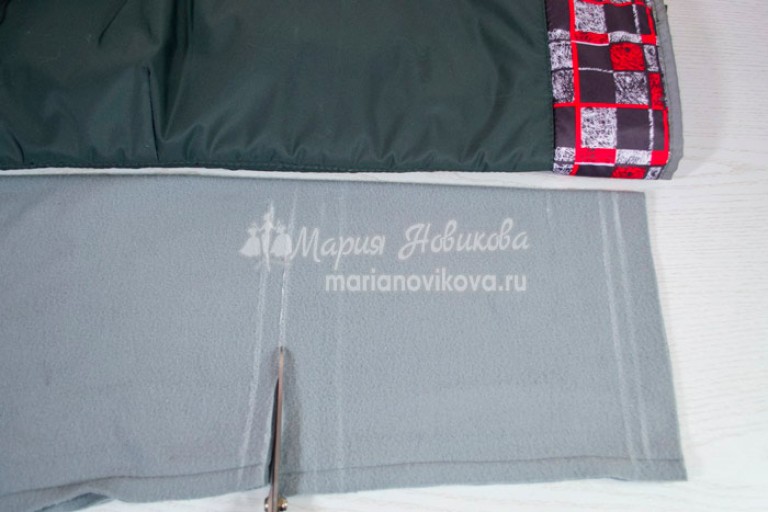
Cutting out the lining
Lay the fleece on a flat surface along the edge with the right sides facing inward, the nap on the fleece should be directed from top to bottom. Lay out the trouser parts on the fabric, outline with chalk and cut. This way you will have lining pieces without side seams or darts, which will reduce the thickening of the trousers at the seams. At the bottom of the lining, add 6.0 cm (for allowances and freedom of movement).
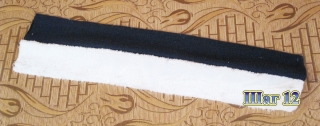
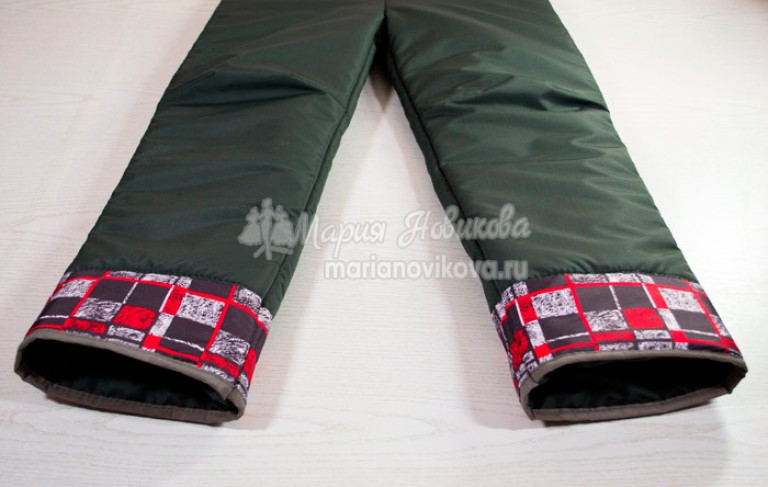
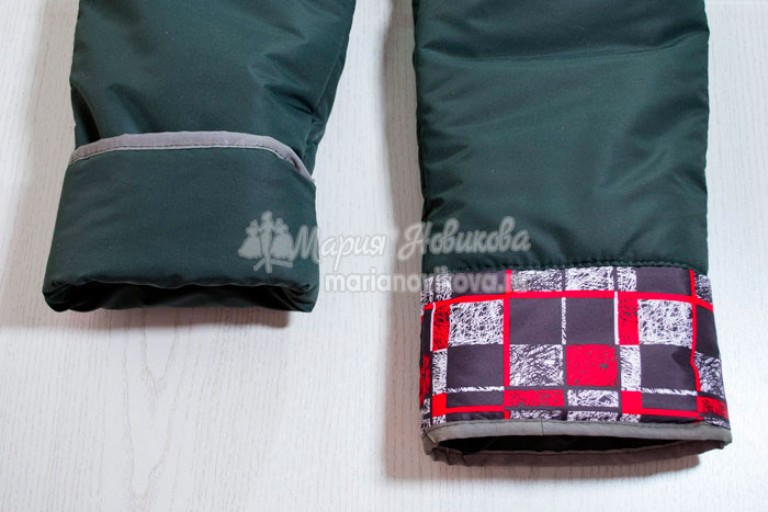
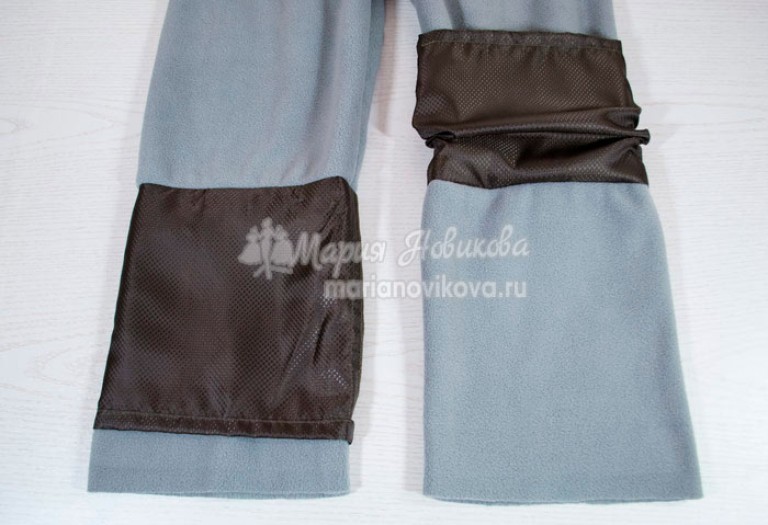
Processing the bottom of trousers with cuffs
Open the cuffs
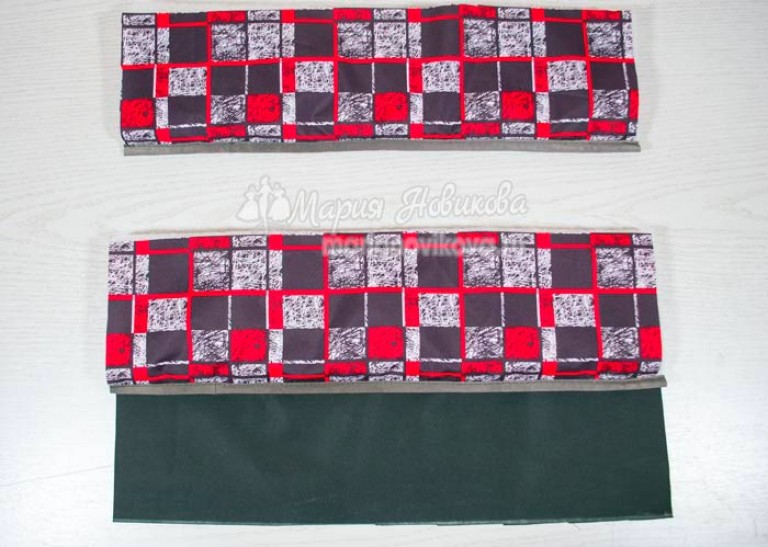
Cut out two rectangles from the main fabric: length = circumference of the trouser leg at the bottom + 2.0 cm (for allowances); width = 8.0 - 10.0 cm + 1.0 cm (for allowance).
Cut out similar rectangles from finishing fabric and padding polyester, but 1.5 - 2.0 cm smaller in width.
Processing cuffs
Connect the cuff parts together along the length from the front side, departing 0.5 - 0.7 cm from the cut, while the padding polyester should be inside.
Edge the resulting cut with reflective tape. If the ribbon is wide, cut it in half lengthwise. On the wrong side, draw a center line along the entire length of the tape for ease of stitching.
This is what should happen:
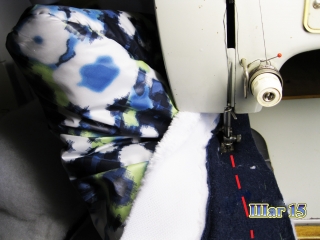
Sew the cuffs to the trouser legs and place a finishing fastening stitch on the right side, directing the seam allowance upward.

Processing seams in trousers
Sew the panels of the trousers together along the middle seam, leaving room for a zipper in the front.
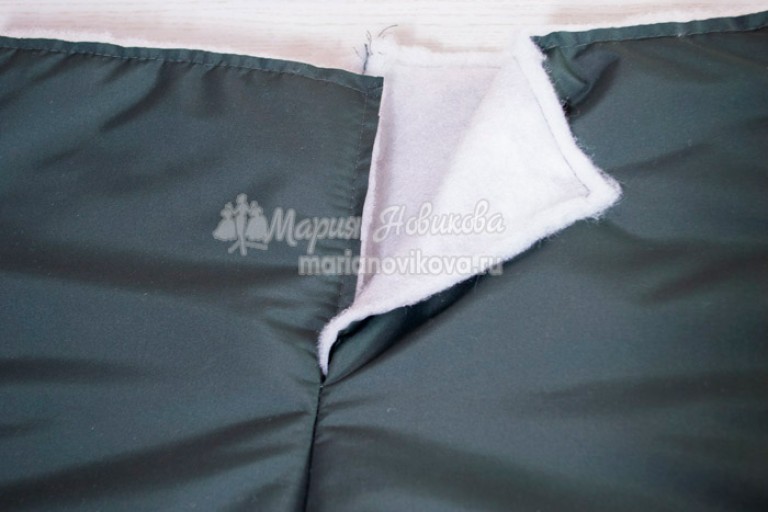
Then sew the crotch seams in one step: starting from the bottom of one leg, through the middle seam and ending at the bottom of the second leg.
Be careful! The horizontal seams on the cuffs must match when stitching; secure them with pins before work.
Sewing the bodice
Processing shoulder seams

Armhole and neck trim
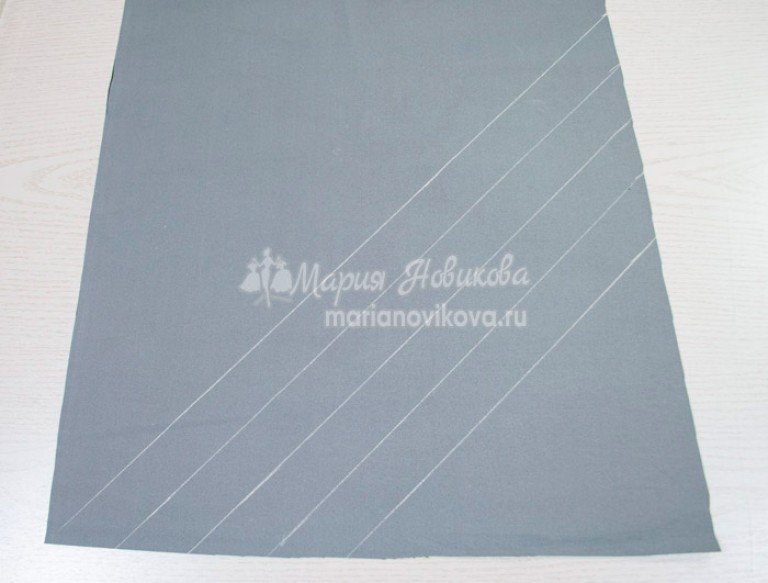
To process the sections of the armholes and neckline, you will need bias tape, which can be made from scraps of the main fabric. To do this, fold the fabric at an angle of 45 degrees, which is the direction in which the bias tape is cut. This ensures its elasticity, which is especially important when processing convex/concave cuts.

Draw strips 3.5 cm wide, length = armhole and neck lengths.

Edge the cuts. First, sew the bias tape from the wrong side, aligning the right side of the tape with the wrong side of the product. Lightly stretch the tape along the concave lines, the seam width is 0.5 - 0.7 cm.
Then wrap the trim around the edge to the front side, fold the free edge of the trim inward and stitch 0.1 cm along the trim from the fold.
What will happen in the end:

Finish the side seams and sides of the shelves
Secure the side seams at the bottom of the armholes, machine stitching seam to seam.

Belt processing
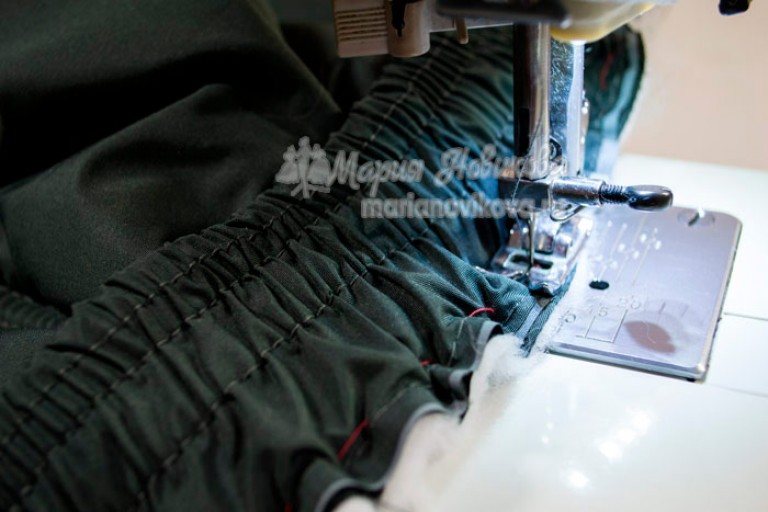
You will learn how to process a belt with an elastic band from my previous master class: A special feature of the belt of children's overalls is the distance from the edges of the belt is 5.0 cm, where the elastic is sewn.
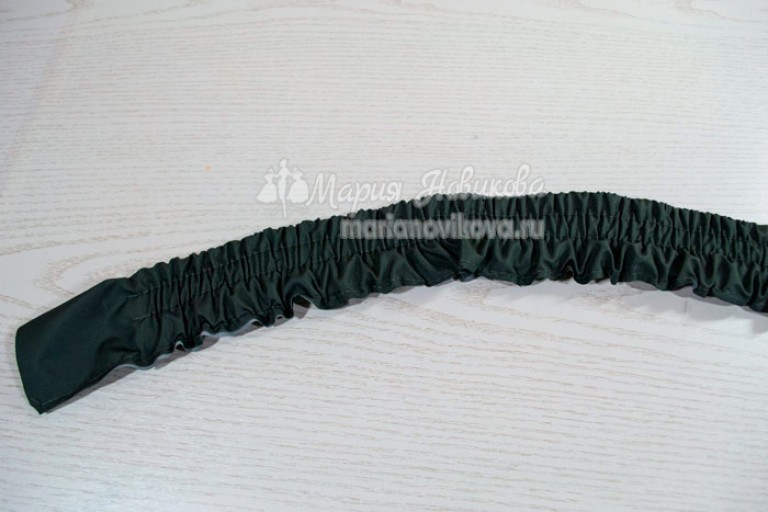
Sewing a belt to trousers
Baste and stitch the waistband to the trousers, stretching the elastic.
 to contents
Processing the bottom of the trouser lining with a cuff
Cut out 2 rectangles from the lining fabric: width = 20.0 cm + 5.0 cm (for allowances); length = trouser circumference + 3.0 cm (for allowances).
Sew the rectangles along the width, retreating 1.5 cm from the cut and overcast.

Finish the bottom edges of the cuffs with a closed hem stitch, leaving holes for the elastic on the seams.


Connection of cuffs with lining
Lay out the main leg and lining legs, as well as the cuff, on a flat surface. Determine the level of stitching of the cuff to the lining. From the resulting line, add a 1.5 cm seam allowance down. Cut the trouser leg along the seam allowance line and align the bottom of the lining.

Sew the cuff so that the cut of the cuff is on the inside, between the trouser leg pieces.


Connect the lining and trousers along the top edge
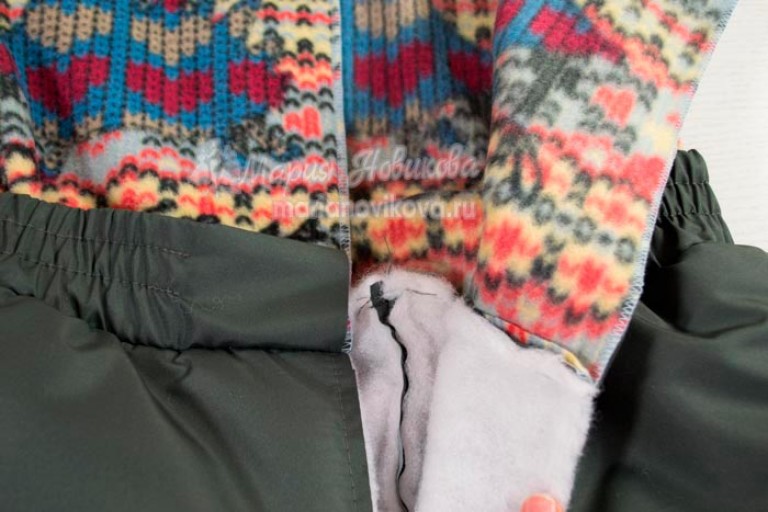
Turn the pants right side out, through the hole near the zipper.
![]()
Baste the lining along the middle seam to the zipper, folding the edges inward.
On the front side, secure the lining with a finishing stitch along the zipper, bending the upper ends of the zipper tape inward. Remove the basting threads.
Presentation of children's winter overalls
The jumpsuit is finished and I'm very pleased with the work done. I admit that this was my first time sewing a children’s winter overall, and I was pleasantly pleased with the result. By the way, while I was preparing the master class, my nephew was already happily wearing overalls. How to sew a children's overalls? At first glance, the task is scary, but if you follow the above instructions, the problem is completely solvable. Don’t be afraid, be more confident, and if you have any questions, please contact us. In the next article you will learn how to sew a winter one. Bye!
P.S. Did you like the master class?
Leave your comments and wishes.
Sincerely yours, Maria Novikova
Hello! My name is Maria and I am the author of this article.
Stop being a gray mouse, join the ranks of the fashionable and stylish! Don't know how? I will help you!
Right now, place an order for a personal pattern or consultation on sewing and cutting clothes. Including consultation on the choice of fabric, style and personal image.
My . I'm on Twitter. Watch on Youtube.
I would be grateful if you use the buttons:
Author of the work: Kuryshkina Yu.A.
To sew the overalls I needed:
- ready-made overalls pattern (we are 6.5 months old, but I sewed a size 74 overalls for growth);
- 1.2 m of main fabric (I used raincoat fabric);
- 1.2 m of fabric for lining (I used fleece as lining fabric);
- 2 m of insulation (our winters are cold, so I made two layers of double synthetic padding);
- 2 permanent zippers 50 cm long;
- 1 cord 80 cm;
- elastic cord 1.5 m;
- 6 clamps and 6 cord ends.
I added boots and mittens to the overalls pattern (patterns are given in actual size):

I also changed the edging of the hood and the backing for the zipper (see below)
Step 1. When cutting parts from the main fabric, I made the following seam allowances (allowances are given in cm)

When cutting out the lining parts, I made all seam allowances according to 1 cm
I cut out the backing for the zipper the same way from both raincoat fabric and fleece.
Step 2. At the next step, I placed the cut out parts (both from the main fabric and the lining parts) onto the padding polyester and cut them out exactly along the contour. Each detail was insulated with synthetic padding. For the convenience of sewing in the zipper, I did not cut out the backing for the zipper from padding polyester; it is better to fill it with padding polyester later.
Step 3. Since I used raincoat fabric as the main fabric, and it slides over the padding polyester, it is necessary to baste all the parts from the raincoat fabric along the edge so that the padding polyester does not get lost when sewing.
Step 4. Now you need to cut off the excess padding polyester on each part.
Step 5. We lay and baste the folds on the central lower part of the front with a fold, connect this part with the front yoke.
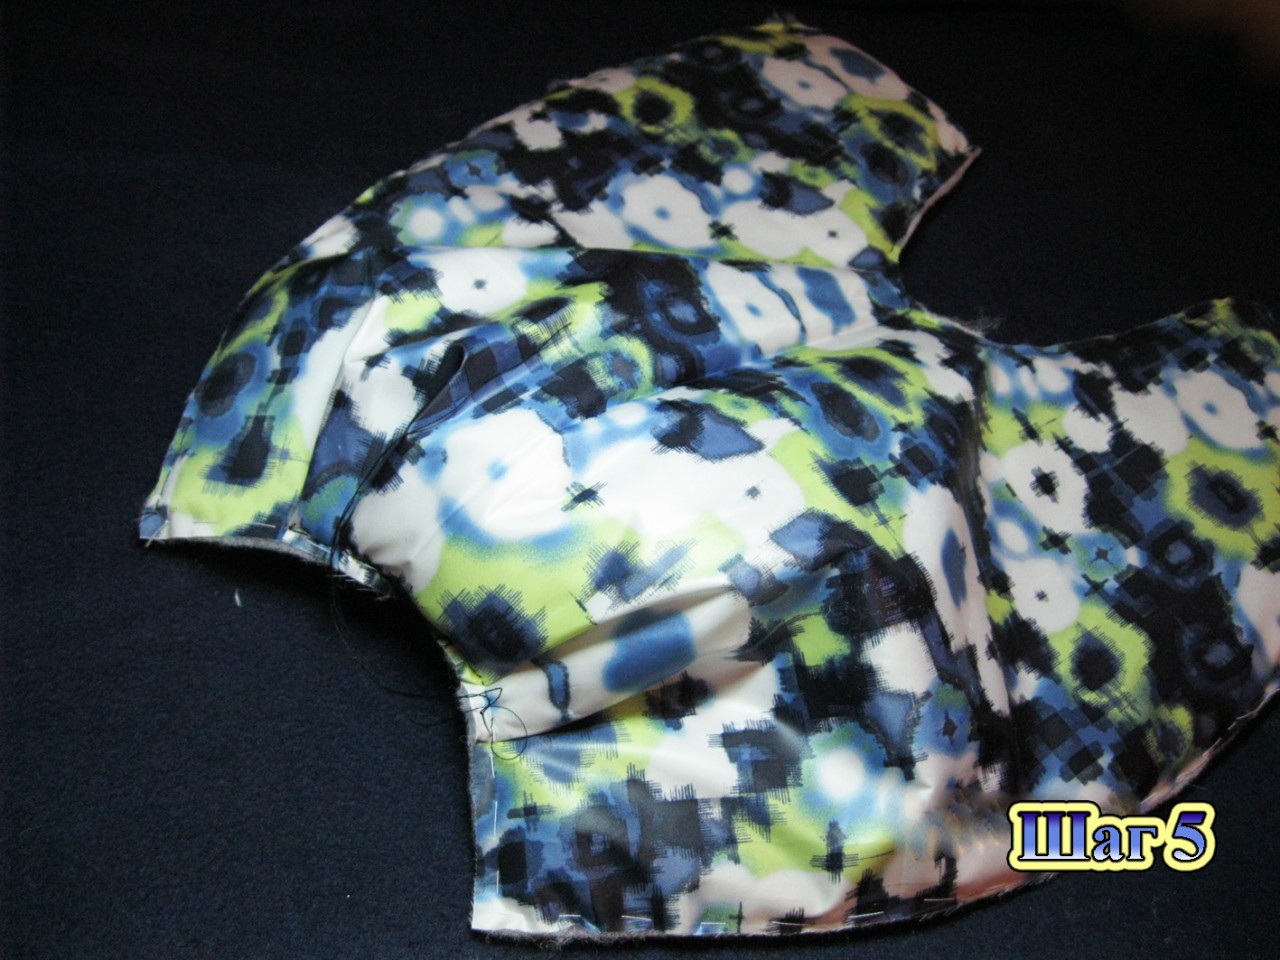
Step 6. We attach strips of fleece to the resulting central front part to the edges (where the zipper will be located) (the length of the strip is slightly longer than the length of the zipper, the width is 3.5–4 cm). I did this for the convenience of inserting the zipper, and then to close the zipper so that the heat does not escape from the overalls.

Step 7 Similarly, we attach the same strips of fleece to the sides of the front to the edges (where the zipper will be located)

Step 8 Now we connect the sides of the front and the central front part (along the seams that are located below the cut for the zipper, they are marked in red in the photo). Here's what happens:
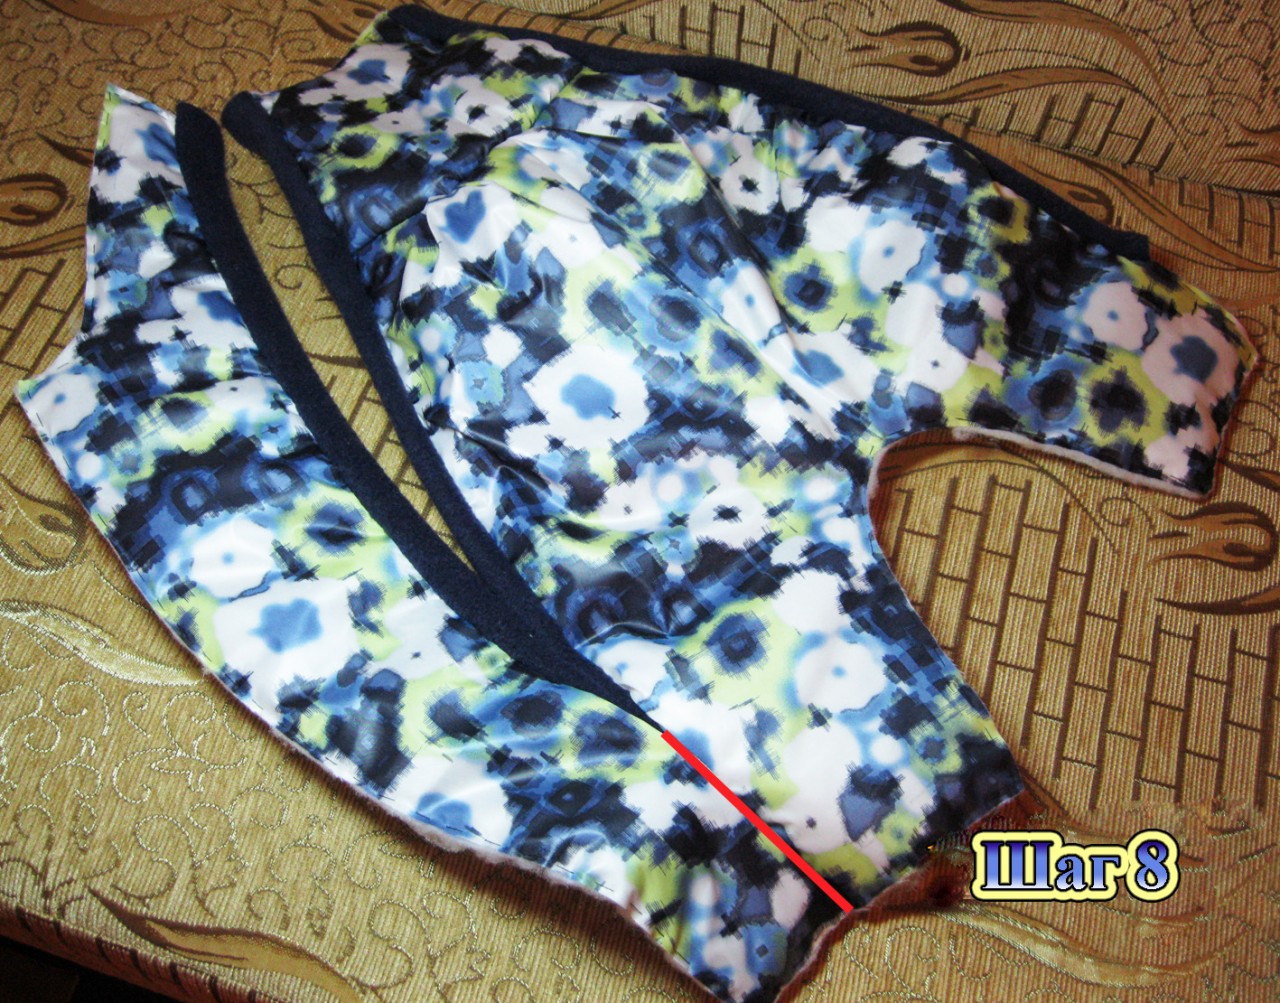
Step 9 We make cuts for the zipper. In the photo I put a zipper into the cut to show how it will be sewn in.
Step 10 Sew the back pieces along the middle seam. I stitched an elastic band to the back, stepping back from the edge of the armhole about 2-2.5 cm. The length of the elastic is 25 cm. Then you can connect the front and back parts of the overalls along the middle seam between the legs. There is no need to sew the side seams yet, they will be sewn together with the sleeve!
Step 11 We sew the sleeves to the front and back parts of the overalls. We fold the overalls and sew the sleeve seam and the side seam of the overalls (in one seam). Unfortunately, I didn’t take a photo of this stage.
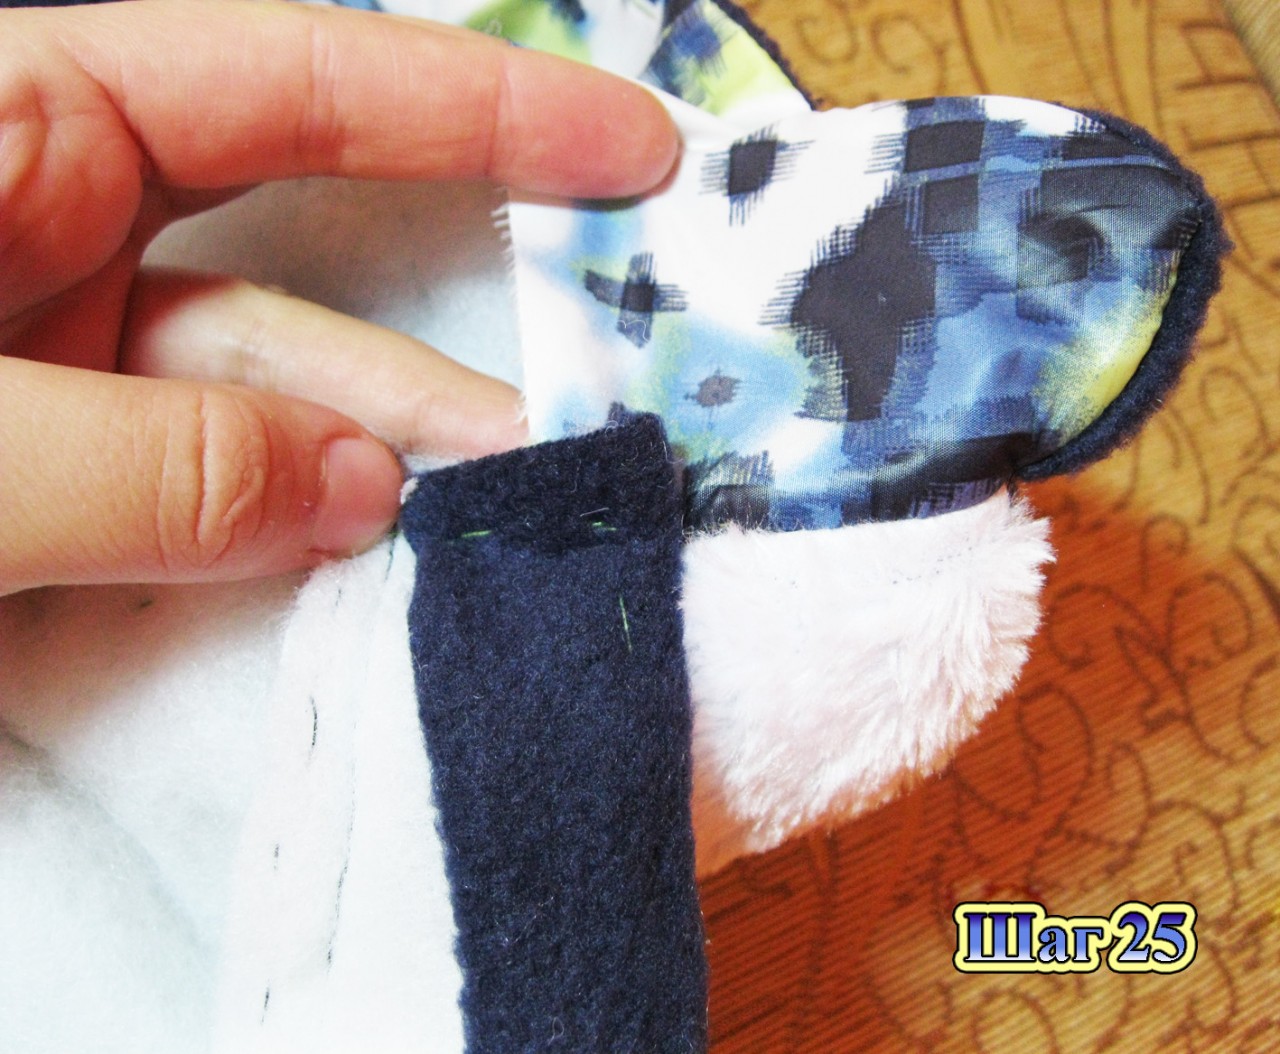
Step 12 Let's start sewing the hood. We cut out the edging of the hood (the pattern is given above). I cut it out of faux white fur and used fleece for the lining.

Step 13 We sew out the edging of the hood.
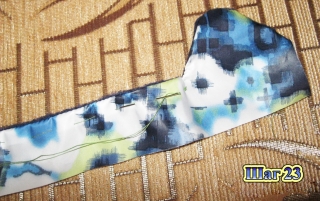
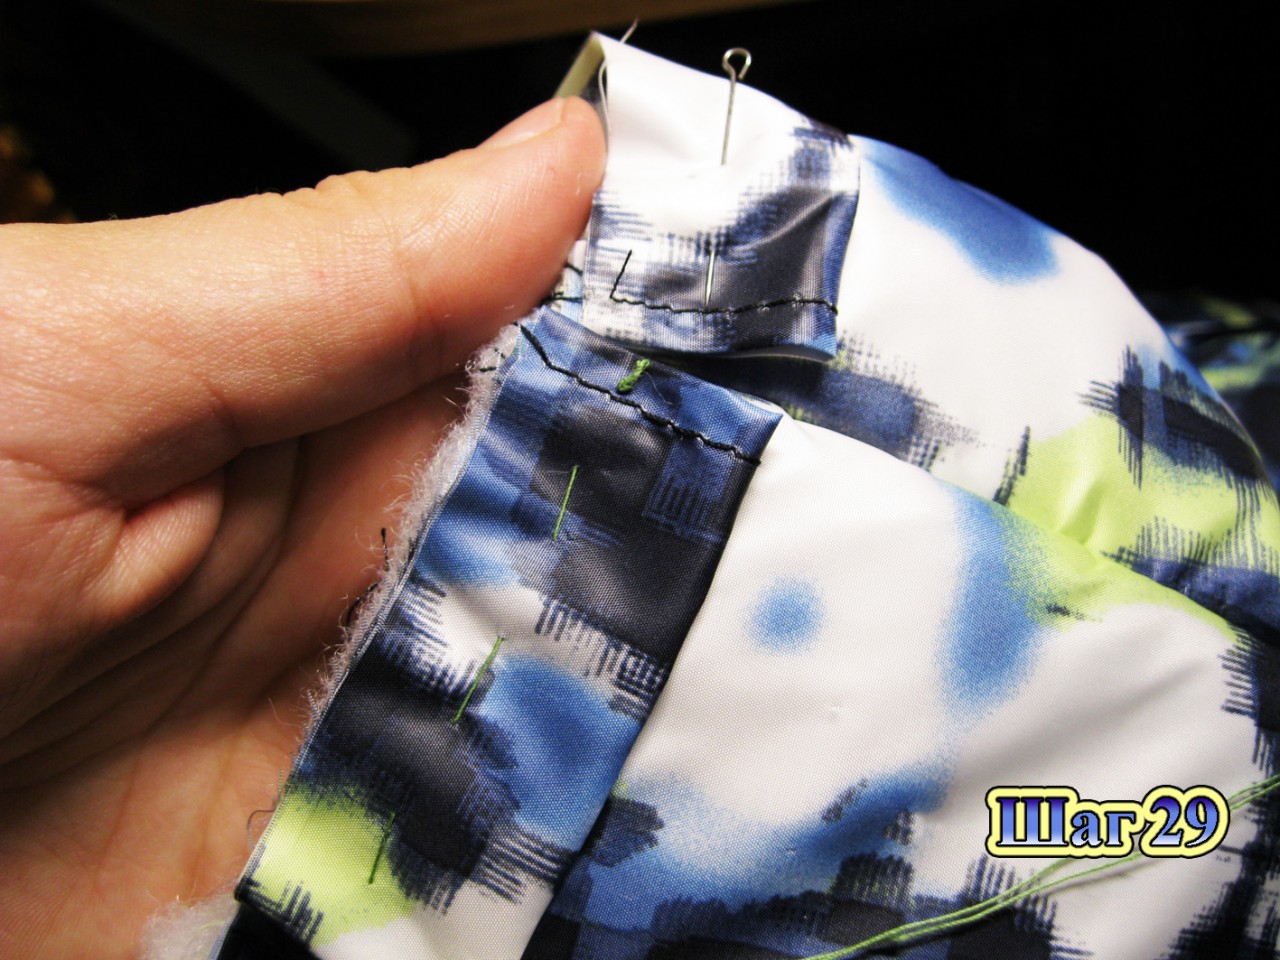
Step 14 We sew up the seam of the hood and attach the edging to it (as shown in the photo).

Step 15 We lay a machine seam, but not where we just basted, but at a distance of about 1.5 cm from the basting seam. This is necessary in order to then insert a cord into this drawstring to tighten the hood. You can make the drawstring for the lace in a different way, as it will be more convenient for you or as you think will be more rational.
![]()
Step 16 We sew down the details of the hood, cut from fleece. We place the hoods from the main fabric and from the lining one into the other with the right side inward (as shown in the photo).
Step 17 We sweep away the details of the hood along the front edge (in the photo I am holding this place with my hand).
Step 18 Then you need to stitch this seam (shown in the photo with a red dotted line).

Step 19 We turn the hood inside out and this is what we got.
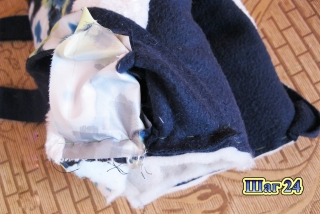
Step 20. Place the zipper backing pieces right sides together.

Step 21 We sew the backing for the zipper. Just don’t put a seam at the junction with the neckline; we will sew the hood there (in the photo this place is circled in red).

Step 22 We cut the seam allowance so that we can carefully turn it inside out.
Step 23
Step 24

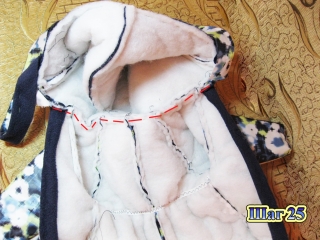
Step 23Turn the backing right side out and baste the edge.

Step 24We combine the backing for the zipper with the hood: the front side of the backing is to the front side of the hood, the hood lining is to the backing lining. We baste the backing to the hood and stitch it together.

The result should be:
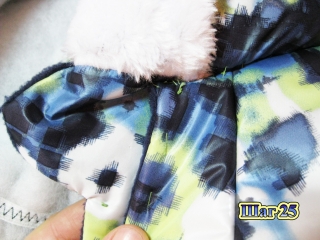
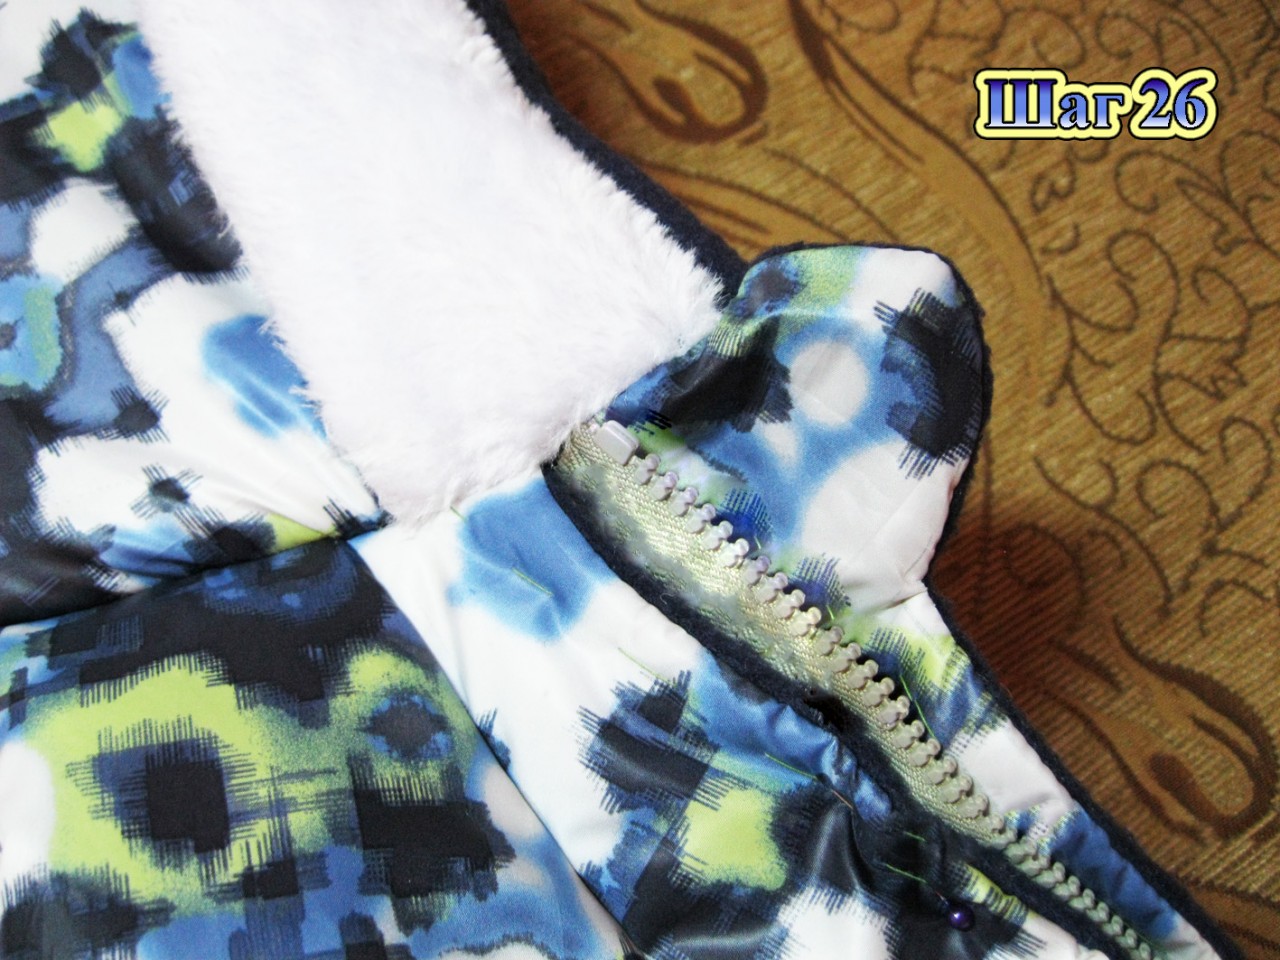
Step 25 Now we apply the front side of the hood to the front side of the overalls and baste them, then stitch them together (in the photo the seam is indicated by a red dotted line).

The junction of the hood, zipper backing and overalls:

Step 26

This is how the zipper will be sewn:
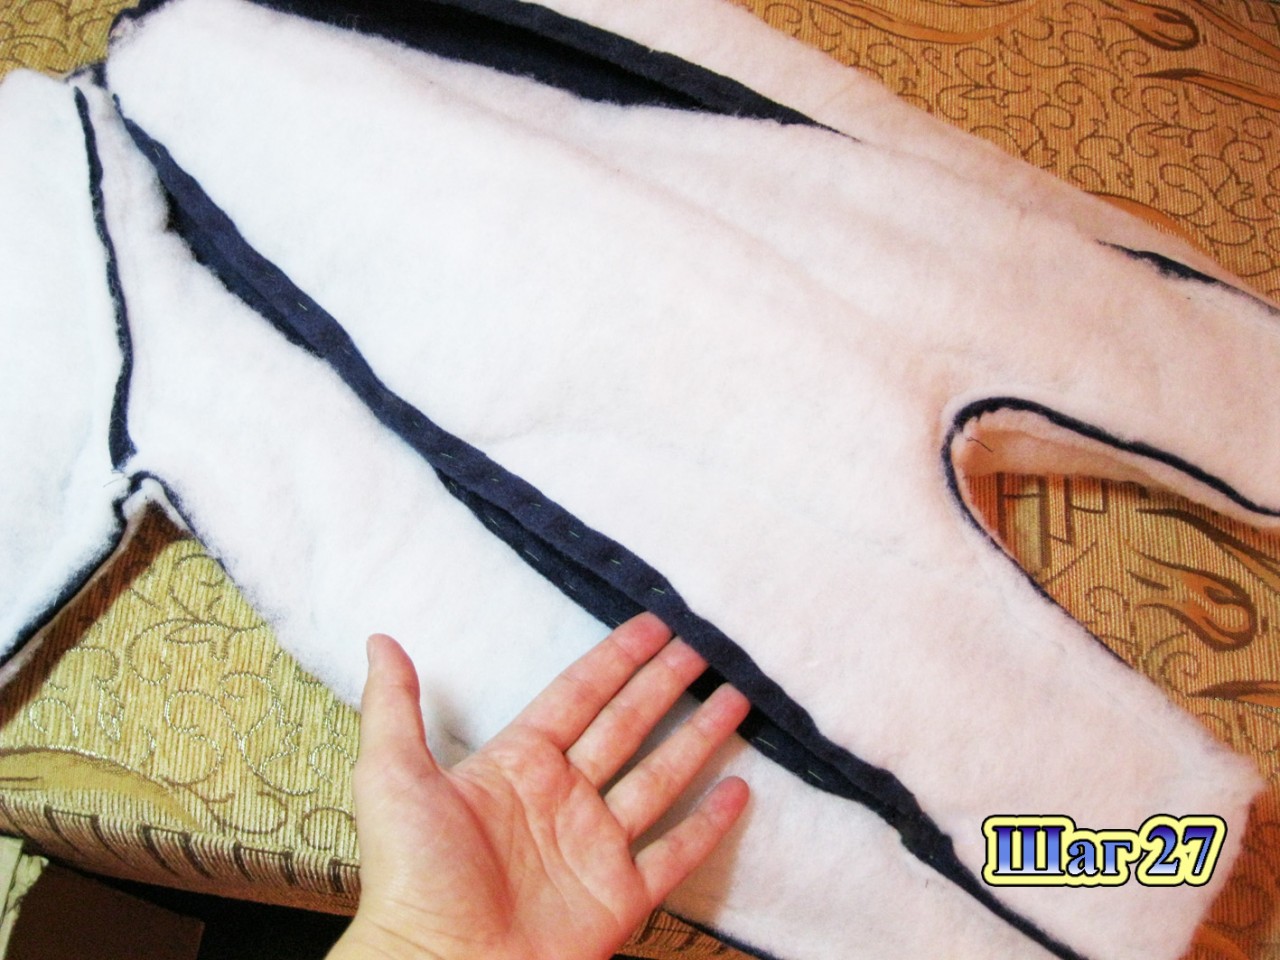
Step 27 Let's start sewing down the details of the lining of the overalls. I did not baste the fleece parts along the edges, since the fleece does not slip on the padding polyester.
The grinding algorithm is similar:
- 1. Connect the front sides and the central front part.
- 2. We cover the cuts for the zipper.
- 3. Sew the back pieces along the middle seam. There is no need to sharpen the elastic!
- 4. We connect the front and back parts of the lining along the middle seam between the legs. There is no need to sew the side seams yet, they will be sewn together with the sleeve!
- 5. Sew the sleeves to the front and back parts of the lining. Fold the lining and sew the sleeve seam and the side seam of the lining (in one seam).
This is what happens at this step:
Step 28 I made drawstrings for elastic on the sleeves and legs. To do this, you need to cut out strips from the main fabric, the width of the strip is 4-5 cm, to determine the length, measure the length of the cut of the sleeve and trouser leg with a centimeter tape and add an increase for the seam (I hope I expressed myself clearly, maybe it will be clearer in the photo). We sew it on the sides so that there are neat edges at the drawstring.
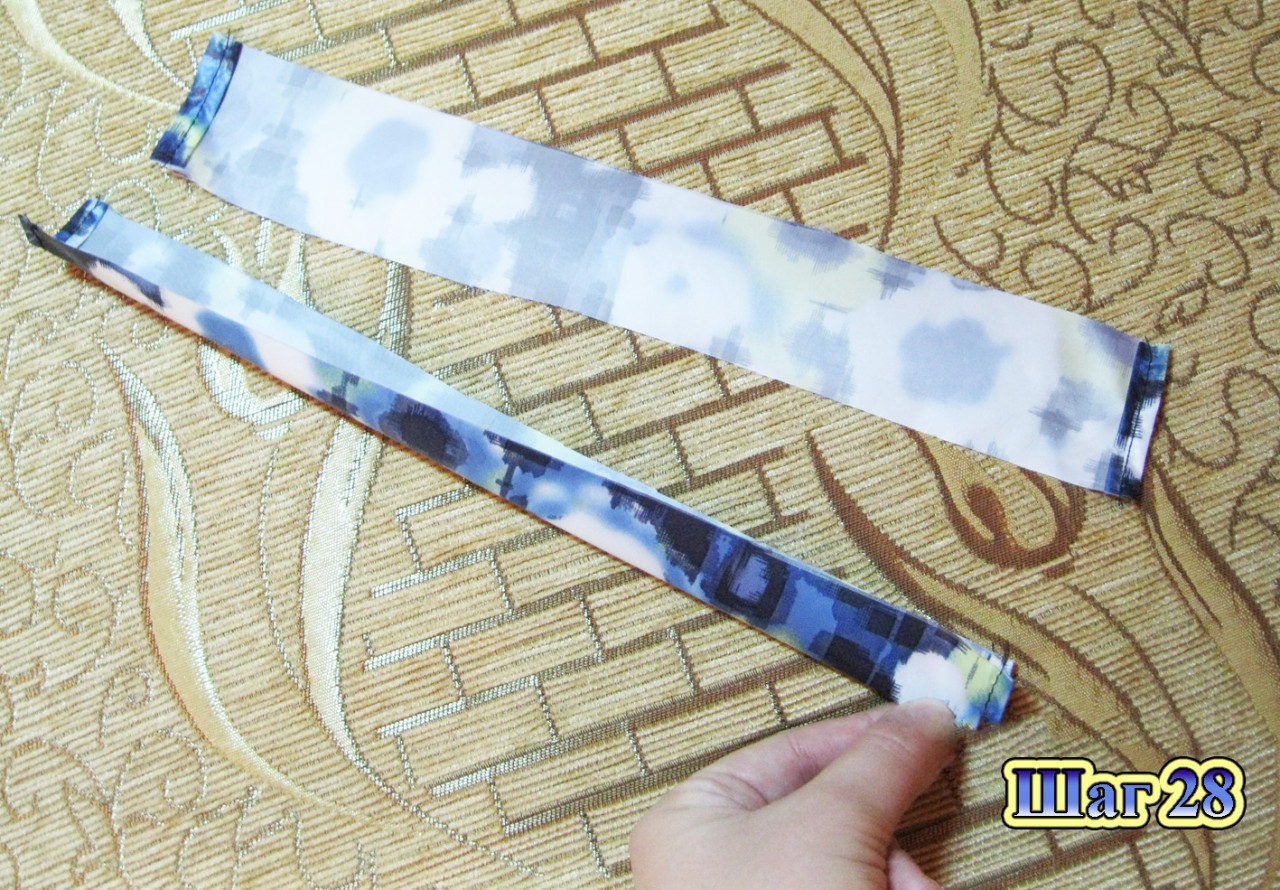
Step 29 We attach the drawstrings to the sleeves and trouser legs.
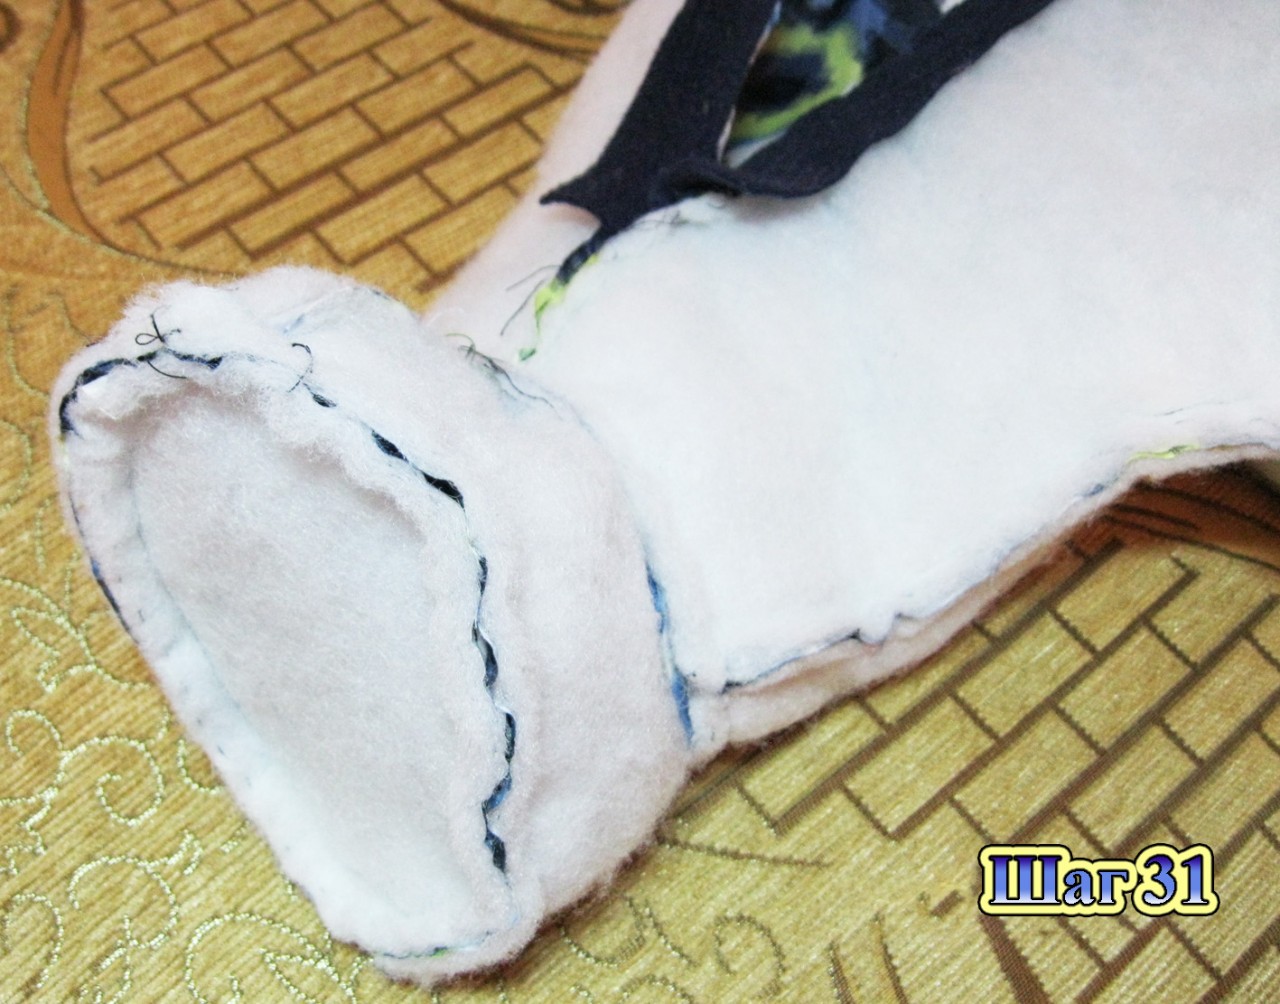
Step 30. We sew down the side parts of the boots, baste them to the legs of the overalls and attach them.

Step 31 We baste and attach the trace.
Step 32
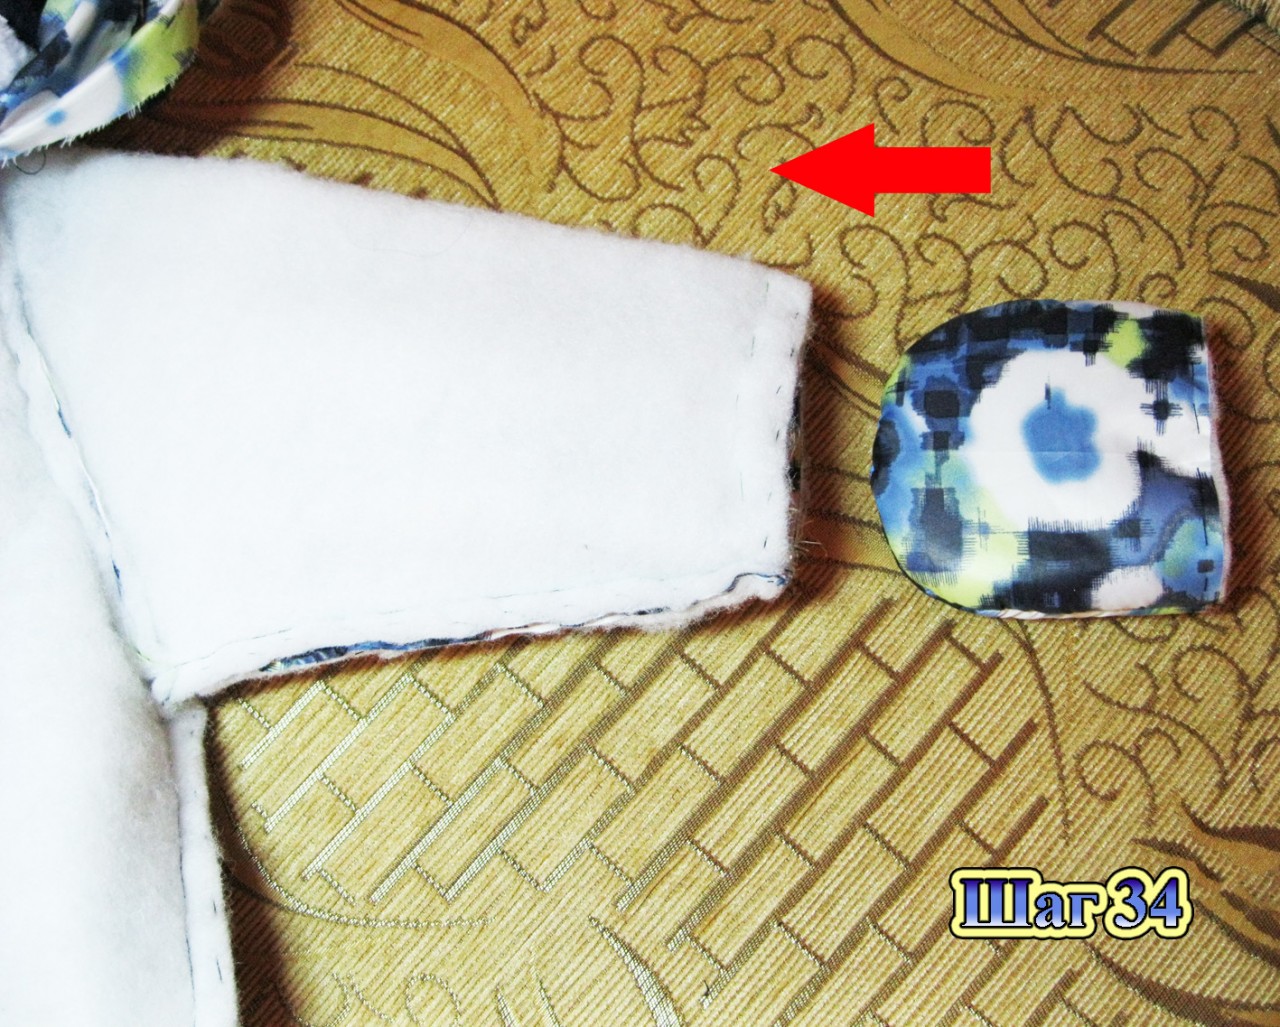
Step 33 We wash and grind off the mittens.
Step 34 We insert the mitten into the sleeve, baste and stitch.
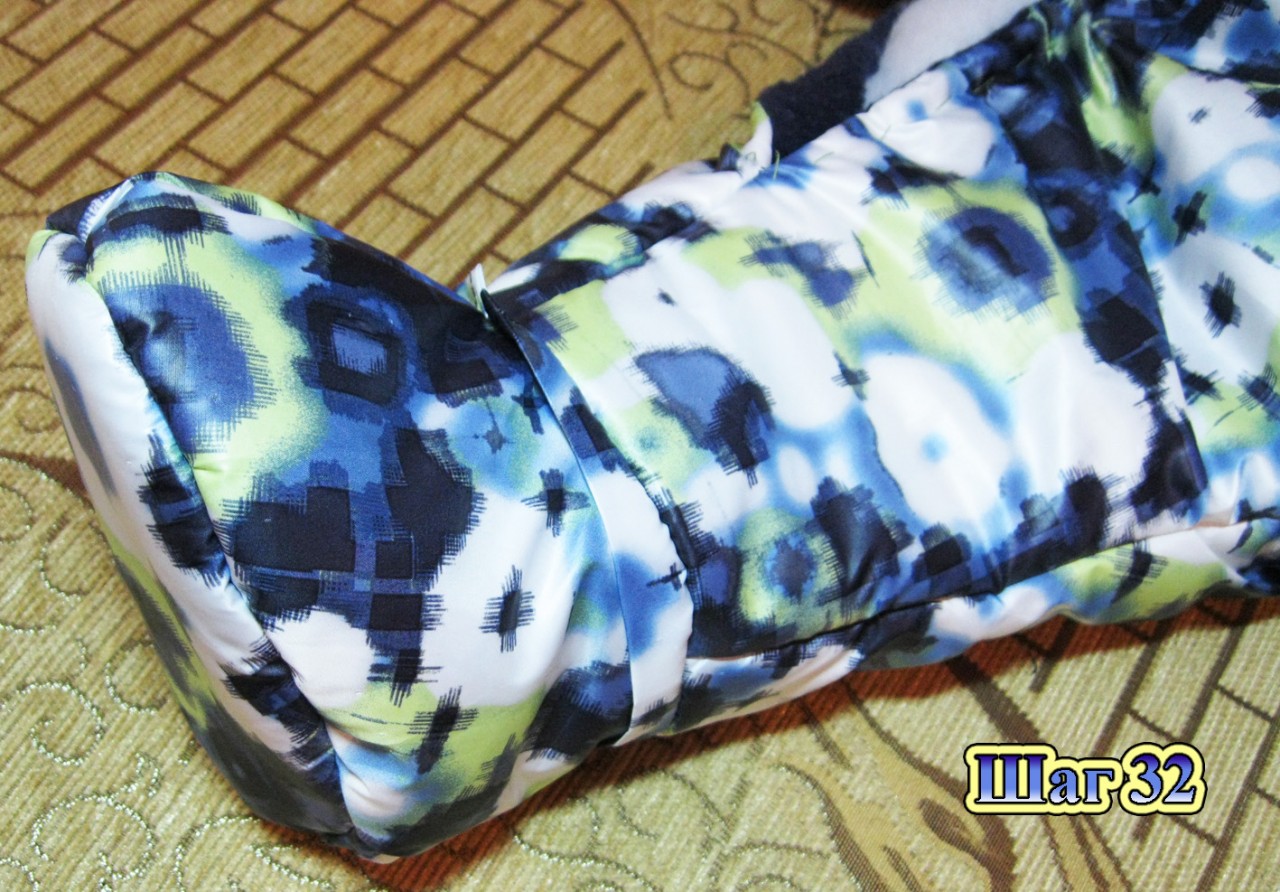
Step 35. Turn it inside out. Here's what we got:
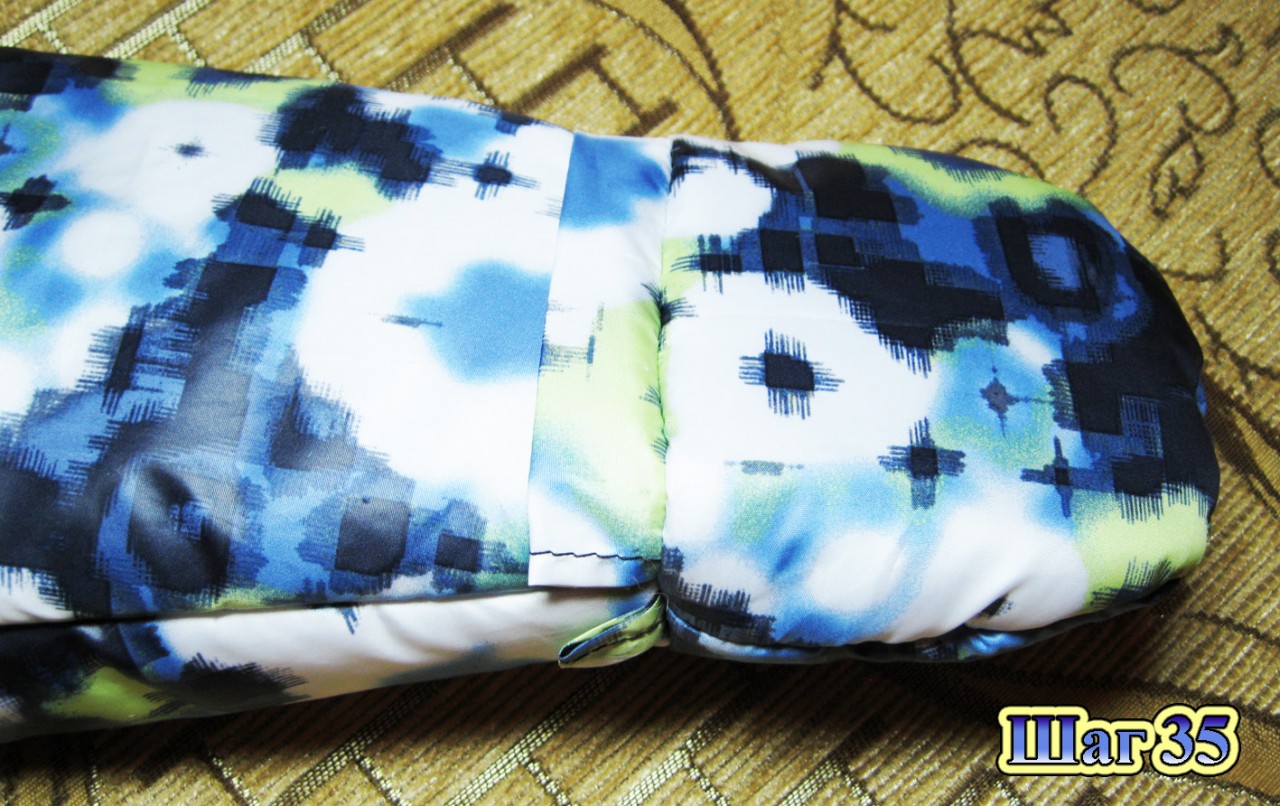
Repeat steps 30-35 for lining the overalls
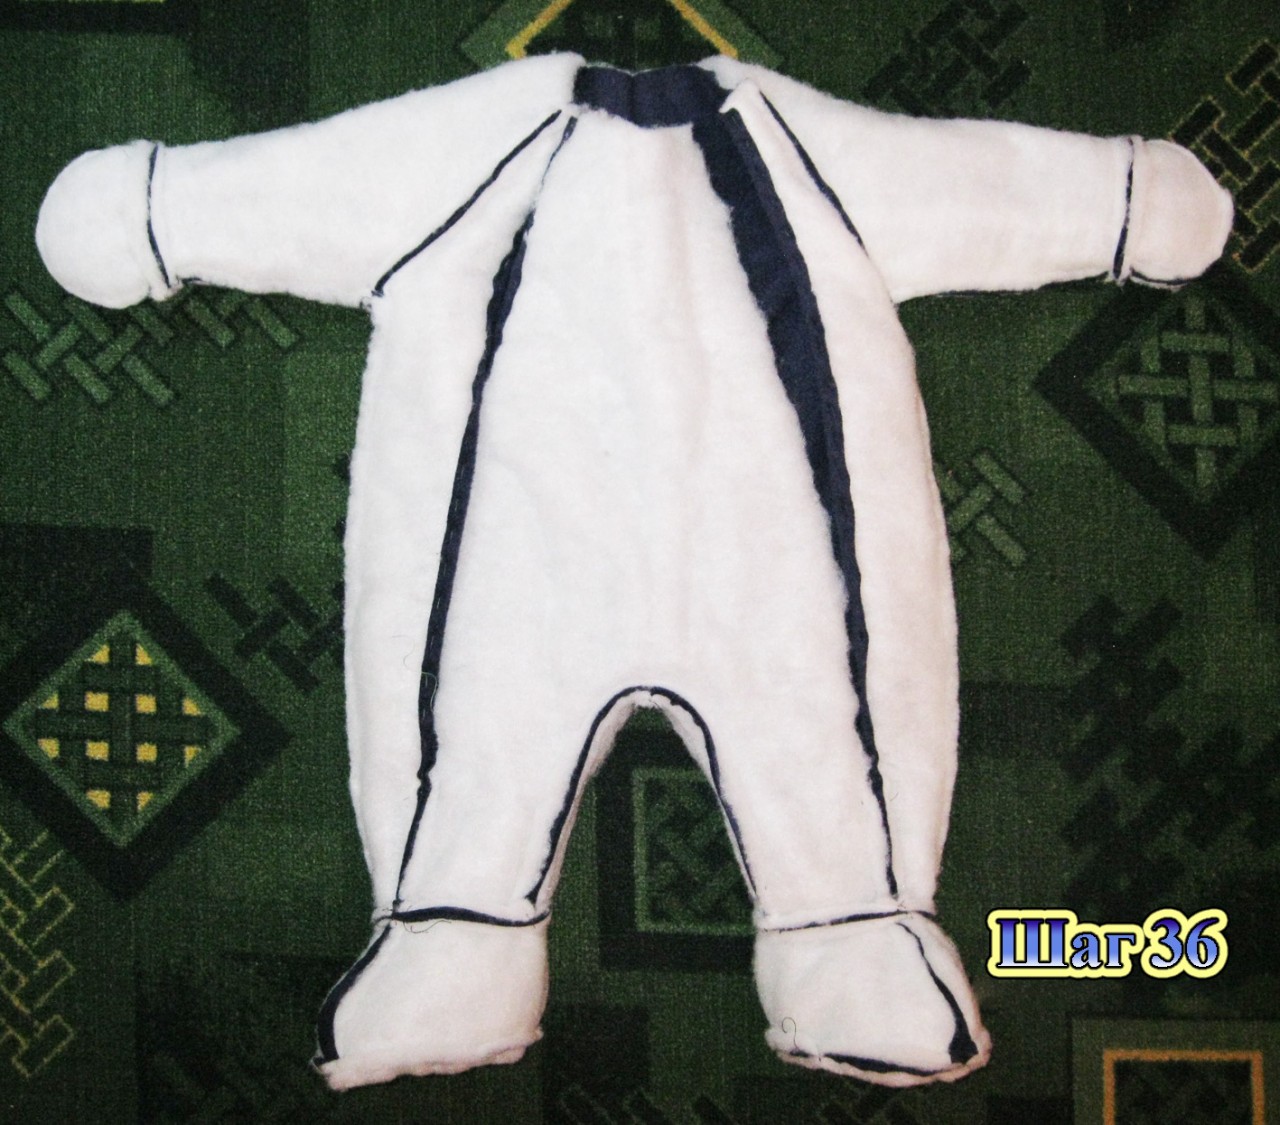
Step 36 At this step the overalls look like this:
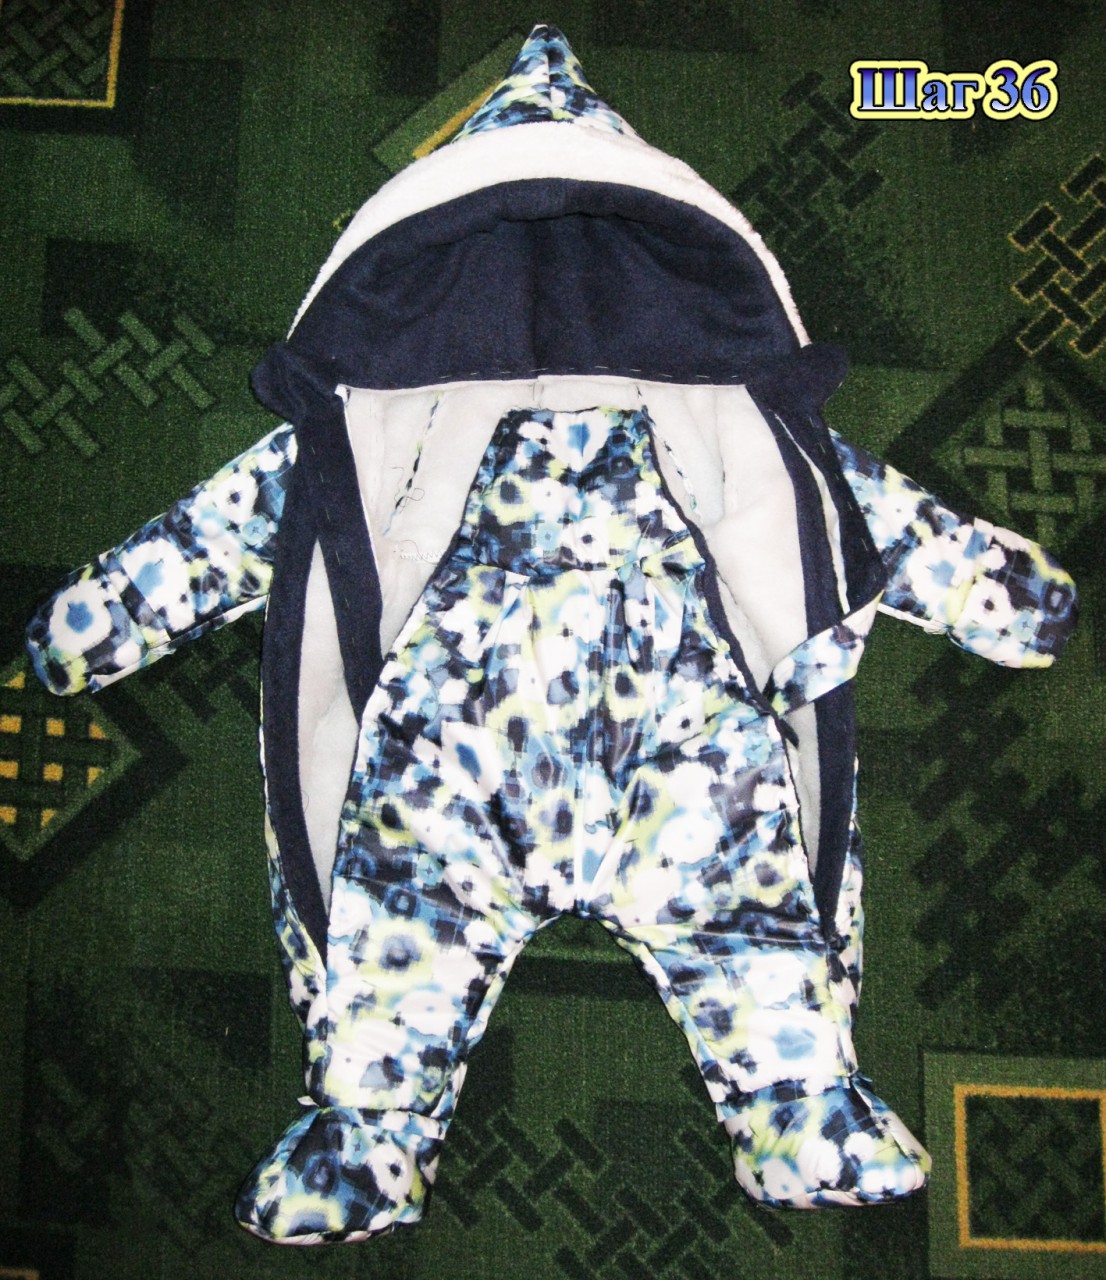
Step 37 We combine the front side of the overalls lining and the front side of the hood lining, baste them and sew them (in the photo the seam is indicated by a red dotted line).

Here's what happened:

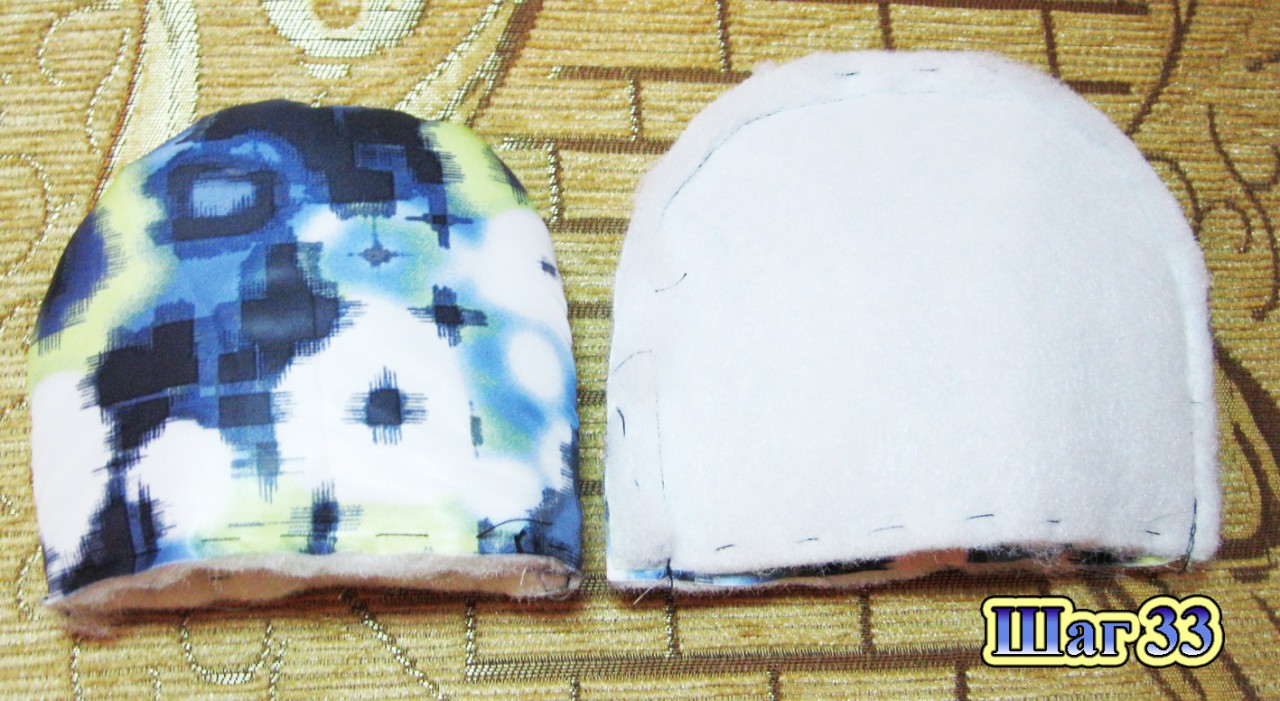
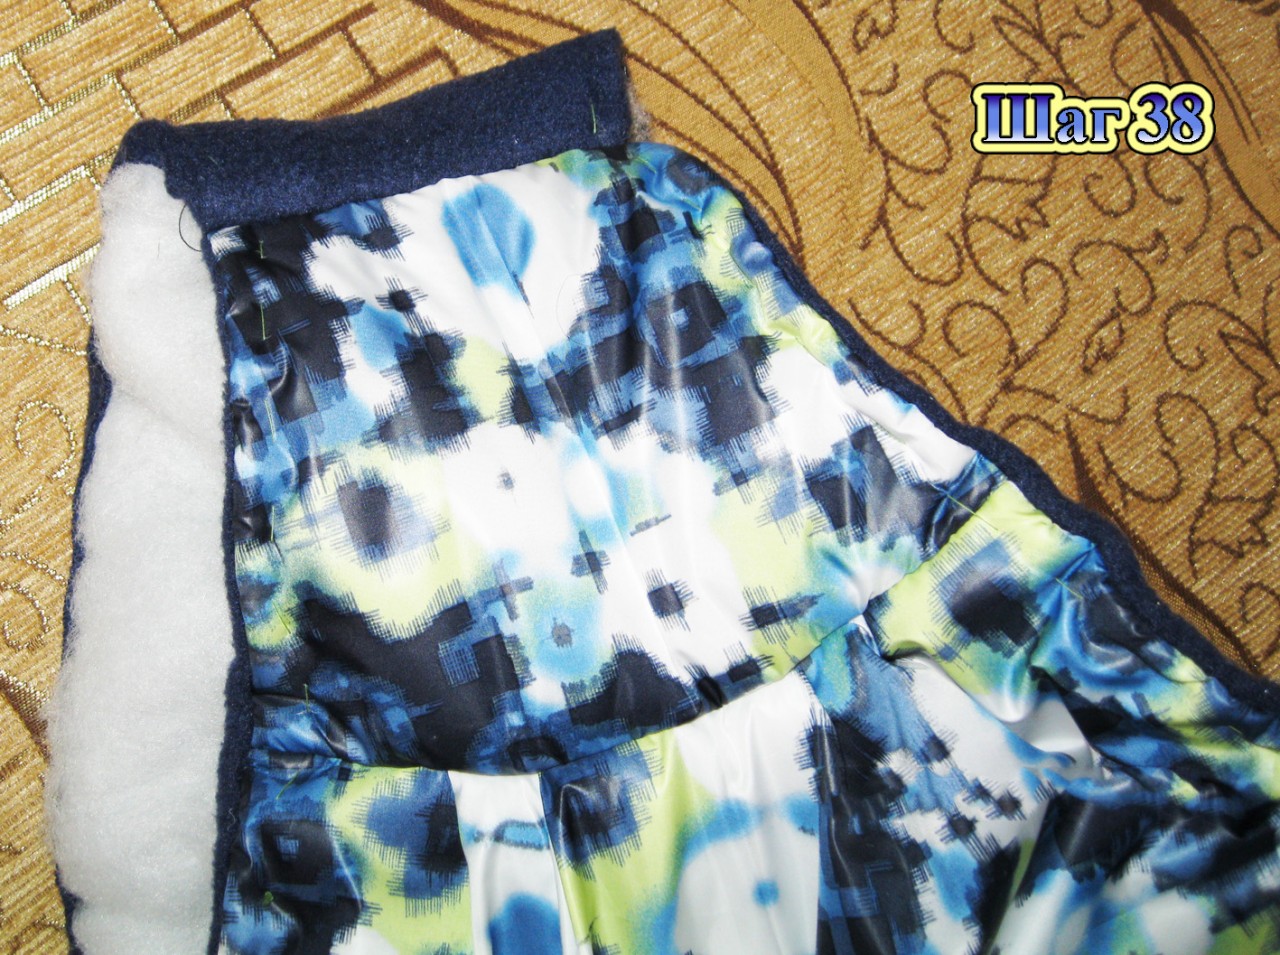
Step 38 We connect the front side of the main fabric yoke with the front side of the lining yoke, baste and stitch.

Turn it inside out. Here's what happened:
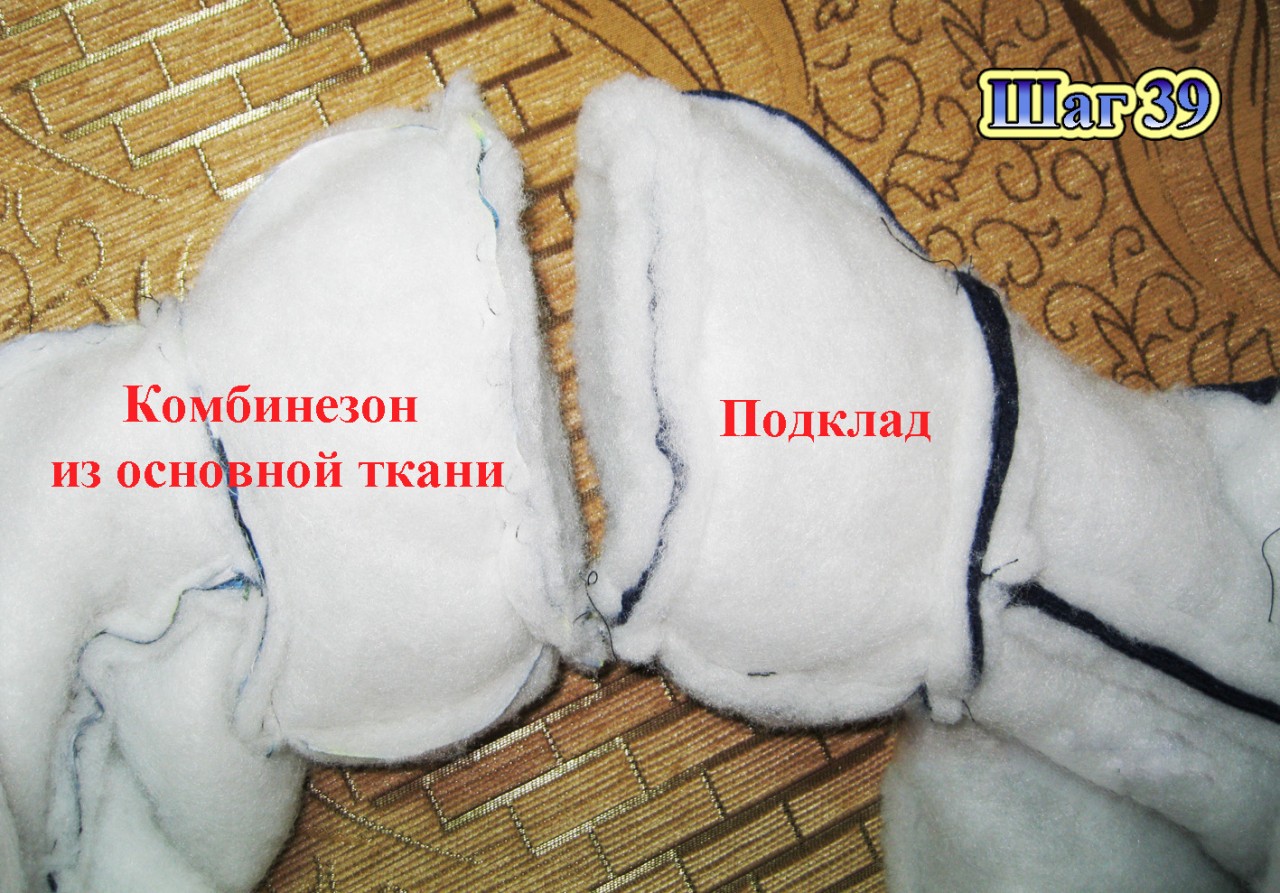
Step 39 We insert the lining into the overalls. We make stitches by hand in several places, thereby connecting the overalls from the main fabric and the lining (the stitches should be free). This is necessary so that the lining does not get lost. You definitely need to connect the boots and mittens, the rest is at your discretion, but it is better to connect them in several more places, so the lining will be securely fixed in the overalls.

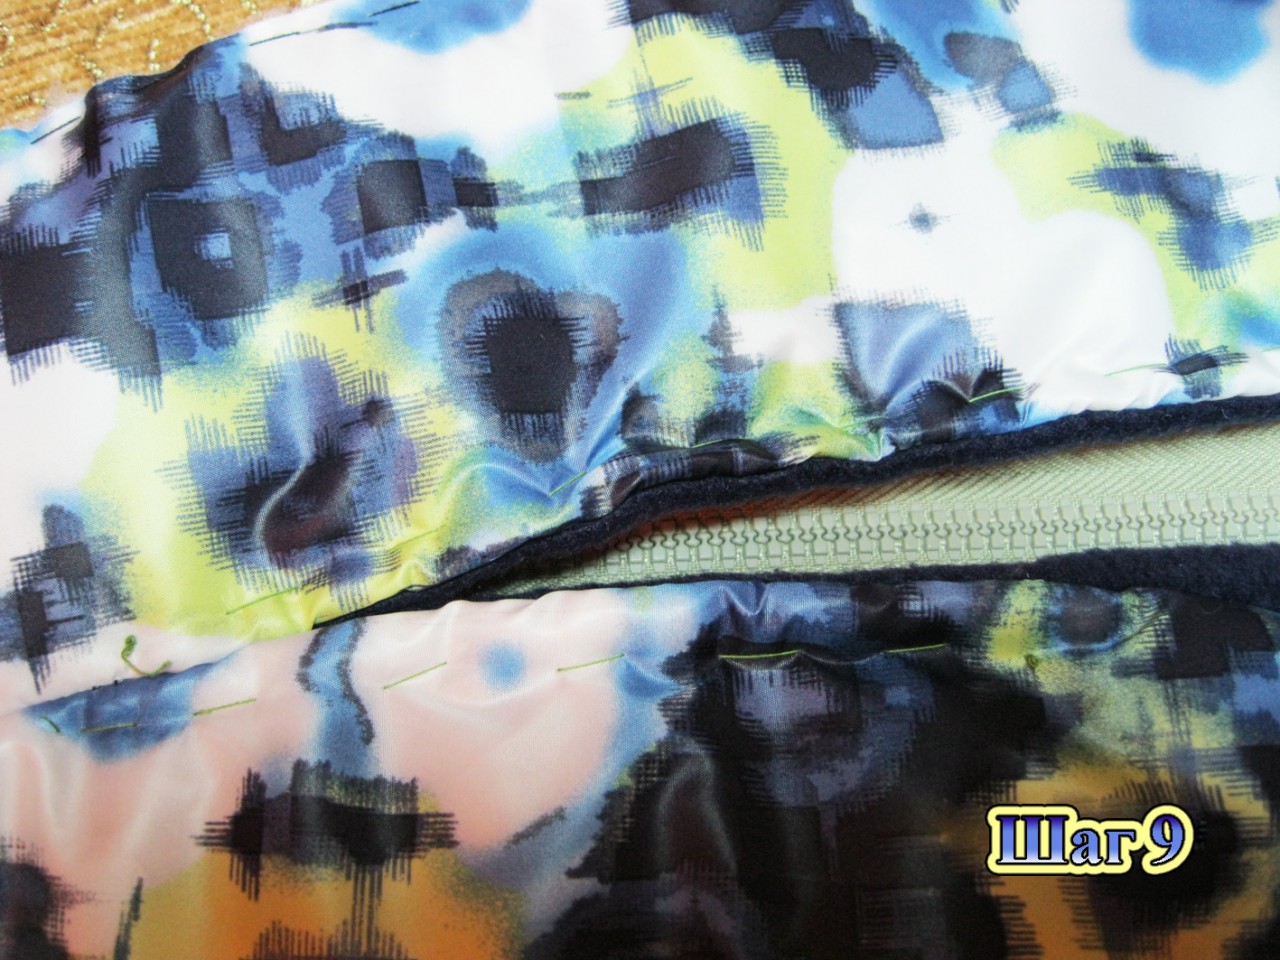
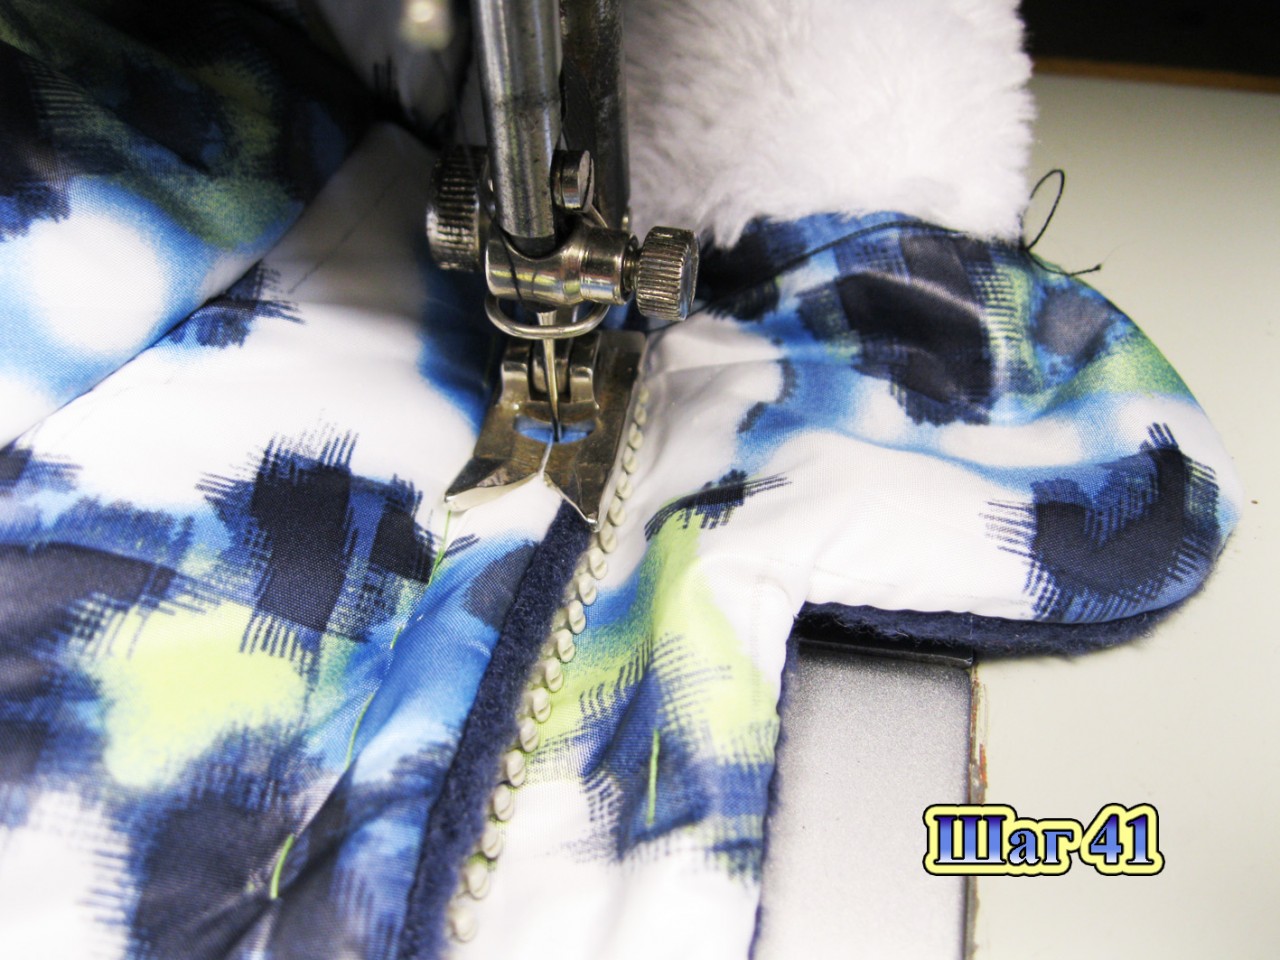
Step 40. We insert the zipper into the slit and baste it to the front side of the overalls (don’t touch the lining yet). It is advisable that the zipper teeth be covered with fabric.


Step 41 Attaching the zipper. My fabric shifted a little during stitching, so the zipper teeth were not completely covered by the fabric, although I intended to close them completely. But it’s okay, the backing for the zipper will save us in this case, it is quite wide, inserted from the inside, so it will block the zipper and press against it.
Step 42 We baste the lining to the zipper from the wrong side of the overalls (on one side we baste it to the backing for the zipper, on the other side to the zipper itself)
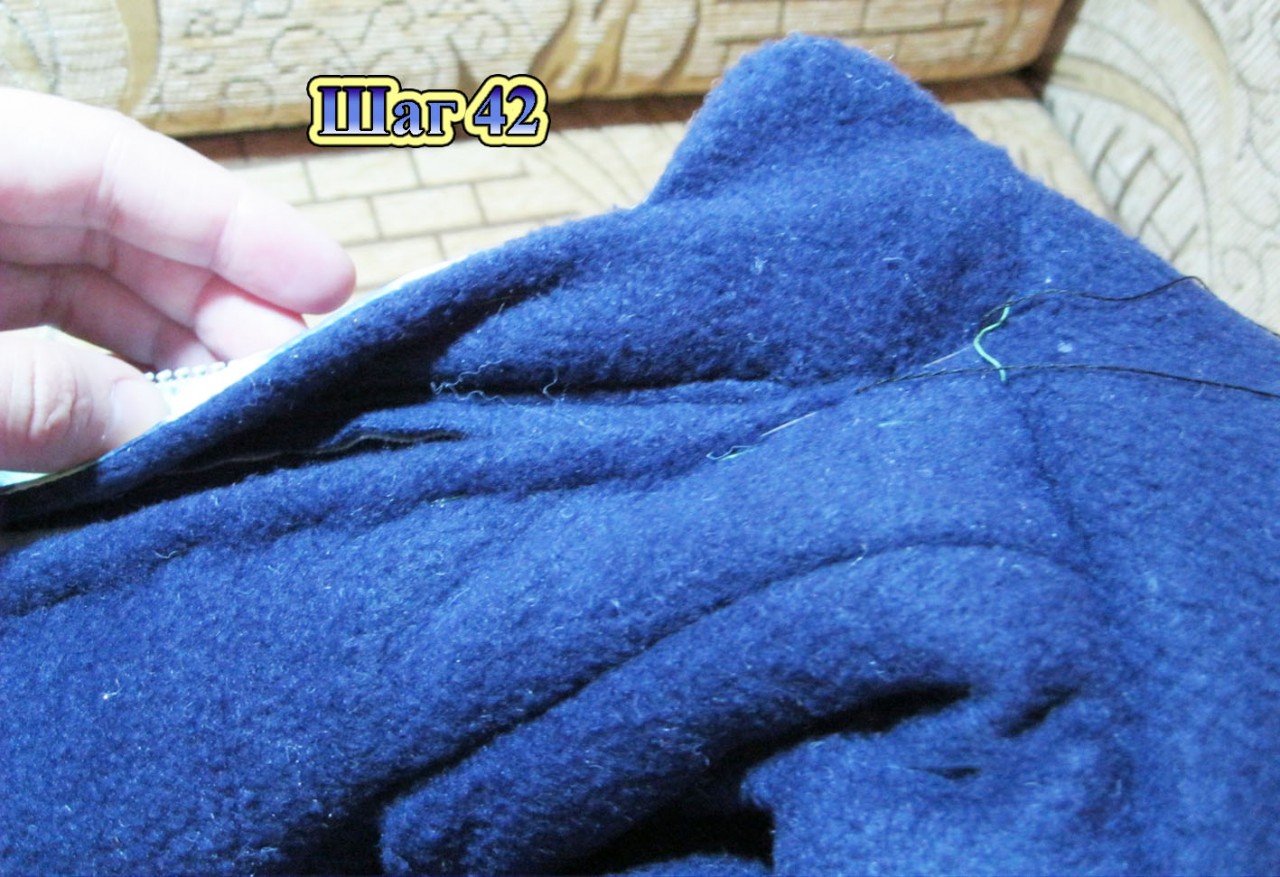
Step 43 We trim the seam of the backing for the zipper and stuff it with padding polyester, but not too tightly. Then we sew this place with hidden stitches.
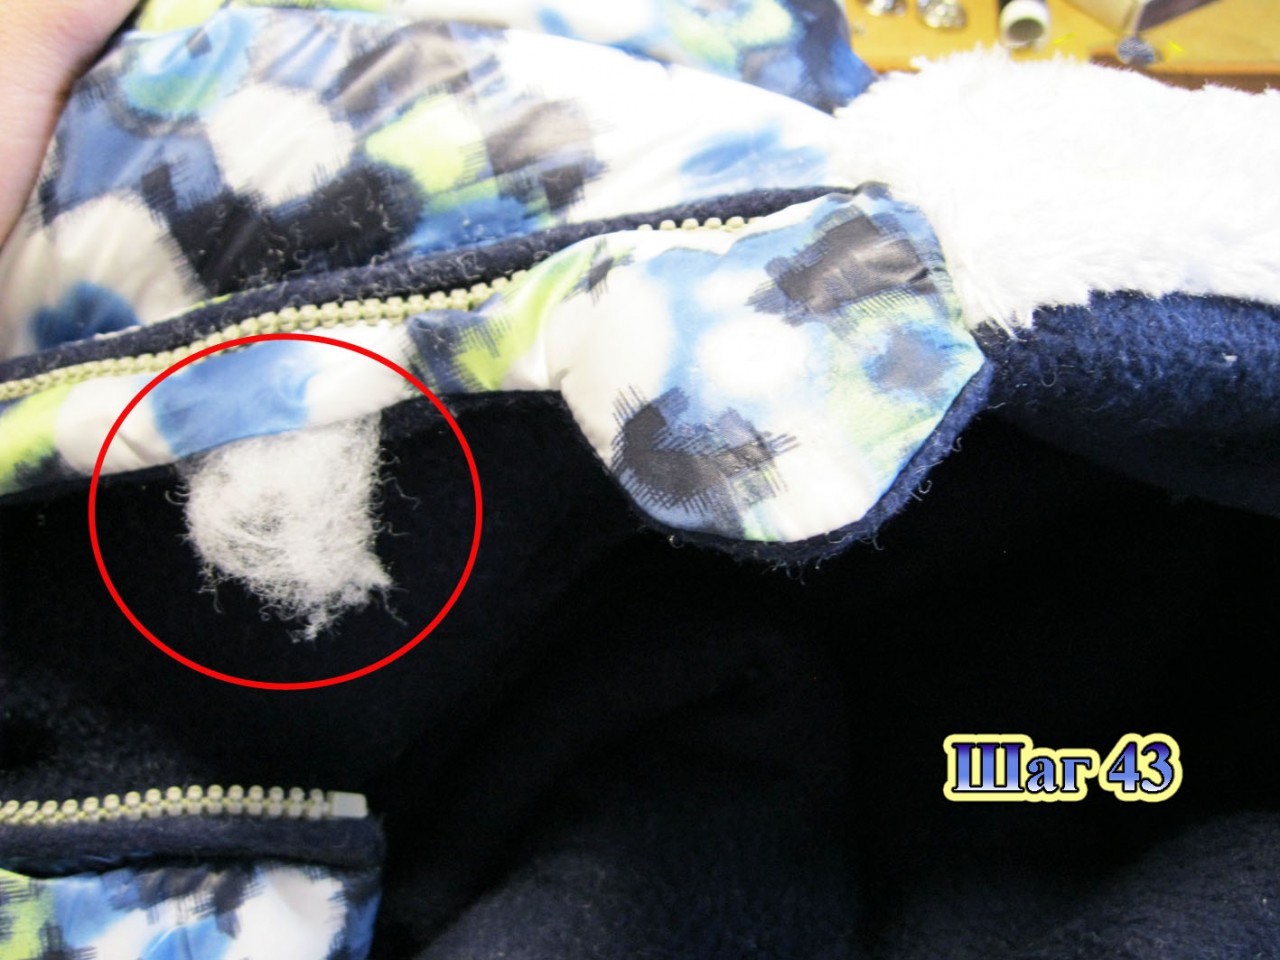
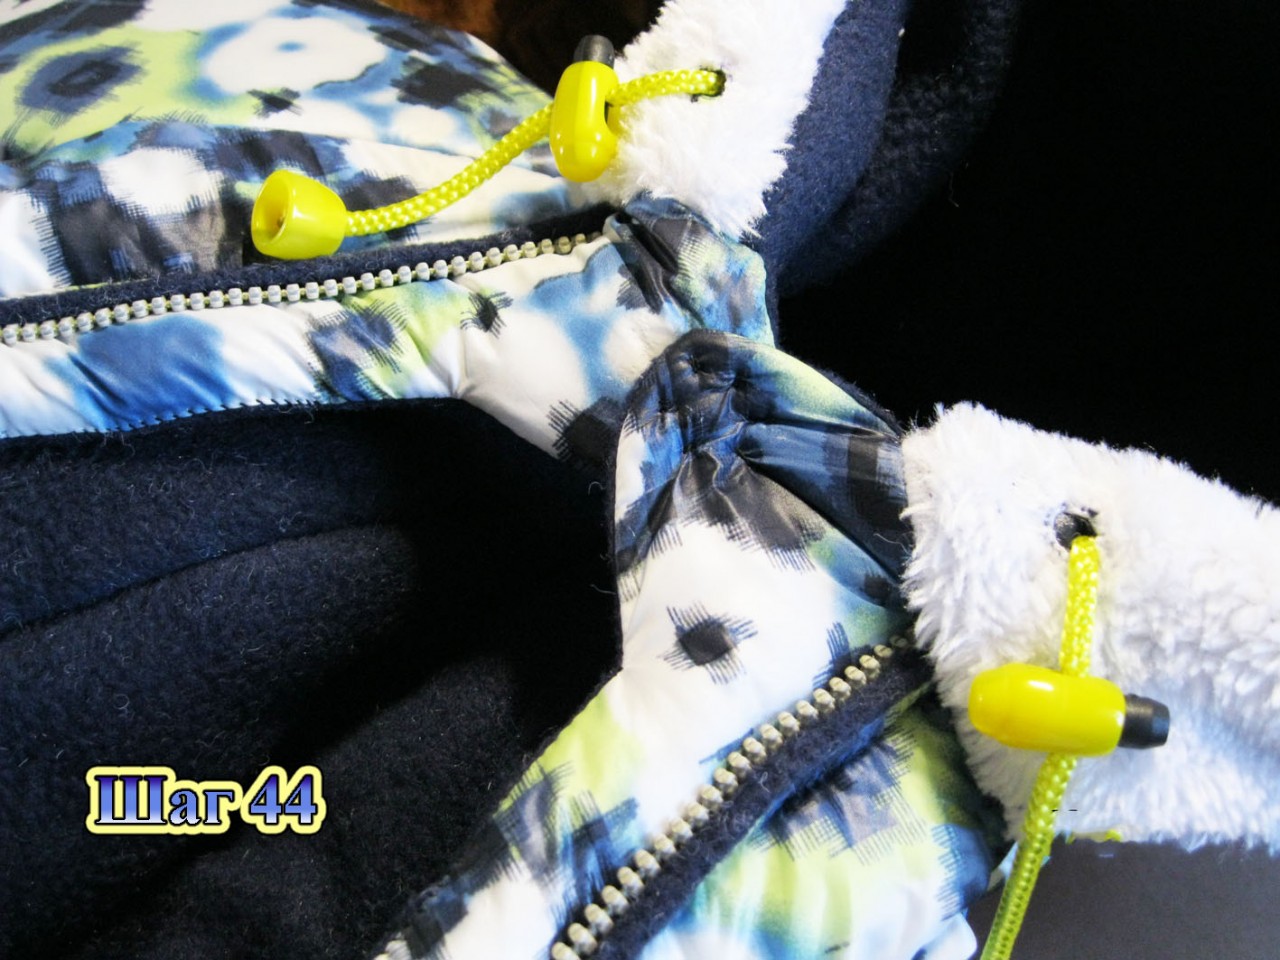
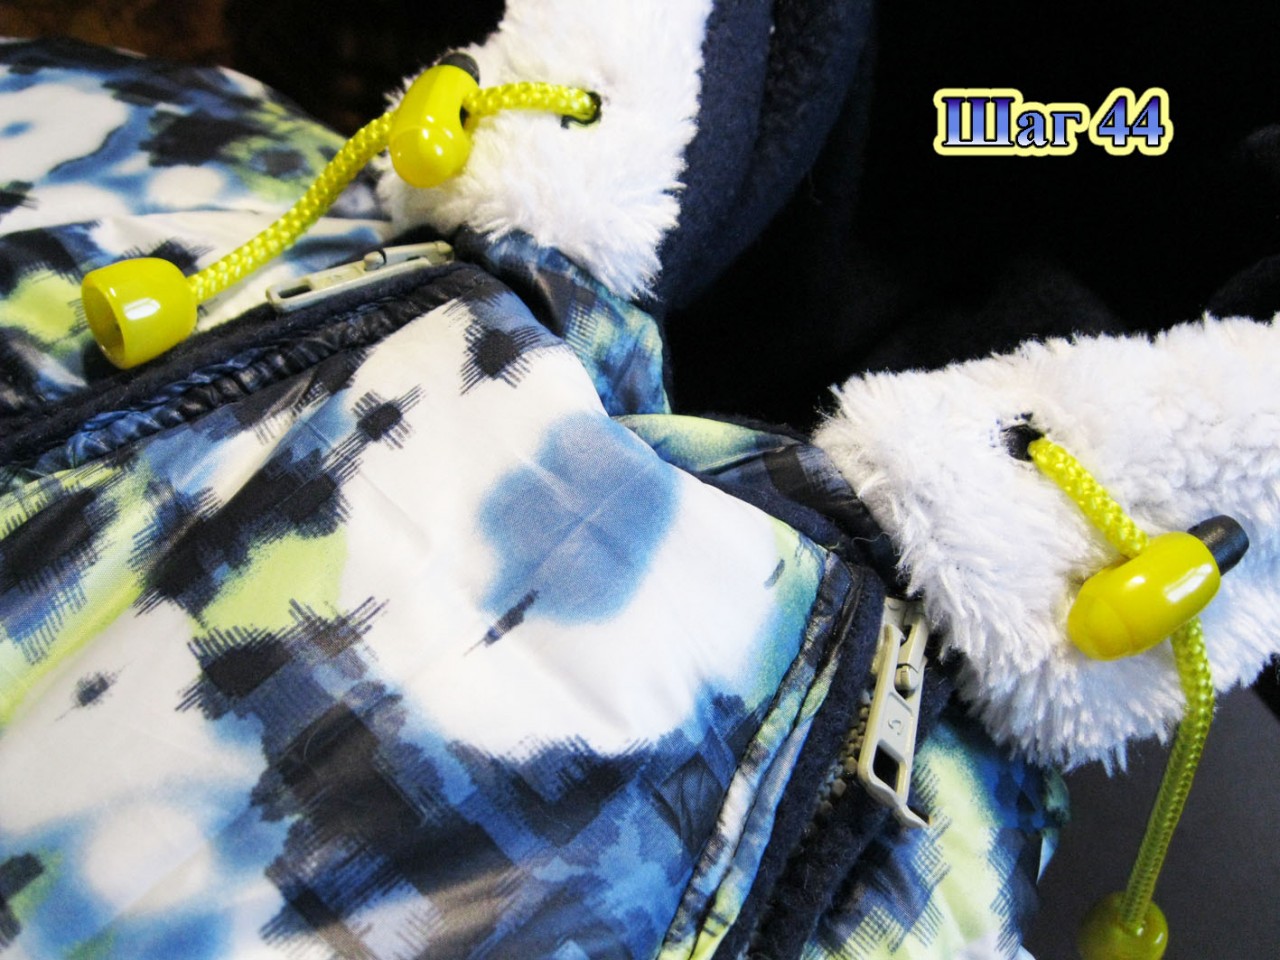
44. We insert the lace into the drawstring of the hood and sew the button to the backing for the zipper.

Attention! Make sure that when the backings for the zipper are fastened to the button and the zippers on the overalls are fastened, the yoke should fit snugly against the backings, otherwise there will be a free space and heat will escape from the overalls.
Step 45. We insert elastic bands into the drawstrings on the sleeves and legs (you can insert laces as you like). They play more of a decorative function.

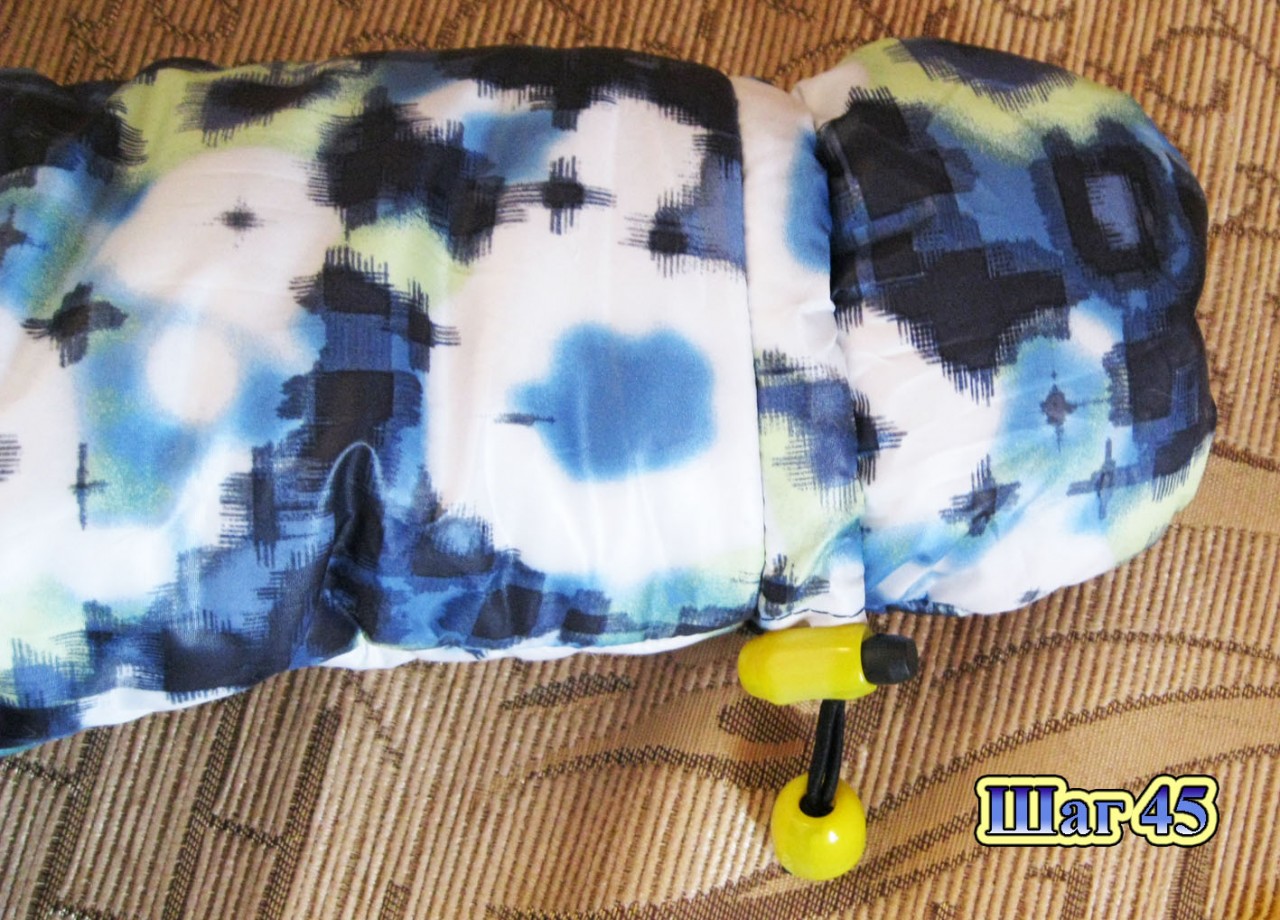
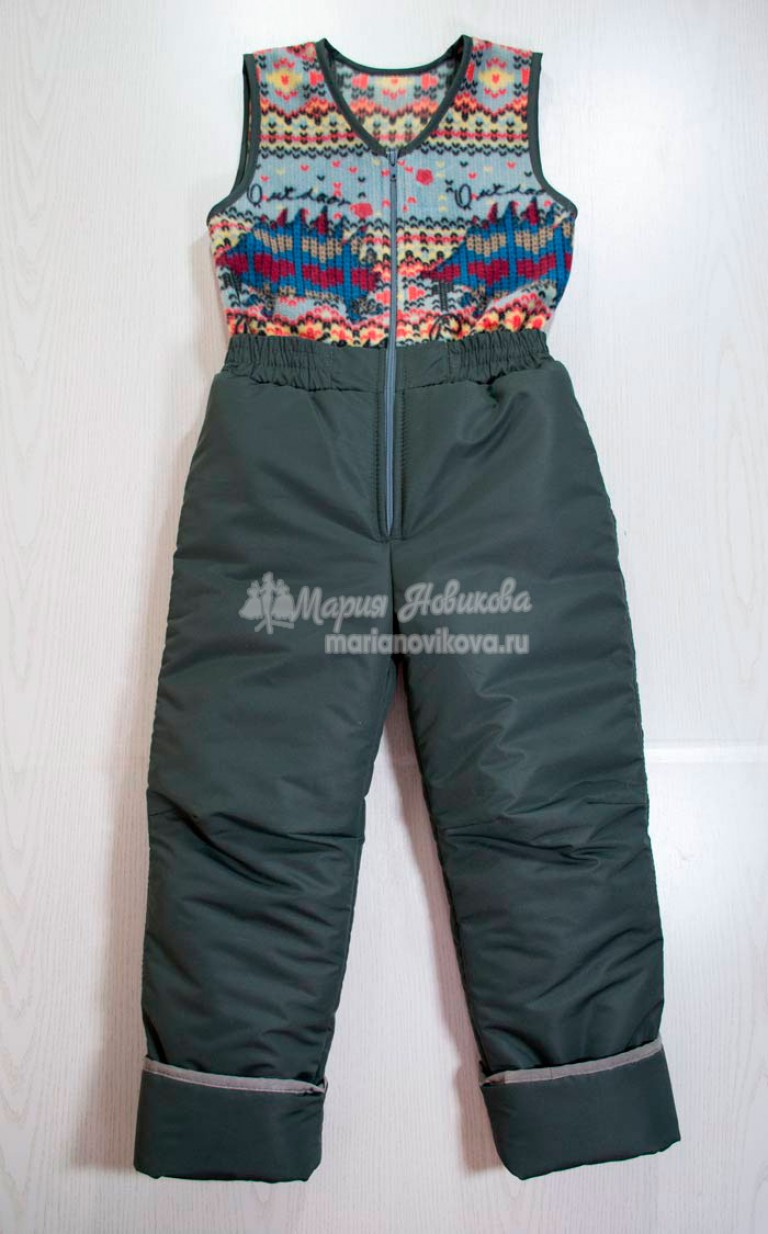
The jumpsuit is ready!

Daughter in new overalls!