Figure measurements. Taking measurements of a woman's figure
Hello, my dear blog readers! Let's talk about women's measurements, and about how important it is to remove them correctly, because this is half the success when building a base pattern. You can sew a product that will fit you perfectly, but for this you need to observe several points:
Firstly, take measurements You must wear underwear, otherwise there will be some mistakes.
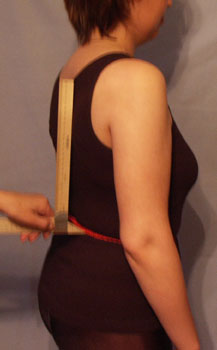
Secondly, you need to tie an elastic band (elastic band) around your waist, and maintain your posture (stand with a straight back).
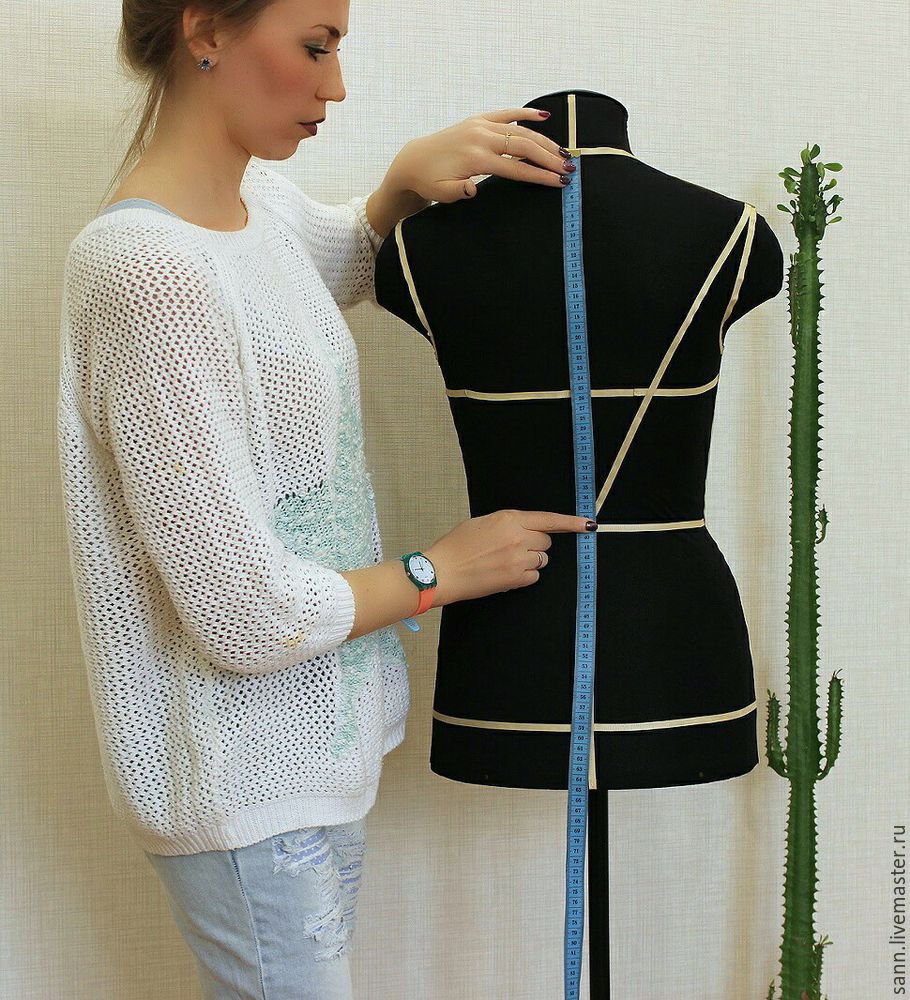
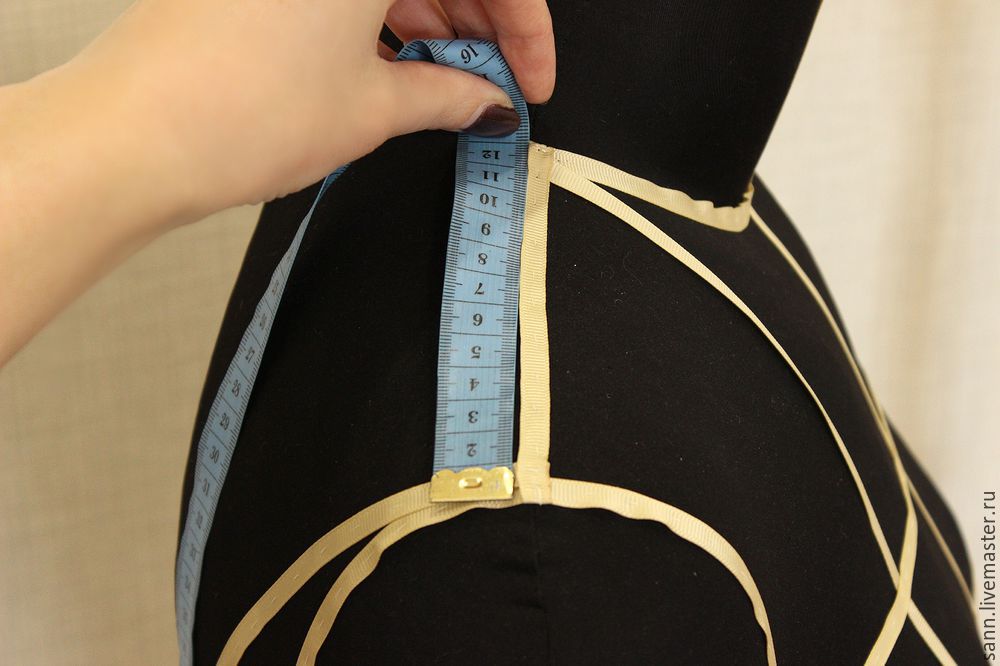
The measuring tape should be applied tightly to the body, without tension or relaxation. We need to find this golden mean.
Read about how take measurements for a dress .
When you take the measurements, you need to make the necessary additions to them when constructing the base pattern.
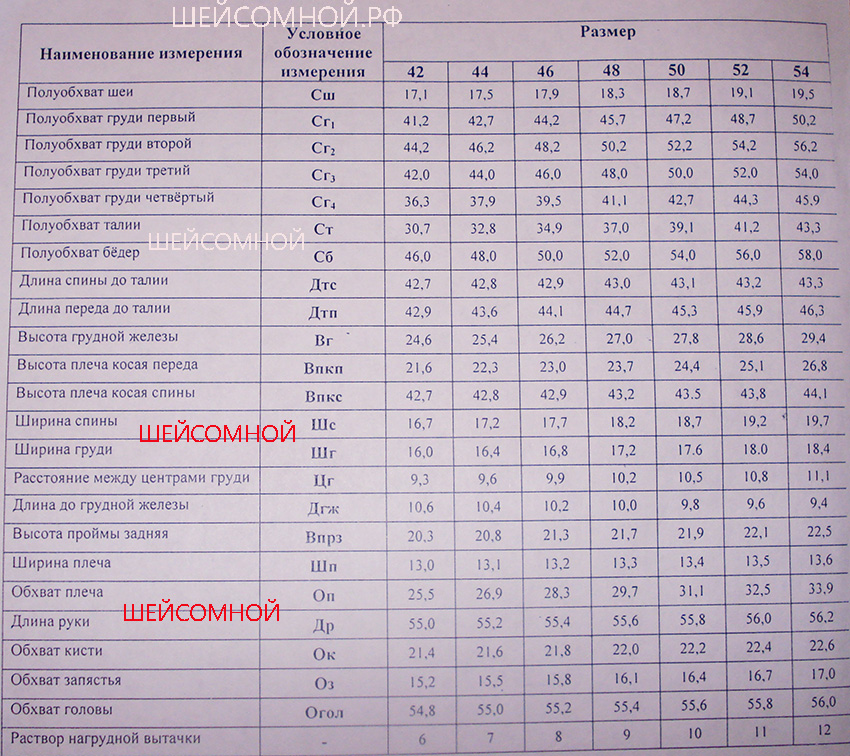
Below is table of measurements women's clothing . Compare your measurements obtained with those on the table. This way you will determine your average size.
Table of measurements of women's clothing for typical figures

When you decide on your measurements, start building a base pattern with which you can sew any dress. And this dress will fit perfectly on your figure! Good luck to you in all your endeavors and see you soon on the pages of the blog “site”
03.06.2009
Measurement table for creating products for an individual figure.
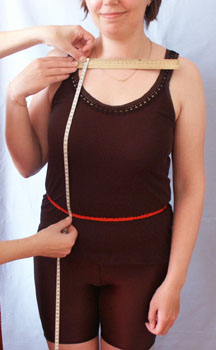
DST - Back length to waist. From the seventh cervical vertebra to the rubber cord at the waist.
DS - Back length. Measurements of DS and DP are taken with one movement of the hand from the elastic band at the waist, parallel to the spine, at a distance of the base of the neck from the spinal column. We lay the elastic band from the back, then in the profile plane at the base of the neck we hold the ribbon with our hand, obtaining a DS.
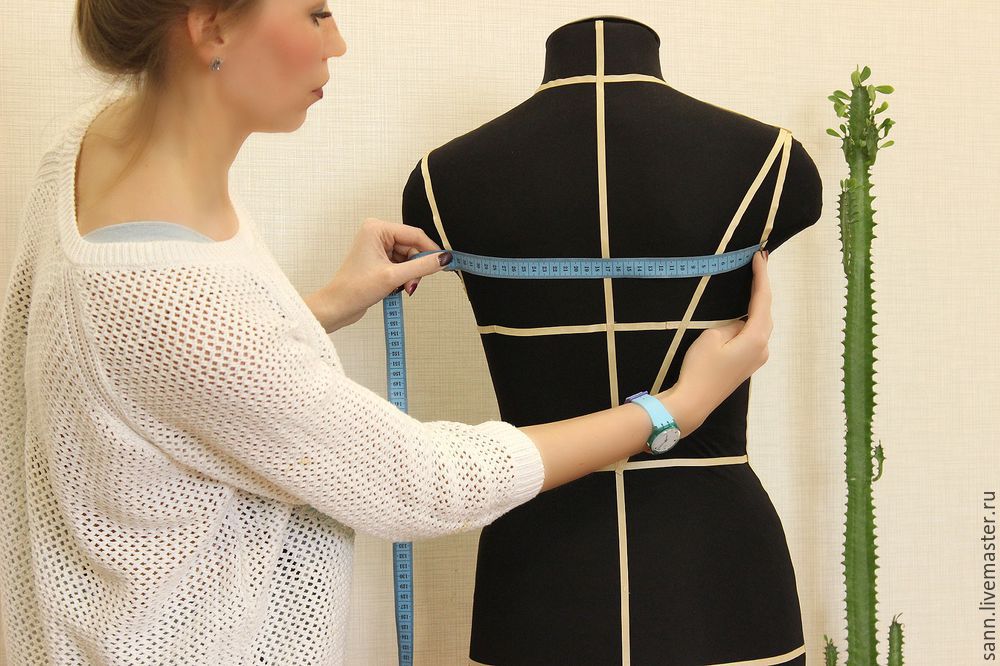
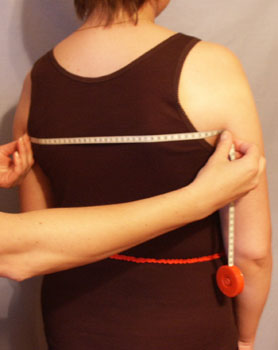 ShS - Back width. The distance from the corners of the armpits along the back is horizontal.
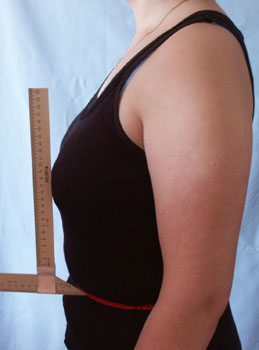
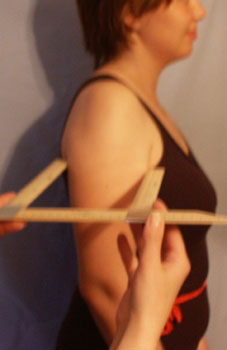 SHPR - Armhole width. Measure with angled rulers, placing them perpendicular to the hand (like a caliper), obtaining the transverse diameter of the hand.
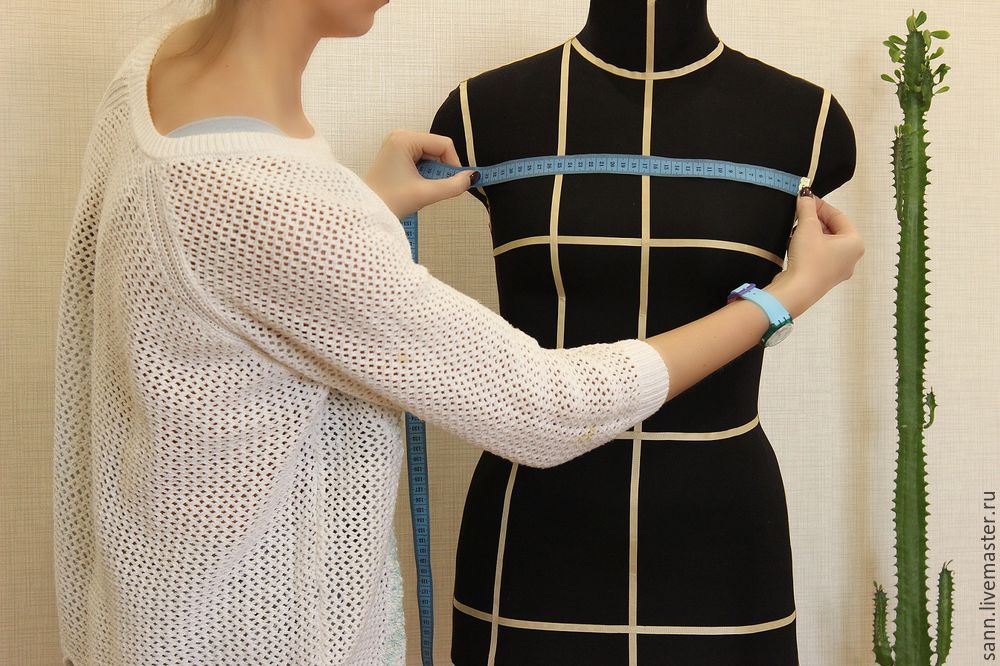
 SH - Chest width. From the corners of the armpits in front, mentally draw down the verticals until they intersect with the horizontal passing through the most protruding points of the chest, the distance between these verticals.
 ШК - Control width. A measuring tape runs above the breasts between the corners of the armpits in front.
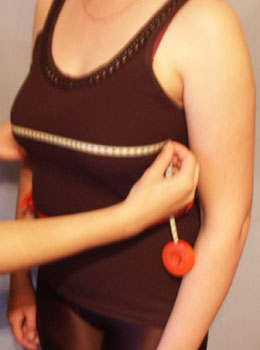
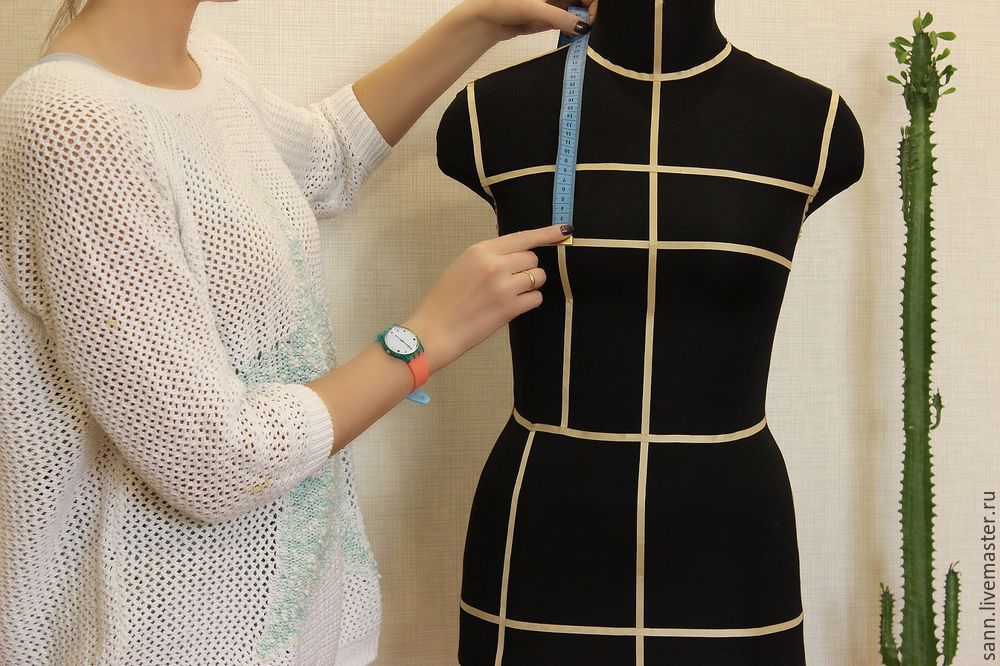
VG - Chest height. From the elastic at the waist to the most convex point of the chest.
 CG - Center of the chest. The distance between the most convex points of the chest.
 ShPL - Shoulder width. Let's measure the distance from the base of the neck to the vertical line drawn from the corner of the armpit in front.
 VPK - Shoulder height oblique. Measure from the point of intersection of the rubber cord with the spinal column to the end of the shoulder.
DR - Arm length. From the shoulder to the condyle with the arm slightly bent.
DL - Length to the elbow. From the end of the shoulder to the elbow.
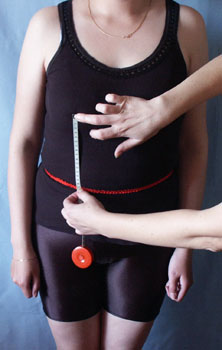
DPG - Length of the shelf with the convexity of the chest. Place the ruler horizontally on your chest, and use a measuring tape to measure the distance from the top edge of the ruler, through the most convex point of the chest to the elastic at the waist. Absent in men.
DPB - Length of shelf without chest. Place the ruler horizontally on your chest and use a measuring tape to measure the distance from the top edge of the ruler, between your breasts, to the elastic at your waist. Absent in men.
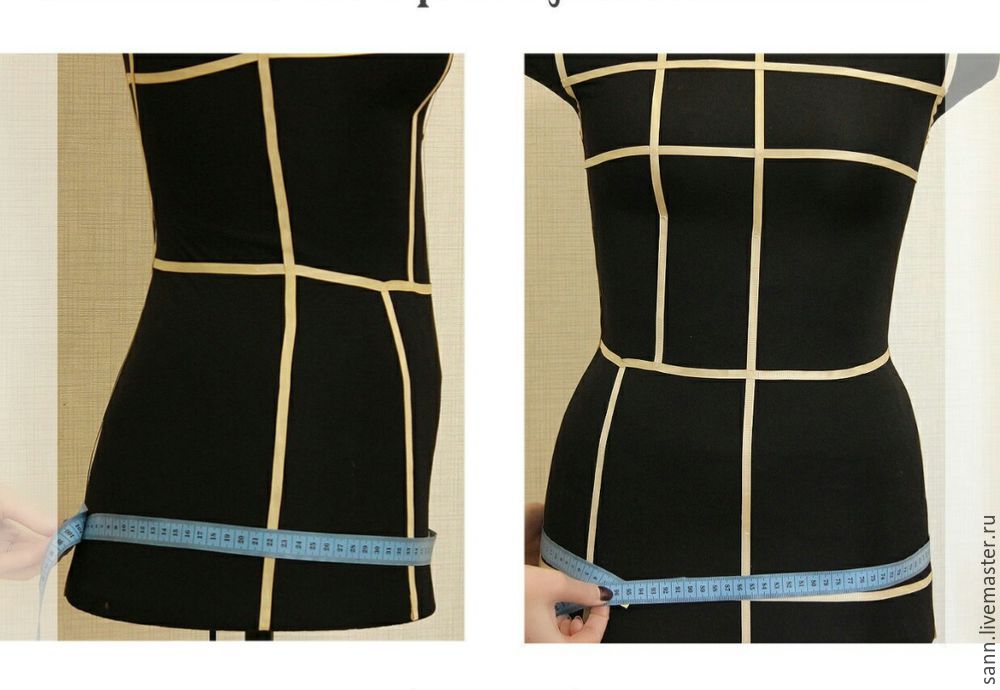
OT - Waist circumference. Waist circumference at its narrowest point.
OT2 - Waist circumference two. Waist circumference is 3-5 cm above the narrow point.
TS - Deviation of the waist line from the back. Measured cm with a tape from the true waist line on the back to a conventional horizontal line drawn along the side.
TP - Deviation of the waist line in front. Measured cm with a tape from the true waist line along the front to a conventional horizontal line drawn along the side.
 PHL - The most convex point of the chest. The horizontal distance in front from the most convex point of the chest to the waist.
BHL - Point showing the shape of the torso. The horizontal distance from the most angle of the armpit to the waist.
 WHL - The most convex point of the back. The horizontal distance at the back from the most convex point of the back to the waist.
OR - Arm circumference. Measure with the arm lowered below the armpit by 3-5 cm, at the widest point.
OZ - Wrist circumference. Measure the circumference of the wrist. The desired increase is often added to the measurement.
In this section, we decided to introduce you to the basics of taking measurements on a female figure. We are sure many people know how to do this, but due to numerous requests from our clients, we will post it again. We would like to draw your attention to the fact that this section does not describe all figure measurements, but only those that our clients need to order the product.
We understand that taking measurements of your figure yourself is not so easy, but there will always be a friend who will help you with this, the main thing is to instruct her correctly. And our section will help you with this.
So, let's get started :) First, the general provisions.
The person being measured should be wearing the underwear that you intend to wear under this product, since modern tights can have a “tightening” effect and remove from 1 to 3 cm in volume, while bras, on the contrary, can add volume. It is necessary to ensure that the person being measured stands without tension, without changing his own posture. The measuring tape should fit against the body without deforming the soft tissue with tension.
At the waist - the thinnest place on the body, you can put your hands on your sides to determine the horizontal position, and use an elastic band (thick elastic band) to fix the waist.
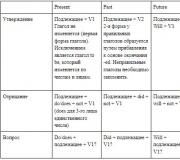
Then we immediately note to ourselves what kind of figure it is:
1. Normal posture corresponds to the uniform development of all curves of the spine.
2. Slouching posture is characterized by a sharp increase in cervical lordosis (the red line in the picture shows the distance from the wall to the neck), a slightly tilted neck forward and reduced lumbar lordosis.
3. Straightened posture corresponds to weakly expressed bends of all parts of the spine.

To designate measurements use letter designations. Dimensions are divided into main, additional and auxiliary. We just need the basic measurements, and we have 18 of them.
1. Height, P - measure the vertical distance from the floor to the apex of the head.
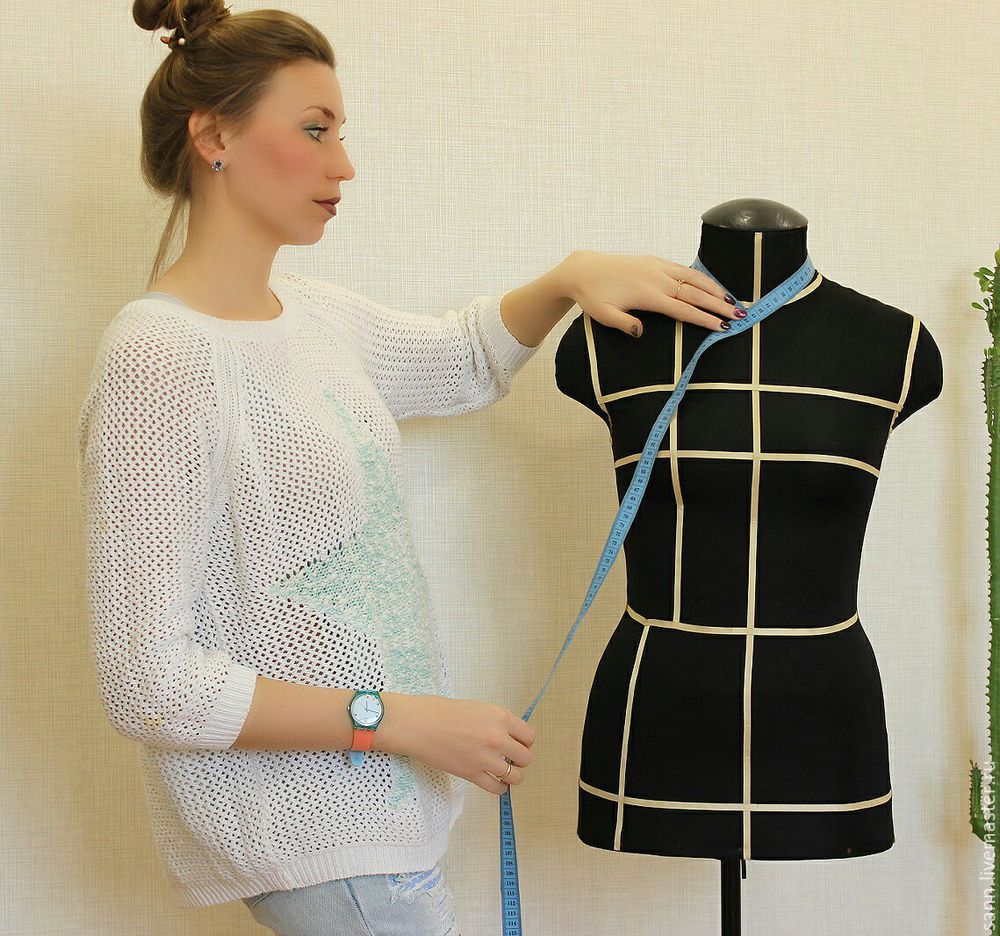
2. Half neck circumference, Ssh - Measure the full circumference of the neck. The lower edge of the tape runs from behind slightly above the cervical point, from the side and in front along the base of the neck, and ends above the jugular cavity.
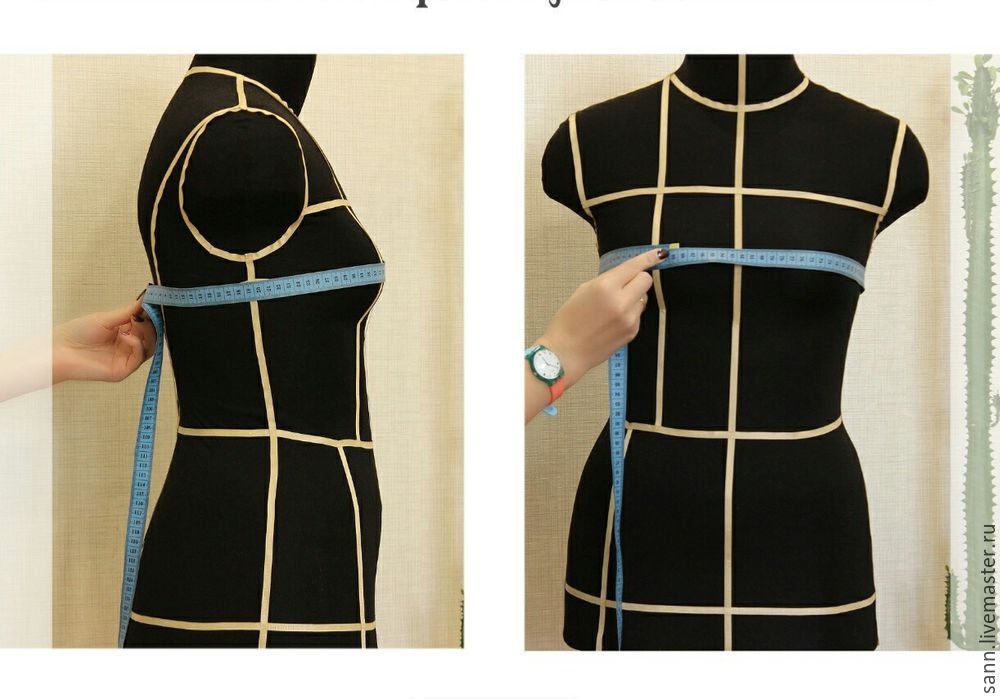
3. Half-chest girth first, Cr I. The tape should run horizontally along the back, touching the rear corners of the armpits with the upper edge, then along the armpits and in front above the base of the mammary glands.
4. Half chest girth second, Cg II. The tape should run horizontally along the back, touching the rear corners of the armpits with its upper edge, then in the plane of the oblique section along the armpits and in front through the protruding points of the mammary glands. If you need this measurement, then Cr I and Cr II should be measured one after the other, without allowing the measuring tape to move on the back.
5. Half chest circumference, Cr III. The tape should pass horizontally around the body through the protruding points of the mammary glands and close on the right side of the chest. When measuring figures with a low bust, the centimeter tape is placed near the armpits (at a distance of 3-4 cm) horizontally, at the back along the back, at the front, taking into account the allowance mammary glands.
6. Half waist circumference, Art. The tape should run horizontally around the torso at the level of the waistline.

7.Half hip circumference, Sat. The tape should run horizontally around the torso, at the back along the most protruding points of the buttocks, and at the front along the abdomen (taking into account the protrusion of the abdomen). For convenience and accuracy of taking into account the protrusion of the abdomen, you can use a ruler, applying it vertically to the abdomen.
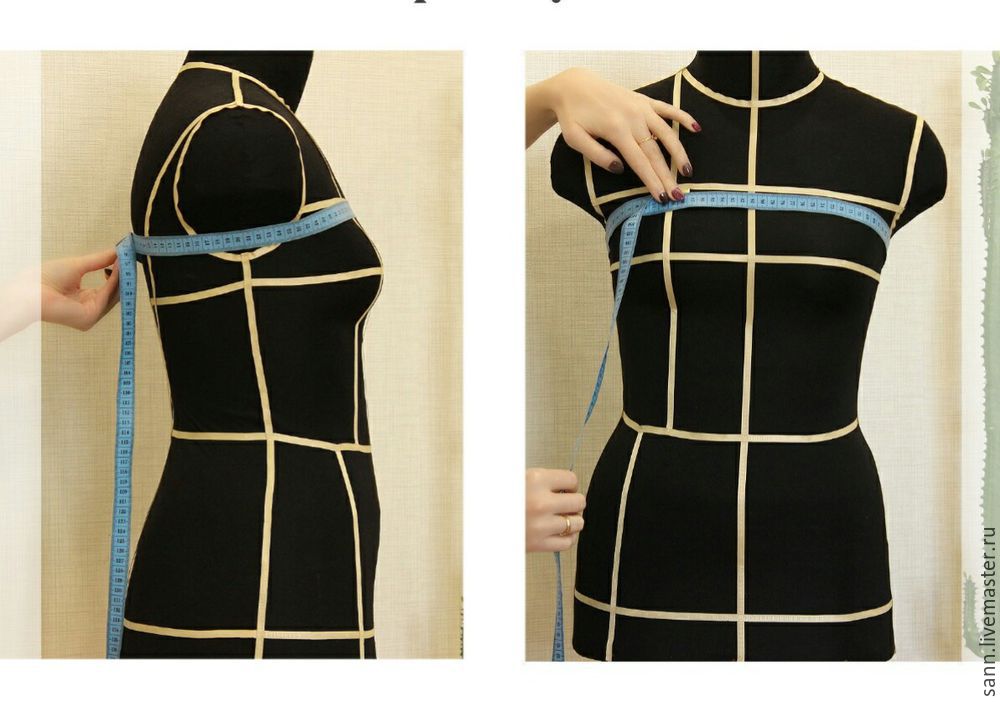
8. Chest width, Shg. Measure horizontally above the base of the mammary glands between the verticals, mentally drawn upward from the front corners of the armpits. Recorded in half size.
9. Distance from the back waistline to highest point projected shoulder seam at the base of the neck, DtsII. Measure from the highest point of the shoulder seam to the back waistline. The measurement is taken parallel to the spine, taking into account the convexity of the shoulder blades.

10. Distance from the highest point of the designed shoulder seam at the base of the neck to the waist line, Road II. Measure from the highest point of the shoulder seam at the base of the neck through the protruding point of the chest and then parallel to the midline of the figure to the waist line.

11. Chest height, Bg II. Measure simultaneously with the measurement of Dtp II as the distance from the highest point of the shoulder seam at the base of the neck to the protruding point of the chest gland.
12. Distance from the highest point of the designed seam at the base of the neck to the level of the posterior corners of the armpits, Vprz II.
Measure from the highest point of the shoulder seam at the base of the neck parallel to the spine, taking into account the convexity of the shoulder blades, to the horizontal line passing at the level of the posterior corners of the armpits. The horizontal line is set either with a measuring tape or with an elastic band.
13. Shoulder height oblique, Vpk II. Measured by the shortest distance from the point of intersection of the waist line with the spine to end point designed shoulder seam.
14. Back width, Shs. Measure horizontally along the shoulder blades between the corners of the armpits. The measurement is recorded in half size.
15.Product length, Di. Measure in the middle of the back from the neckline, conventionally taken at the base of the neck, to the level of the desired length. For products with a straight silhouette, the tape below the shoulder blades is kept taut, and for products with semi-fitting and fitted silhouettes, it is fixed according to the figure at waist level.
16.Width of the shoulder slope, Sh. Measure from the highest point of the designed shoulder seam to its end point.
17. Sleeve length, dr. Measure with the arm freely lowered from the end point of the designed shoulder seam along the outer surface of the shoulder and forearm to the level of the desired length. Dr. It is recommended to measure simultaneously with Shp.
18. Shoulder circumference, Op. Measure with the arm freely lowered perpendicular to the axis of the shoulder and so that the upper edge of the tape touches the armpit. The tape should close on the outer surface of the hand.
We wish everyone good luck and inspiration for new images.