How to work in Photoshop CS6: for beginners. Plugins for "Photoshop CS6"
Dear friends, if you are interested how to quickly learn to use photoshop, then this article is for you.
Honestly, I’ve been wanting to write an article like this for a long time, but the inspiration to write it only came today (I wrote the article in one go, it turned out how it turned out, maybe tomorrow I’ll add/change something else).
The article turned out to be voluminous, so sit down, I’m starting. Photoshop has always been my favorite hobby.
And now this hobby helps me earn money through the Internet.
Personally, I know only 2 ways to quickly master Photoshop (if you know another way, please write in the comments):
1. How to quickly learn how to use Photoshop on your own (in this part, I will publish a summary of my experience described in the first part and make recommendations for beginners).
2. How to very quickly learn to use Photoshop (in this part I will tell you my observations about the fastest way to learn the program).
Dear friend, I wrote this article in 2014, the data in it is almost still relevant :)
Only one thing has changed - I developed author's system on how to learn to confidently use Adobe Photoshop in 30 days.
Benefits of learning Adobe Photoshop at my school:
1. The most effective lessons
You will get access to 57 video lessons (after the first payment, access forever), which you can study at a time convenient for you.
The duration of the video lesson is from 3 to 20 minutes. I recommend studying 2-3 video lessons every day.
Each lesson is thought out to the smallest detail. All lessons must be studied sequentially, as the difficulty increases from lesson to lesson.
2. Recordings of all video lessons and copies of all source files
If you want to review the important points of the lesson again, you can watch it online again or simply download the recording of the lesson to your computer.
All lessons have source files that you will receive along with the lesson.
You need to devote 20-30% of your free time to studying theoretical video lessons, and then devote the remaining time to consolidating the acquired knowledge.
Thus, by investing only 1-2 hours of your time per day, after 30 days you will easily and with pleasure gain the skill of confident proficiency in Adobe Photoshop.
You are enriched with knowledge, experience and a charge of strength for constant development.
3. Community and support that promotes you
Once you get to school, you are no longer left alone with your fears, unresolved problems and questions. In the person of people, like you, who are striving to improve their lives, and in the person of a wise and experienced mentor - Sergei Ivanov.
You receive strong support and a promoting, motivating environment. Together, it is much easier for you to maintain focus on development and achieve new results. And new friends will not let you lose faith in yourself again. Day by day you become better and stronger.
4. Get the skills you need
Learn to work confidently in Adobe Photoshop (master all the necessary tools, learn to work with masks, layers, smart objects, make collages, process and restore photos with ease)
And also create logos, banners, website designs, website headers, avatars, unique pictures and much more. etc.).
Get knowledge of where and how you can look for the first orders for your services.
5. Opportunity to ask questions to the coach
Only students of the school have the exclusive opportunity to ask the most intimate questions to me personally (Sergei Ivanov) and receive detailed answers.
6. Study online without leaving home
All training at the school takes place online. Therefore, all you need to learn is the Internet, a computer and your desire to be successful.

And so let's go according to the order stated above.
How to learn to use Photoshop yourself
And so, if you decide to learn Photoshop on your own, then read a few of my recommendations that helped me learn Photoshop (I hope you will find some of them useful for yourself).
- At first glance, after the first launch, the program seems complicated - but there is no need to be scared, nowadays there are a lot of sources using which you can quickly master this program (when I started learning Photoshop in 2003 there was not so much information on learning the program as there is now , everything had to be studied at random or bit by bit from books, but there weren’t any good books, just reference books, and that was long, tedious and uninteresting, and they were also black and white, brr….
As I remember, I shudder, I didn’t have the Internet yet, then dial-up appeared - this is when you access the Internet using a modem through a telephone line... oh, those were the days. And now everything has changed on the Internet you can find a ton of information + excellent educational books have appeared on store shelves).
— To begin with, just open the program and start doing at least something at random. This method helps me a lot at first when studying a particular program; you can resort to training materials at any time (for example, when you need a quick result and there is very little time, and the program needs to be mastered in a very short time).
Pay great attention to the tools in the program, once you understand how each of them works, it will be easier for you to study various Photoshop tutorials in the future.
— Start studying and doing lessons on Photoshop on special sites with lessons (you can start with).
— I also recommend that beginners study books on Photoshop. I highly recommend Scot Kelby’s books (Scott is truly a master of Photoshop, his books describe complex things in simple words, all the lessons are step-by-step and with color illustrations, in general, for beginners it’s the best thing, you read the lessons, do what the author says and gradually learn). I myself studied from books (I vouch for the quality of the books 100%). Books can be bought at any bookstore, you can also download e-books from the Internet - you just need to search.
— If you have a friend who already knows at least a little about the program, invite him to your place and let him give you a few lessons (at one time my sister gave me my first basic lessons), you can also get a job or do an internship (I worked in a photo salon, I did an internship in a printing house, and now I am a freelance web designer).
- learn to use search in search engines, in fact, in order to solve the question you are interested in, just enter the desired phrase in the Google, Yandex search engine, or use the search on youtube.com (the site contains a large number of video tutorials on Photoshop), you need not to be lazy and try to find the answer yourself, practically to every question you have, there is already a ready-made answer: step-by-step instructions or a video tutorial.
- if all else fails, try contacting people on forums; almost every site with Photoshop tutorials has a forum.
— I highly recommend that you constantly go to sites where people post their work, for example, I really like to go to freelance exchanges, look at the work of Photoshop masters (I choose a freelancer and look at his work), and gain inspiration.
— download ready-made add-ons for Photoshop (psd sources) and see how they are made, they can be found on almost every website about Photoshop (for example, on my website in this section).
- do your first works, lessons and publish them online, do not be afraid of criticism, listen to what people think about them and you will see how people begin to praise you for the work you have done, suggest how you can do it so that you can improve the result.
How to quickly learn to use Photoshop
What should you do if you really want to quickly learn the Adobe Photoshop program and there is no free time to independently learn the program through books, websites, forums, the random method, etc.
Then ready-made video courses on Photoshop come to our rescue - essentially all the information is laid out on the shelves and recorded on a DVD, all you have to do is set aside 1-2 days and you are a confident Photoshop user. All video courses are paid, but if you value your time and want quick results, then this is for you. All video courses are recorded by professionals and cannot be bought in a store, you can only order them online.
That's all I wanted to tell you about today. And to sum up, I would like to give you a few words of advice. First of all, I know that you will succeed if you don’t give up at the very peak of difficulties, don’t give up in the face of difficulties and you will definitely be able to learn how to use Photoshop well!
Good luck learning Photoshop!
How did you/are learning Photoshop, write in the comments, I’m very interested, perhaps you have some of your own techniques, please share, it will be interesting for people to read about them.
Best regards, Sergey Ivanov.
I recently came across an article by Max Heeger (a well-known Internet entrepreneur, creator of the automatic mailing service "Smartresponder") - here is his opinion (I quote it in full, since it cannot be explained or said better):
Today I have one fundamental recommendation for you :) But first, let me tell you a short story...
Not many people know that before I got into e-commerce and created my own successful Internet business, I worked long and hard as an employee.
At first I was creating computer cartoons in one studio for a modest salary at that time. Then I did video editing on television for a slightly higher salary.
And after that, I worked as a professional designer for several years and created various printed products, receiving a larger salary +%...
And you know WHAT?!
Even though my activities have changed so much over the years, one thing has always remained the same.
This is an ADOBE PHOTOSHOP program!
Regardless of the type of my activity, regardless of what I did on the computer, there was always one program that I could never do without and still cannot do without - this is the cult and most popular graphics editor:
And I’ll tell you for sure - if you try to do anything on your computer, then sooner or later you will face the fact that you will need a functional raster (pixel) graphics editor...
And the most popular, well-known and convenient program for editing raster graphics is Adobe Photoshop!
Therefore, I believe that owning the Adobe Photoshop program is not only useful, but also extremely NECESSARY for anyone who wants to connect their professional activities with computers, and especially making money via the Internet! And if it were up to me, I would include training in Adobe Photoshop in the school curriculum.
As soon as you start creating your website or running your mailing list, or you just need to touch up your digital photos from a picnic, then the need arises to use Adobe Photoshop. Without him - nowhere. Honestly!
But master Adobe Photoshop- not the best simple task.
People (like me) were forced to go through this path many years ago... Brrrrr!
But today, unique video learning technologies have emerged that help anyone learn in a couple of dozen hours what previously required hundreds of hours of persistent reading and active use of the “poke” method.
Okay... I won't beat around the bush! :))
A unique and highest quality video course on Adobe Photoshop that I have ever encountered on my way. The author of this video course is Zinaida Lukyanova, and the course is called “PHOTOSHOP FROM ZERO IN VIDEO FORMAT.”
Believe me, as a professional designer in the past and an experienced user of Adobe Photoshop, that today the fastest and most effective way for you to learn the Adobe Photoshop program at a good level is to take the video course “PHOTOSHOP FROM SCRATCH IN VIDEO FORMAT”
"More than 80 video lessons, 15 hours 52 minutes of on-screen video dedicated to only one topic - Adobe Photoshop" Fantastic! :)
I am personally amazed at the quality of this video course! Everything is clearly structured from beginning to end. The course is designed for both complete beginners and experienced users.
Learning begins with the simplest basics: what raster and vector graphics are, how to work with color. The following explains all the functionality of the program.
The lessons are based on demonstrations of real examples of solving various problems, and practical tasks are given. The course ends with visual demonstrations of how to solve certain practical problems when frequently working with graphics.
It was also pleasantly surprising that Zina has EXCELLENT diction and a clear line of thought - she comments on the video sequence easily and in simple language. It feels like she's been doing this all her life.
No fancy words! There is no “ba, me, uh...”.
And in general, this video course allows you to quickly learn about Adobe Photoshop almost everything that may be useful to you in the future for professional work.
I am simply sure that there is no shorter way to get to know the program and the capabilities of Adobe Photoshop CS3 well.
Study the course “Photoshop from scratch in video format”, enjoy the learning process and I hope that you, like me, will become friends with the Adobe Photoshop program for many years to come!
This article was created specifically for people who decide to start using a program such as Photoshop CS5. It is quite simple, if you know all its functions. By reading this article to the end, you will be able to find out the most important functions of Photoshop and what they do. After reading, working in this photo editor will become much easier. In general, good luck!
Today, many users of the World Wide Web are wondering -. For many, this program is quite complicated. It will indeed take a lot of time to fully study all the functions of this photo editor. But in order, for example, to crop an image, or to give a picture the desired level of transparency, you don’t need a lot of time, effort and, most importantly, knowledge. After all, there is such a thing as “ basic photoshop functions" To quickly and correctly learn Photoshop, many different methods have been created, among which only four main ones should be highlighted.
How to Open or Create an Image in Photoshop CS5
Initially, to start working with this version of the popular photo editor, you will have to create a new file and assign the necessary parameters to it, or simply open a suitable picture. This is quite easy to do. This has not changed with the release of the new version. Everything remains the same, but for those who are generally encountering the program for the first time, you should know how to create or open a file.
File creation:
Click on the button "File", which is located in the upper left corner of the program;
Select the one you need width, height, extension, Color mode, File background;
That's it, a window of the indicated sizes has opened for you. All your work will take place in it.
Opening a file:
In Explorer, find the location of the file. Once selected, click "Open".

Ways to Learn Photoshop CS5 Quickly
After the release of the new version of Photoshop, many began to be outraged by the redesigned design. It has differences, but not so significant. If you can easily understand Photoshop CS4, then learning the new, fifth version will not be so difficult.
Photoshop CS5 can be easily studied using special articles that describe all the functions and capabilities of the new version of the photo editor. But it is almost impossible to remember so much information. That’s why this article is being written to highlight all the basic functions, without which, unfortunately, you won’t be able to fully use Photoshop;
In addition, many useful books have now been written for beginning web designers. They contain a lot of useful information, but also too much of it. Therefore, this method is suitable specifically for those people who have a lot of time. But not all good books are free. Some ask for quite a lot of money. And our goal is learn to use Photoshop CS5 completely free;
Now, there are many professional Photoshop users on the Internet who are ready to accept a certain number of people for training. But almost no one does it for free. Therefore, this method, unfortunately, is not suitable;
The video courses are quite useful and easy to understand. Still, it is better and easier to watch a video lasting one hour than to read a certain book for several months, or to work on the advice of others;
But there is another way to quickly learn the basic functions of Photoshop - our website. You just need to read all the information that is written in this article. This method is easy and does not require much time and effort.
Basic Photoshop CS5 Features
There are quite a lot of functions that every person who wants to learn how to use Photoshop cs5 needs. To remember everything completely, you will need desire and, of course, time. But, we will try to briefly study all the necessary functions that will help you in the future to fully work with images in almost any version of Photoshop. After all, they are no different.
Most people who set themselves Photoshop CS5, are faced with a problem. Therefore, in this article the names of functions will be in Russian and English. All this so that you don’t get confused in the future, or sit with a translator, learning about each function yourself.
Toolbox (Photoshop Toolbox)
As you know, most functions can be activated by pressing hot keys. But Photoshop doesn't always display them. This is the whole problem. And sometimes pressing a key is simpler and easier.

In most sections you will notice a small triangle. This means that when clicked, a small window will appear in which additional tools of this tab will be displayed.

Groups of elements
Most people already know that quite a lot of tools have been developed for use. But not everyone realizes that they are all logically divided into five groups:
Cropping:
"Frame". It is one of the most useful tools in this category. With its help, you can crop the desired part of the image;
"Cutting". This function is used to create fragments;
"Selects fragments". If you need to highlight several fragments of interest, then do it using this function.

Highlight:
"Region". These tools are used to select rectangular and oval images. And areas that consist of only a single row and column;
"Move". As is already clear, using this tool you can select an area and move it. Also, do not forget that the movement occurs along with all layers and other applied effects;
"Lasso". This tool will help you select the desired part of the image and, for example, . For smoother, hand-drawn pictures, you should use "Magnetic Lasso". And for images with many angles, it was created "Straight-line lasso". The usual version of this tool will have to select the image entirely manually;
"Quick Selection". Once you select this tool, you can easily select an area using the adjustable brush tip;
"Magic wand". With its help, you can easily and, most importantly, quickly highlight areas that have the same color.

Retouching:
"Spot Healing Brush". A very convenient tool for people who work with photographs. After all, it often happens when you need to remove a certain point on a person’s face. This is done precisely with the help of this tool;
"Healing Brush". This tool eliminates all unnecessary defects in the photo, while painting them with a suitable pattern or gradient;
"Patch". Using a sample and pattern, eliminates defects in the area you have selected;
"Red eyes". Photos with red eyes are quite common. Now this is not a problem. After all, this tool can help you cope with such a problem. The red eyes caused by the flash disappear instantly;
"Stamp". Having selected the desired area, you can draw using the sample taken;
"Pattern stamp". By selecting and highlighting a specific part of the image, you can also draw. The created drawings will serve as patterns;
"Eraser". With this tool you can remove unnecessary pixels. It erases to the part of the image that was last saved. Only the previous layer remains;
"Background Eraser". It often happens that you need to remove the background and leave only a certain part. This eraser, by dragging, removes the growth and leaves only a transparent background. Transparent pictures must be saved in .png format;
"Magic Eraser". If areas of the image are monochromatic and you need to remove the background, leaving only one element, then use the magic eraser. With one click, it completely removes the background, making it transparent;
"Blur". A tool that softens the clear edges of a picture;
"Sharpness". With use, soft edges become sharper;
"Finger". With this tool you can create a blur effect on a specific area of the image;
"Clarifier". A tool that helps add a “lightening” effect to a certain part of the picture;
"Dimmer". It works in the same way as "clarifier", only in reverse. In other words, with this tool you can make the image darker;
"Sponge". The selected area becomes more saturated in color;

Drawing and Text
"Outline Selection". Outlines fragments and displays direction points;
"Text". With this tool you can create a text box into which you enter the desired content;
"Text mask". With this function you can create a selected area that will have a text form;
"Feather". Helps draw straight contours with clearly defined edges;
"Figure". Draws lines and shapes that will be displayed on a regular layer;
"Free figure". In P hotoshop CS5 there is a “Custom Shapes” tab. You can draw them using this function. All loaded shapes may appear in your image. And all it takes is a few clicks.
![]()
Coloring
"Brush". This tool is used to create brush strokes;
"Pencil". This way you can draw lines that have clear edges. This will greatly simplify further work with changing the background;
Having selected the desired color of the image, you can easily change it with this tool;
"Archive brush". This tool draws copies of the saved image;
"Archival art brush". With the selected state, you will be able to create stylized brushstrokes that completely imitate different artistic styles;
"Gradient". This tool is designed for creating and further using gradients of different formats. These include: rectilinear, mirror, radial, cone-shaped, diamond-shaped color transitions;
"Fill". Many people have come across this tool. It's quite easy to use. More precisely, it fills the selected area with the desired color, which has clear and uniform edges.

In general, in this article we dealt with the issue "How to use Photoshop CS5". We also considered all the most important and useful features, with the help of which beautiful images, layouts, templates, business cards, and other things. Working with Photoshop will now become much easier. You don’t need to remember everything, because this article will be available at any time. You can always return to this page and read the function you need. Happy using!
You probably know what the software under the loud name Adobe Photoshop is intended for. This is not just an image editing application - Photoshop is a huge platform for ideas and creativity related to picture files, photographs and drawings. Here you can not only modify existing files, but also create a completely new and unique product.
Welcome to Adobe Photoshop!
Indeed, almost all designers use Photoshop: from simple drawings for content to full-fledged illustrations for books, games and other products. To the delight of users, the developers are constantly improving the program, adding new functions and capabilities. Therefore, it is important to stay tuned for updates released by Adobe. Now, after a short tour, let's learn how to use Photoshop.
Where can I get the program?
You can download the electronic version of the software on the official Adobe website on the download page https://creative.adobe.com/ru/products/download/photoshop?promoid=61PM825Y&mv=other. Here you must first register with Adobe to obtain an AdobeID. Then fill out the fields that the download page suggests and, after logging in, download the installation file and go through the installation procedure. It is important to note that for the first 30 days you can use your copy of the application for free. After which, after trying the product, you will be asked to purchase a license.

The developer provides several options for using the program
Adobe offers its users fairly reasonable prices for its products. So, you can purchase Photoshop for a certain price per month, that is, by subscription. The same option is available for the CreativeCloud suite, which includes several Adobe programs. The cost and composition of the kit should always be checked on the official website, as they may change. Please also note that the system has special conditions for students and teachers, as well as corporate clients. So, you can save a decent amount when using Adobe services.
First launch of the program
After installation, you should launch the application from the shortcut created on the desktop. When you first open it, a window will appear with a description of the program and a notification about the start of the 30-day trial period. Click on “Start trial” and wait for the program to open. Now let's move on directly to how to work in Photoshop.

The work area is very convenient and can be customized to suit you
Photoshop main menu
At the top there is a main menu with the following items:
- File. Here you can perform all operations such as saving a file, creating a new one, printing photos, importing.
- Editing. As the name suggests, this section contains tools for changing various settings, of which there are a huge number. For example, here you can change the color settings. There is also the “Step Back” function, which will answer your question about how to undo an action in Photoshop.
- Image. Here you can find parameters such as color correction of the picture, trimming, rotation, cropping and much more.
- Layers. In general, if the file being edited contains many different elements, then each of them is created on a separate layer. For example, if you put text on top of a picture, it will automatically be created on a new layer. They are located at the bottom right. The top menu item “Layers” controls all the settings regarding the discussed issue of layers. Here you can create a new one, delete an existing one, add effects to it, and so on.
- Text. From the name it is clear what exactly is regulated by this tab. All operations on the added text field are controlled in this item.
- Selection. Here you can select various objects (for example, layers). This is also important to know in order to learn how to work in Photoshop cs6.
- Filter. All filters and effects like blur, distortion and others are located here. You can also find other filters on the Internet by clicking the corresponding “Filter” menu item.
- 3D. Here you can customize 3D layers and scenes for a photo or any other image.
- The “View” menu has all the options for displaying information on the screen: here you can display auxiliary elements (grid, ruler, etc.) and configure guides.
- "Window" allows you to add new panels to the work area. For example, if you need a histogram, then you just need to check the box next to the corresponding “Window” menu item.
- Well, the last item is “Help”. This is where you'll find all the product information, a support center, and a tab to sign in to AdobeID for more features.

Main functions are accessed through a menu hierarchy
Toolbar
The next thing you see below the main menu is a field with settings for the tool that is currently selected. These tools are located on the left panel. Let's look at each of them. In parentheses there is a button for quick access to the function (all letters are in English). It also describes additional options when you right-click.
- Move (V). Allows you to move the selected object or area in any direction. You can also use it to spin this object, rotate it, reflect it.
- Rectangular area (M). Highlights in the shape of a rectangle. You can also highlight in the form of an oval, horizontal and vertical lines.
- Lasso (L). Also a selection tool. You can choose from a regular lasso, a straight line lasso, and a magnetic lasso.
- MAGIC WAND (W). Selects an area within a specific frame. There is also a quick highlight.
- Frame (C). Crop the image. Also here are cutting, perspective framing and fragment selection.
- Pipette (I). Recognizes color when you click on a photo (the pixel you hit is taken into account). There is also a ruler, commentary, counter, color reference and 3D material pipette.
- Healing Brush (J). There is also a spot tool, a patch tool, a content-aware move tool, and a red-eye removal tool.
- Brush (B). It allows you to draw over a photo or can help you create a new image. Has quite flexible settings. In addition to the brush, there is a pencil, a mix brush and a color replacement.
- Stamp and pattern stamp (S).
- History brush (Y).
- The eraser (E) erases the area you drag over. The background eraser removes everything, including the background (that is, when saving in certain formats, the background will be transparent).
- Gradient (G) and Fill fill the selection with a color or gradient.
- The action of the blur and sharpen tools is clear from their names; your finger moves the area like plasticine. You can, for example, move your eyebrow higher or lower your eyes.
- As in the previous case, the names of the tools coincide with their intended purpose: brightener, darkener and sponge. You can quickly access them by pressing the letter O on your keyboard.
- The feather (P) in various variations is located below the clarifier. Helps with drawing, adjustments and other operations performed on the image.
- Next is a tool for adding a text field. Is an integral part of understanding how to use Adobe Photoshop.
- Outline selection (A).
- A tool with various shapes allows you to add an object of any shape that is available in the program’s collection to a new or existing layer.
- Next is the “Hand”, which makes it possible to move the photo. For example, if you have increased the zoom and want to edit the image in such an approximate form, then this tool will help you to move, for example, from one eye to the other.
- A magnifying glass increases the zoom of a photo.
- The two squares with black and white are the colors that are currently being adjusted. That is, if the color in the nearest square is red, then the brush from point eight will paint in red. The farthest square is responsible for the color of a regular eraser.
Many tools contain subtools
As you can see, there are a lot of tools and it’s quite difficult to learn them all at once. Therefore, try to devote some time to each of them. Then you will know how to work with Photoshop cs6, for example.
Right program area
This area of the workspace is regulated using a special tab, where by default it says “Main Workspace”. There will be a color palette, a field with corrections and styles, as well as a window with layers, channels and contours. You can change the environment to space for photography, drawing, movement and other adjustments.

Additional panels for work
Results
Now you know how to work in Photoshop and have studied the basic tools of the program. And from now on, you can fully use various instructions on the Internet, which describe many interesting lessons on creating amazing effects. From now on, your imagination will work for you, and all your ideas will come true. Share your first works in the comments. Fruitful work, dear friends!
There are probably no people who have not heard about this wonderful computer program, which allows you not only to transform photographs, but also to create various pictures, banners, collages, etc. You can learn how to work in Photoshop for yourself to edit your photos. Also, mastery of this skill is quite beneficial, since many employers welcome knowledge of the basics of this program. You can also use Photoshop to work from home: freelance, create website layouts, etc. So, developing your creative skills and learning this computer program will only benefit you.
How to learn to work in Photoshop
Don’t think that you will master all the tricks of Photoshop in a day: real masters of photo transformation have studied this program for a long time. So you must have patience, and most importantly, the desire to learn how to make a miracle out of a simple picture. This article will tell you the very brief basics of Photoshop that a beginner needs to know.
If you are just going to install this program on your computer, then version CS5 or CS6 is suitable for you. They weigh about two gigabytes. Initially, beginners are lost in this program, since the interface contains a bunch of tools that also have English names. But don’t be scared: you can simply open any image in Photoshop and try to click on all the existing tools - this will make further actions easier.
To open an image, you can use a shortcut using the Ctrl + O keys. Just press the buttons and try to remember what they are for. Special books and video courses, which can easily be found on YouTube for free, will also help you learn how to work in Photoshop.
Basic tools of Photoshop
At first, you'll be using mostly the stamp, brush, healing brush, highlight, burn, and dodge.
Removing facial imperfections using Photoshop
Even a beginner can do this procedure because it is very easy to disguise an unwanted pimple on the face.
![]()
- To do this, select the Healing Brush Tool in the toolbar.


- Find a clean area of skin on your face that will match the color of the area of the face where the flaw is located and press the Alt button on the selected area so that the brush copies the color.

- Next, press the treatment brush onto the area with the pimple.
That's it! The same procedure can be done using the Clone Stamp Tool, thanks to which you can copy a selected area of a photo and “multiply” it.
Using the "brush" parameter, you can change the size, as well as adjust the softness and hardness of the brush. But it is very convenient to simply hold down the Alt key together with the right mouse button and drag the mouse from right to left to zoom out and, conversely, to zoom in. Do the same trick to change the hardness, only moving the mouse up or down.

How to move an image to a different background
Let's say you want to paste your photo onto a different background, for example, using Photoshop you can put yourself in an exotic tropics or far from a volcano to show off to your friends.
- Choose two photos of the same size.
- Use the Straight Line Lasso button or the Polygonal Lasso Tool to select an area (in particular, your image). You can zoom in on your image in a special window to make the selection clearer. Copy the selected image using the famous CTRL+C command and paste it into our background image using CTRL+V.
Tip: for this trick, use a clear image of yourself, and not one taken with a 2-megapixel mobile phone camera, otherwise the pictures will not match in quality, and the resulting photo will not look natural.

Working with image color in Photoshop
If your photo has red tones, but you want to give the picture a cool tint, then you can play around with the editing panel, which is located in the upper left corner. In this panel, look for color balance and try one or another scale.

As you can see, using this program is very simple, the main thing is to want to and devote at least half an hour a day to the lessons. And then you will surely create masterpieces!
1 voteHello, dear readers. It's great when a person wants to learn something, especially when it comes to such an amazing and powerful program like Photoshop.
Only those who are not interested do not know how many hidden functions this utility contains. It opens up incredible opportunities for making money on the Internet and simply realizing your creative potential. I wouldn’t be surprised that someday the knitting-loving grandmothers will be replaced by those who quietly photoshop in the evenings, create their own incredible paintings, collages, or retouch something old.
Today we will talk to you about Photoshop lessons from scratch. I will tell you everything about where to look for free classes, what their advantages and disadvantages are, how to master the program at a professional level and step by step learn all the intricacies of the editor.

Let's start with something simple and accessible to everyone.
Where and how to look for lessons
I don't think I need to explain why tutorial videos are the best way to understand Photoshop. Everything is visible, accessible, understandable. The author does not have to explain everything in detail, and you can repeat after him and not encounter discrepancies.
For many beginners, YouTube becomes a storehouse of useful information. The advantages of this service are obvious:
- For free;
- In Russian;
- Lessons of different levels (from beginner to professional);
- Access at any time of the day;
- You can model your own training program.
There are, of course, disadvantages, but we'll talk about that a little later. Let's focus on the positive. It became very convenient to work after YouTube provided the ability to create collections.
If you don’t understand the program at all, I can advise you to start with this one.
Everything is here: where to download Photoshop and which version to prefer, which language is better to work in (by the way, you can also find information on my blog), a lot of information about the main tools - moving, zooming in and out of photos, brushes and much more.
Once you understand the basics, you can move on to improving your professionalism. You can find a lot of videos on this topic, much more than in the first case.
I will suggest several of them. I really liked Alexey Kuzmichev’s lessons on photo processing.
In this collection you will find many videos on creating interesting effects: turning summer into winter, neon glow, pencil drawing, watercolor, professional portrait retouching, complex selection, how to cut a person from a picture and paste it into another image, and so on. If this is not enough for you, you can watch another 137 lessons from him.
The main drawback of this “course” is that, at least in those instructions that I looked at, the author does not pay due attention to explaining this or that point, but simply suggests doing the same thing as he does. “Click here, click here, poke without looking back.” In my opinion, this is not very healthy. You are not a real student who understands what he is doing, but a monkey blindly following the leader.
Another selection that I offer you is created a little more professionally.
There aren't many lessons here. The abundance of terms that are incomprehensible to a beginner complicates perception and the speed of work, as if it forces you to keep your “rolls” in suspense, but how nice it is to watch how a real master works. I liked it very much. If you have approximately the same level of proficiency in the program as I do, then these lessons will not seem useless to you.
So that you understand what I mean when I talk about ideal activities, I’ll offer you a cool video from the channel ProPhotoshop .
The author explains everything, you really understand what you are doing and why. You get an idea of colors, shadows, what the photo looks like and the professional work of a Photoshop artist. Overall, just beautiful.
The only drawback of this channel is that there are too few videos, about 50, most of which are not entirely suitable for either a beginner or an average user - something about Lightroom, somewhere about logos.
This is understandable; the authors are quite busy people who make money from their skills. They don't create a training program for newbies. They don't teach the program to others at all, they are busy with real work, and this was just a temporary activity, most likely for the sake of PR. Just one or two interesting effects is enough.

Unfortunately, the findings are depressing. What are the disadvantages of learning Photoshop using YouTube? The lack of quality materials leads to gaps in the student’s knowledge.
It is difficult to find a full-fledged course that would tell you about the artistic component and tools, and also help you become a real professional. Well, we must not forget that a lot of time and effort is often spent searching for the next lesson. Productivity drops, but knowledge levels remain at the same level longer.
Fortunately, there is a way out of this situation.
How to learn to work masterfully
When we want to cook pilaf or borscht, why not open a recipe or the same YouTube? We have the basic knowledge, all that remains is to see what ingredients to put in the pan and in what order. If you want to become a real chef, you need to look for a teacher. In Photoshop everything is exactly the same.
I can offer you two courses. The first one is suitable for beginners who still have little understanding of the basics of this program. It's called " Photoshop from scratch in video format ».

There is just a lot of information about the tools, as well as their use, basic terms and basic work with the program: channels, filters, objects, and so on. Everything a beginner needs to know.
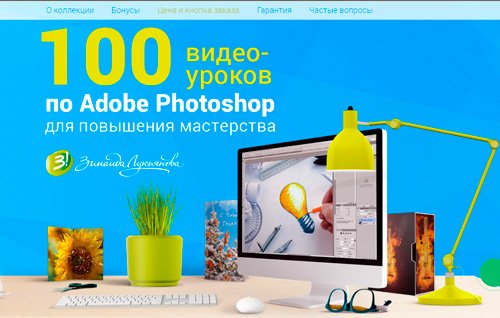
Well, for those who are ready to move to the next level " 100 Photoshop lessons to improve your skills ».
Here we talk about both the artistic component and the technical aspects. Well, that's all. Real professionals are working on the project, who strive to make money not only from their skills, but also from training users.
If you are afraid to buy a pig in a poke, you can see what the lessons look like on the website photoshop-master.ru . Those published no later than two weeks are free. You can get access to the rest for 100 rubles per month.
That's basically it. I can also recommend you an interesting article about or. The articles turned out to be very interesting.
You have something to do and think about. Choose the best ways to achieve your goal. Don't forget to subscribe to the newsletter and become a subscriber of my official VKontakte group . This will allow you to get useful recommendations on how to turn your passion into a profitable hobby easily and simply.
See you again and good luck in your endeavors.
I bring to your attention an excellent tutorial on Photoshop - "Official training course in Russian on Adobe Photoshop CS6".
This is the official training course for the program, part of the famous "Classroom in a Book" series.
The book will be useful for both beginners and experienced users who want to get the most out of Adobe Photoshop CS6.
The entire course is a series of simple, well-chosen step-by-step instructions, which are combined into 14 sections. Each section is a lesson on a specific topic, allowing you to practice the tools of Adobe Photoshop CS6 and learn how to work with hot keys.
Everything is covered here - from starting to work with photos and working with layers, to using mix brushes and creating three-dimensional images, as well as working with video material in a video editor.
What is in the text file:
Beginning of work
1. Getting to know your workspace
2. Basics of photo correction
3. Working with selected areas
4. Working with layers
5. Correction and enhancement of digital photos
6. Masks and channels
7. Text formatting
8. Vector drawing technique
9. Creating compositions
10. Video editing
11. Painting with a mix brush
12. Working with three-dimensional objects
13. Preparing files for the World Wide Web
14. Printing and color management
Subject index
Name: Adobe Photoshop CS6. Official training course
Author: Adobe Creative Team
Publisher: M.: Eksmo
Year: 2013
Format: PDF
Pages: 432
Genre: Tutorial
Russian language
Size: 144.47 Mb
But since this manual contains step-by-step lessons, equipped with theoretical references, for those who want to repeat these lessons in practice, additional material will be needed. Links to download additional material are provided below. Each section has a corresponding link to the material with the corresponding number.
So, for example, if you decide to study section 10 - "VIDEO EDITING" -
you need to download the file Lesson10.zip, unzip it, open the text document in section 10, and also launch Adobe Photoshop CS6 Extended (since only the extended version has the ability to work with video).
Additional materials are image files, PSD files, video files, etc. necessary to complete the lesson.
Now about the Adobe Photoshop CS6 Extended program itself.
Next, using the links according to the bit depth of your system, you can download a portable full version of Adobe Photoshop CS6 (Extended) with almost the latest updates.
I highly recommend downloading this guide and trying to study it. I assure you, you will definitely find interesting points for yourself in this manual. The capabilities of Adobe Photoshop CS6 are very great, learn as much as you can about them.
I had great pleasure working with lesson 12 "WORKING WITH THREE-DIMENSIONAL OBJECTS"
Using the materials for the lesson and standard 3-D shapes that are available in Photoshop, as well as the ability to create 3-D text and, following all the instructions from the manual step by step, I made this 3-D composition. During the lesson, I learned how to position objects on the stage, change the camera angle, move objects using the 3D Axis widget, apply materials to -3-d objects, and work with scene lighting. Here is my result for lesson 12
I present to you an excellent selection of books on Photoshop CS5 and CS6, which will appeal to all Photoshop lovers. For you 6 best books from the most popular authors. All books are in color and in good quality.
- The first book on Photoshop in our selection will be Official Adobe Photoshop CS6 Training Course. This course is designed for both beginners and experienced designers. Beginning Photoshop lovers will be able to master all the basic tools of the program step by step in practice, while more experienced colleagues will learn how to get the most out of Photoshop. Thanks to a simple description of the various methods of working in the program, You can become a good specialist in working with. The lessons in this educational material cover everything from the simple basics of working with photographs to creating 3D images. The book is full of various tips and step-by-step instructions, which will help you master the material as efficiently as possible.

- Next we have Adobe Photoshop CS6. Master class from Evgeniy Tuchkevich. This is a very beautifully designed and well-made book, based on an educational methodology for training professional designers that is distinguished by its effectiveness. For beginners learning Photoshop, this book will also be useful, as it begins with a simple examination of all the tools of the graphic editor and photo processing techniques. In practice you will gain high-quality knowledge on methods of creating collages, learn how to restore old photographs, as well as do retouching. In addition to working with raster images, techniques for working with vectors will also be discussed.

- It will be quite useful for beginners to learn the basics of design. A clear tutorial on Photoshop CS6 from Vladislav Dunaev. After reading the book, you will quickly master the basic techniques of working in the latest version of the best graphics editor, Adobe Photoshop CS6. The most necessary tools and functions will become available to you, so you can easily perform any operation - from creating and processing an image to outputting it to a printing device.

- For those who have Photoshop CS5 installed, it will be more convenient to gain knowledge from a book on Basics of working in Adobe Photoshop CS5 from Molochkov, as well as from the course CS5 in examples from Karchevsky. Both options are good, where basic information about the basics of working with Photoshop is presented in a simple and accessible way. The reader will have access to a large number of practical examples and exercises, which tell about everything that a designer or photographer needs to know when solving any problems. Both books contain a lot of color illustrations.

- Well, in conclusion, an excellent book, which is a classic in this genre - Scott Kelby. Adobe Photoshop CS6. Guide to Digital Photography. This book will tell you about using Photoshop in digital photography. In the book, the author pays great attention to digital image processing processes. It will be interesting not only to professional photographers, but also to many fans of digital photography. A detailed description and clear explanations will help you find out what parameters of the tools need to be set in this or that case during the work process. The book is filled with advice from the best experts in the Photoshop editor. A lot of valuable tips will allow you to save a lot of time when processing photos. In general, for those who are interested in digital photography, this book will be a real treasure.


