How to draw a beautiful doll step by step. How to draw a doll: a step-by-step process
Dolls are human-shaped toys made from different materials. There are souvenir dolls, amulet dolls, and dolls for games. When playing with dolls, girls and boys learn motherhood and fatherhood. In this article we will look at how to draw a doll with a pencil.
Tools and materials
In order to draw a doll, you will need a blank sheet of paper, an eraser and a simple pencil. If you want to color the drawing, you also need to prepare colored pencils/markers or paints, brushes and a jar of water in advance. If you have everything you need for drawing prepared, let's get started!
How to draw a doll step by step
We will draw a Lol doll.
- Let's start drawing with the hair. We depict curls going to the right and down and curling at the ends. From the beginning of the curls, from the bottom point we continue to draw the head. We depict the left side of the hair and the ear. We also draw lines for the neck.
- Let's move on to the body. We start with the left hand, then depict the body itself and the second hand. We finish drawing the hands and the outfit of the Lol doll - overalls.
- The next step is drawing the legs. We lead them from the bottom of the overalls drawn earlier. We also depict shoes. Now let's see how to draw a doll's face. The most important thing about a doll's face is its large glowing eyes. To do this, in the center, half of the face, draw two circles - future eyes. Inside them we depict the pupils, always with highlights - to show their brilliance. Add eyelashes to the eyelids. We reproduce the eyebrows from above - they should be straight, without kinks. We draw the nose and mouth completely minuscule, so that the main attention is paid to the bottomless eyes.
That's all, the Lol doll is ready! We discussed how to draw a Lol doll, now let's try to color it.
Coloring the Lol doll
In order to color the Lol doll, you will need markers/colored pencils/paints in brown, orange, yellow and black.
We paint the body of the Lol doll brown. The hair is yellow, the overalls and bows are orange. We paint the pupils black.

Chucky doll
Now let's see how to draw a Chucky doll.
1. We start with a small line, on both sides of which we draw nostrils. Then we depict the wings of the nose and the back. We draw a horizontal line above the back - a wrinkle, and draw eyes on both sides of it. Just below the nose we place the mouth. We draw Chucky's teeth so that he seems as scary as possible.

2. On both sides, from the top point of the wings of the nose, draw wavy lines to the left/right and down, depicting wrinkles and giving his face even more horror. Next, we draw the contours of the head and move on to how to draw the body of the Chucky doll. We draw the base of the neck, and from it we draw a figure resembling a rectangle to the sides and down. We will draw Chucky in pants with suspenders. In front, on the chest, he has a pocket. We also add two buttons


4. On the pocket located on the chest, we write Good Guy, which translates as “Good Guy.” The final touch is the hair. They reach Chucky's shoulders.

Here the drawing is ready. If you wish, you can color the guy. We dye our hair red and our overalls blue. His blouse, like the collars, is multi-colored: blue, green, pink, red, gray. The eyes are gray-blue, and the shoes (sneakers) are brown. The buttons on the jumpsuit are red.
Lalaloopsy doll
Let's see how to draw a Lalalupsi doll.
- First we draw a large circle. If you can't make it neat, you can simply outline something round: for example, the bottom of a glass. Divide the head in half, leaving a little more space at the bottom, with a slightly curved line - this will be the bangs. On the right side of the bangs we draw a bow on the headband, and from it we draw curls to the right side. On the doll’s face we draw two buttons: a circle, a border inside, four small circles on each side and connect them with a plus sign. We draw eyelashes to the eyes. At the bottom of the face we depict two ovals - cheeks, as well as a kind smile.

2. Now let’s look at how to draw a doll’s body. From the head we draw down a small figure, similar to a rectangle, only with smooth sides. Down from the “rectangle” we draw a skirt that resembles an umbrella. Draw a bow in place of the collar. On both sides of the body we depict thin arms, and below, under the “umbrella”, the same thin legs. On the legs we draw boots with buttons, and above the boots we draw leggings. If desired, for greater effect, you can draw peas on the dress.
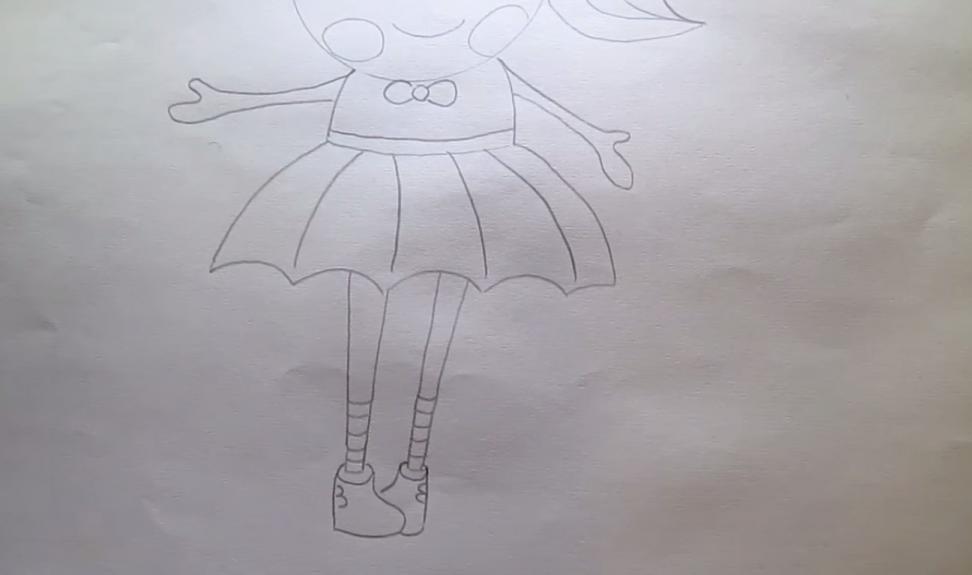
That's all, the Lalaloopsy doll is ready! Now you can color it.
Drawing with children
The dolls shown earlier are unlikely to be able to be portrayed by small children. Therefore, now we will discuss and see how to draw a doll if the artist is still just a baby.
- First of all, draw a large circle. From it down we draw a figure resembling a triangle in shape. This will be the doll's head and dress.

2. The next stage is hair. Draw a horizontal line at the top of the head, which will serve as the outline of the bangs. In this part we draw sticks - hairs - from top to bottom. On both sides of the head we make ponytails: first we draw two small ovals, which mean hair bands, and then the tails themselves. We depict eyes and a smile on the face. On the dress we draw on the collar and buttons.

3. The final stage is the limbs of the pupa. On both sides of the dress we depict handles. Below are feet in boots.

That's all, the doll is ready! For the first time, it is better to draw with your child, showing him the reproduction of each detail separately. After your child draws a doll, you can give him colored pencils/paints/markers to color his creation.
Dolls are one of girls' favorite toys. When very young, girls begin to play with dolls, build houses for them, sew clothes, and play mother-daughter with them. Usually, girls' first dolls are various naked ones and baby dolls. Little older girls adore Barbie, Winx and others dolls. These dolls resemble adult girls, they have slender figures, beautiful hair, and chic clothes. Girls want to be like them, and for many, such dolls are the ideal of female beauty. Today we will teach you how to draw a doll. This is not a baby doll, nor a Barbie-type doll. This is a simple doll for middle-aged girls.
Stage 1. Draw the main lines of the doll’s body. The circle is the future head. In the circle, draw the lines of the eyes and nose with straight lines. Below is a small unequal quadrangle - the chest; two straight lines extend from it, connected by a curve - the skirt of the dress. From the points of the supposed shoulders, we draw two lines connected to each other at a slight angle - the arms. From the skirt there are two straight ones, one is slightly bent - these are the legs. Below we will mark the feet.
Stage 2. We start with the design of the head. We draw a circle with a smooth, gentle line, forming the doll’s face. Slightly pointed chin at the bottom. The neck comes from it. We frame the head with wavy lines of curls falling onto the shoulders.

Stage 3. Now we show the eyes on the face. For dolls they are usually large, round or elongated. We have already written about how to draw eyes in our lesson. Here we use circles to denote the eyes themselves; they have large pupils. The upper eyelids have thick eyelashes. Above the peephole we will draw eyebrows. Along the middle vertical there is a neat nose. Below are his heart-shaped lips.

Stage 4. Now let's proceed to the doll's dress. On the top of the quadrilateral we make a cutout from the neck line. At the junctions with the handles we beautifully draw lantern sleeves with frills. And a bow tied at the waist.

Stage 5. It’s the turn of the pens. Using auxiliary lines, under the sleeves we draw smoothly the outlines of the handles with curved lines, forming brushes with fingers at the bottom.

Stage 6. Outline the hem of the dress or skirt. It is flared towards the bottom.

Stage 7. We draw the legs of the doll by tracing the lower straight lines so as to give the correct contours. One leg stands straight, the other is slightly bent at the knee. The feet are shod in shoes with buckles.

Stage 8. Now we give the doll’s hairstyle pomp and volume, using wavy lines to indicate her loose hair. The head is decorated with a bow or headband.

Stage 9. Now is the most exciting stage in today's drawing. This is doll coloring. Here girls will be able to show all their imagination and skills. Hair can be black, brown, yellow, with various shades. The dress can also be colored however you like. Just try to ensure that the clothes, shoes and hair bow are in harmony with each other and your doll has her own style.

Hi all. In this drawing tutorial we will show you, how to draw a doll. The dolls are modeled after the human body, which means this lesson will apply the principles of drawing a human being.
Step 1
So first of all draw a circle as a guide for the head. Then outline the spine where the rib cage and pelvis are located. Stretch your arms and legs and move to step number two.

Step 2
On the head, draw two lines that intersect in the center of the face. Next draw the short neck and torso. Draw the shoulders as circles. Next, outline the arms and slightly curved legs.

Step 3
Now let's add some basic details to our doll's body. On the horizontal line from the previous step draw the eyes. I drew a mouth a little lower. At the end of the step draw the hair and tiara.

Step 4
Using clear and dark lines draw the outlines of the eyes and pupils. Next, draw out the eyelashes, eyebrows and small nose. Make the contours of the hair and face dark and remove all unnecessary lines from the head.

Step 5
Draw the clothing details on the upper part of our doll's body. Draw out the bow and add a few folds. Carefully extend the arms and fingers as in our example.

Step 6
Now let's work on the lower part of our doll's body. Draw a wide skirt with a lot of folds on it. Next, draw the plump legs and shoes.
It was a lesson about how to draw a doll step by step. By the way, using this lesson, you will be able to draw a child, because the principles of drawing dolls and children will be approximately the same. I would also like to talk about the general features of the doll’s drawing. Firstly, the doll's body is made of synthetic materials; the doll has no joints or real bones. That is, we don't need to try to make our doll too human-like. He should have a frozen expression, and his arms and legs should be in a static, not too natural pose.
We are learning to draw a doll step by step, drawing a doll is not difficult, and even if you have never drawn, then after looking at the instructions with descriptions and pictures, you will definitely learn how to draw a doll. There are two ways to draw a doll: easy and more difficult.
How to draw a simple doll step by step
1. Draw a circle at the top of the sheet - this will be the doll’s head.
2. Next we draw the body, it should be smaller in width than the head. The parts are in contact.
3. Erase the upper part of the oval so that the neck does not cover the head.
4. The lower limbs are depicted without fingers in the form of elongated ovals.
5. Draw your hands under your head. There are no clearly defined shoulders in the toys. First we draw the left one.
6. Now we draw the right one. Hands should be on the same line. Then slightly lengthen your left arm.
7. Do the same with the right hand to make the upper limbs more graceful.
8. To begin, mark the beginning and end of the skirt with two lines to make it easier to connect them.
9. Connect the skirt parts with slightly curved lines so that the garment resembles an a-line.
10. We make the figure of the toy thinner and more refined, slightly adjusting the oval.
11. Draw the collar in the form of a semicircle. It doesn't have to be big. With its help we separate clothes from the body.
12. Shoes are depicted in the form of slippers, which are slightly larger than the feet themselves.
13. In the circle that represents the head, we form the face and immediately separate the hair.
14. Erase the extra lines. The dolls' faces are made to resemble human faces, so they are not perfectly round.
15. Draw bangs by adding a few lines on the hair.
16. Draw the tails of approximately the same length. In the picture they are at the back, but you can depict them on the left and right.

17. On clothes, in addition to a flower, you can draw anything: ice cream, a smiley face, a heart. Or choose another flower.
18. To ensure that the eyes are at the same level, you can very lightly draw a horizontal line and depict them on it.
19. Don't forget to add details: long eyelashes and pupils.
20. The last detail is a smile and dots in the shape of a nose.
21. And the last thing left is to color the toy as you want.

How to draw a beautiful doll step by step
1. We draw the doll’s silhouette using simple lines and geometric shapes; this is done to make it easier to draw everything else later.
2. Draw the hair on the doll’s head.
3. Draw the details of the doll’s face. First, draw the big eyes, then the eyebrows, nose and mouth.

4. Draw the top part of the doll’s dress.
5. Draw both hands of the doll.
6. Draw the lower part of the dress.

7. Now we draw the legs and shoes on them.
8. Let's add pomp to the doll's hairstyle.
9. Color the doll’s drawing with colored pencils.


