Easter basket drawing for children. How to Draw Easter Eggs
Very soon, everyone will be preparing for Easter. Draw Easter basket, not difficult.
There is one, you can draw it
Let's start the drawing with a basket


All that remains is to paint the basket and Easter eggs with bright colors

I will offer a detailed lesson, how to draw an Easter basket step by step not only simple pencil, but then decorate it beautifully with watercolors. The lesson is simple, suitable for drawing with children. So, prepare everything for drawing and carefully repeat the video tutorial:
When painting with watercolors, remember that the paint must be given time to dry so that the drawing does not run. Good luck!

In order to draw a basket with Easter eggs in pencil step by step, you must first decide on the shape of the basket and the number of eggs. Your basket can be the usual mushroom shape, or it can be rectangular, large or small. As soon as we realized what kind of basket we need, we immediately draw and don’t forget about the pen. Here is a wonderful picture with which you can easily and simply draw a basket with Easter eggs.


Very soon the Holy holiday is coming - Easter. This day is the kindest day of the year. And together with the children we can draw an Easter basket with eggs.
After all, on this day all people should go to church with a basket to dedicate Easter cakes, Easter cakes and eggs.
First, we draw a semicircular basket in which the eggs will be placed.

All that remains is to decorate this beauty.
The main skill in drawing an Easter basket is to draw the basket from the correct perspective and angle, which will give it a voluminous, realistic look, and what you fill it with is at your discretion, but in our case, beautiful Easter eggs.


Several successful options for drawing an Easter basket with eggs and chocolate bunnies.


Have a nice Holy Easter and delicious Easter cake!
Quite simple.
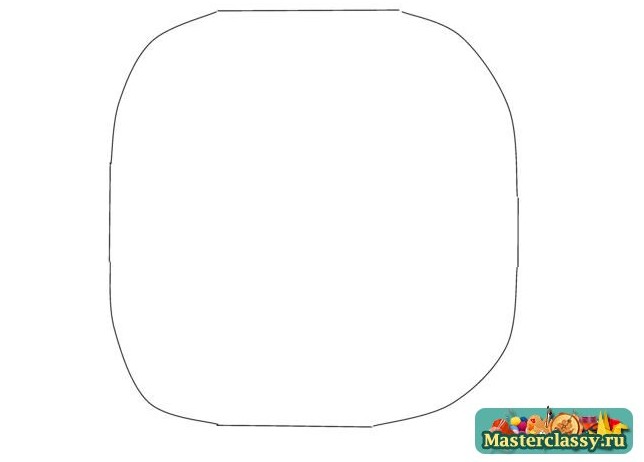
To do this, outline the contours of the future basket, without drawing the handles yet

Now we draw the eggs inside the basket, after that we finish drawing the handle near the basket

The finished sketch can be colored with colored pencils or paints.
We draw Easter eggs step by step with a pencil in a basket very easily step by step, first we draw a circle, this will be a basket, and then we draw it step by step, as in the pictures. The pictures are highlighted in different colors to make it easier to navigate where what is.


A basket of colored eggs - that’s what colored eggs were called in the old days, you can draw using these step-by-step drawings. First the basket, then the eggs themselves with fancy patterns. The basket is wicker, as are its handles.
Draw a basket with Easter eggs You can use a pencil and then color everything.
Baskets are different, and therefore the designs of such baskets with Easter eggs may differ.
Here are some examples of how you can draw a basket of Easter eggs using a pencil.

Good day everyone! Preparations for Easter are in full swing, the sun is shining brightly outside, the birds are singing, in general the mood is lifted and you want to sing and, of course, create. And they will help us in this case. Today let's make another souvenir in which you can easily put Easter eggs and even put a hen and chicks in it. We are talking about baskets.
I think that you have already learned how to decorate, found the most suitable way for yourself and painted them somehow in a special way this 2020. After all, doing the same thing every year gets boring, you want variety, don’t you?
As usual, I went and strolled through the Internet and what I found there, and in general from various magazines and newspapers, I will show you today, I think you are all for it! By the way, you can also write what else you would like to see in my next articles.
The first thing that comes to my mind is that you can make such a beauty out of paper or cardboard. Or you can cheat a little more, using a lid or something similar as a basis. The box will turn out colorful and original, and most importantly, you can make it in a couple of minutes.
We will need:
- colored paper (can be replaced with office paper) - 2 pcs.
- openwork napkin - 1 pc.
- stationery knife
- satin or other decorative ribbon - 1 pc.
- Hochland processed cheese lid
Stages of work:
1. Take sheets of paper and you need to make them square and then follow these steps which you see in these images.

2. In my opinion, it looks very charming and gentle. Can you imagine, if you put more paint in there, it will definitely be cool!

These cockerels have sunk into my soul, this year we’ll do just such a cool little thing with our little one, do you like it?

Even an ordinary napkin or fabric can be folded in such an unexpected way, such as bunnies.


You can take any idea as a basis and decorate it with corrugated paper.

Either go the original route, for example, find a wooden ring, or make it out of thick cardboard, tie it with thread and decorate it with something, even feathers can come in handy. And place the testicles. This will make a kind of modest stand, and it also looks very good!

And if you are friends with fabric and are head over heels in love with it, then perhaps you will be hooked by this idea from foamiran.

We will need:
- foamiran
- glue gun
- scissors

Stages of work:
1. Make flowers from this fabric, you can take any shape, or like this:


3. Make the base itself green. These will be the leaves.

4. Then follow these steps. You need to buy or make a bow and a handle yourself.


The most favorite activity for kids is playing with plasticine or you can use play dough. First roll it into a bun, and then use flagella to mold it as shown in these instructions.


There are many options, you can come up with something unusual yourself.

You have no idea, but you can even use newspaper strips or paper from old unwanted magazines.

Remember, in childhood we made bookmarks for books this way, this is exactly the same technique.

This is what it might look like if you show up at someone’s house with an Easter egg.

And one more paperwork.


Or consider this option.

They are even made from twine, hiding it in multi-colored fabric.

It turns out that such a seemingly ordinary egg box can also be used to make another souvenir.

Or this one with grass, you need to cut the egg mold.


Cut out imitation grass from any material or paper. You can also decorate a living one.

Place flowers.

And this is what happens, cool!

This is such an interesting idea made from threads and sticks.

You can take regular threads, preferably thicker ones, and wrap them around any glass or container.

Or you can make a laying hen. The base is a candy box.


The fence is made of ordinary paper strips.

You will be very surprised if you look at this miracle.
This beaded craft looks fantastically elegant and beautiful.
![]()
Making a craft from newspaper tubes
It’s not difficult to learn how to do this, so if you like this idea, then go ahead and sing.
Well, for those who are in the know, look what the great Internet offers us, to make such a nice chicken.

Or like this. How cool it is, and the main thing is that you can do everything yourself.


How to crochet a basket (description and diagram attached)
Let's move on and make some wonderful souvenirs for Easter from knitting threads, take note for needlewomen. For those who know how and love to knit, this post will also be interesting. From last years I still have such different ideas on my shelves.
I’ll start with perhaps the egg, namely the stand or case, I don’t even know how to put it more correctly. But one thing I can say is that you can crochet such a beauty in literally an hour. And please others too. You only need a little bit of thread.

So, try to create! An approximate diagram is like this.

Or you can make it even more delicate; to do this, take this idea and turn it into reality. If you need a diagram and description of this model, write to me at the bottom of the article, I will send it to you by email.

I can offer another option, it looks a little like a vase.

Honestly, someone might even say that this is such an original box. Although they put mushrooms here, you can bring Easter gifts here.


This is such a wonderful, beautiful cockerel, just wonderful, I once made it out of a magazine description a long time ago.


I also really like this bird family of chickens. You can hide Easter eggs with them.

Or tie potholders on which to place the Easter cakes.


If you are new to knitting, you can use this craft - an egg stand.

Or knit a chick that will decorate your holiday table. 
Cool new items this year are, of course, basket bunnies and mother hen.

I also have a detailed description and diagram of this illustration in my piggy bank, if anyone needs it, please contact me.

Either take this blank and create something weird, it’s also a cool version of a bunny, or maybe it’s a rabbit. According to the description, this is a mini crochet basket for Easter eggs.


I also liked this option. A very simple diagram.

And in conclusion, this is a charming miracle, which is also unrealistically beautiful.

It feels like a flower opening.


I was really looking for a description for this model, but unfortunately I couldn’t find it. If anyone has one, please share).

Interesting souvenir idea Basket decorated with hares
Another version of the basket with bunnies looks cool and very unusual, and you can take any material, be it cotton fabric, felt or even any unnecessary scraps.
In order to create such an exclusive gift, you first need to outline the correct pattern; it may look something like this.

And then you apply it to the material and trace these funny figures by hand.


After stitching or hand stitching, remove any unnecessary items.


Looks like a whole army of rabbits))).


All that remains is to decorate them, add a nose, mouth and eyes, and embroider these parts of the body with floss threads.

Then give the ears uniqueness and some playfulness, tie them with thread carefully and slowly.


Then stuff the toys with cotton wool or padding polyester.


And now all that is missing is the base, make two circles, insert cardboard.


And then connect the bunnies and the stand together, sew on a gathered skirt. It turns out very cute and attractive.


Now let's make a mold for paints in the shape of a bunny's face.
We will need:
- white fleece or velor
- any fabric: linen or satin
- buttons
- calico white
- padding polyester
Stages of work:
1. Cut out parts of the basket from velor.

2. The template for these side parts will be like this.


4. Make blanks like these from calico.


6. Then make a headband from checkered fabric.

7. Start directly assembling all the parts, sew with a blind seam.


Don’t forget to fill it with padding polyester and add something of your own to this product. It turned out to be a cool Easter bunny.
Templates and diagrams of paper boxes for eggs
Let's start with the most primitive and common form. Take this sample, print it out and color it however you like. Bend where the dotted lines are and then glue them together.

The next option will be more interesting, with a little plot.

Or take this one, you won’t have to paint it at all.


You can even make it in the form of an applique.


Master class on Easter pasta baskets
If you are a fan of all sorts of decorative things, and especially like to create weird things using household materials, then I suggest you watch this charming story. Today you can make such a charming large egg in the form of a handbag where you will place your gifts.
Don't think it's difficult, it's easier than you expect, you will need a balloon, glue and of course noodles and your crazy hands.
Beautiful basket made of cardboard in the shape of an egg for children
Now it’s time to surprise and make very unusual things, for example from threads.

Stages of work:
1. Take a large bowl or even a basin so as not to get dirty; you can cover it with cling film or line it with newspapers.

Inflate the balloon with your mouth to the desired size. Blow until it resembles an egg, and then tie the ends with thread.
Then apply PVA glue directly over the ball, and fill the threads with glue too.
2. Now rewind the ball with threads randomly. And then boom, pop, pierce it with a needle.

3. Wait until the threads are completely dry, and then take scissors and make a hole.

Each one produces absolutely their own masterpieces.

This time we cannot do without the kirigimi or protruding technique.

You will first have to print the template on your printer, and then use a cutter to cut and glue two bunny blanks together.

Same with the flower.

Do the same with the chickens.

The main thing is to take your time and be careful and everything will work out.

Or will you stick with these options?


You'll have to work a little here.

You can do something interesting and unusual yourself.

Children begin to get acquainted with traditions and main holidays in kindergarten and elementary school. As a rule, this acquaintance occurs within the framework of creative drawing and labor lessons. It has long been known that with the help of various themed crafts and drawings dedicated to a particular holiday, children remember information about it much better and at the same time develop fine motor skills and creative abilities. In today's article we will touch on the topic of children's drawings for Easter. Agree, it is quite difficult to explain the whole essence and traditions of this bright holiday to young children. And with the help of a beautiful pencil drawing with images of eggs, the Easter bunny or a holiday cake, this is much easier to do. Learn how to draw a simple and original drawing for Easter with your own hands step by step from the following master classes with photos.
Beautiful children's drawing of Kulich for Easter with a pencil in kindergarten step by step
Kulich for Easter is a beautiful and simple pencil drawing that is perfect even for the younger group of kindergarten. You can draw it with a simple pencil, and then, if desired, color it with watercolors or felt-tip pens. This beautiful children’s drawing “Kulich for Easter” in pencil for kindergarten can be used as an independent gift or as decoration for a holiday card.
Necessary materials for children's drawing of Easter cake with a pencil step by step
- album sheet
- simple pencil
- eraser
- paints
Instructions on how to draw a beautiful picture of an Easter cake for kindergarten
A simple drawing for Easter “Easter basket with eggs” for children step by step
Another option for a very simple Easter themed design for children is an Easter basket with eggs. Since the egg is one of the main symbols of this holiday, its image is always relevant on Easter cards and drawings. And krashankas in a wicker basket look very festive! Read on to learn how to draw a simple drawing for children for Easter in the form of an Easter basket with eggs.
Necessary materials for drawing a basket with eggs for children for Easter
- simple pencil
- paper
- eraser
- black marker
- colour pencils
Instructions for a simple drawing of an Easter basket with eggs for children for Easter
How to draw a beautiful picture for Easter for school with a pencil step by step
A fairly popular symbol is the Easter chicken, hatched from a krashanka or pysanka. At first glance, drawing such a picture with a pencil, for example, for school on Easter, is difficult. But thanks to the following step-by-step instructions on how to draw a beautiful Easter drawing for school with a pencil, it’s not difficult at all.
Necessary materials for a beautiful Easter drawing for school
- simple pencil
- eraser
- black marker
- felt-tip pens, paints optional
Instructions on how to draw a beautiful drawing for school for Easter step by step
DIY children's drawing “Rabbit” on the theme of Easter, step-by-step master class with photos
Another well-known symbol of the Easter holiday that can decorate any children’s drawing with their own hands is the rabbit. The following step-by-step master class with photos describes in detail how you can easily and simply learn to draw a rabbit. This DIY children's drawing “Rabbit” on the Easter theme is aimed at elementary school students.
Necessary materials for a child's DIY drawing on the theme of Easter
- paper
- watercolor paints and brush
- simple pencil
- eraser
- black felt-tip pen
Instructions on how to draw a children's drawing with your own hands “Rabbit” for Easter