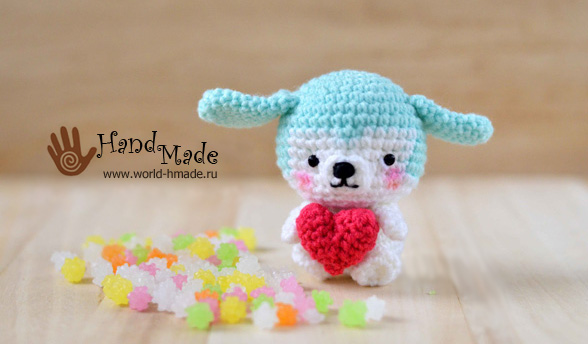
Crochet dog. Small dog - amigurumi crochet
"R-r-r-av!" - amigurumi puppy wants to wish you a happy Valentine's. This baby was created by the talented craftswoman Lee Mei Li. Try it too crochet this wonderful dog, and it will definitely fill your every day with romance.
The master class on knitting an amigurumi dog suitable for beginners because it requires a minimum amount of knowledge when crochet, namely, you should have an idea of how to knit chain stitches, single crochet, increase and decrease.
Most often small toys start to knit from the so-called amigurumi rings, which in the diagrams is considered the first row. Of course, start knitting from the ring is not necessary at all. Instead, you can cast on 2 air loops, and then knit the required number of single crochets into the second loop from the hook. However, the undoubted advantage amigurumi rings is that there is no hole in the middle.
To learn to knit amigurumi ring, watch the following master class on our website:
Let's get started knitting dogs.
Difficulty level: for beginners.
Working hours: approximately 4 hours.
Toy size: 7-8 cm (depending on the chosen yarn).
Knitting materials:
Knitting a dog's head.
1st row:
2nd row:
3rd row:
4th row:
5 row:*3 tbsp. b/n, increase* - repeat 6 times (30 loops).
6th row:*4 tbsp. b/n, increase* - repeat 6 times (36 loops).
7-8 rows:
9th row: 12 tbsp. b/n, change the color of the yarn to white, knit 5 tbsp. b/n, then knit again with blue yarn 2 tbsp. b/n, knit with white yarn 5 tbsp. b/n, blue - 12 tbsp. b/n (36 loops).
10-11 rows: We knit with blue yarn 12 tbsp. b/n, white - 12 tbsp. b/n, blue - 12 tbsp. b/n (36 loops).
Row 12: Art. b/n in each loop (36 loops).
Row 13:*decrease, 4 tbsp. b/n* - 6 times (30 loops).
Row 14:*decrease, 3 tbsp. b/n* - 6 times (24 loops).
Row 15:*decrease, 2 tbsp. b/n* - 6 times (18 loops).
We fill the head with filler.
Row 16:*decrease, 1 tbsp. b/n* - 6 times (12 loops).
Row 17: decrease until the hole is completely closed.
Let's finish knitting. Leave a long tail of yarn so you can sew the head to the body later dogs.
Knitting a dog's body.
We start knitting with white yarn.
1st row: 6 tbsp. b/n in an amigurumi ring (6 loops).
2nd row:*increase in each loop* - repeat 6 times (12 loops).
3rd row:*1 tbsp. b/n, increase* - repeat 6 times (18 loops).
4th row:*2 tbsp. b/n, increase* - repeat 6 times (24 loops).
Rows 6-9: blue yarn - 4 tbsp. b/n, white - 16 tbsp. b/n, blue - 4 tbsp. b/n (24 loops).
10th row: In the first 4 loops we knit: decrease, 2 tbsp. b/n (blue yarn), then *decrease, 2 tbsp. b/n* - repeat 4 times (white yarn), decrease, 2 tbsp. b/n in the last 4 loops of the row (blue yarn) - (18 loops).
At this stage we finish knitting the dog’s body.
Knitting ears for a dog.
We knit 2 parts with blue yarn.
1st row: 6 tbsp. b/n in an amigurumi ring (6 loops).
2nd row:*increase in each loop* - repeat 6 times (12 loops).
Rows 3-10: Art. b/n in each loop of the previous row (12 loops).
We finish knitting, leaving a long “tail” so that we can then sew the ears to the head.
Muzzle.
We knit with white yarn.
1st row: 5 tbsp. b/n in an amigurumi ring (5 loops).
2nd row:*increase in each loop* - repeat 5 times (10 loops).
Knitting handles (2 parts).
We knit with white yarn.
1st row: 6 tbsp. b/n in an amigurumi ring (6 loops).
2-5 rows: Art. b/n in each loop (6 loops).
We finish knitting and, according to tradition, leave the “tail” so that we can then sew the handles to the dog’s body.
Knitting legs (2 parts).
We knit dog legs with white yarn.
1st row: 6 tbsp. b/n in an amigurumi ring (6 loops).
2nd row:*increase in each loop* - repeat 6 times (12 loops).
3rd row: Art. b/n in each loop (12 loops).
4th row: 6 decreases (6 loops).
We finish knitting and leave the tail.
Tail.
We knit with white yarn.
1st row: 3 tbsp. b/n in an amigurumi ring (3 loops).
2nd row: 3 increases (6 loops).
3rd row:*increase, 1 tbsp. b/n* - repeat 3 times (9 loops).
4th row: 9 tbsp. b/n (9 loops).
5 row:*decrease, 1 tbsp. b/* - repeat 3 times (6 loops).
6th row: 6 tbsp. b/n.
We finish knitting.
Knitting hearts.
We will knit the heart with red yarn. We crochet two identical parts, then connect them together.
First half of the heart:1st row:
2-3 rows: 8 tbsp. b/n.
Second half of the heart:1st row: 8 tbsp. b/n in an amigurumi ring (8 loops).
2-3 rows: 8 tbsp. b/n.
4th row: We begin to connect the two parts of the heart together. We knit 6 tbsp. b/n, then connect to the first half with a connecting post. This makes 16 loops. Next we knit in a circle.
5 row:*decrease, 2 tbsp. b/n* - repeat 4 times (12 loops).
6th row:*decrease, 1 tbsp. b/n* - repeat 4 times (8 loops).
7th row: decrease until the hole is closed.
We finish knitting.
Assembly of the toy:
1. Sew the muzzle to the head. Pull the head a little with stitches in the eye area (see photo).

2. Sew on the eyes. Embroider the nose using a series of horizontal stitches.
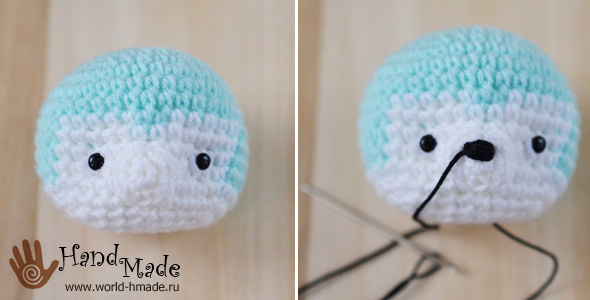
3. Embroider a smile in the shape of the letter W.

4. Sew the head, arms, legs and tail to the body.
5. Sew on the heart.
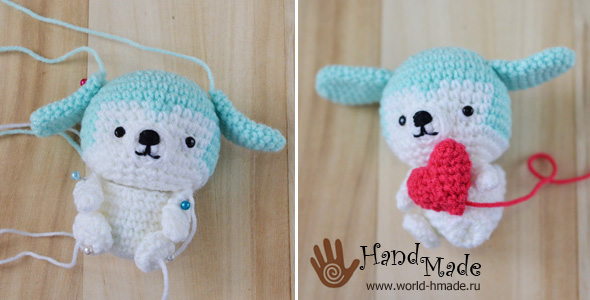
Amigurumi dog is ready!

Such a charming and cute dog keychain can be crocheted by yourself in just a couple of hours, even if this is your first time holding a hook in your hands. And the accessible step-by-step photo master class, with description and diagrams. From time immemorial, a dog has symbolized loyalty and devotion, so a hand-knitted dog keychain will be a wonderful and very symbolic gift for a loved one!
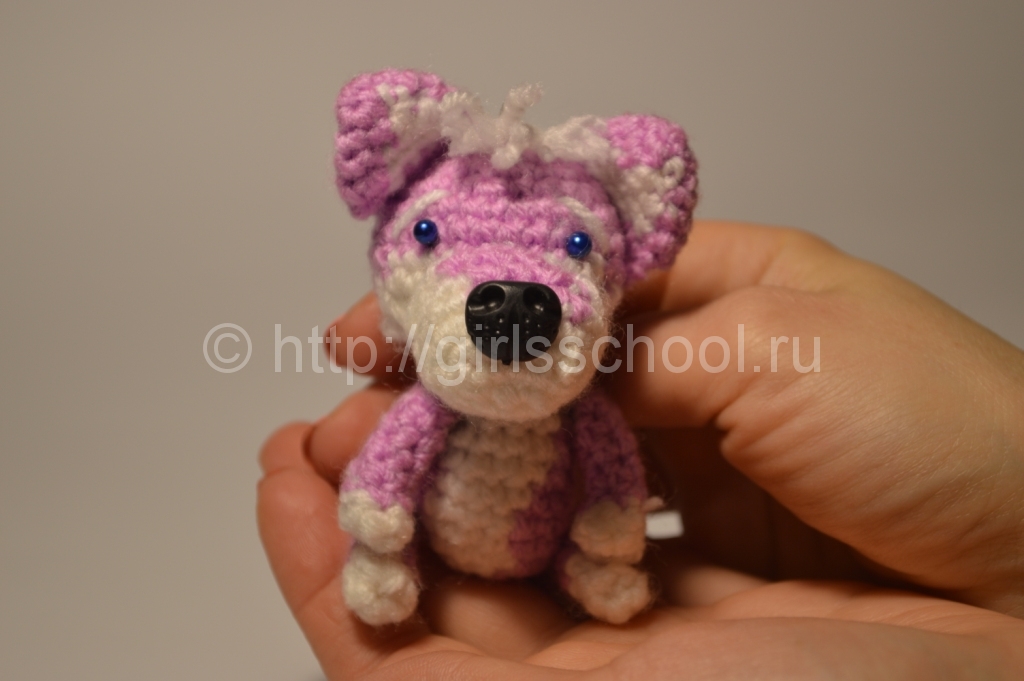

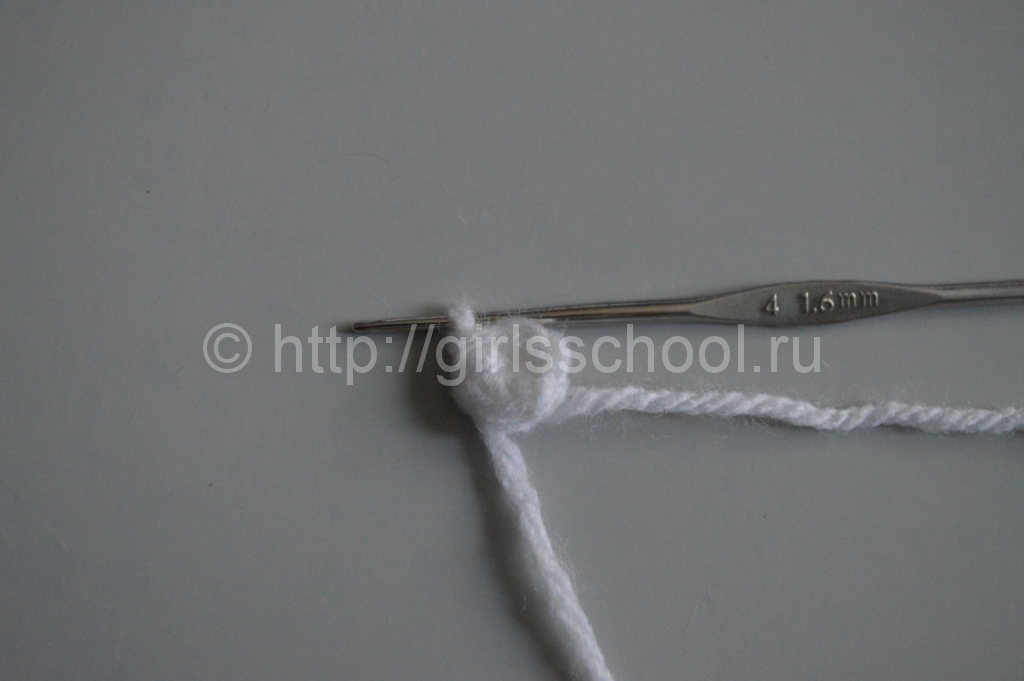
Crochet doggie keychain step by step
Legend:
- pr - increase (from each loop we knit 2 tbsp);
- dec - decrease (we knit 2 loops together with a connecting stitch);
- s/s - connecting column;
- s.b/n - single crochet.
First, we will knit all the parts separately, and then we will sew them together with a crochet hook or a gypsy needle.
Head
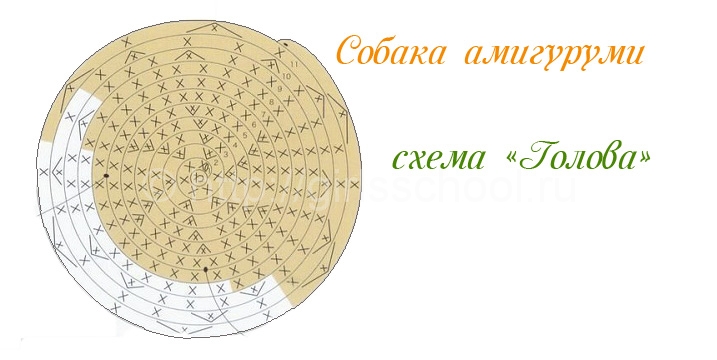
from 1st to 7th row inclusive we knit with purple thread)
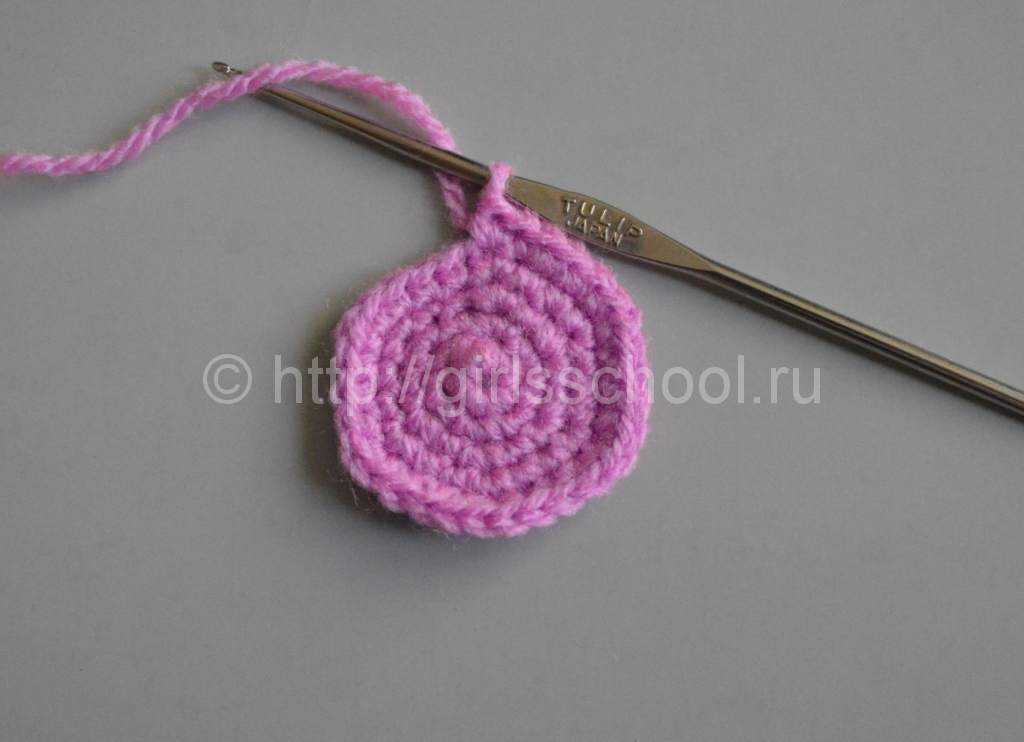
1 row amigurumi ring

2nd row in each loop we make an increase. At the output we have 12 loops.

3rd row in every second loop we make an increase. At the output we have 18 loops.

4 row in every third loop we make an increase. At the output we have 24 loops.

5 row in every fourth loop we make an increase. At the output we have 30 loops.
We knit rows 6-7 without increasing 30 st.b/n.

8 row 10 single stitches (lilac thread) 10 double stitches (white) 10 double stitches (lilac thread)

9th row: (lilac: 3 tbsp.b/n + dec + 3 tbsp.b/n) + (white: decrease + 3 tbsp.b/n + dec + dec + 3 tbsp.b/n + decrease) + ( lilac: 3 tbsp + dec + 3 tbsp);

Row 10: (lilac: dec + 2 sc.b/n + dec + 1 sc.b/n) +
(white: 1 tbsp.b/n + dec + 4 tbsp.b/n + dec + 1 tbsp.b/n) + (lilac: 1 tbsp.b/n + dec + 2 tbsp.b/n + dec)
11th row: (lilac: 1 tbsp + dec) - 2 times +
(white: 1 tbsp + dec + 1 tbsp + dec + 1 tbsp) +
(lilac thread: dec + 1 tbsp + dec)
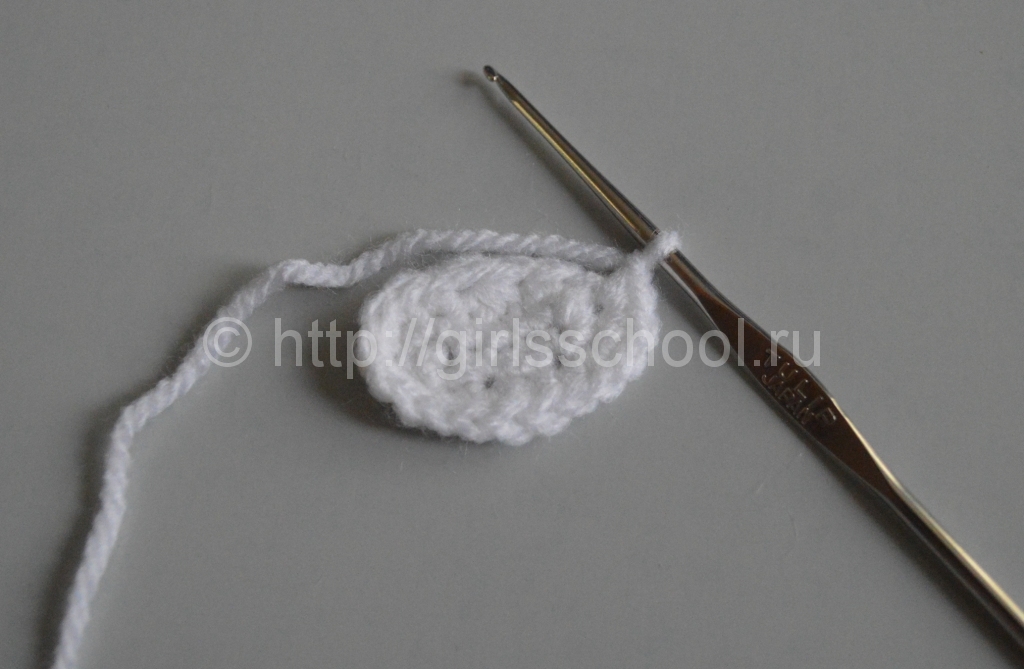
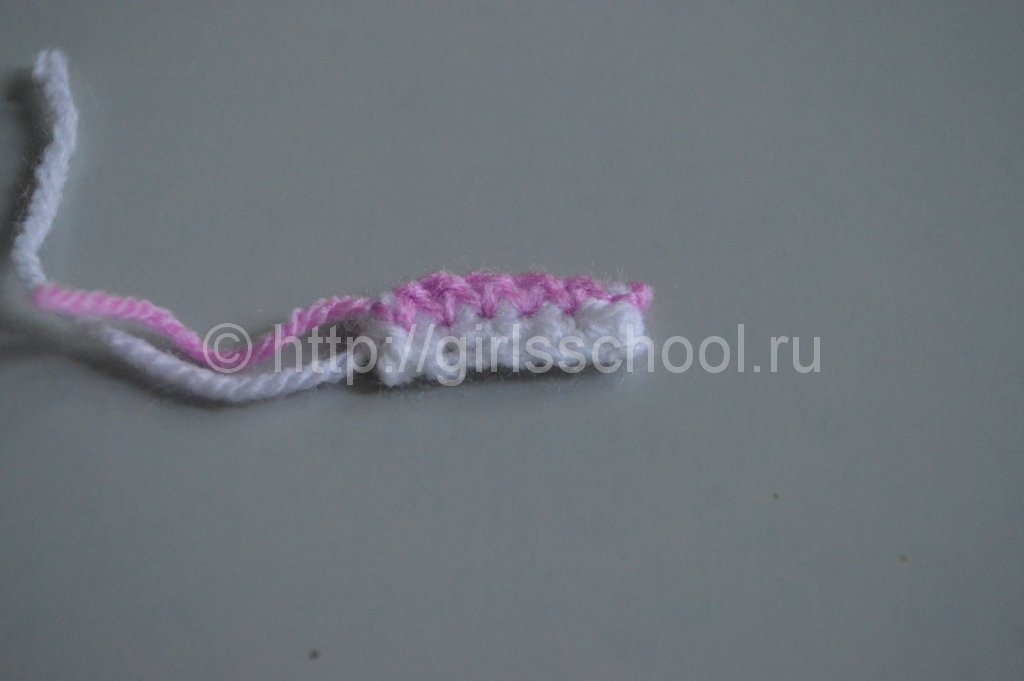
Muzzle

We cast on a chain of 6 loops and knit with white thread.

1st row: start knitting in the second loop from the hook. We knit 4 tbsp + from one loop we knit 4 tbsp + 3 tbsp + from one loop we knit 3 tbsp. At the output we have 14 loops.

2nd row: 1 tbsp + 3 loops knit 1 tbsp + 1 tbsp + inc + inc + 2 tbsp + inc + 2 tbsp + inc + inc. At the exit we have 17 loops.
3rd row: (white: + 8 dc) + (lilac: 4 dc) + (white: 5 dc). The output is 17 loops.

Row 4: (white: 7 sc) + (lilac: dec + 2 sc + dec) + (white: 4 sc). The output is 15 loops.
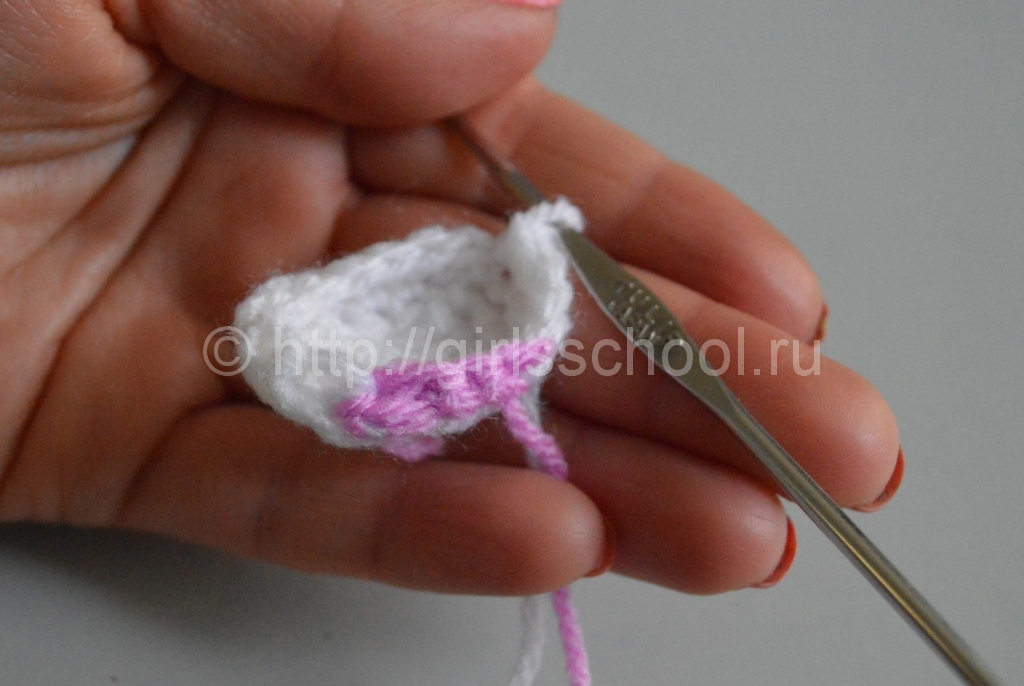
Row 5: (white: 7 sc) + (lilac: 4 sc) + (lilac: 4 sc). The output is 15 loops.
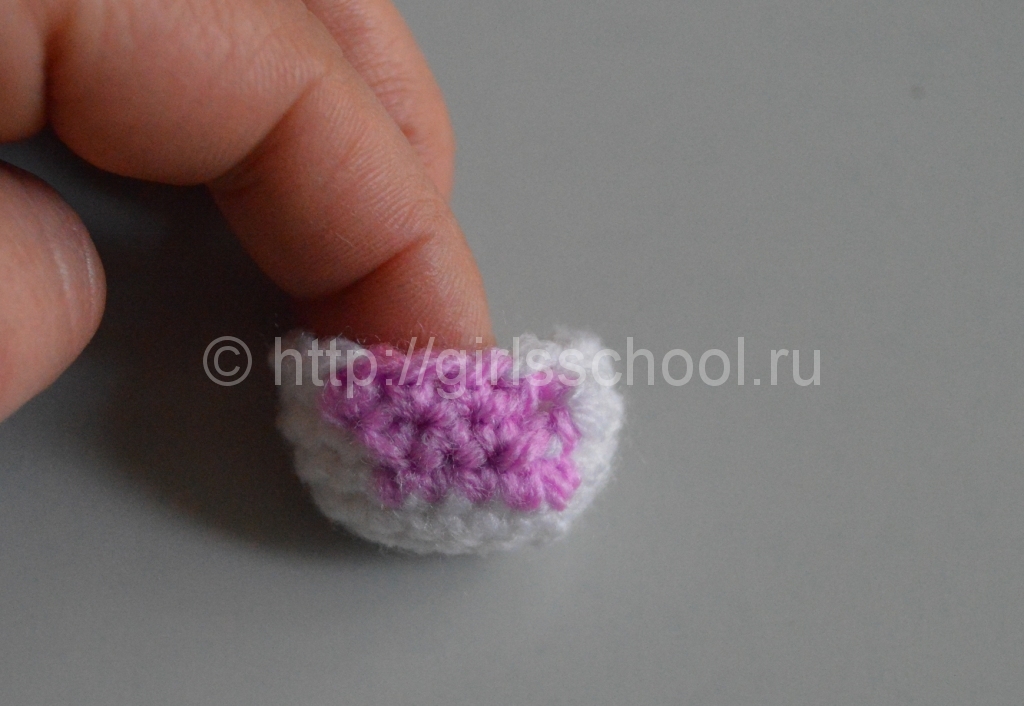
Ears
1st row: amigurumi ring made of 5 tbsp purple thread

2nd row: (lilac: 1 tbsp + inc) + (white: 1 dc) + (lilac: inc + 1 dc)

3rd row: (lilac: inc + 2 dc) + (white: inc) + (lilac: 2 dc + inc)

4th row: (lilac: 3 tbsp) + inc + (white: 2 dc) + inc + (lilac: 3 dc)

5th row: (lilac: 4 tbsp) + (white: 4 tbsp) + (lilac: 4 tbsp) (576)

We will need two of these parts.
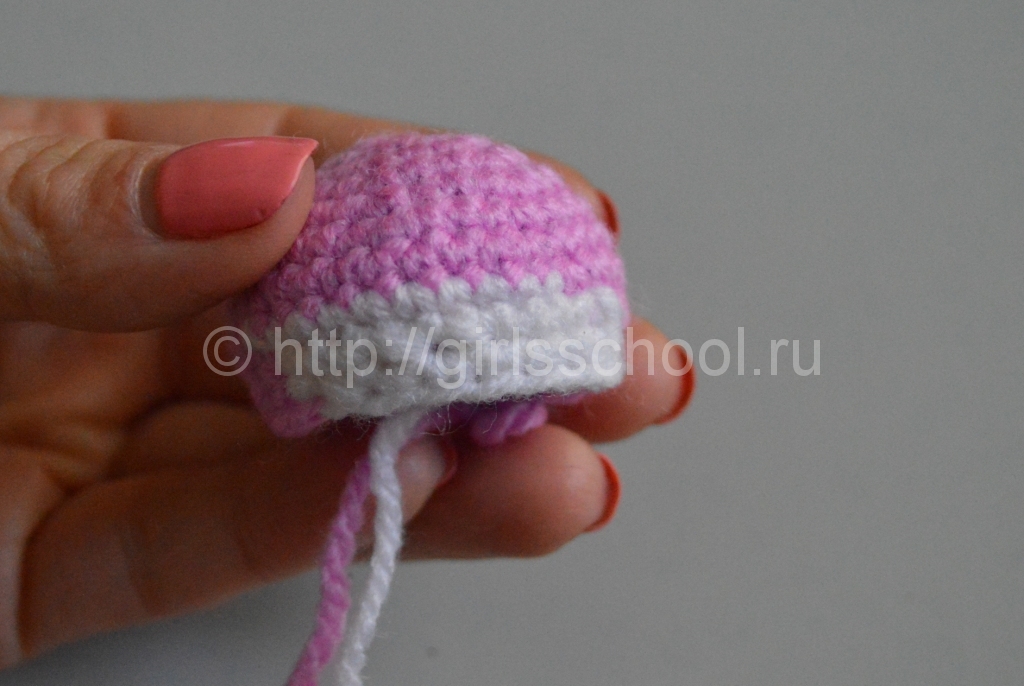
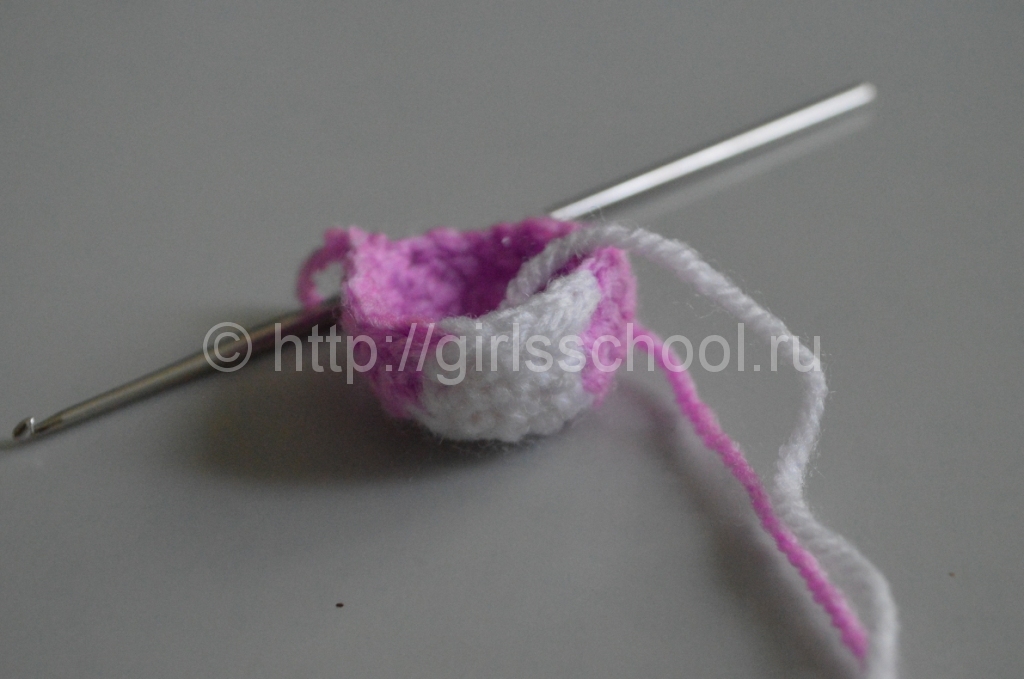
Torso
![]()
1st row: with a lilac thread - an amigurumi ring made of double stitch.

2nd row: (lilac: inc + inc) + (white: inc + inc) + (lilac: inc + inc)

3rd row: (lilac: 1 tbsp + inc) - 2 times + (white: 1 dc + inc + inc + dc) + (lilac: inc + 1 dc) n + pr + 1 st.b/n + pr).

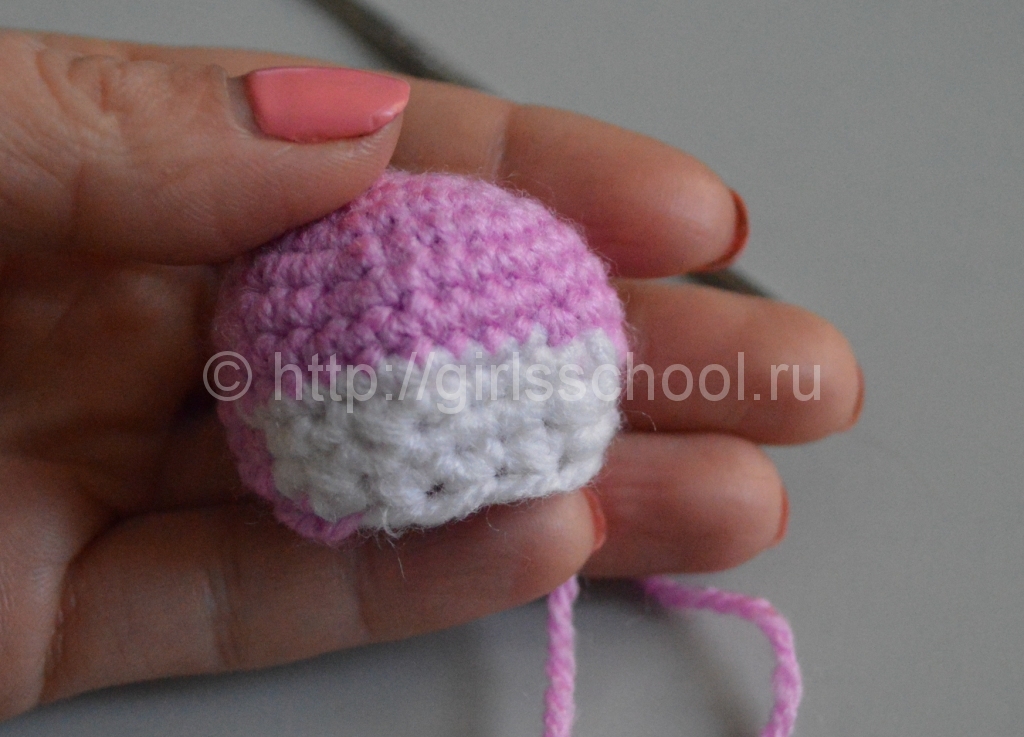
4th row: (lilac: 1 tbsp + dec + 4 tbsp) + (white: 4 tbsp) + (lilac: 45 tbsp + dec + 1 tbsp) )
![]()
5th row: (lilac: 6 tbsp) + inc + (white: 2 dc) + inc + (lilac: 6 tbsp)

6th row: (lilac: 7 tbsp) + (white: 4 tbsp) + (lilac: 7 tbsp)
7th row: (lilac: 1 sc.b/n + dec + 2 sc.b/n + dec) + (white: 4 sc.b/n) + (lilac: dec + 2 sc.b/n + dec + 1 tbsp. b/n)

8th row: (lilac: 5 tbsp) + (white: 4 tbsp) + (lilac: 5 tbsp)

9 row: (lilac: dec + 3 sc.b/n) + (white: 4 sc.b/n) + (lilac: 3 sc.b/n + dec)

10th row: (lilac: 4 tbsp) + (white: 4 tbsp) + (lilac: 4 tbsp) (571)

Paws
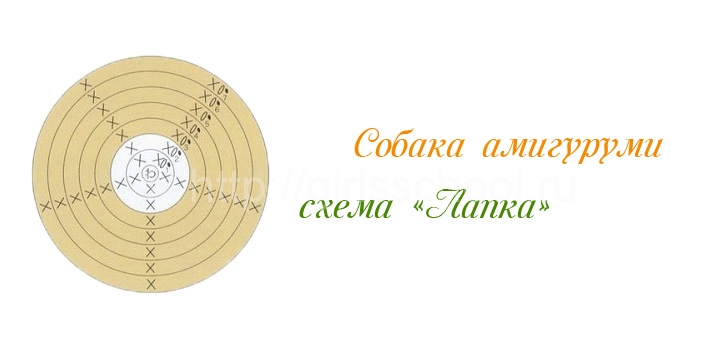
we knit the paws in single crochet stitches
1st row: with white thread: amigurumi ring from 5 tbsp.
2nd row: white thread: 5 tbsp.

Rows 3-7 inclusive with lilac thread: 5 tbsp.

You will need four such parts.
Tail
cast on a chain of 7 loops.
1st row: start knitting white thread in the second loop from the hook, knit 6 tbsp. Turn the knitting and change the thread.
2nd row: knit with purple thread. We knit 6 tbsp.
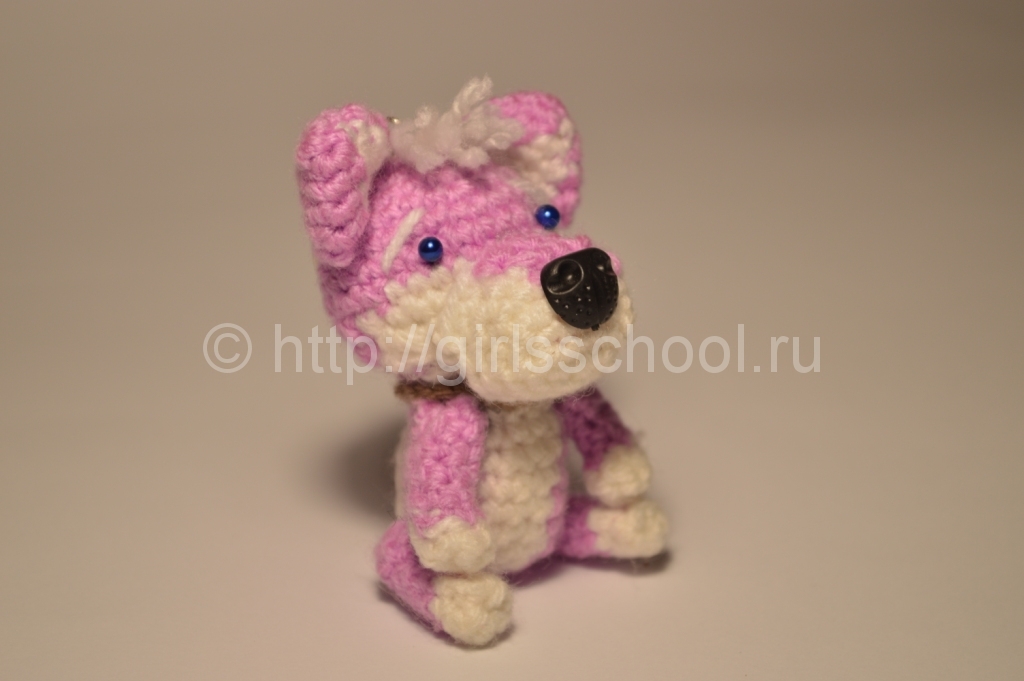
Assembly
Now all the parts need to be connected, simultaneously stuffing with holofiber (cotton wool, padding polyester, etc.)

There is no need to stuff the ears with anything :) The lower rows of the base of the ears are knitted together in single crochets. This will make it easier to sew them to the head.

Let's add a nose, beady eyes, a neat bang to the dog, and also, if desired, a ring for a keychain.
The charmer is ready!
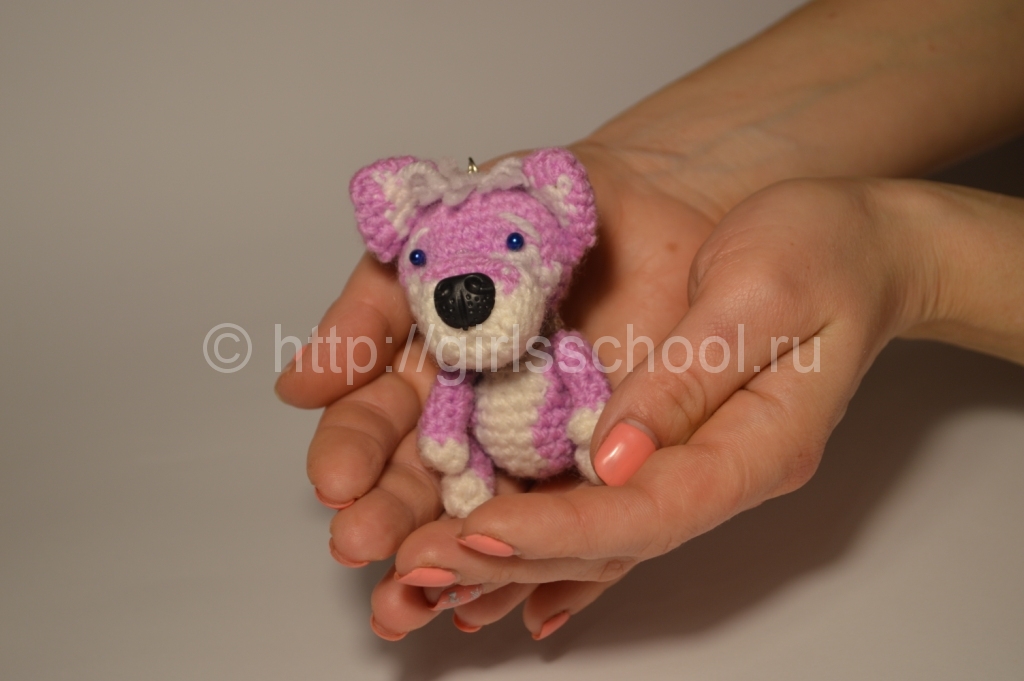
Happy creativity!
Rats)))Taxics)))Description.
Do you still remember my little rats and dachshunds?

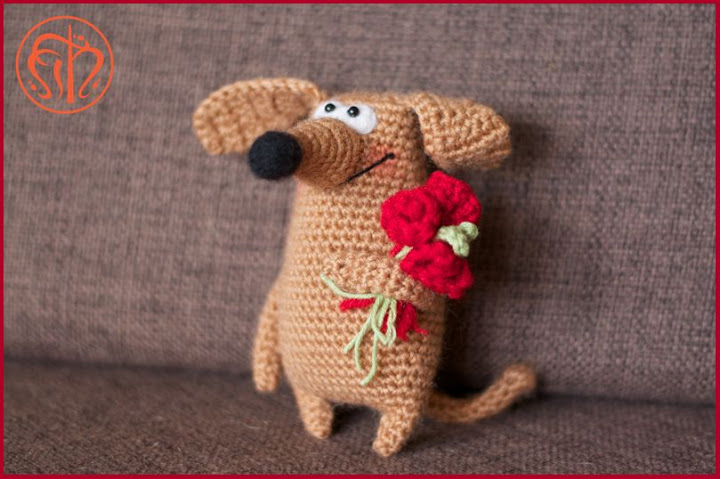
Then I’ll share the description of these creatures)))
We knit online on the website "Rosette Knits" http://glinchak.com/online/krisiki-taksiki-t262.html.
Designations:
VP-air loop
x-single crochet
V-increase (in the column of the previous row we knit 2 single crochets)
A-decrease
(...)*? Once again, what are we tying in brackets? once
[...] - the number of columns in a row
Torso
1st row: 6 VP, in the second loop from the hook 2x, 3x, in the first loop of the chain 4x, turn the piece and knit on the other side of the chain 3x, in the last loop of the chain 2x
2nd row: 2V,3x,4V,3x,2V
3rd row: (10x,V)*2 times
4th row: 24x
5 row: (11x,V)*2 times
Row 6: 26x
Row 7: (12x,V)*2 times
8 row: 28x
Row 9: (13x,V)*2 times
Row 10: 30x
Row 11: (14x,V)*2 times
Row 12: 32x
Row 13: (15x,V)*2 times
Row 14: 34x
Row 15: (16x,V)*2 times
Row 16: 36x
Row 17: (17x,V)*2 times
Row 18: 38x
Row 19: (18x,V)*2 times
Rows 20-22: 40x -3 rows. For dachshund, work rows 6-8. :2:
Row 23: (18x,A)*2 times
Row 24: (17x,A)*2 times
Row 25: (16x,A)*2 times
26th row: (15x,A)*2 times
We knitted the 26th row and knitted the legs without stopping: 2:
We knit 4x, count in the opposite direction 7x, connect with the 7th column and knit in a circle 14x, A, 2x. We cut the thread, tighten the hole, fasten the thread. We knit the second leg in the same way on the opposite side of the body. Leave the end of the thread 15-20 cm, tighten the hole. If you see that the legs are not very stable, fill them a little.
We fill the body, but so that it remains slightly flattened. We sew up the hole between the legs, fasten it, and cut the thread. 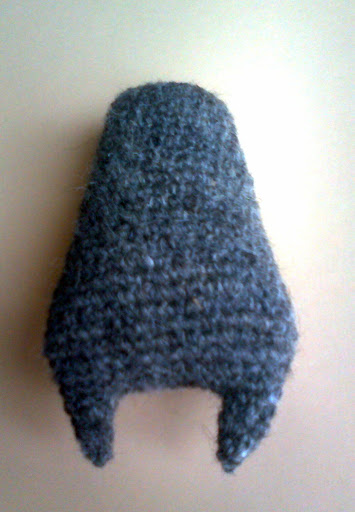
Handles-paws (2 parts)
1st row: In the amigurumi ring 6x
Rows 2-10: 6x -9 rows. In general, be guided by what length of handles you want.
Leave the tip of the thread on one foot for sewing-joining the feet
Muzzle
You can start with the thread you chose for the spout and knit the first 4 rows with it.
1st row: in amigurumi ring 6x
2-4row: 6x -3rows
5th row: (xV)*3
6th row: 9x
7th row: (2x,V)*3
8th row: 12x
9th row: (3x,V)*3
Row 10: 15x On this row you can finish the face for the dachshund.
11th row: (4x,V)*3
12th row: 18x
13th row: 8x
Leave the end of the thread for sewing on the muzzle
Ears(2 parts)
1st row: in amigurumi ring 6x
2nd row: 6V
3rd row: (xV)*6
Tie with connecting posts, leave a thread for sewing
These are the parts I get for the rat 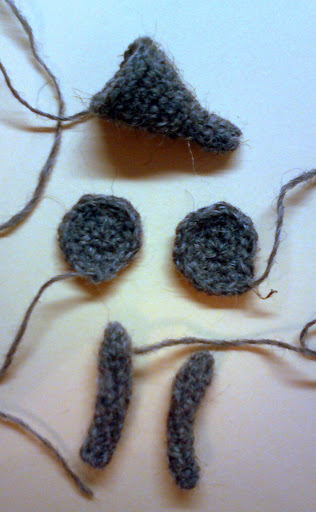
Tail
In the amigurumi ring 4x, and then knit in a spiral to the desired length. For a dachshund, the tail is shorter. Leave the tip of the thread for sewing.
Dachshund ears (2 parts)
We knit in turning rows.
PP lifting loop
1st row: 3 VP
2nd row:PP,x,V.x
3rd row:PP,x,V,2x
4th row:PP,2x,V,2x
5 row: PP, 6x
Row 6:PP,2x,A,2x
Row 7: PP, 5x
8th row:PP,x,A.2x
Row 9: PP, 4x
10th row: PP, x, A, x
11-12 row: PP, 3x
Work in single crochet stitches, leaving the end of the thread for sewing.
We find a place for the parts on the head and body. Fill the muzzle a little. Sew it on.
If you did not immediately knit the nose with the muzzle, then felt it or embroider it.
Give the shape to the muzzle. I curved the rat’s face slightly downward, and the dachshund’s up to the top. Well, that’s how I wanted it. 
Now the ponytail.
We bend the tip of the wire at an angle of 90 degrees, insert this bent tip into the body where the tail will be. We put a knitted piece for the tail on the wire, sew it to the body. We give the tail a shape for stability and beauty.
Let's decorate the muzzle. I embroidered the mouth and filled in the eyes.
And now I’m in a hurry to show you my result this time. True, I haven’t completed it yet. And again I apologize for the quality of the photo... 
Knit with pleasure! And if anything.....ask, I’ll help!