Walkthrough of Chronicles of Mystery: The Tree of Life. Mystical Chronicles: Ritual of Scorpio: walkthrough
Chronicles of Mystery: Scorpio Ritual
Mystic Chronicles: Ritual of Scorpio
A little about management and inventory. One click of the mouse, Sylvia walks, double click, she runs. At the bottom of the screen is the inventory. All found items will be placed there. You can also enlarge an item in your inventory by clicking the right mouse button. We will see the names of the items and their actions at the top of the screen. We combine items in the inventory by dragging one onto another. To the right of the inventory is a question mark (hint). By clicking on it, we will see on the screen active points that we definitely need to pay attention to. To access the main menu, you need to move the cursor to the top of the screen. There is also a diary of notes where you can read all the dialogues, look at the diary and documents.
We are in our apartment. We need to pack our things to go to Malta at my uncle’s invitation. He discovered an underground temple of the secret Order of Malta in Gozo. Let's get ready to go. We go to the table and take a plane ticket. We pull out the drawer and take away: Passport photo, ID and credit card. We approach the fireplace and close the valve, moving it to the right. We approach the suitcase and take it. We're ready to go. We leave the room.
We arrived in Malta, at my uncle’s house and are in the office. We approach the table, open the drawer and take a ballpoint pen refill, a photograph of my uncle, a flashlight and a bottle of dried glue. We pass forward to the coffee table, to the left of the doors. We take Maltese coins from the jewelry box. To the right of the coffee table we look at the panel. We try to open it, but the cache is closed. We leave the office. We are interested in the niche in the wall on the left. There is a cup there. Our task is to restore the drawing on it by rotating its parts. Once the drawing is correctly restored, a click will be heard. This is what the cup should look like.
We return to the office to the hiding place and use the key to the scooter on the crack. It is bent, but the hiding place is now open. We get the letter. We read it in the inventory. It's addressed to James. Uncle tells James that he was working on translating tablets found in the ruins and asks him to look after and help us. Next we read the book of the Order of Malta. Please note that the last chapter is written in an incomprehensible font. We leave the office and go up the stairs. This is Uncle's bedroom. We take sleeping pills from the night table standing near the bed. We go to the table and look at the photo. Let's go to the screen. Strange, my uncle never went on a trip without his robe. Maybe he just went for a walk? We go downstairs and approach the front door. We check the mailbox, but it is empty. We go outside. After the video in which an automatic conversation with a man takes place, we ask him all the questions on the list. The man introduces himself as Inspector Grunk, and subtly hints that our uncle has disappeared and is involved in the theft of valuable stone slabs. Not far from the inspector, near the hatch we take the wire. We approach the scooter. We can't start it yet. We need to find a technician to align the key. We go down the screen to the square. There is a workshop right on the corner. Let's talk to her owner. He will straighten the key for us, but we must go to the docks and convey a strange message to his brother. On the right side of the table we take the pliers. We won't be allowed to take them with us, but we can use them to snag the wire in our inventory. In the center of the square, there is a flower bed with a statue, near which an old man sits on a bench. Let's talk to him.
He will promise to find out something about our uncle. There is a passage to the right of the gray car. Let's go there. After passing one screen, we will find ourselves in the courtyard. Near the house on the right, we take an old newspaper on the ground. To the left of the tree we take a leaky net. Next we go into the passage between the houses, which will lead us to the harbor. The brother of the workshop owner is sitting on the bench. Let's talk to him, and at the same time to the parrot. The parrot demands fish in exchange for information about James Anderson. A fish swims in the water. But for now we can’t get it. We return to the square to the flower bed. We use a net on it. In the inventory, right-click on the watering can and remove the spout. We combine the wire with the spout from the watering can, and then combine the resulting structure with the net. Now you can return to the harbor and catch fish. We use a repaired net on a floating fish. Then we wrap it in newspaper and give it to the parrot. He will reject our fish, but will tell James's address - Piazza Scola 5-R. We return to the square. Before leaving the square, from the alley, let's pay attention to the house with an intercom. We press the 5-R button, but James is not at home. We go to the owner of the workshop, report on the work done and receive a repaired key. Now you can go searching on a scooter. We approach it, use the key in the ignition, turn it and go.
Gozo Island
Not far from us, we pick up a journalist’s ID from the ground. We tear off a cactus leaf. In your inventory, unscrew the cap from the glue bottle and use a cactus leaf on it. Now we have glue. We combine glue with a photograph, and then a photograph with a journalist’s ID.
Great, this certificate will give us confidence. Let's go to the left side of the screen. Archaeologist Henry Simon sits near the trailer on wheels. Let's talk to him, and we will be allowed to go to the ruins. That's where we'll go. On the right is a source with spring water. Let's put it in a watering can, it might come in handy. Let's go to the temple. Near the entrance to the dungeon, there is a female police officer. Let's talk to her twice. She'll let us in if we bring a cup of coffee. What can you do to get to the right place? We return to Henry’s trailer, who has already gone to rest. There are boxes to the right of the trailer. There we take a canister of gasoline. All that remains is to get inside the closed trailer. Apply the ballpoint pen refill to the trailer step and then the bent refill to the lock. Here we are inside. Take a spatula and a brush near the front door. We approach the table and use the flashlight on the hook. To the left of the table we take the metal detector. In the drawer are photographs of four sculptures and a stone slab. Behind the laptop is a thermos of coffee. Just what we need. Turn on the laptop and click on the screen. We step back and take the printed drawing from the printer. We turn off the computer and leave the trailer. Let's take a closer look at the photographs in the inventory. Then in the inventory we unscrew the thermos and use sleeping pills on it. We go to the temple and give the coffee to the policewoman. We enter the temple, but it is very dark there. You need to start the generator located to the right of the entrance to the temple. Our guard snores nicely and won’t interfere. We approach the generator. We pour gasoline into the tank, and water from a watering can into the cooler. On the right, click on the red button and go to the dungeon. We go to the center of the room, into the circle with the scorpion. In the inventory we look at the drawing printed from the computer. Let's look at each stand. They have a specific symbol. We approach the portal at the top of the screen and look at it. We don't know what to do yet. We leave the dungeon. We are approaching fresh excavations. We use a metal detector, a squeak will be heard. We found something. At this point we use a spatula and then a brush. We find a ring with the coat of arms of the Order of Malta. It's time to return to my uncle's house. We go to the scooter and leave.
We go out into the street and go to the city square, to the house where James lives. We call the intercom. We were lucky to catch James. We go up to the apartment. During the conversation, James will ask you to bring the book from the hiding place. Let's do so. The book and photographs will greatly help James in his work. We go outside. Let's now talk to the owner of the workshop and find out what rumors are circulating about my uncle.
Gozo Island
We get on a scooter and go to the temple. On the way to the ruins we will talk with the tourist. We will find the archaeologist near the fresh excavations. After talking with the archaeologist, the phone will ring. This is James. He found out something. We will have to go to Istanbul, find an art gallery located at Galatasaray 23. Its owner Faina Flatova may already own the missing stones.
Let's talk to the rickshaw owner. No, he didn't see his uncle. We go to the right and go through the arch where the car is parked. I wonder if there is security everywhere? We take a poker from the ground. We return back to the street and go right. Not far from the entrance to the gallery there is a convertible, and there is a cat sitting in it. We go into the gallery and talk with Faina. She's not very kind. How should we view the gallery? We leave the gallery and talk to the merchant standing on the corner. We return to the courtyard where the guard stands. He now stands in a different place. Let's go forward and look at the barrel. We use the poker to get the ball. Now let's go to the convertible. We put a ball under the front wheel and give the harmful cat a fish. She will run away. We switch the gear lever and pierce the ball with a poker. Here's a small accident. The guard in the courtyard has left his post, and we can enter the gallery. We go to the barrel from which we took the ball. We pass to the warehouse of boxes and barrels. Our task is to move first the barrel and then the box towards the wall. The principle is simple. These objects can be pushed forward or pulled towards you.
And now up. We're inside. We approach the table. We take a shawl, and from the bag a business card and a powder compact. In the inventory we look at the business card. On the reverse side there is an inscription in Hebrew. James will need to decipher this inscription. To the right of the table, behind the cabinet we take a bicycle chain and a pump. In the inventory, combine the shawl and powder compact, hang it on the middle hook and turn the mirror to the left. Let's go where the sun's ray points. He leads us to the switch. Let there be light! There are drawers on the left. Let's see what's there. We use a poker on both boxes. The large box contains the missing stone tablet, and the smaller box contains four stones - symbols. We won’t be able to carry away the slab, but we will grab the symbols. But what is it? A blow to the head and we are on the street, without stones.
A little about management and inventory. One click of the mouse, Sylvia walks, double click, she runs. At the bottom of the screen is the inventory. All found items will be placed there. You can also enlarge an item in your inventory by clicking the right mouse button. We will see the names of the items and their actions at the top of the screen. We combine items in the inventory by dragging one onto another. To the right of the inventory is a question mark (hint). By clicking on it, we will see on the screen active points that we definitely need to pay attention to. To access the main menu, you need to move the cursor to the top of the screen. There is also a diary of notes where you can read all the dialogues, look at the diary and documents.
We are in our apartment. We need to pack our things to go to Malta at my uncle’s invitation. He discovered an underground temple of the secret Order of Malta in Gozo. Let's get ready to go. We go to the table and take a plane ticket. We pull out the drawer and take away: Passport photo, ID and credit card. We approach the fireplace and close the valve, moving it to the right. We approach the suitcase and take it. We're ready to go. We leave the room.
We arrived in Malta, at my uncle’s house and are in the office. We approach the table, open the drawer and take a ballpoint pen refill, a photograph of my uncle, a flashlight and a bottle of dried glue. We pass forward to the coffee table, to the left of the doors. We take Maltese coins from the jewelry box. To the right of the coffee table we look at the panel. We try to open it, but the cache is closed. We leave the office. We are interested in the niche in the wall on the left. There is a cup there. Our task is to restore the drawing on it by rotating its parts. Once the drawing is correctly restored, a click will be heard. This is what the cup should look like.
We return to the office to the hiding place and use the key to the scooter on the crack. It is bent, but the hiding place is now open. We get the letter. We read it in the inventory. It's addressed to James. Uncle tells James that he was working on translating tablets found in the ruins and asks him to look after and help us. Next we read the book of the Order of Malta. Please note that the last chapter is written in an incomprehensible font. We leave the office and go up the stairs. This is Uncle's bedroom. We take sleeping pills from the night table standing near the bed. We go to the table and look at the photo. Let's go to the screen. Strange, my uncle never went on a trip without his robe. Maybe he just went for a walk? We go downstairs and approach the front door. We check the mailbox, but it is empty. We go outside. After the video in which an automatic conversation with a man takes place, we ask him all the questions on the list. The man introduces himself as Inspector Grunk, and subtly hints that our uncle has disappeared and is involved in the theft of valuable stone slabs. Not far from the inspector, near the hatch we take the wire. We approach the scooter. We can't start it yet. We need to find a technician to align the key. We go down the screen to the square. There is a workshop right on the corner. Let's talk to her owner. He will straighten the key for us, but we must go to the docks and convey a strange message to his brother. On the right side of the table we take the pliers. We won't be allowed to take them with us, but we can use them to snag the wire in our inventory. In the center of the square, there is a flower bed with a statue, near which an old man sits on a bench. Let's talk to him.
He will promise to find out something about our uncle. There is a passage to the right of the gray car. Let's go there. After passing one screen, we will find ourselves in the courtyard. Near the house on the right, we take an old newspaper on the ground. To the left of the tree we take a leaky net. Next we go into the passage between the houses, which will lead us to the harbor. The brother of the workshop owner is sitting on the bench. Let's talk to him, and at the same time to the parrot. The parrot demands fish in exchange for information about James Anderson. A fish swims in the water. But for now we can’t get it. We return to the square to the flower bed. We use a net on it. In the inventory, right-click on the watering can and remove the spout. We combine the wire with the spout from the watering can, and then combine the resulting structure with the net. Now you can return to the harbor and catch fish. We use a repaired net on a floating fish. Then we wrap it in newspaper and give it to the parrot. He will reject our fish, but he will tell James's address - Piazza Scola 5-R. We return to the square. Before leaving the square, from the alley, let's pay attention to the house with an intercom. We press the 5-R button, but James is not at home. We go to the owner of the workshop, report on the work done and receive a repaired key. Now you can go searching on a scooter. We approach it, use the key in the ignition, turn it and go.
Gozo Island
Not far from us, we pick up a journalist’s ID from the ground. We tear off a cactus leaf. In your inventory, unscrew the cap from the glue bottle and use a cactus leaf on it. Now we have glue. We combine glue with a photograph, and then a photograph with a journalist’s ID.
Great, this certificate will give us confidence. Let's go to the left side of the screen. Archaeologist Henry Simon sits near the trailer on wheels. Let's talk to him, and we will be allowed to go to the ruins. That's where we'll go. On the right is a source with spring water. Let's put it in a watering can, it might come in handy. Let's go to the temple. Near the entrance to the dungeon, there is a female police officer. Let's talk to her twice. She'll let us in if we bring a cup of coffee. What can you do to get to the right place? We return to Henry’s trailer, who has already gone to rest. There are boxes to the right of the trailer. There we take a canister of gasoline. All that remains is to get inside the closed trailer. Apply the ballpoint pen refill to the trailer step and then the bent refill to the lock. Here we are inside. Take a spatula and a brush near the front door. We approach the table and use the flashlight on the hook. To the left of the table we take the metal detector. In the drawer are photographs of four sculptures and a stone slab. Behind the laptop is a thermos of coffee. Just what we need. Turn on the laptop and click on the screen. We step back and take the printed drawing from the printer. We turn off the computer and leave the trailer. Let's take a closer look at the photographs in the inventory. Then in the inventory we unscrew the thermos and use sleeping pills on it. We go to the temple and give the coffee to the policewoman. We enter the temple, but it is very dark there. You need to start the generator located to the right of the entrance to the temple. Our guard snores nicely and won’t interfere. We approach the generator. We pour gasoline into the tank, and water from a watering can into the cooler. On the right, click on the red button and go to the dungeon. We go to the center of the room, into the circle with the scorpion. In the inventory we look at the drawing printed from the computer. Let's look at each stand. They have a specific symbol. We approach the portal at the top of the screen and look at it. We don't know what to do yet. We leave the dungeon. We are approaching fresh excavations. We use a metal detector, a squeak will be heard. We found something. At this point we use a spatula and then a brush. We find a ring with the coat of arms of the Order of Malta. It's time to return to my uncle's house. We go to the scooter and leave.
November 5, 2008 La Valletta
We go out into the street and go to the city square, to the house where James lives. We call the intercom. We were lucky to catch James. We go up to the apartment. During the conversation, James will ask you to bring the book from the hiding place. Let's do so. The book and photographs will greatly help James in his work. We go outside. Let's now talk to the owner of the workshop and find out what rumors are circulating about my uncle.
Gozo Island
We get on a scooter and go to the temple. On the way to the ruins we will talk with the tourist. We will find the archaeologist near the fresh excavations. After talking with the archaeologist, the phone will ring. This is James. He found out something. We will have to go to Istanbul, find an art gallery located at Galatasaray 23. Its owner Faina Flatova may already own the missing stones.
Let's talk to the rickshaw owner. No, he didn't see his uncle. We go to the right and go through the arch where the car is parked. I wonder if there is security everywhere? We take a poker from the ground. We return back to the street and go right. Not far from the entrance to the gallery there is a convertible, and there is a cat sitting in it. We go into the gallery and talk with Faina. She's not very kind. How should we view the gallery? We leave the gallery and talk to the merchant standing on the corner. We return to the courtyard where the guard stands. He now stands in a different place. Let's go forward and look at the barrel. We use the poker to get the ball. Now let's go to the convertible. We put a ball under the front wheel and give the harmful cat a fish. She will run away. We switch the gear lever and pierce the ball with a poker. Here's a small accident. The guard in the courtyard has left his post, and we can enter the gallery. We go to the barrel from which we took the ball. We pass to the warehouse of boxes and barrels. Our task is to move first the barrel and then the box towards the wall. The principle is simple. These objects can be pushed forward or pulled towards you.

And now up. We're inside. We approach the table. We take a shawl, and from the bag a business card and a powder compact. In the inventory we look at the business card. On the reverse side there is an inscription in Hebrew. James will need to decipher this inscription. To the right of the table, behind the cabinet we take a bicycle chain and a pump. In the inventory, combine the shawl and powder compact, hang it on the middle hook and turn the mirror to the left. Let's go where the sun's ray points. He leads us to the switch. Let there be light! There are drawers on the left. Let's see what's there. We use a poker on both boxes. The large box contains the missing stone tablet, and the smaller box contains four stones - symbols. We won’t be able to carry away the slab, but we will grab the symbols. But what is it? A blow to the head and we are on the street, without stones. The bell rings. This is James. After talking with him, we go to the rickshaw. We give him a chain and a pump. The rickshaw will take us to the airport and we will go to Malta.
Someone searched my uncle's office. But apparently he didn’t find anything or we scared him off. Let's check the bedroom. Everything is fine. We go outside and talk to Inspector Grunk. We're heading to the harbor. But, frightened by the shadows, we return to the central square. We need to tell James everything. We ring the intercom and go up to the apartment. After talking with him, we go to our scooter.
Gozo Island
We go to the archaeologist's trailer and eavesdrop on the conversation. So he is one of those involved in the theft and attack on us. We take the key from the bag standing near the trailer. Let's return to our scooter. To his right is a van. We look at the back window and notice boxes, the same as in the gallery. We use the key on the lock. Inside the van, open the blue tool box. From it we take a hammer and a chisel. We use a hammer and then a chisel on the small box standing with poison. We take four symbol stones. We do the same with a large box. The stone slab is in place. It's time to leave the van. But it was not there.
A little about management and inventory. One click of the mouse, Sylvia walks, double click, she runs. At the bottom of the screen is the inventory. All found items will be placed there. You can also enlarge an item in your inventory by clicking the right mouse button. We will see the names of the items and their actions at the top of the screen. We combine items in the inventory by dragging one onto another. To the right of the inventory is a question mark (hint). By clicking on it, we will see on the screen active points that we definitely need to pay attention to. To access the main menu, you need to move the cursor to the top of the screen. There is also a diary of notes where you can read all the dialogues, look at the diary and documents.
We are in our apartment. We need to pack our things to go to Malta at my uncle’s invitation. He discovered an underground temple of the secret Order of Malta in Gozo. Let's get ready to go. We go to the table and take a plane ticket. We pull out the drawer and take away: Passport photo, ID and credit card. We approach the fireplace and close the valve, moving it to the right. We approach the suitcase and take it. We're ready to go. We leave the room.
We arrived in Malta, at my uncle’s house and are in the office. We approach the table, open the drawer and take a ballpoint pen refill, a photograph of my uncle, a flashlight and a bottle of dried glue. We pass forward to the coffee table, to the left of the doors. We take Maltese coins from the jewelry box. To the right of the coffee table we look at the panel. We try to open it, but the cache is closed. We leave the office. We are interested in the niche in the wall on the left. There is a cup there. Our task is to restore the drawing on it by rotating its parts. Once the drawing is correctly restored, a click will be heard. This is what the cup should look like.
We return to the office to the hiding place and use the key to the scooter on the crack. It is bent, but the hiding place is now open. We get the letter. We read it in the inventory. It's addressed to James. Uncle tells James that he was working on translating tablets found in the ruins and asks him to look after and help us. Next we read the book of the Order of Malta. Please note that the last chapter is written in an incomprehensible font. We leave the office and go up the stairs. This is Uncle's bedroom. We take sleeping pills from the night table standing near the bed. We go to the table and look at the photo. Let's go to the screen. Strange, my uncle never went on a trip without his robe. Maybe he just went for a walk? We go downstairs and approach the front door. We check the mailbox, but it is empty. We go outside. After the video in which an automatic conversation with a man takes place, we ask him all the questions on the list. The man introduces himself as Inspector Grunk, and subtly hints that our uncle has disappeared and is involved in the theft of valuable stone slabs. Not far from the inspector, near the hatch we take the wire. We approach the scooter. We can't start it yet. We need to find a technician to align the key. We go down the screen to the square. There is a workshop right on the corner. Let's talk to her owner. He will straighten the key for us, but we must go to the docks and convey a strange message to his brother. On the right side of the table we take the pliers. We won't be allowed to take them with us, but we can use them to snag the wire in our inventory. In the center of the square, there is a flower bed with a statue, near which an old man sits on a bench. Let's talk to him.
He will promise to find out something about our uncle. There is a passage to the right of the gray car. Let's go there. After passing one screen, we will find ourselves in the courtyard. Near the house on the right, we take an old newspaper on the ground. To the left of the tree we take a leaky net. Next we go into the passage between the houses, which will lead us to the harbor. The brother of the workshop owner is sitting on the bench. Let's talk to him, and at the same time to the parrot. The parrot demands fish in exchange for information about James Anderson. A fish swims in the water. But for now we can’t get it. We return to the square to the flower bed. We use a net on it. In the inventory, right-click on the watering can and remove the spout. We combine the wire with the spout from the watering can, and then combine the resulting structure with the net. Now you can return to the harbor and catch fish. We use a repaired net on a floating fish. Then we wrap it in newspaper and give it to the parrot. He will reject our fish, but he will tell James's address - Piazza Scola 5-R. We return to the square. Before leaving the square, from the alley, let's pay attention to the house with an intercom. We press the 5-R button, but James is not at home. We go to the owner of the workshop, report on the work done and receive a repaired key. Now you can go searching on a scooter. We approach it, use the key in the ignition, turn it and go.
Gozo Island
Not far from us, we pick up a journalist’s ID from the ground. We tear off a cactus leaf. In your inventory, unscrew the cap from the glue bottle and use a cactus leaf on it. Now we have glue. We combine glue with a photograph, and then a photograph with a journalist’s ID.
Great, this certificate will give us confidence. Let's go to the left side of the screen. Archaeologist Henry Simon sits near the trailer on wheels. Let's talk to him, and we will be allowed to go to the ruins. That's where we'll go. On the right is a source with spring water. Let's put it in a watering can, it might come in handy. Let's go to the temple. Near the entrance to the dungeon, there is a female police officer. Let's talk to her twice. She'll let us in if we bring a cup of coffee. What can you do to get to the right place? We return to Henry’s trailer, who has already gone to rest. There are boxes to the right of the trailer. There we take a canister of gasoline. All that remains is to get inside the closed trailer. Apply the ballpoint pen refill to the trailer step and then the bent refill to the lock. Here we are inside. Take a spatula and a brush near the front door. We approach the table and use the flashlight on the hook. To the left of the table we take the metal detector. In the drawer are photographs of four sculptures and a stone slab. Behind the laptop is a thermos of coffee. Just what we need. Turn on the laptop and click on the screen. We step back and take the printed drawing from the printer. We turn off the computer and leave the trailer. Let's take a closer look at the photographs in the inventory. Then in the inventory we unscrew the thermos and use sleeping pills on it. We go to the temple and give the coffee to the policewoman. We enter the temple, but it is very dark there. You need to start the generator located to the right of the entrance to the temple. Our guard snores nicely and won’t interfere. We approach the generator. We pour gasoline into the tank, and water from a watering can into the cooler. On the right, click on the red button and go to the dungeon. We go to the center of the room, into the circle with the scorpion. In the inventory we look at the drawing printed from the computer. Let's look at each stand. They have a specific symbol. We approach the portal at the top of the screen and look at it. We don't know what to do yet. We leave the dungeon. We are approaching fresh excavations. We use a metal detector, a squeak will be heard. We found something. At this point we use a spatula and then a brush. We find a ring with the coat of arms of the Order of Malta. It's time to return to my uncle's house. We go to the scooter and leave.
We go out into the street and go to the city square, to the house where James lives. We call the intercom. We were lucky to catch James. We go up to the apartment. During the conversation, James will ask you to bring the book from the hiding place. Let's do so. The book and photographs will greatly help James in his work. We go outside. Let's now talk to the owner of the workshop and find out what rumors are circulating about my uncle.
Gozo Island
We get on a scooter and go to the temple. On the way to the ruins we will talk with the tourist. We will find the archaeologist near the fresh excavations. After talking with the archaeologist, the phone will ring. This is James. He found out something. We will have to go to Istanbul, find an art gallery located at Galatasaray 23. Its owner Faina Flatova may already own the missing stones.
Let's talk to the rickshaw owner. No, he didn't see his uncle. We go to the right and go through the arch where the car is parked. I wonder if there is security everywhere? We take a poker from the ground. We return back to the street and go right. Not far from the entrance to the gallery there is a convertible, and there is a cat sitting in it. We go into the gallery and talk with Faina. She's not very kind. How should we view the gallery? We leave the gallery and talk to the merchant standing on the corner. We return to the courtyard where the guard stands. He now stands in a different place. Let's go forward and look at the barrel. We use the poker to get the ball. Now let's go to the convertible. We put a ball under the front wheel and give the harmful cat a fish. She will run away. We switch the gear lever and pierce the ball with a poker. Here's a small accident. The guard in the courtyard has left his post, and we can enter the gallery. We go to the barrel from which we took the ball. We pass to the warehouse of boxes and barrels. Our task is to move first the barrel and then the box towards the wall. The principle is simple. These objects can be pushed forward or pulled towards you.

And now up. We're inside. We approach the table. We take a shawl, and from the bag a business card and a powder compact. In the inventory we look at the business card. On the reverse side there is an inscription in Hebrew. James will need to decipher this inscription. To the right of the table, behind the cabinet we take a bicycle chain and a pump. In the inventory, combine the shawl and powder compact, hang it on the middle hook and turn the mirror to the left. Let's go where the sun's ray points. He leads us to the switch. Let there be light! There are drawers on the left. Let's see what's there. We use a poker on both boxes. The large box contains the missing stone tablet, and the smaller box contains four stones - symbols. We won’t be able to carry away the slab, but we will grab the symbols. But what is it? A blow to the head and we are on the street, without stones. The bell rings. This is James. After talking with him, we go to the rickshaw. We give him a chain and a pump. The rickshaw will take us to the airport and we will go to Malta.
Someone searched my uncle's office. But apparently he didn’t find anything or we scared him off. Let's check the bedroom. Everything is fine. We go outside and talk to Inspector Grunk. We're heading to the harbor. But, frightened by the shadows, we return to the central square. We need to tell James everything. We ring the intercom and go up to the apartment. After talking with him, we go to our scooter.
Gozo Island
We go to the archaeologist's trailer and eavesdrop on the conversation. So he is one of those involved in the theft and attack on us. We take the key from the bag standing near the trailer. Let's return to our scooter. To his right is a van. We look at the back window and notice boxes, the same as in the gallery. We use the key on the lock. Inside the van, open the blue tool box. From it we take a hammer and a chisel. We use a hammer and then a chisel on the small box standing with poison. We take four symbol stones. We do the same with a large box. The stone slab is in place. It's time to leave the van. But it was not there.
Walkthrough - Page 1
Control
With one click on the left mouse button we direct the hero, with a double click we make the hero run. By clicking on an item in the inventory with the left mouse button, we take this item, and by clicking on it with the right mouse button, we examine it. All active location points are highlighted when you click on the question mark in the inventory on the right. The main menu is at the top of the screen.
Brittany. A few days earlier
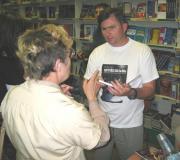
We talk with the director of the museum, Mr. Guillaume, on all topics. We go into the Erker - a small office on the left side of the hall. We take it from the table leaf with a list of items: a fragment of ancient pottery, a 16th century pistol, keys and a cleaning rod. We look at the small chest standing on the table. To open it, we need the correct combination of arrows. We return to the large office and from there we go to the right - to the exhibition hall. We go to the restorer Claire, standing on the right side of the painting, and in a conversation with her we learn that Marcel had a voice recorder. We return to the large office and from the desk drawer standing to the right of the notice board, we take out a voice recorder and tweezers. In the inventory, right-click on the voice recorder for a closer look and, looking at the voice recorder’s screen, we find out that the memory card is missing.
We return to our new friend Claire and take the recorder’s memory card from her. We go into the large office, combine the voice recorder and memory card in the inventory and listen to the recording. After listening to the recording, we receive two clues to opening the chest - a storm and Jupiter. We also learn that Claire has the third and last necessary clue. In the office, we approach the notice board and look at printed reproductions of the 19th century with natural phenomena depicted on them. We are interested in a picture that depicts a storm. By clicking on it, we remember the number 8 on the Beaufort scale, it will be the first digit of the code. Next we go into the exhibition hall, look at the ceiling vault and examine the fresco. We conclude that Jupiter is the fifth planet from the Sun, which means the second digit of the code will be 5. We go out into the yard, approach the well and find out from Claire the last clue - this is the number 2.
We go to the bay window, look at the lid of the chest and set the code 8-5-2. To set the values, you need to click on the clock dial. After correctly arranging the clock hands, we hear a click and lift the lid of the chest. From the opened chest we take out a pistol with a ramrod and the key to the pistol. We look at the wall of the chest and find another lock, into which we insert the key from the chest. We have found a hiding place, but how can we open it? In the inventory, take out the ramrod from the pistol and insert the ramrod into the hole in the chest on the side. Now we can easily open the cache and take out an ancient manuscript from it. We read a manuscript that tells about travelers who were looking for the island. Between the pages of the manuscript we find pieces of the map.
In the inventory we connect the manuscript and tweezers, so we have removed the thread connecting the sheets, and now we can easily get the pieces of the map. We open the manuscript, turn the pages to any fragment of the map and click on it, after which all the pieces of the map will be in our inventory. Next, click on the pieces of the map in your inventory and start collecting them. So, the card is assembled double-sided, so you can choose which side of the card to collect, the reverse side will be assembled automatically. In order to turn a fragment of a map to the reverse side, you need to move the mouse cursor to the corner of the map and click on it. To rotate map fragments around their axis, simply move the cursor over the map and press the right mouse button. Correctly collected cards:

It’s bad that we won’t be able to take the map with us - we need to make a copy of it. We go into the office and approach the copy machine. Open the side door of the copier and take out the empty cartridge. Next, we lift the lid of the copier and notice that the surface is dirty and needs to be cleaned. We go out into the showroom and look at Claire’s table. Before you take anything from him, you need to ask Claire's permission, which is what we do. Having received the go-ahead, we return to the table and open the case. From the case we take out the canvas, brush and fixing varnish. We approach the director of the museum and inform him about our find. We go out into the yard, go to the gatehouse and ring the bell. We meet the watchman Antoine and receive a new cartridge from him. We return to the office and approach the copier. Raise the lid and wipe the dirty surface of the glass with a cloth. Next, open the side door of the copier and insert a new cartridge into the hole. Place the card on a clean glass surface, lower the lid and press the green “Copy” button. We take a copy of the card, and also do not forget to take the original card.
We go to Claire, talk with her and receive the key from Marcel’s secretary. We return to the office, approach the secretary and open it with the key. From the secretary we take out an ink cartridge for a 3D printer, then we read the count’s letter and Marcel’s notebook. We go to the exhibition hall and eavesdrop on a telephone conversation between the museum director and a stranger. We go to the exhibition hall and give the original map to the director of the museum. We return to the office and approach the D-printer. Strange device! We go to the director and ask him about the functions of the magic printer, after which we talk with Claire about the count’s letter. We return to the printer and open three covers. From the left hole we take an empty cartridge, insert an ink cartridge into the right hole, and we need to place glue in the bottom hole, but we don’t have it yet.
We go to the director and ask him about the glue, he in turn sends us to Antoine’s guardhouse. We enter the museum and immediately leave it into the courtyard, where the guard calls us and gives us a container of glue, and also tells us that Marcel used potato flour instead of powder. We go through the main entrance, then go to the cliff and talk with the owner of the hotel standing at the front door. He is ready to give us potato flour, but in exchange for the flour we must bring him a bucket of fresh water from the well. We take a bucket from the hotel owner and go to the exhibition hall. We take the rope from the boat located on the right side of the exhibition hall. In your inventory, tie the rope to the bucket and rush to the well. We move the well grate, lower the bucket down and take out a full bucket of water. We take the bucket to the hotel owner and receive the promised potato flour in return. In your inventory, pour the flour from the bag into the powder container.
We approach the fence and remove the wire from it. We approach the stone wall and between the stones we find a gold coin, which we pick out from the stones with wire. We return to Marcel’s office, go to the printer, insert the cartridge with flour into the left slot of the printer, and the container with glue into the bottom slot. Press the “Print” button, lift the protective glass and take a copy of the jug’s spout. In the inventory, dip a brush into the fixing varnish and then use the brush to apply the varnish to a copy of the jug’s spout. We talk with the director in the exhibition hall and go to Venice.
Carnival in Venice
 Upon arrival in Venice, we talk with the organizer of the lecture on all topics. Then we go to the conference room and then to the niche. We look at the upper part of the bas-relief, but it is located too high. We take the ladder and place it on the floor of the lower part of the bas-relief. Having climbed the stairs, we look at the upper bas-relief - so these are tags! We take the lower right bas-relief tile and start collecting tags:
11, 8, 9, 12, 11, 10, 7, 8, 9, 6, 3, 2, 5, 4, 7, 8, 5, 2, 3, 6, 9, 12, 11,
8, 5, 2, 1, 4, 7, 8, 5, 2, 3, 6, 9, 12, 11, 10, 7, 8, 5, 2, 3, 6, 9, 8, 5, 6,
3, 2, 5, 6, 3, 2, 5, 8, 9, 6, 3, 2, 5, 6, 9, 8, 5, 6, 9, 8, 5, 2, 3,
2, 5, 8, 11, 12, 9, 6, 3, 2, 5, 8, 11, 12, 9, 6, 3, 2, 5, 8, 9, 6, 3,
2, 5, 8, 9, 6, 3, 2, 5, 8, 9, 6, 3, 2, 5, 8, 9, 12, 11, 8, 5, 2, 3, 6, 9, 12
After this, insert part of the slab from the inventory onto the free 12th cell and hear a click. For those who can’t put tags together, I’ve prepared a save game “ Venice. Tags collected" We go down the stairs and notice that the bases of the left and right columns rotate when pressed. We rotate the right column four times, and the left column twice. We approach the hiding place, move the grate aside and take dry seeds. We return to the conference room, where the gondolier is waiting for us, who brought a watch from the Count of Saint-Germain. We barely have time to take the watch when the count's envoy is killed...
Control
Mouse. In the game you can move with the mouse. Interaction with the outside world is carried out by clicking on the desired object on the screen. By hovering your mouse over an object, you can see a description of the items or characters on the bar at the top of the screen.
Left mouse button. Allows you to interact with characters and objects (including those in the inventory or on the large panel). Using the left button you control Sylvia. Double clicking will make the girl run.
Right mouse button. By right-clicking on an item in your pocket, you will activate a large panel that allows you to take a closer look at the item.
Button press Esc displays the main menu and also stops the screensaver. When you move the cursor to the top of the screen, a panel with the game menu pops up.
Pressing a combination Ctrl+S saves the current game. The button has the same function F5.
- F1- includes hints.
- F2- displays the save game screen.
- F3- Displays the game loading screen.
- F4- opens the notes window.
Inventory (pocket) is located at the bottom of the screen and contains all the items that Sylvia finds during her journey. Items from the inventory can be combined with each other or with other objects on the game screen. When your inventory is full of items, you can move between them using the arrows located along the edges of the screen.
By clicking on the question mark, you activate the hint system. Small question marks will appear all over the game screen. They help you see active areas on the map and transitions to other game screens.
A large item panel is displayed when you right-click on an item in your inventory. It magnifies an object and is mainly used for reading documents or studying objects closely. When this panel is activated, you can also interact with objects. To do this, click on them with the left mouse button. You can close the large panel by clicking the left mouse button.
Dialogues are presented in the form of subtitles, where you are asked to choose from several phrases. By clicking the left mouse button you can skip the dialogue. Sylvia's and other characters' phrases are highlighted in different colors. All completed conversations, important information or comments are added to Notes.
You can view a recording of completed dialogues, the heroine's diary, or documents received during the game. To do this, select Notes. Bookmark Dialogues shows a recording of your conversations with characters. On the tab Magazine Sylvia's personal notes have been collected - they appear closer to the end of each episode of the game. Last bookmark Documentation, opens access to documents collected during the game.
Cursors
- Ordinary– means that the cursor is not hovering over an object with which you can perform some action. By clicking the left mouse button you can move the heroine to the selected point.
- Pick icon– Displayed when the selected item can be picked up.
- Action icon– means that the object can be used in some way in the heroine’s pocket or on the game screen.
- Surveillance icon– flashes when you can obtain additional information about the object.
- Conversation icon– You will see her at the moment when Sylvia is able to talk to the character she has met.
- Icon for moving to another location– allows you to switch to another game screen.
- Zoom icon– is shown when you can zoom into the specified location area.
- Ready icon– displayed when the information is completely loaded or the screensaver has finished playing.
- Aim icon– displayed when you need to target a specific area of the location with high accuracy.
- Move icon– its appearance means that the object can be moved in the direction shown on the icon.
Paris
Sylvia's apartment
After watching the introductory video, we approach the fireplace and look at the photographs. Click on the vent cover to turn off the fireplace. From the table on the left we take the plane ticket. We open the desk drawer and take away the credit card, ID and old ID photo. We take our luggage and leave the apartment.
La Valletta
Uncle Oliver's apartment
Open the desk drawer on the right and take from it a photo of your uncle, a bottle of dried glue, a pen refill and an electric flashlight. We approach the coffee table and open the jewelry box. We take Maltese coins from there. Pay attention to the fragment of the paneling to the right of the coffee table. Let's look at the fragment up close. There is a cache behind the casing, but we cannot open it yet. We go out into the corridor. We examine the portrait on the wall, and check the mailbox on the front door. We look at the niche in the wall on the left. In a niche stands an ancient vase, the parts of which are spinning. We restore all parts. As soon as the pattern on the vase is assembled correctly, a click is heard. We return to the office and approach the hiding place in the wall. We use the scooter key on the panel. We take the letter from the cache and read it in the inventory (right-click on the letter and turn the pages using the side arrows). We take out the old book and look at it in the inventory. What was this vision? We read the book and notice that the last page of the book is covered with encrypted signs.
We go out into the corridor and go up the stairs to the second floor to the bedroom. We take sleeping pills from the bedside table and look at the family photo on the secretary. We examine the screen and pay attention to the portrait of Napoleon on the wall. We go downstairs and leave the house onto the street.
In the city
We pick up the wire from the ground on the left and talk about all topics with the stranger. The stranger introduces himself as Police Inspector Grunk. The police suspect Oliver Leroy of stealing valuable slabs from excavations. We approach our scooter, look at the ignition switch and remember that the key to the scooter is bent.
We go down the screen to the square. We are heading to the monument. An old man is sitting on a bench, we talk to him. We go left to the workshop. We communicate on all topics with the owner of the workshop, Stefano Cavlata. On the left from the workbench we take pliers and use them on the wire in the inventory. We go out to the square and go to the alley between the house and the school. We turn left into the yard and pick up an old newspaper from the ground on the right. To the left of the tree we take a leaky net. We exit through the arch onto the embankment. We communicate with the parrot, but this extortionist demands fish for information. We look at the fish swimming in the water, but Tom Kavlata demands a fee to enter the pier. We talk with brother Stefano, give him a message, and at the same time ask Tom about everything that interests us.
We return to the square and approach the flower bed. The old man is no longer on the bench, but his cane lies under the bench. Using this cane we take out the watering can from the flower bed. We look at the watering can in the inventory and remove the sprinkler from it. We combine the sprinkler with the wire in our inventory, and then use it on the leaky net to get a repaired net. We return to the embankment and use a net to catch fish in the water. We wrap the fish in old newspaper and offer the parrot a treat. The parrot doesn't like the treat, but he still gives James's address. Let's go to the square. We head to the entrance of the apartment building to the left of the school and press the 5-R button on the intercom. No one answers our call, so we rush to the workshop. We communicate with Stefano and get a ready-made key to the scooter. We go to the street where our vehicle is parked. We sit on the scooter, insert the key into the ignition and click on the key. We are leaving the city.