Kinusaiga: pictures, templates, descriptions for beginners. Stencils for walls: Kinusaiga templates or patchwork without a needle: details about the technique and tools that are needed
Needlewomen know. But many have only heard of what kinusaiga is. The unfamiliar magic word actually means the art of making paintings from silk scraps. A kind of patchwork, only without a needle. This type of needlework was born in Japan. At the origins of Kinusaiga was Setsu Maena, a professor at a Japanese university. Over time, kinusaiga spread beyond the borders of their homeland and European craftswomen immediately adopted this technique of creating beauty with their own hands. How can you pass up creating amazing things from scraps and remnants of silk fabric? Simply put, European needlewomen acquired the art of creating masterpieces while saving on expensive materials.
At the origins of Kinusaiga was Setsu Maena, a professor at a Japanese university.
Kinusaiga or patchwork without a needle: details about the technique and tools that are needed
The kinusaiga technique does not involve the use of a needle as in the patchwork technique, but is based on making a sketch on paper, which is then transferred to a wooden board.
A slot is made along the contour of the sketch - a recess. After that, the picture itself is made using scraps of silk. The Japanese women took these pieces of silk from old kimonos, which the thrifty Japanese never threw away - silk, after all.
The shreds are laid out on the cut elements of the sketch and the edges of the shreds are pressed into these same slots. With the right selection of paints and colors, the paintings turn out to be of unique beauty. And it would seem - scraps of an old kimono! We can say that the natural economy of the Japanese became the parent of this art - kinusaiga.
Gallery: kinusaiga (25 photos)


Kinusayga: master class (video)
How to make a painting on polystyrene foam from fabric with your own hands: a master class for beginner needlewomen
How to make a picture in the New Year style in patchwork for children? New Year's patterns always look beautiful and festive. We can talk about the art of kinusaiga for a very long time. But it’s better to see how to make at least a small masterpiece with your own hands. Below is a technique for creating a painting on foam plastic for beginners.
What you will need to start the master class:
- foam sheet (thickness not less than 1 cm;
- scraps of fabric of different colors;
- scissors;
- stationery knife (scalpel);
- nail file (for threading fabric into foam);
- sketch (your own or you can take any ready-made one);
- carbon copy.
The fabric should be selected to be non-stretchable and thin enough. The edges should not fray.
First, look at what is in stock: old scraps, leftover fabrics that were not thrown away after sewing some wardrobe item. Everything will go to work. If checking the storerooms did not give any results, then you will have to take whole pieces and cut out the elements of the planned picture from them.
Process:
First you need to decide on a drawing. For the first time, you should not choose something complex, with many elements. Let these be light geometric shapes. And from them you can already build a small cute house.

Using a sheet of copy paper, you need to transfer the sketch onto a piece of foam plastic.

Using a knife or scalpel, make a cut along the contour of the sketch to a depth of about 3 mm.

Cut the selected fabric into pieces of the desired size. Using a nail file or something more convenient, tuck the pieces of fabric into the foam sheet. Thus fill the entire “picture”. The edges of the fabric should fit tightly into the slits.

Cut off the excess edges of the foam with a scalpel or a stationery knife.

Next, the resulting panel can be framed. It can be purchased, or you can make it yourself. If suitable materials are available. You can simply make a border using decorative tape, which you need to secure with beautiful push pins. These buttons are sold at any office supply store. Buttons in bronze or gold colors look beautiful.


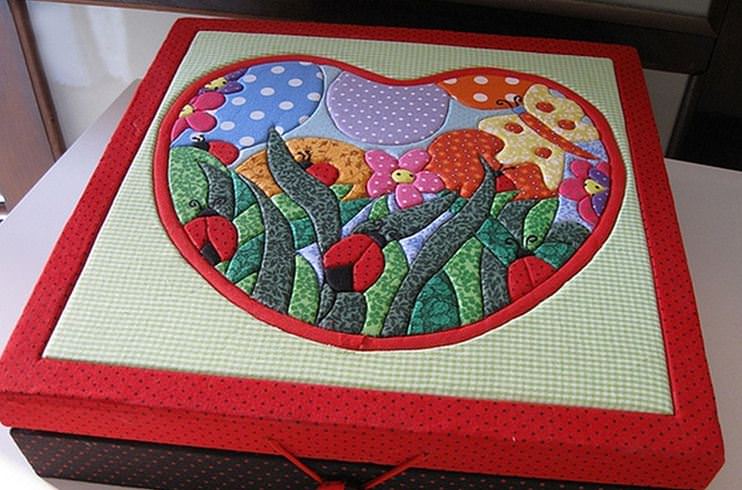
The kinusaiga technique is often used to decorate lids for boxes or boxes (for example, for sewing accessories or cosmetics).

Stunning Christmas tree decorations and crafts are made using this technique.

Kinusaiga: simple patterns and their execution
Kinusaiga allows the use of any scheme that is at hand. You can buy templates, or you can make them yourself. The easiest way is to use stencils. As an example, below is a Kinusaiga master class using a simple template.
To complete this handicraft you need:
- A3 size cardboard;
- A4 size cardboard;
- scraps of fabric of different colors;
- padding polyester;
- glue;
- nailfile;
- threads;
- needle;
- scissors;
- acrylic paints;
- thin brush;
- cord (soutache) of different colors;
- pins;
- frame.
Scheme for creating a painting:

In your work, you can use any scraps that you can find.
- The drawing must be transferred to tracing paper. Cut into component parts - parts.
- After the division is completed, you need to number the parts of the drawing. Then cut out fabric elements using them. You need to leave a 3 mm allowance along the edges.
- Then prepare the canvas for the future painting. For this purpose you need to take a sheet of ceiling tiles. The thickness should be half a centimeter. Glue the sheet onto thick cardboard.
- Glue the second copy of the drawing, which was printed in advance, to the foam. Cut a groove in it, the depth of which should not exceed 2 mm, along the contour of the sketch.
- Apply glue along the cut grooves with a glue stick. When performing this Japanese handicraft for the first time, it is recommended to apply a glue stick to the entire surface.
- Next comes the process of creating the appliqué: the edges of all parts prepared from fabric must be pushed into the grooves so that the edges plunge into the grooves and are tightly fixed there.
Some ideas and patterns for decorating a kitchen using the Kinusaiga technique
Below are sketches and diagrams for designing and decorating the kitchen with Kinusaiga paintings.


This whole application is not done quickly, but the result is worth spending time on. Embroidery with needles takes much longer than paintings made using the Kinusaiga technique. When the basic knowledge of the Kinusaiga technique is fixed, you can take on more complex panels and paintings, which will definitely decorate your home and become an excellent gift for any occasion.
With the spread of the art of kinusaiga throughout the world, specialized stores began to open, which began to sell tools for this type of needlework. Special sets of fabrics also appeared on sale (not every European has an old kimono at home that can be used for scraps).
In addition to fabrics, you can also purchase combination sets in such stores, which include tools, fabrics and drawings - sketches of varying degrees of complexity. Such sets are designed for both beginning needlewomen and those who have been practicing this art for several days.
Here's what these sets look like:


Painted walls are becoming increasingly popular. But sometimes you want to break up their monotony with something. The easiest, fastest, cheapest and most effective way is to use stencils for walls to be painted. The drawing is graphic, clear and bright. Such objects can fit into any environment. But the best part is that the work takes from a few minutes to several hours.
What are they made of?
Stencils for decorating walls for painting are divided into reusable and disposable. Depending on the purpose, various materials are used. Disposable ones are mostly paper. Made from thick white or colored paper. Reusable stencils for walls for painting are:
A few words about vinyl stencils for painting walls. They can be in the form of sheets or in rolls. If you are going to cover a large wall surface with one pattern, it is advisable to take several identical templates. They can be fastened to each other. This way the work moves faster - a larger area is processed at one time.
Types of stencils
Stencils for walls for painting vary not only in the material from which they are made. They also differ in the type of pattern:
- Simple or single. The entire drawing is painted with one color. If desired, you can make a gradient - from a darker shade to a lighter one. But that's all. Parts of other colors are not available.

- Combined or multi-colored. This is a whole series of templates, each of which is painted with a different color of paint. To ensure that the details of the drawing match, marks are applied to them. When placing the stencil on the wall, these marks are aligned.

For this painting, two stencils were needed - one for black and one for red.
- Reverse or anti-stencil. This template is cut out according to the reverse principle, that is, what is cut out in ordinary templates remains in this one, and it is these parts that are mounted on the wall. Then paint is applied, but it paints the areas not covered by the stencil. It turns out that there is a halo around it from a different paint, but the drawing itself remains the base color.

- For three-dimensional drawings. Decorative plasters and putties are now on sale. They can also be used to apply designs to walls. Stencils for them are made specially - thick, made of polyvinyl up to 4 mm thick. When applying the pattern, the slots are filled with putty and left until dry. The result is a three-dimensional drawing.

It's easiest to work with simple templates. For starters, you can try this type of pattern. If you are confident in your abilities, you can work with more complex combined ones. When working with them, remember that you can remove the film only after the paint has dried.
Where to get templates
There are ready-made templates for wall decoration on sale. They are all made from vinyl film as it is flexible, durable and lightweight. If you don't like ready-made templates, you have two options:
- Order production from a company engaged in outdoor advertising or printing booklets (often this is the same company). They have special equipment - plotters, which cut out the necessary outlines on vinyl. Moreover, some of them can develop a stencil for you based on a photograph.
 Beautiful birds and animals are another win-win option
  Stencil of dancing cranes - according to popular belief, good luck
 - Do it yourself. If you have artistic abilities, it is likely that you will be able to draw the pattern yourself. If not, download the version you like, enlarge it to the required size and print it. Take thick (not packaging) cardboard, put a carbon copy, and a drawing on top. Everything needs to be firmly secured so that it does not move. While tracing the drawing, transfer its contours to the cardboard. Then cut it out with a sharp knife. To make cutting easier, place something soft (a piece of felt, for example) under the cardboard. This will make the edges smoother. In general, when making it yourself, you need to be careful - every burr or unevenness spoils the overall impression.
 Stencils for walls for painting: cats are a win-win option. These are more difficult to make - more fine details
Making stencils yourself is a painstaking task. If this doesn't scare you, go for it. You can try working with film. It requires a very thin and sharp, but rigid blade. If there are even small defects - a burr, uneven edges - everything must be corrected. In general, good luck to you.
How to work with stencils
You can apply the design not only to painted walls, but also to wallpaper, plastic, glass, etc. That is, stencils for walls for painting can be used not only to decorate walls, but also to decorate furniture facades, for example. Only highly textured surfaces are not suitable. You cannot apply paint to them properly. All others are suitable. Moreover, acrylic paint is compatible with almost all. They can be in a jar or aerosol. The advantages of acrylic are known to everyone: the paint adheres well to both smooth and porous surfaces, dries quickly, does not fade for a long time, and has almost no odor. That is why stencils for painting walls are usually painted with acrylic paints.

What to work with
If an anti-stencil is used, then paint is applied only from a can. You cannot achieve this effect with other tools (except perhaps a spray gun). When spraying paint, the can is located 25-35 cm from the surface to be painted. It is better to select the distance by doing a “pen test” on a piece of old wallpaper. This way you can accurately select the duration of paint dispensing, movement, and distance. And one more thing: when working with a spray can, it is necessary to additionally protect the areas adjacent to the stencil so that careless movement does not end up painting an unnecessary part of the wall.

You need to work with paint in spray cans carefully - its quantity is difficult to control
When working with all other templates, you can use:

In any case, we take paint in limited quantities. If there is a lot of it, it will flow under the stencil and ruin the whole job. Therefore, after dipping the brush/foam rubber/roller into the paint, we squeeze it out well. The amount of paint can be checked by running it over an unnecessary sheet of paper/piece of wallpaper several times.
What and how to fix it
To prevent stencils for painting walls from moving, they must be fixed to the wall. There is a special glue for this. It is applied in a thin layer to the back of the stencil, after which it is attached to the wall. After completing the work, removing it is not a problem. Moreover, it does not damage the surface.
Another option is double-sided masking tape. Note! Masking tape is a must. Unusual. If you use a regular one, it will damage the wall - most likely, a piece of paint will remain on the tape. Or vice versa, part of the sticky composition will end up on the wall. Which is no better. But masking tape acts approximately like the glue described above: it holds well and does not leave marks after peeling off.

Scotch tape is easier to buy and cheaper, so most people use it. We cut it into small pieces, remove the protective film on one side and glue it to the stencil. You need pieces in the corners - that's for sure, but they may also be needed in the middle of the long side of the sheet or somewhere else. It is important that the stencil holds well and there is no possibility of moving it.
The procedure for transferring a picture to the wall
You need to work with a stencil for painting walls like this:

Then, if necessary, we repeat the procedure. Next time you need to check whether the paint left over from the previous time has dried. Can only be used after complete drying. Dried several times, the paint forms a thick crust. This may cause it to flow between the stencil and the wall, or the shape of the design will change. Therefore, after several uses, remove the paint.
Features of working with a volumetric stencil
To create a three-dimensional image, you can use textured paint, putty, decorative plaster, liquid wallpaper and other similar compositions. You can find special formulations in stores, but they are very expensive. In this part, the choice is yours; all the compositions listed above are suitable.
All of the materials listed above have a paste-like consistency. There is no point in applying them with a brush or roller. You need a small spatula, preferably a flexible plastic one. If you don't have it, you can use a piece of any plastic. Even an old plastic card will do.

We take a certain amount of the composition on a spatula, fill the cavities with it, immediately removing the excess with the same card. At this stage, you need to make sure that there are no air cavities left and that the surface filled with plaster/putty is smooth. If you've ever worked with plaster, you won't have any problems. Everything is exactly the same.
After the composition has set, but before it dries completely, remove the stencil. In this case, the edges of the picture turn out torn and uneven. Don't be upset, this is normal. Don't do anything, just wait for it to dry completely. Now we take sandpaper with medium or fine grain (depending on the composition that was used) and sand all the nerves. In general, that's all. Then, if you want, you can color the resulting ornament, but that’s another story.
Choosing a location for the stencil
The drawing looks best on an empty or almost empty wall. Here the choice is unlimited. You can choose a stencil that will attract attention. This wall becomes an accent wall.
If the wall is not too busy - there is a piece of furniture next to it, but most of its surface is free, choose a stencil that will make the furniture “play.” There are drawings that play off a sofa or a mirror, turning everything into a single composition.

Tall and narrow stencils near doors and windows fit well. Usually these are floral ornaments. When choosing them, be guided by the design style of the room. If the decor is colored, choose the colors that are found in the interior.

The best way to hide is to pay attention
Small drawings that play off sockets and switches look very good. This is one of the decorating techniques - if something cannot be hidden, let’s shift attention to it. In this case it works great.
Type of stencil for different premises
Stencils for walls for painting are selected depending on the type of room. There are universal designs: geometric, floral patterns, landscapes. They are suitable for any room, hallway, kitchen, etc. You can find a lot of them, in different versions. And under strict minimalism, and under chic classics or romantic Provence. Moreover, it is often not only a matter of the drawing itself, but also the selection of paint. The same pattern will look different in black and pink. And this is worth remembering.

There are stencils for walls for painting with thematic designs that are appropriate only in certain rooms. For example, in the kitchen they usually use thematic pictures with food and products. In nurseries they often draw cartoon characters for smaller children, and for teenagers - game or anime characters.
For bedrooms they are trying to find calmer designs. Even if it's a man's bedroom. Here you need to relax and the atmosphere should be appropriate.

In other rooms - corridors, living rooms, dining rooms - neutral images are selected that will appeal to people of different ages. These are all the same plant motifs or landscapes.
Stencils for walls for painting: photo
The number of possible drawings is impossible to count. Different styles, elements, sizes. Graphic, fantasy, from cartoons, based on paintings, photos, schematic and realistic images of flowers, insects, animals, trees... In general, there is everything. You just need to find it. Some interesting options have been collected in this section. Perhaps you will like something.


Stylized animals and cartoon characters - stencils for walls for painting in children's rooms

Floral patterns - unobtrusive and calm


Even one sheet is a work of art


Linear or border stencils, elongated upward compositions - all based on plant motifs

Stencils with dragonflies... and if you choose fluorescent paint, the effect will be unexpected

Flowering trees are a symbol of spring and eternity
- an eternal theme... they are also on the stencils

Bamboo, spikelets - different styles, but how beautiful...

Flowers are another win-win theme for interior decoration

Simple and promising...
Are you looking for a fresh and unusual idea for interior decoration? Familiar pictures are good, but the soul is looking for something new. On the Internet you can find more than one master class on creating three-dimensional paintings with your own hands from paper, fabric or leather. These are 3D canvases that are amazing in their liveliness, which are fun to create and pleasant to contemplate.
DIY paintings
A three-dimensional painting can be called a 3D sculpture in a frame, made from scrap materials. It can be anything in the full sense of the word: paper, dried flowers, polymer clay, leather, fabrics and other creative materials. For example, they make magnificent three-dimensional drawings from plaster directly on the kitchen wall. Plaster modeling is, of course, beautiful, but this article will talk about simpler techniques.
Anyone can make an original masterpiece of art with their own hands. Why don't you try your hand at it? The master class will help you learn the basic principles to get started with an idea and start creating.

Master class “3d paper painting”
For the first test of the pen, take the simplest version of a three-dimensional painting - a paper appliqué.
Set of materials for work:
- frame with deep sides;
- stationery knife;
- pencil;
- colored cardboard with a bright print;
- white watercolor paper or thin cardboard;
- ruler, scissors;
- PVA glue.
Instead of a frame, you can take a candy box.

Step-by-step description of a three-dimensional paper painting:
- cut out a rectangle from a white sheet of paper to fit the selected frame;
- draw by hand or print a heart of such a size that it fits freely in the frame 9 times in three rows. The approximate size of the heart is 4x5 cm;
- the heart needs to be cut out and circled with a simple pencil, placing it on white paper prepared earlier. You should get 3 rows of three hearts or more (less) as you wish;
- Now the important step has come - carefully, using a stationery knife, we cut out the “wings” of the hearts. To do this, you need to make cuts along the contour of the hearts, without touching the lower and upper parts;
- bend the cut parts of the hearts up and towards the center, making them voluminous;
- The blank with hearts must be glued onto colored cardboard. It is desirable that it be special scrap paper with a small pattern. It will be visible through the bent wings of the hearts;
- The final step is to place the picture in a frame and fix it on the back side with a stapler or glue.
The presented master class is simple, but based on it you can make your own 3D plot - fluttering butterflies, tiles, people and other interesting templates.

Master class “multilayer 3d paper painting”
Making an interesting paper painting using the multi-layer technique is very simple - you just need to find a design and print many copies. The finished product, hung on the wall, looks interesting from different angles - a real 3D painting.
Set of materials for work:
- sufficiently deep frame;
- cardboard;
- laminate backing;
- thick album sheets and printer;
- craft glue;
- acrylic paint;
- acrylic lacquer;
- scissors;

Step-by-step description of a multilayer paper painting:
- choose a beautiful and bright picture with a clear image. It is desirable that there are many parts on it that will be convenient to cut out. We format or select the picture to fit the frame size. We print 10-12 copies on thick paper;
- Depending on what kind of printer you have, we determine whether the pictures need varnishing. Thus, images printed on an inkjet printer must be sprayed and varnished, otherwise the colors will run. Laser images can be left as is;
- We simply glue the first image onto cardboard cut to the size of the frame plus gaps for mounting;
- We cut out all other images, but in a special way. For example, if you are creating a flower, then let several whole flowers be cut out with a stem and leaves, a couple more layers of leaves, and even more of the inflorescence itself. It sounds complicated, but as you go along it will become clear;
- Now we are preparing the basis for the parts from a thin backing for the laminate, which looks like a thin layer of polyethylene foam. The cut-out backing should be slightly smaller than the parts so that it is not visible in the finished product on the wall;
- we glue the parts onto the substrate, but not all of them, but selectively - only those layers that should protrude forward. In some small parts, a substrate may not be needed;
- We place the prepared parts on the base in a frame with glue. First, we place large pictures with many details, and then individual details that should be more voluminous;
- the side parts should not remain white, otherwise they will reveal the presence of a substrate - they need to be painted over to match the image;
- We cover the picture with acrylic varnish in several layers. Each layer is applied after the previous one has dried;
Now you will have a three-dimensional painting with your own hands - now you can place it on the wall in this form or add glass. Such canvases can be made from fabric, then you will get a picture with a beautiful terry surface. 
Master class “3d painting made of leather”
Set of materials for work:
- frame;
- the base of the picture is made of leather, suede or fabric;
- pieces of leather of any color;
- acrylic paints;
- rectangular sheet of chipboard or plywood;
- furniture stapler;
- craft glue or superglue;
- scissors;
- paper (for sketches);
- soap or chalk (for contours on the skin).

The first question that arises about creating such a work is where to get the leather? Firstly, it must be natural, and therefore it is not cheap. But you probably have a jacket, bag, gloves and other used genuine leather products. Feel free to chop them up - you will have a lot of fun and can make a gorgeous picture.
Step-by-step description of creating a painting “bouquet of leather”:
- Make sketches of leaves and petals on paper and cut them out - these will be templates for work;
- transfer the contours to the skin and cut out how many flowers with petals you want to have in the finished painting;
- If the materials at hand do not contain colored leather of a suitable shade for the colors, then use acrylic paints. Paint the petals with burgundy or pink colors, and the leaves with green. You can choose paints of any colors you like;
- to make the petals round and voluminous, you need to hold the skin over a candle flame - it will begin to take on an interesting natural shape;
- we collect buds from the petals; you can place a ball of leather or fabric in the center as the center of the flower;
- we stretch a base made of any fabric, suede, leather or other material onto a sheet of plywood and fasten it with staples from the wrong side. The fabric can be pulled tightly or draped. We insert the resulting base into the frame;
- Arrange the finished flowers and leaves on the base - evaluate their location by stepping aside;
- complement the composition with leather curls, natural materials - shells, dried flowers, etc.;
- Now you can glue all the elements to the intended places using a glue gun or a tube of superglue.

We clean the finished picture from traces of handicraft and hang it on the wall - that’s the whole master class. Similar creations can be made from fabric - decorating the drawn silhouettes of girls with dresses made of fabric and lace.
To repeat the master class and create three-dimensional paintings with your own hands, you do not need to have the ability to draw. But what you really need is perseverance and accuracy.

For beginners, we can recommend techniques made from paper, and for more experienced craftsmen, magnificent 3D paintings made from leather, polymer clay or plaster. Interesting paintings for the kitchen are framed vegetables and fruits sculpted from clay or made from plaster.
Video gallery
Photo gallery


Having decided on the style, you can begin to select materials for the future work:
- Paint and canvas.
- Cardboard, designer paper, magazine clippings, old photos.
- Textiles, leather, ribbons, braid.
- Glass or crystals.
- Buttons.
- Dried flowers, shells.
Advice! Don't throw away old children's drawings, scraps of fabric, magazines, decorations– all this can become part of the picture. Store them in a separate box, periodically reviewing and arranging them together.
Painting with paints
The easiest way to create an original painting for your interior with your own hands is to paint it. The subject is limited only by the imagination of the creator. Even if you have no artistic skills, you can create a masterpiece: use abstract techniques, study master classes and photos of finished works.
Oil, watercolor, and acrylic paints will become faithful assistants in creating paintings for the interior. As a base, you can use either professional canvas or regular thick paper or a primed board.
Advice! You can draw inspiration from nature if there are picturesque places near your home. If you are unlucky with either the location or the weather, feel free to draw your household, pets, fruit compositions - whatever. The accuracy of the reproduction of reality does not play any role, the main thing is to approach the process with soul.
Modular paintings are suitable for almost any room: from kitchens before living room, but it is important to select appropriate images. If you don’t have the time to create a masterpiece with your own hands, then we have good news for you - today you can buy them in any specialized store!
Photo printing
The technical side of the issue is taken care of by a photo workshop, which can print a suitable image on almost any basis: canvas, paper, ceramics, etc. These can be ordinary posters depicting interesting places, people, ornaments.
Advice! A poster is not just a picture, it must convey a certain idea, correspond to the interior, the theme of the room and the character of the owners of the house. Recently, pin-up and retro style posters have gained particular popularity.
If the poster is large-format, you can divide the image into several segments and, when combined into a single canvas, play with the joints, making it look like a modular picture.
If there is a child in the house, then you can scan his drawings and select the ones that match the color, shape, etc. Such a poster can be complemented by a photo of the artist himself. All that remains is to print the poster and place it in a frame that matches the color and style.
Collage of old and new family photos You can hang it as a picture in the bedroom or living room, and posters depicting the corresponding paraphernalia and fruits are suitable for the kitchen. Finally, it is worth noting that it is recommended to choose posters and panels for the kitchen in rich and bright colors, however, no one forbids you to go against the rules and create stylish ones.
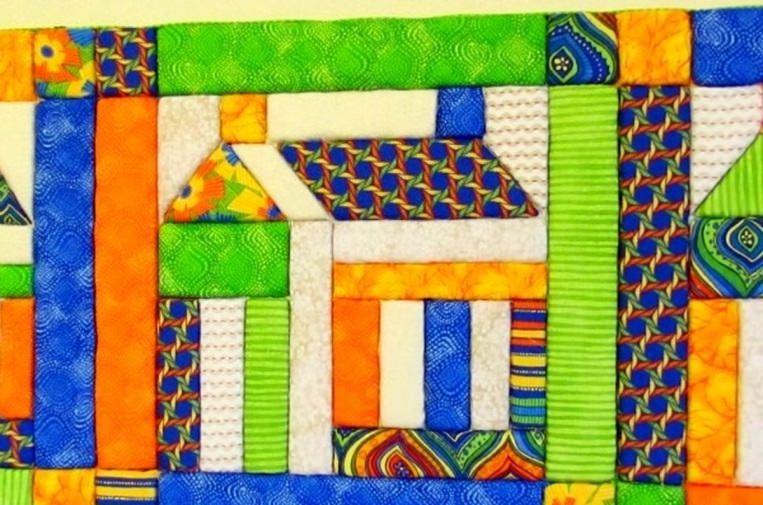
Textile
From all kinds of scraps, fabric with beautiful patterns, ribbons, braid or lace, you can create real masterpieces in patchwork style with your own hands. Fabric paintings are most often made using the appliqué technique. The basis is taken of dense textiles with discreet and inconspicuous patterns (stripes, polka dots, etc.), and the main elements are cut out from bright shreds.
Most often, kitchens and children's rooms are decorated with textile works, since these rooms are characterized by a certain simplicity present in the appliqué.
Advice! From felt, flannel and other fabrics that hold their shape well, you can cut out fruits, animals, cars, and houses. You can safely combine different textures and patterns on fabrics, use braid, decorative cord, and buttons for decoration. For the living room, you can make a textile picture from crinkled silk with abstract patterns.
From buttons
With their help, you can create original things by sewing or appliqué. Often this type of fittings is used to depict leaves on trees. Buttons can be glued in an original way inside any contour, for example, a silhouette butterflies or cats. In sewing stores you can select parts of various shapes, colors and materials and lay them out, like a mosaic, according to a pre-prepared pattern. Such button creations will fit perfectly into the kitchen, however, they can also be used for the living room and bedroom.
Advice! Buttons can be glued around the perimeter of the picture frame, giving it individuality.
Wallpaper and panels
Often, after renovation, large pieces of beautiful wallpaper remain, which are useful for making unusual interior paintings.
- Wallpaper in a frame is the easiest option to create something like this panel. A piece of the desired shape is cut from the roll and placed in a frame. Moreover, the ornament may coincide with the pattern on the walls or differ from it. Such elements can come in a row of 2-3 pieces.
- Golden paint and a stencil or small black and white photos, stylized in an antique style, will help to revive a boring canvas in a frame. Similar wallpaper pictures will fit perfectly into
Drawings on walls were made long before our era. Hundreds of years later, rock paintings make the “interior” of caves not only attractive, but also unique.
Nothing has changed. Well-chosen and properly executed wall painting will help transform the room.
A stencil print on the wall is an easy way to achieve the required zoning of space. By making small changes, you can hide the disadvantages of the layout or, conversely, draw attention to the advantages.
The execution of this painting can be either very complex or very simple. The difficulty of the work is largely determined by the chosen execution technique, the size and number of details in the outline. You need to figure out what is right for your home.

How to make the right choice: types of stencils
Determine which number of shades you will work:
- One tone of paint. Used if it is necessary to apply various inscriptions or graphics. This method is popular when drawing silhouettes or ornaments.
- Several shades or colors are used simultaneously. Gives you the opportunity to create entire pictures. This technique is chosen when they want to apply an auxiliary one to the main drawing in order to highlight or hide some part.

Volumetric or embossed. Instead of paint, at the initial stage, putty is used (coating thickness does not exceed 3 mm), which gives the surface a certain silkiness. Then paint is applied to the pattern. To perform such work, you need to confidently wield a spatula. Proper lighting and careful execution allows you to achieve a 3D effect.

Reverse stencil, where the paint is applied not inside, but outside the boundaries of the stencil. The main design (a cutout - a part that is usually thrown away) is fixed to the surface and painted not inside, but behind it. Either a small area is painted, creating a kind of contour, or the entire surface beyond the boundaries of the cutting.

Decide on stencil quality. Think about how many times you want to use your stencil.
- Disposable. Apply one or two patterns. The quality of the material is not so important, the main thing is that it can withstand our manipulations.
- Reusable. When making large-scale illustrations or when they want to create a wallpaper effect. The stencil is made of durable, moisture-resistant material.
You should not rush when choosing; it is better to think through everything carefully and prepare.

Making your own stencil
Having decided on the drawing, we will select material for a stencil and let's start making it.

For disposable For small templates, you can use simple office paper, cardboard or other thick material. For example, plastic film, foil, parchment. If your budget allows, it is better to choose a self-adhesive film (it is strong enough and can withstand moisture).

Follow these steps:
- Draw or transfer the design you like onto the prepared base. In some cases it can be simply print on the printer. In others it is better to use tracing paper. If it is transparent film or parchment (secure the layout to it with a needle or tape so that it does not move), carefully trace the image using a marker. A base that is not very dense (for example, plain paper) can be made more solid by sticking tape over the entire surface.
- Place the workpiece on any surface that you are not afraid of cutting. Using a utility knife (if more convenient, use scissors) carefully cut out the inner areas of the outline, so that the main design is hollow, but at the same time all the details of the image are well held.
Tip: Try to make even cuts, then the template will have fewer gaps with the surface. The drawing turns out clear and beautiful. Pay attention to small details. They must be securely fastened.

For complex or repetitive illustrations, make reusable template. Choose very thick cardboard, acetate film or thin plastic sheets will do.
Tip: You can laminate the paper, it will acquire the necessary moisture resistance. Thick cardboard will become more rigid if you coat it with waterproof paint.

Do the same as in the previous case, taking into account some nuances:
- When making large or complex drawings, you should break them into parts that will be combined during the process of transferring to the wall. Otherwise it will be very difficult to hold them in place when painting.
- You can attach the dimensional pattern to the base using masking tape, adhesive tape, or even glue it (at several points).
- The cut out contours can be strengthened by covering them with tape. Pressing the middle of the tape to the cut border, fold its edges along the borders (one edge of the tape inward, the other outward). You will achieve a tight fit of the material to the surface, the cuts will be smoother.

How to use stencils for walls?
Exists a few rules to achieve the desired result:
- It will help to correctly place the stencil on the prepared wall surface marking. This is necessary when applying the ornament (a slight distortion will definitely catch your eye). Large drawings that were divided into parts will, after marking, fall exactly into place.
- The stencil must be securely secure on a surface. When using self-adhesive film, peel off the protective layer and stick it on the wall. Cardboard, plastic, paper are fixed with masking tape or tape. As a last resort, press firmly with your hand. Other materials should be fixed with special temporary adhesives (for example, Spiri or Takter). They do not leave visible marks, but securely attach the stencil.
- Choose paint depending on the surface. Acrylic paint is suitable for concrete or brick. Use a small amount of paint on a brush or sponge, otherwise it may end up outside the stencil. Try to distribute the paint evenly.
- When choosing a multi-color stencil, think in advance color scheme. Which one will be first, second, etc. Apply subsequent colors after the previous patterns have dried. When making a three-dimensional drawing with a stencil, the paint is applied after the putty has dried.
- Application technique reverse stencil pattern requires preliminary calculation of paint application density and halo width. An image made of paint-impermeable material is fixed on the wall. Paint (spray) creates a halo of the desired shade. The sprayer should be kept at least 20 cm from the wall.
- The stencil is removed from the wall immediately after applying the paint. If you use it multiple times, be sure to wipe it off before using it again. When applying putty, on the contrary, leave the stencil until it dries.