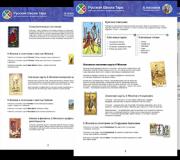
Chibi poses for drawing. What You Will Need
Chibi is a subtype of manga style where the characters give child-like features to appear cute (small body, huge head, big eyes). Because of this heavy exaggeration, lapwing is very easy to make—without the required knowledge of human anatomy! And you can also draw a chibi base, you can give him different outfits and facial expressions, which is also not difficult to do. Thanks to this, drawing lapwings can be a great activity for beginners!
In this tutorial, I'll show you how to draw a base for a chibi girl, and how to create three different outfits for her: for a party, for graduation, and for an awards ceremony.
You will need
for traditional drawing:- several sheets of paper
- pencil
- anything darker and thicker than a pencil (marker with capillary pen tip, etc.)
- Graphic tablets
- one sketch layer (low opacity)
- one layer for the final lines (full opacity)
1. How to draw Chibi base
Draw in the guide lines so you can cover them with final, darker lines later.Step 1
draw a circle. It doesn't have to be perfect—You don't have to paint it with just one continuous line. Remember that than smaller figure, the easier it is to draw such a figure.Step 2
draw a line in a circle, approximately the diameter of the circle. This will help us find land for the character. Keep in mind that this is the classic proportion for chibi, but it can be changed to create the effect you want.Step 3
split the line into three parts.Step 4
draw the basic shape of the body by drawing two curves on the sides.Step 5
cut out a piece at the top to create some space for the neck.step 6
draw a circle under the neck—this will be the torso.step 7
draw half a circle around the torso—these will be the hips.step 8
draw two curves under the hips to close the short-legged shape.step 9
draw the hands using another pair of simple curves.step 10
Add a curve under the arms to close out their shape.step 11
divide the head-circle into halves.step 12
Lapwings have tiny faces on huge heads. Sketch the area for the face as a simple oval in one of the quarters.step 13
Add hands......and thumbs.
step 14
draw two circles on the chest to create the chest. Don't make them too big—the chibi's entire body is small.step 15
time for some huge, manga eyes! In lapwing, they should not be too complex, but they should still be expressive. Draw two curves in the upper half of the face.
step 16
draw two curves on top of them.step 17
Add a tiny mouth to better see the facial expression we are creating.step 18
Add simple eyebrows.step 19
Add an ear.step 20
With the face almost done, we can safely finish the eyes. Add two ovals inside the area we prepared for them. These irises.step 21
draw two small ovals inside. These students.step 22
draw a curve for the eyelashes.step 23
close the eyelash shape. They should be thick and noticeable.step 24
draw shadows for the eyes.step 25
if you want to finish your drawing, take your dark tool/go to another layer and make the final lines. If you want to give him clothes, skip this step.2. How to create a Chibi girl outfit
Step 1
draw top part dresses.Step 2
draw the headband of the dress around the legs.Step 3
Draw frills along the edge.Step 4
describe the dress.Step 5
create some clothing accessories—cute shoes and some jewelry. Don't make these details too complicated; they should match the simple style of the entire chibi body.step 6
let's draw chibi hair. It's basically manga hair, just simpler. Draw “helmets” around the head. What distance is needed to make the hairstyle look soft and light.step 7
We draw a parting and a haircut on one side revealing the face.step 8
sketch of the overall rhythm of the rest of the haircut.step 9
contours of the strands, keeping it as simple as possible.step 10
Add some details to the strands.step 11
let's add the final detail to the outfit, a cute bow.step 12
Now you can add the last, dark lines to the whole picture. She's ready to go to the party!Notice that the eyebrows are still visible under the bangs. This is a typical stylization in manga: heavy as the hair looks, it shouldn't look completely opaque.
3. How to draw a Chibi girl in prom dress
Step 1
first, let's give our chibi girl a more interesting pose. She will hold an important accessory, after all—a diploma of education! Use simple lines the bend of one of the arms.Chibi is an anime style that exists to emphasize the comic image of the character- very small, about 3-4 times smaller than a regular anime. They are characterized big head, which takes 1/2 the height of the character himself, large eyes, very expressive emotions, small limbs of the hands and feet.
Please note: the arms and legs here are drawn differently from how we are used to drawing in any other anime genre.

Step 1. Start by drawing the basic shape of the head, guide lines for the eyes and soft shapes designate the bodies with a triangle. Draw circles around the head where the ears should be.
Pay attention to your ear. For a chibi boy it is larger than for a girl.

Step 2. Now you can draw Chibi's eyes.
Thick eye shapes are more 3/4 circle, then draw thin line along the iris of the eyes. Make your mouth in the shape of a turned letter (D) or a small smile. The nose is almost invisible.

Step 3. After erasing the lines of the eyes and half of the ear, you need to add width to the lines of the arms and legs on the body, making sure that they connect to the body.

Step 4. Now you can start drawing the scarf and shirt.
You can start drawing the scarf thick and wrap it around your neck.
Then draw the part of the scarf hanging from the neck. Add a loose shirt, a little bigger size than the body itself.

Step 5. Remove any additional body parts that will be covered by the T-shirt or shirt and we can move on to the pants! The girl's trousers are very easy to draw, you just need to widen them a little at the bottom and you're done. For boys: Pay close attention to wrinkles and baggy legs.

Step 6. Erase the lines of the legs, which will fit under the trousers and allow movement.
When drawing a chibi girl— her bangs should be long enough and fall apart into pieces. Don't forget to draw the hair that comes together at the front of the ear.
When a chibi boy is drawn, you can create many jagged lines starting from the top of the ear and working all the way to the center of the head.

Step 7. Now for the chibi girl we need to add something similar to the shape of an egg that hides behind her head. Then on the opposite side of the head we will draw a large curl. For a chibi boy, add swirls and erase part of the oval at the bottom of the head.

Step 8. Now for the girl we draw eyelashes in some parts of the eyes. Large at the top, tiny at the bottom of the eye. For the boy don't forget pay attention to thick eyebrows.
Don't forget the whirlwind in the ears for both of them.

All is ready - there are little chibis in front of you!

It is difficult for a mere mortal to imagine that there are many various styles, directions, branches in the field of manga and anime. For him, everything with big eyes, hair tightly sealed with varnish and weapons the size of its owner is one kind of product, flown in from distant Japan. In fact, there is so much diversity that there is none even in the plot of Carmelita. Based on countless requests from my beloved readers, I have prepared a lesson on how to draw a chibi with a pencil. Chibi is a style of drawing cute girls with a huge head and a frail body. As conceived by the authors, the style was created to display comical situations, although science does not yet know how size affects the level of laughs caused, but there is more than enough kawaiiness here. Some offspring believe that the heroes of the trashy cartoon Sauce Park are also chibiks. Such examples should be immediately punished and sentenced to the guillotine, because the legendary Sauce Park is America, where they only know about anime that it exists.
What can we say about Chibiks:
- Since the size of a chibi is much smaller than a regular anime character, their eyes are no longer half the size of their face, but half their body;
- They are another example of the fact that the Japanese strive to either idealize our world or distort it so that not a trace remains of this world. Strange narrow-eyed view of the world;
- Because of their big eyes and cute clumsiness, the amount of cuteness emanating from them increases by +100500 for each person;
- Mostly low-budget anime use these characters as a basis;
- The subject can be used as cookie cutters. It is important.
Well, well, try to draw them!
How to draw a chibi with a pencil step by step
Step one. First, draw a large rectangle on paper. Now add five circles inside that will turn into heads, and a few lines from them to represent the bodies.  Step two. First draw the hair and large eyes on the face, then carefully draw the small bodies.
  Step three. If you like how everything is drawn, start adding shadows and shading the cuties.
  Step four. Use an eraser to clean up the drawing and trace each line again. This is what should happen:
  Want anime drawing lessons? There you are.
This lesson took me several weeks, but what's the point? Maybe it would make some difference to the fact that I'm not that good at drawing chibi. May be. Who knows.
I apologize for... this nonsense. I couldn't think of anything else to write here:/ Chibis are so simple that there's not much to explain about the process of creating them. The reason why I called this lesson a Mega lesson (haha) is most likely because I tried to briefly describe the process from sketch to computer graphics.
I hope this tutorial helps you, at least a little.
STEP BY STEP:
For beginners: Chibi's body structure is super deformed. The head is huge, but the body is very small compared to the head. Personally, I prefer to make the torso slightly longer than the height of the head. The shape of the chibi's body resembles, let me think... a bean?!
Step 5: The chibi line sketch should be created on a separate layer. Try to vary the thickness and saturation of the lines.
Step 6: Select and fill the base colors, each on a separate layer on top of the sketch layer.
Step 7: Shading.
Step 8: *optional: coloring the sketch lines.

Click on the picture to view the image in full size and 100% quality.
CREATING A LINEAR SKETCH...
The main thing in a line sketch is that your lines don't look unnatural, which can happen if the lines are the same thickness everywhere. Try to start the line wide, and gradually narrow it towards the tip. The harder the pressure -> the thicker the lines.

Click on the picture to view the image in full size and 100% quality.
The same steps were followed to create the chibi data.

Click on the picture to view the image in full size and 100% quality.
1) Sketch the pose. The main components are: head (circle), chest (circle), hips (circle) and arms and legs.
2) Trace the lines to get a clean sketch.
3) Create a linear sketch based on the above technique.
4) Shade.
SOME POSE...

Click on the picture to view the image in full size and 100% quality.
Sketching poses will become less difficult if you work with simple forms. Just be aware of different body parts. As you can see (in red), sometimes I don't make the torso "bean-shaped" but rather more rectangular. God, xD the chibs are so weird.
Using the samples in the picture above, you can create wacky pictures like these:

Click on the picture to view the image in full size and 100% quality.
Hahaha
To draw such nonsense, you need to practice for a long time, did you miss it?
EMOTIONS...
What You'll Be Creating
Chibi is a subtype of Manga style where characters are given childlike figures that appear cute (small body, huge head, big eyes). Because of this extreme exaggeration, chibis are very easy to draw - no knowledge of human anatomy required! And once you can draw the base of a chibi, you can give her different outfits and facial expressions, which is also not easy to do. Thanks to this, drawing chibi can be a great practice for a beginner!
In this tutorial, I'll show you how to draw a base for a chibi girl, and how to create three different outfits for her: for a party, for a final exam, and for a medal ceremony.
What You Will Need
For a traditional drawing:
- Several sheets of paper
- Pencil
- Anything darker and thicker than a pencil (marker, capillary pen, etc.)
For digital drawing:
- Graphics tablet
- One sketch layer (low opacity)
- One layer for final lines (high opacity)
1. Draw the Chibi Base
The lines you draw should be subtle, so you can outline the final outlines with darker lines later.
Step 1
Draw a circle. It doesn't have to be perfect—it doesn't have to be a circle with one continuous line. Remember that the smaller the drawing, the easier it is to draw a similar figure.
Step 2
Draw a line underneath the circle, about the same length as the diameter of the circle. This will help us determine the ground underneath the character. Keep in mind that this is a classic chibi proportion, but can be adjusted to create the desired effect.
Step 3
Divide the line into three parts.
Step 4
Draw the basic shape of the body by drawing two curves on the sides.
Step 5
Select a section at the top to create space for the neck.
Step 6
Draw a circle under the neck - this will be the torso.
Step 7
Draw half a circle - these will be the hips.
Step 8
Draw two curves under the hips to close out the shape of the short legs.
Step 9
Draw the arms using another pair of simple curves.
Step 10
Add a curve below the arms to close out their shape.
Step 11
Divide the circle head in half.
Step 12
Chibi has tiny faces on huge heads. Draw the area for the face as a simple oval in one of the quarters.
Step 13
Add palms...
And thumbs.
Step 14
Draw two circles on the chest area to create the breasts. Don't make them too big - Chibi's whole body should be small.
Step 15
It's time for Huge Eyes Manga! For Chibi they shouldn't be too complex, although they should still be expressive. Draw two curves in the upper half of the face.
Step 16
Add two curves above them.
Step 17
Add a tiny mouth to better see the facial expression we are creating.
Step 18
Add simple eyebrows.
Step 19
Add an ear.
Step 20
When the work on the face is almost completed, we can safely work on the eyes. Add two ovals to the area we prepared for them. These are irises.
Step 21
Draw two smaller ovals inside. These are the pupils.
Step 22
Draw a curve for the eyelashes.
Step 23
Close the shape of the eyelashes. They should be thick and visible.
Step 24
Add outlines to shade the eyes.
Step 25
If you want to finish your drawing now, then take a darker tool/move to another layer and then trace the final lines. If you want to add to her outfit, then skip this step.
2. Draw a Chibi Girl in a Party Outfit
Step 1
Draw the top of the dress.
Step 2
Draw the headband of the dress around the legs.
Step 3
Draw ruffles around the headband.
step 4
Draw a dress.
Step 5
Accessorize your outfit with fun shoes and cute jewelry. Don't make these details too complicated; they must match simple style the whole image of Chibi.
Step 6
Now let's draw Chibi's hair. It's basically Manga hair, very simple. Draw a “helmet” around the head. Some volume is needed to make the haircut look soft and light.
Step 7
Draw a parting, as well as one side of the haircut that opens the face.
Step 8
Recreate the basic dynamics of the rest of the haircut's curls.
Step 9
Outline the curls, making them as simple as possible.
Step 10
Add individual details to the curls.
Step 11
Let's add the final detail to the outfit, a beautiful bow.
Step 12
Now you can add the final dark lines to the entire image. Chibi girl is ready to go to the party!
3. Draw a Chibi Girl in Academic Attire
Step 1
At first. Let's give our Chibi girl a more interesting pose. Still, she will be holding an important accessory - a diploma higher education! Use simple curves to bend one of the arms.
Step 2
Draw a closed palm at the end of the arm.
Step 3
Draw a line defining the size of the diploma, add curls at the ends of the drawn line.
Step 4
Outline the diploma.
Step 5
Add a thumb.
Step 6
Draw the characteristic “collar” of the graduation robe.
Step 7
Draw the rims of the robe: at the bottom and on the sleeves.
Step 8
Outline the graduation robe.
Step 9
Draw the headband of the dress under the robe.
Step 10
Now, let's add a hairstyle. The same thing, draw a “helmet” at some distance from the head.
Step 11
Draw the front part of the hairstyle.
Step 12
Draw the dynamics of the curls of the entire hairstyle.
Step 13
Add a square academic cap, step by step:
Step 14
Add a tassel to one side.
Step 15
Step 16
Now you can add the final dark lines!
4. Draw a Chibi Girl in a Sports Outfit
Step 1
Let's give the Chibi girl a solemn pose with her arms raised. You can do this by drawing the same curves as before, just in a different direction.
Step 2
Add brushes.
Step 3
Draw the collar of the suit.
Step 4
Draw headbands on the sleeves and also on the bottom of the suit.
Step 5
Outline the suit.
Step 6
Add details to your suit to make it look less flat.
Step 7
Add outlines to the bottom of the shorts.
Step 8
Complete the outline of the shorts.
Step 9
Draw the shoes:
Step 10
Add a medal to your chest.
Step 11
Finally, simple hairstyle. Draw a “helmet” at some distance from the head.
Step 12
Draw a parting on the front side of the hairstyle.
Step 13
Recreate the dynamics of the rest of the hairstyle curls.
Step 14
In a simple way, outline the entire hairstyle.
Step 15
Now, just add the final dark lines!
So cute!
Now you know how to draw three cute Chibi girls in three outfits, as well as any style of Chibi in any outfit you want. If you want more chibi related tutorials, then you will like the following articles: