Look at paintings of girls in watercolor. Drawing with watercolors
With watercolors you can paint anything - from a realistic portrait to imaginary alien worlds. Many people think watercolor is a complex artistic tool. But all you really need to learn how to paint with watercolors is to just start. We have selected 11 tips for you, thanks to which you will become 11 steps closer to understanding the art of watercolor drawing.
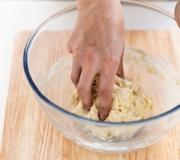
1. Don't be afraid to get your hands dirty!
If you've never drawn before, it's time to get started. Open the album, create interesting textures and stains with watercolors so as not to freeze in front of a white sheet of paper. Start from them in search of a plot. Color pages can be bright and exciting or create a calm, melancholic mood. Color or texture may suggest the next step - or maybe you're itching to paint without it.
Illustration from the book “The World of Watercolors”.
2. Find your watercolor paper
The result of the work largely depends on the quality of the watercolor paper. Go to a bookstore and select 5-10 different sheets of watercolor paper to try out. Be sure to make notes on each sheet (type, weight of paper and results of working with it). A suitable paper weight for beginners is 300 g/m2, some professionals prefer 600 g/m2. There are other types of watercolor paper, such as NOT paper and rough texture paper, or cold pressed paper.

3. Use professional paints
Even novice artists should purchase professional watercolor paints. Unlike cheap analogues, artistic paints lay beautifully and spread on paper.
“I prefer tubes rather than pans: firstly, you don’t have to wait for the paint to soften and become workable, and secondly, it’s easier to create rich, dark mixtures with tube paint.”Billy Showell
It is true that artist paints are more expensive, but they will also last longer. They dilute better and therefore are not used up so quickly.
Advice. Try new paints and other art materials as often as possible. Experiment. Don't become a hostage to one habit
4. Observe and consider before you take up the brush
Before drawing, study the structure of the object. Look at it as if you were seeing it for the first time, look carefully, take notes, sketches, get familiar with textures and details that you have never paid attention to. For example, observe the spiral arrangement of the leaves or the whorls along the veins of the stem.

You get double benefits from drawing plants - first you meditate while looking at it, and then you get real pleasure from drawing. Isn't it wonderful? @miftvorchestvo
Try to mentally break down what you see into its components. Select the main shapes. See how they overlap each other. Imagine the landscape as a stage set. Pay attention to what is closest and what is further away.
5. Learn to mix paints
Try mixing colors to get an idea of what shades you can achieve with your paint set. Mix two colors first, then add a third to them. Experiment!
You will love creating such beautiful colors and variations of shades and tones, the number of them is almost inexhaustible.
Focus on yourself. You can make either very realistic drawings or very non-trivial ones. Your task is to collect paints whose properties you will know, which will allow you to create the desired shades with a guaranteed good result.

By mixing pure pigments, you can create cool, warm or grayish variations of the same color. Illustration from the book “Song of Colors”
6. Start with sparing expression
If you make pencil sketches or sketches, you can diversify your watercolor drawings by adding accents. You don't have to color the entire page; sometimes a few well-placed brush strokes create the most powerful effect.

Careless dotted watercolor strokes in sketches are the signature style of Felix Scheinberger. Illustration from the book “Watercolor Sketching”
7. Use liquid primer for watercolors
Liquid primer for watercolors is applied to the paper before starting work and allows you to easily remove dried paint if necessary. This is especially important when working with intense or persistent pigments: you don’t have to worry about “staining” the paper in the area of highlights. Before using it, practice in a sketchbook, as the surface for drawing will be quite slippery.
To remove paint from those areas where it was not needed (you accidentally went beyond the edges or you need to create highlights), simply wash off the paint with a clean, dampened brush or sponge.
8. Learn the art of glazing
Artists call glazing a technique for obtaining deep iridescent colors by applying translucent paints on top of the main one. The glazing technique is an excellent way to convey the finest color gamut. The paints are applied very delicately, layer by layer, and after drying the details of the last layer are worked out.

Illustration from the book “Song of Colors”
9. Dry brush technique
This technique can be used to draw animal fur or small hairs on fruits such as kiwi.
Apply paint to the brush and remove excess with a napkin. Straighten the brush hairs. Apply paint to a dry surface previously painted in the background color. Work in small strokes in one direction, imitating hairs on the surface.

Kiwi using dry brush technique. Illustration from the book
Hi all! You really asked me to publish watercolor painting lessons, and I thought for a long time where to find suitable material, because this topic is not new, and there is already a lot of different information on the Internet, so I decided not to invent it, but to use materials from foreign authors. This article is the first, but not the last. I hope you enjoy it and find it useful!
This article covers the basics you need to know to get started with watercolors. However, if you continue to scratch your head after reading, then please feel free to ask questions in the comments! I will be happy to answer you!
Before I started writing this article, I decided to do a little research on the Internet about painting. watercolor for beginners. This way, I reasoned, I wouldn’t miss a single moment and would write the best post. But good God... I've been painting with watercolors all my life, and the information I found on Google stunned me. After three too many overwhelming articles, I threw up my hands and decided that I would show you how I, personally, work with watercolors - and the adjective to my watercolor approach is “simple”.
Tools and materials
First, I want to talk about the materials and tools you will need. Of course, the most obvious tool would be a watercolor set.

I prefer the set from Greenleaf & Blueberry. It's a little pricey, but I love it! However, if you are just starting out, there is no need to invest in expensive kits.
Advice from the site:
Go to the nearest art store and buy an art set of watercolor paints that suits your price, the main thing is that it is not for children 😉
If you live in the outback, where it is difficult to find such a product, then you can order a set through an online store. So that you can get an idea of the cost, I’m sending you examples of sets that are easy to find in our country:
Finally you will need clean water and cloth(I use an old dinner napkin) or paper towel to dry the brush.

Any glassware will do, I use an old mug.
Transparency of watercolor
The great thing about painting with watercolor is that you have complete control over the opacity of the paint. Watch how one color can change depending on the ratio of water and paint on the brush!

The picture on the left shows what a brush stroke looks like with a lot of water and a little paint. The illustration in the middle has a more equal ratio of water to paint. The picture on the right has more paint than water.
You may be thinking, “That's all well and good, but how can I control this water/paint ratio?” Before you do anything, apply a drop or two of water directly to the cuvettes you plan to use. This will wet the paint and make it ready to go. Then, you can do one of two things:
1. Use a palette
You can take a palette and mix three different shades of the same color on it. For the first color, use a brush to apply about eight drops of water into the indentation. Then, dip the still wet brush into the already moistened watercolor and transfer the color to the palette.

Apply about five drops of water into the second cavity. Again, dip your still wet brush into the watercolor and transfer the color into the water. Be sure to agitate the brush so that all the paint comes off! If this new color is very similar to your first, add more paint.

For the darkest shade, you will simply work directly with the paint from the pan, the shade should be very saturated.
2. We work directly from the watercolor set
You can use the concentration of water on your brush to control the shade of the paint. If you want a very light shade, wet your brush well with water and touch the tip of the brush to the paint. If, when transferring to paper, you find that the concentration of paint is too high, dip your brush in water again, and apply this water directly into the paint on the paper. The color will become more transparent! For midtones, you'll still be applying watercolor with a damp brush, but using more paint. For darker tones, I dab my brush with a tissue (it will still be damp, but not saturated) and then take the paint straight from the kit.

Mixing
The reason we looked into transparency is for mixing and overlaying colors. With different shades of the same color you can make any look come true. I'm going to show you how to turn a circle into a ball using watercolor blending and transparency:
1. First, draw a circle in the lightest shade.

2. Assume the light is at the top right as shown in the picture. Accordingly, the shadow will be in the lower left corner of the circle. To start painting the shadow, use your brush to pick your medium shade. Draw the shadow as if it is “hugging” a crescent-shaped circle, like this:

3. You can see that there is now a definite separation between the shadow and the highlight. To get rid of this difference and create a smooth transition, you need to mix the colors together - an easy task when painting with watercolors! To mix, submerge the brush in water to remove any remaining paint from the brush. Dry the brush to make sure all the paint is gone, then wet the brush bristles again with water. Then, place the brush on the separation between the shadow and the highlight and drag the middle shade with water, it will blur. Soon, you won't be able to tell where the mid-tone and light end and where the shadow begins!


4. Now it's time to add a dark shadow to the bottom of the circle. Apply a dark shade around the bottom of the sphere, as in the photo.

5. Mix the dark shade the same way you did with the middle shade, and voila!

6. You can add a drop shadow if you want. To do this, draw a thin line on the opposite side of the light below the sphere, like this:

Then, you need to draw out the color with a brush dipped in water until it disappears.

You might find it easier to understand the concept of blending/shading if you watch the video:
If you want more practice with blending and shaping, I'd recommend painting these shapes in different colors:

You could make the sphere green, the cube blue, etc. Drawing shapes like these helps you understand how to make things look three-dimensional. Yes, it can be a little boring... but so rewarding!
Mixing watercolors
To mix watercolors, you definitely need a palette, whether built into your kit or separate. The process of mixing colors is simple: apply one color to the palette and then add another color. Mix them together and you get a new color!

If you have a small selection of colors in a set, knowing how to mix will come in handy. There are many sources that tell you what colors to mix together to achieve the desired result.

If your mixed color dries out in your palette, don't worry. You can re-wet it and it will be as good as new no matter how much time has passed.
In Ancient Egypt they painted with a sharpened stick with a piece of camel hair at the end using paints made from crushed earth. This was the first watercolor technique, which is already about four thousand years old. Since then, watercolor painting has become firmly established in Europe.
The word “watercolor” itself has the Latin root “aqua” - water. Therefore, the main principle of the watercolor painting technique is the degree of hydration of the paper. It is water that gives the transparency of paints, purity of color and allows you to see the texture of the paper.
The artist has a choice of existing watercolor painting techniques:
- dry watercolor (Italian watercolor);
- wet watercolor (English watercolor);
- combined (mixed) technique;
- watercolor on fragmentarily moistened paper.
Dry watercolor (Italian watercolor)
Acquarello - this word sounds musical to the ear. Layers of paint are applied (one if it is a single-layer watercolor) or several (if it is glaze) on a dry sheet of paper.
“Watercolor is the tender promise of oil,” and this technique is a direct confirmation of this.
The tonality of the paint is thicker, the colors are brighter, the strokes are visible as if the drawing was painted in oil. The main difficulty is that if the oil endures everything, the work can be corrected, but in watercolor it is almost impossible to make mistakes. The Italians even have the term “A la Prima”, that is, “in one go.” The picture is painted without stages. With pure, undiluted colors, you need to boldly capture the essence, make a sketch from life.
Steps of an artist using the watercolor-on-dry technique:
- drawing a contour drawing, developing shadows;
- watercolor in one layer, or glaze;
- brush strokes are opaque, mosaic, precise;
- avoid dirty deposits, high speed of work.
Who to learn the Italian style from: Russian academic painting of the 19th century. For example, “Italian Landscape” by A.A. Ivanov is kept in the State Tretyakov Gallery in Moscow.
Watercolor on wet (English watercolor)
 The French call this technique “working on water” (travailler dans l’eau, French).
A sheet of paper is generously moistened with water. The main feature of this technique is the unpredictability of the result. Even if the artist has correctly calculated the tone and color, the drawing may still change more than once before it takes its final form before it dries completely. The contours of objects in this technique are blurry, the lines smoothly flow into each other and are airy. A painting made using this technique is thought out and imagined by the viewer.
In his book How to Understand Watercolor, writer Tom Hoffmann said: “Painting in watercolor is a dialogue between the artist and the viewer, each with their own role. If only one person talks, the other one will get bored.”
Artist's steps in wet-on-watercolor technique:
- adding water to paints;
- mixing paint, it doesn’t matter where, on the palette or on the sheet;
- wet the sheet generously, then smooth it so that there are no irregularities left;
- remove excess water from the sheet with a piece of cotton wool so that it stops shining;
- complete the drawing using extremely precise strokes;
- drying the pattern for 2 hours;
- development of foreground elements (if required).
Who to learn the English style from: the brilliant English painter William Turner. According to contemporaries, he created four drawings at once using this technique “with amazing, monstrous speed.”
An example of Russian artists is the drawing by Maximilian Messmacher “View of Cologne Cathedral”.
Mixed media watercolor
Many artists combine several drawing techniques in one work.
Combined (mixed) technique techniques:
- put the first layer of paint on a wet sheet;
- elaboration of plans, creation of the required degree of blur;
- drying the drawing;
- lay out the next layers of paint in stages;
- elaboration of the middle and close plans.
Basic rule of technology: the paper is not wetted all over, but in the desired area (reserve); the pigment is applied to the surface from top to bottom.
 The paper may become wet in patches. The artist himself decides which plan to work on, creating watercolor stains. Using a sponge, you need to remove excess water so that water does not seep into those areas that should remain dry according to the artist’s plan. Examples of combined techniques in the work of artist Konstantin Kuzema.
The next issue for the artist is to create layers of paint. There are single-layer and multi-layer techniques (glaze).
Single layer watercolor technique
To paraphrase the famous satirist, one careless movement, and at best you will end up with graphics instead of watercolors. The paint is applied in one layer; adjustments cannot be made. The single-layer technique can be applied dry-on-dry or wet-on-dry.
Features of single-layer watercolor “dry on dry”:
- execution literally in one or two touches;
- it is necessary to outline the contours of the drawing in advance;
- select the colors to use for speed;
- for colorization, use shades only on a damp layer;
- more clarity and graphics, less overflow.
Features of watercolor in one layer “wet on dry”:
- more shimmer, less graphics and clarity;
- Apply strokes quickly, until dry, one after another;
- For colorization, have time to add paint when the smear has not yet dried.
 The advantage of the single-layer technique is the creation of picturesque watercolor tints. On a dry sheet it is easier to control the fluidity and outline of the strokes. Contemporary artists often conduct master classes and post videos on Youtube. You can see the technique of single-layer watercolor, for example, from watercolorist Igor Yurchenko.
Those who tirelessly improve their watercolor technique should master the multi-layer technique (glazing), which is used by famous masters.
Multilayer watercolor technique (glaze)
This watercolor technique can give the green light to creating realist paintings. Glaze- multi-layer technique, applying watercolor with transparent strokes from lighter to darker, one layer on top of the other.
Features of multi-layer watercolor technique:
- realism of the image: the picture is in bright, rich colors;
- the bottom layer of light and transparent strokes must have time to dry before the next application;
- the boundaries of the strokes are visible;
- the paint does not mix in different layers;
- the strokes are done carefully, the plans are airy, the painting is in a soft style;
- You can divide the process into several sessions and complete a large canvas.
 Watercolor works made with glaze become similar to oil or gouache painting. So that the work does not have such a disadvantage, you must be able to work with light, apply glazes subtly and accurately.
Sergei Andriyaka is considered an unsurpassed master of multi-layer watercolor. In addition to his creativity, the artist is actively involved in teaching; his and his students’ works are constantly exhibited.
“Oil painting is like driving a limousine, and watercolor is like driving a Ferrari.” Not the same respectability and security, but it’s really cool,” Croatian watercolorist Joseph Zbukvich wittily remarked. What does it take to paint a good watercolor, or to “drive a Ferrari like a breeze,” according to the artist? He answers: “Follow watercolors, or just paint.”
To draw you need brushes, paints, mastery of technology and special effects. You can paint with a dry (wrung out), semi-dry and wet brush (kolinor or squirrel brush).
Techniques in multilayer technology are also varied:
- Strokes you need to do it according to the principle “the master’s work is afraid”, invent your own technique, making dotted, linear, blurry, curly, solid and intermittent strokes.
- Fill covers most of the design with one color, used to provide smooth color transitions.
- Washing- applying no more than three layers of paint, one on top of the other after drying, to enhance halftones, add details and shadows. This way the overall tone is achieved.
- Gradient stretch- strokes smoothly transition into each other, each next one is lighter than the previous one. This is done with a rainbow transition of colors.
- Pulling paint- a clean, dry brush makes the tone of the stroke lighter, passes over the paper, collecting excess pigment.
- Reserve- that part of the sheet that is left white.
Types of reservation:
- « bypass“- the name speaks for itself, you need to carefully go around the right places with your brush. In wet watercolors, you need to leave more space for the reserve due to paint leakage.
- mechanical impact: scratching, masking. Avoid damaging the paper with sharp objects and sharp contrasts. Additional materials: razor, wax crayons, etc.
- paint washing out with a dry cloth or wrung-out brush. You can use a palette knife if the paint is dry.
You can create watercolors using the grisaille (monochrome), dichrome (with ocher) and multi-color techniques.
You can also combine coloring materials and create special effects:
- Mixing watercolors with whitewash, gouache, watercolor pencils, ink, pastel. This is no longer a pure technique, but a mixed one. What does this give? — clarity (pencils), shading (pastel), wash (ink), book illustrations (pen), reserve (white), linear strokes (watercolor pencils).
- Special effect " drawing on crumpled paper"gives an amazing effect of chiaroscuro on the folds of paper.
- Special effect with salt: salt crystals are applied to the drawing, and as a result of friction with the paper, fantastic stains appear. Suitable for drawing a starry sky or water meadow.
- Special effect " splashing“- this effect is familiar to all 1-2 year old toddlers. It turns out that the technique of splashing exists in painting, and you won’t be scolded for it. Using a toothbrush, apply tiny drops of paint. Suitable for writing the elements, storms, storms.
- Watercolor with tea: for the effect of “aging” paper, with a texture reminiscent of parchment. The leaf is tinted with tea leaves.
- A special effect with cling film: the film, moistened with paint, is sharply separated from the sheet of paper. The resulting stains are used as a background.
And again about the principle “the master’s work is afraid”: each artist can create his own, original techniques and techniques. Whether or not to share with others is his business, but every artist is responsible for the originality of his work. As the already mentioned watercolorist Joseph Zbukvic said: “Watercolor is the boss. I’m just her young assistant.”
Each of the forms of art is beautiful in its own way and is different from the other: one requires developed physical abilities, another requires good hearing and a sense of rhythm, and the third requires imagination. Now we will talk about painting - a fine art form that contains beauty, flights of fancy, atmosphere and artistic interpretation of various images. In this article I will talk about such a painting technique as watercolor. You will become familiar with what this paint is, where its history originates, and what it consists of. I'll briefly talk about papers and brushes suitable for watercolor, but I'll also give valuable tips for beginning watercolorists and illustrate in detail popular techniques for this airy art form.
About watercolors
The word “watercolor” itself contains the whole principle of this technique: “aqua” - water. So watercolor paints create pictures only when interacting with water. All drawings painted in watercolor have the effect of lightness and airiness. The peculiarity of this paint is its fine structure applied to a special sheet.  paper. Her strokes have no relief. That is, if we look at an oil painting, we can see the relief and direction of the stroke. In watercolor this is impossible.
It is worth noting that this technique is one of the most elegant in fine art. At the same time, there are many completely different methods of painting with watercolors. Evidence of this is the work of great masters of different eras. It's time to learn the history of this wonderful technology.
From the history
 The watercolor technique originated in the Land of the Rising Sun. Its appearance is not spontaneous, but is associated with the invention of paper, which happened in the 2nd century AD. The technique of watercolor painting also came to Europe with the advent of paper, but it began to gain popularity later than other techniques in this art form. The Renaissance artists who preferred watercolors included: Durrer, Anthony Van Dyck, Giovanni Castiglione, Claude Lorrain. However, there were those who considered watercolor painting to be a cross-cutting and insignificant form of art. This was the opinion of Payot de Montaber.
In the 18th century Many people have come to understand that painting is not only beautiful, but also convenient. This technique was used in military expeditions to quickly sketch the terrain, various objects, and other things. In the middle of the same century, painting with water paints was extremely popular among those who had nothing to do with art. They spent their leisure time painting with watercolors. We learned about this entertainment from the travel diaries of William Gillin. Closer to the 19th century. watercolor has become one of the most important art techniques in England.
At the same time, numerous amateur artists supported the popularity of watercolors by creating portrait miniatures with these paints, which was very popular at that time. Watercolor experienced an even greater rise thanks to Thomas Guertin and Joseph Turner, who painted large format watercolor paintings. In other countries, for example in France, the popularity of such painting was supported by Paul Desroches, Eugene Delacroix and others.
The demand for watercolors lasted almost a century, but by the end of the 19th century. It has been discovered that some watercolor paints tend to fade quickly. Despite this drawback, famous artists of France - Paul Signac, Paul Cezanne and the USA - Maurice Prendergast, John Sargent and other artists, for example, Wassily Kandinsky, preferred watercolors. In 2001, Mexican artist Alfredo Guati Rojo proclaimed November 23 as International Watercolor Day.
It is worth noting that the English tradition of watercolor had a great influence on Russian artists. Here it originates in the cultural capital - St. Petersburg. One of the important personalities in the history of Russian watercolor is Pyotr Sokolov. Well-known people were also fond of watercolors: Karl Bryullov, Mikhail Vrubel and many others. Already in 1887, the association “Society of Russian Watercolor Painters” appeared, which existed for 31 years. But in 1998 it was revived under the name “Society of Watercolor Painters of St. Petersburg”.
About paints
It's time to get to know the colors better. Firstly, watercolor paints are considered one of the most ancient, and, secondly, they have a natural composition. There are many occasions when children love to taste watercolor paints. Adult professional artists also sin by licking their brush. Therefore, it is interesting to know what is included in these paints.
Watercolor paints include:
- finely ground pigment;
- vegetable glue;
- honey/sugar/glycerin;
- wax;
- resins-balsams.
Despite the attractive sweet taste of watercolor, it is better not to try to eat it, because you don’t know how your stomach will react to it.
Watercolors are sold both in small plastic squares and in tubes. Personally, all my life I have used only paint from a Russian manufacturer, namely the “St. Petersburg” series from the Nevskaya Palitra ZK.

What to paint on with watercolors?
Many beginning artists like to experiment with the choice of paper for watercolor. I’ll immediately advise: if you want  To achieve a certain effect and color in a watercolor painting, do not use regular Xerox paper, Whatman paper or regular album sheets. Yes, buying specialized rough paper for watercolors will be more expensive, but such paper absorbs moisture and provides ample opportunities for all your watercolor ideas. You can also use canvas. I do not stretch the canvas onto a stretcher myself, but buy it at an art store. Here the quality of the canvas is no longer so important as it is important that it is already prepared by the manufacturer for applying paint.
How to paint with watercolors
Before telling you about various techniques for painting with watercolors, I suggest starting with the basics of this matter, so:
- Remember that after applying a wet layer of paint, the drawing will become lighter when it dries.
And this is natural, because while the watercolor is wet, it looks brighter and more contrasting, but as soon as it dries, the colors become pale and dull. That’s why it’s an “airy” watercolor. If you want to make the drawing brighter, then add more paint, but do not forget that the brush should still be wet.
- Create colors on a palette.
 If you don’t have a large set of paints, you can always create the color yourself by mixing paints on a palette. Before applying, test the mixed color on another piece of paper, because the color of the paint on the palette and on the paper may differ.
- Dried watercolor can be washed off or diluted with water.
Even if the paint is completely dry, you can still wet the brush well with clean water and highlight the desired elements of the design. But here you need to rub so that the top texture of the sheet does not peel off and lumps do not appear in your drawing.
- Watercolor is a transparent paint.
That is why you should not apply thick layers of paint, this contradicts all the laws of watercolor. And you won’t be able to paint over anything either.
- Start with light.
Start drawing the light elements of the picture and gradually move to the darkest ones.

It is better to purchase three quality brushes: thick, medium and fine, rather than a set of cheap synthetic brushes. A high-quality brush holds its shape and applies watercolor well. I recommend using squirrel. A cheaper option is a pony.
- Don't add a lot of water.
If you use an excessive amount of water with your brush, you will not get the expected shade and color saturation, and you also risk getting blurry contours and details in your composition.
Watercolor painting techniques
And now, when you are already sufficiently familiar with what watercolor is, it is time to consider several good techniques for painting with this airy paint. It is worth noting that each of them requires a special approach, rhythm and time of painting. In one of the techniques you will need to apply several layers and wait until the paint dries, and in the other you have time to apply colors while the drawing is wet.
On our website you could already familiarize yourself with others. However, this lesson will be many times larger and this is justified by its benefits. For an easy example, I solved it using different techniques. This is what the initial pencil drawing will look like in all techniques:

Watercolor with graphics

Watercolor painting techniques for beginners

Mosaic in watercolor

Now we'll move on to other non-traditional watercolor painting techniques. There are two more wonderful techniques that are suitable for children and adults. They will not require such painstaking work as the previous one. To implement the following methods in watercolor, you need a faster pace of work, and you will understand why. To do this, among other things, you will need to stock up on a thick brush for greater ease of use. And so, let's start with the first, easy technique, which will be very interesting for children.
Techniques for drawing with wax crayons and watercolors

Watercolor gradient
I will also show this technique using the example of an apple. Why not?

For even greater effect, I recorded two combined watercolor painting techniques for you on video. Watch a short example, I hope it will be useful for you, and then you will learn about another interesting technique, which will be partially touched upon in the video.
Techniques for painting with watercolors on wet
This is one of the easiest and most interesting techniques in which you need to have time to mix paints again. In this case, we will again need a thick brush and clean water. Let's get started:

But I want to show another equally interesting subtype of this technique.

Conclusion
In this article, I decided not to confuse readers who are novice artists and write the names of paints with commonly used adjectives: “red”, “dark red”, “scarlet”. They do not correspond to the professional names of the paints that are indicated on the White Nights packaging, but they give a clear idea of the color to those who use other watercolors. I think professionals will recognize the correct name of the paint by its color in the picture.
To get the desired result when working with paints, you need to have the right tools. Of course, you don't have to buy expensive painting supplies, but I still don't recommend using bad watercolors or paper that isn't suitable for it.
Here's a list of the basic things you'll need to get your creative journey started:
- Brushes: my favorite ones are with faux sable. They have a reasonable price and are in no way inferior in quality. You may need brushes of different sizes. I advise you to buy round brushes number 2, 4, 6, 8, 10 and 12, as well as one or two large ones, so that you have plenty to choose from.
- Palette: Choose a palette that has enough space to place and mix colors together.
- Paints: My favorite is Winsor & Newton, but there are many other good brands. If you don't want to pay a lot, remember that manufacturers often create two types of paints - for beginners and for professionals. The Cotman series from Winsor & Newton is for beginners, and the Artist is for professionals. Even though the beginner series are cheaper, they are still of high quality. If you want to save money, but still get acceptable quality, buy Russian “White Nights” paints.

- Water cans: I usually have at least two - one for my dirty brushes, the other for mixing colors.
- Paper: Choose between semi-smooth (cold pressing) and smooth texture (hot pressing). Hot pressed paper has a smoother surface and the ink adheres to it differently. I use semi-smooth because I like the hard texture and I think watercolor looks interesting on it.
- White gouache: White watercolors are usually too transparent and barely noticeable. I prefer to do the final strokes and highlights with white gouache.
2. Start with a sketch

Regardless of whether you come up with the drawing yourself or copy it, I advise you to always start with a sketch. I like to draw with a ballpoint pen on newsprint—the stiff texture allows ideas to flow freely, and I don't worry too much about mistakes.

Above I've attached a few examples from my children's book, Pickle: The Little Bird Who Doesn't Tweet! To begin, I make a rough sketch in blue pencil. I draw the same line several times, trying to find the right forms that complement the plot.
If there are too many lines and it becomes difficult to make out them, then I simply move to another page. As soon as I like one of the sketches, I outline everything with a black ballpoint pen.
3. Sketch in color

I often create studies in color before I start working on the actual painting. To choose the right colors, the sketch must be drawn on watercolor paper. Let it be small, for example 10x15 cm or less.
The sketch doesn't have to be perfect. Instead, take note of how colors attract attention and how you can add interest to a painting using light and shadow. The purpose of the sketch is to understand what impression the final picture should make.

Even though Pickle is an ebook, I really wanted it to retain the feel of a classic children's picture book like Peter Rabbit, but also be modern and funny.
To achieve this, I added subtle, subtle lines and textures to the paintings. And in order for “Pickle” to also look current, I used not only modern visual references, but also a brighter and more saturated color scheme than those in classic illustrations.
4. Preparing paint and paper

There is a common misconception that for the final painting you must use the same range that you selected for the sketch. Of course, then the painting will look exactly like the sketch, but it's still better to start with clean drawing supplies and a clean palette. This will prevent the paint from looking dull and uncontrollable.
Also, don’t forget to regularly wash all accessories as soon as they become too dirty. This will help keep the colors clean and rich.
You don't have to worry about keeping the paper from shrinking if you're drawing in a sketchbook, but be sure to secure the paper of the final painting. You can either stretch it yourself, or buy a watercolor block that is already stretched.
Thin line with pencil
After all this, you can finally make a sketch. Draw very thin lines so that you can paint over them later. Unless, of course, you have plans to make them noticeable.
People often ask if I use any techniques to transfer the sketch onto the paper of the final painting. Actually, I just redraw it by hand. That's when I usually finalize it and add the finishing touches.
5. Watercolor is a multifaceted medium.

There is a common misconception that painting with watercolor means constantly worrying about how much water is on your brush. Many people think that if they use more water, the paint will behave as it should.
In reality, everything is not like that. It is better to pay attention to how quickly water evaporates from the paper. You must consider the weather and humidity when painting. And also, of course, the characteristics of the paper itself, how strong its absorbency is.

If you paint on a dry, sunny day, use more water. And if you are painting, for example, near a waterfall, then too much water on your brushes can create a risk of color bleeding. And in general, it is better to add new layers of paint in a timely manner, taking into account the moisture level of the paper.
One of the interesting things about watercolor is that you can paint with little or no water to create a dry effect or to capture the look of an oil painting. Watercolor really can do a lot.
6. Where to start

You can find many watercolor painting techniques and tutorials on websites and in books. But I would like to tell you how to perceive the big picture. There are many theories about where to start with watercolor painting. One of the most popular methods is from light to dark. Although I don’t think you should be constrained by any rules - I’ve seen artists create amazing paintings by working from the darkest to the lightest.
I usually start with what I like the most, like Pickle the bird, and then move on to the side characters. And after all this I add the background color using a large brush.
I advise you not to worry if the paint does not lay down the way you want or goes over the edges. On the contrary, it should be perceived as one of the most interesting aspects of painting with watercolors. You can achieve cool and unexpected effects at any time.

Usually, after I apply the background colors, the paper becomes damp, so I let it dry before worrying about the details. And this time I really have control over how the paint flows.
I almost always leave room for decorative details empty until the very end, because I use them to enhance the composition or direct the reader's attention to a specific place. That's why I don't want to accidentally highlight them too much.
In my children's book, the characters spend most of their time outdoors, so I usually save leaves, plants and flowers for last, even though they are an important part of the composition. I want them to highlight the art as much as the storyline itself.
7. Experiment

There are no rules, there are only tools! As with any other art form, there are many techniques in painting. Experiment and learn new techniques that will complement your drawing style. You can use white, you can scrape the surface of the paper, you can apply a lot of paint. Most importantly, have fun!
If you're interested in my painting process, you can watch a quick-motion video of how I painted the picture below from start to finish. The video is three minutes long, but in real time it took me seven hours:
Schoolgirl drawing in mixed media. Watercolor + colored pencils. Video