Why develop the ability to write with both hands? Drawing with two hands.
There is an opinion that people who write with their right hand have a more developed left hemisphere of the brain, and for left-handers, accordingly, the opposite is true. Therefore, it is very useful (not only for children, but also for adults) to develop both hemispheres equally. That is why psychologists have already invented several techniques that help with this.
Today we want to tell you about a drawing technique called griffonage. Another name for the technique is double doodling. The essence of this exercise is that a person draws something while his attention is occupied with something else. For example, when a student is sitting at a lecture, he begins to unconsciously draw something in the margins of his notebook - this is a type of double doodling. Griffon images can be both abstract and concrete. This is a very useful technique for children. But we recommend that you develop yourself in the same way.

How to draw using this technique?
Your task is to draw with both hands at the same time, while leaving as symmetrical drawings on the paper as possible.
To do this, take felt-tip pens or pencils in your hands, press them together and place them in the center of a sheet of paper. We begin to draw with two of these markers at once, creating a mirror drawing. For example, if the right hand draws to the right and down, then the left hand should draw to the left and down. When one hand begins to move towards the center, the other should immediately do the same.
To make it more convenient for children to draw, secure their sheet of paper on the table with tape.
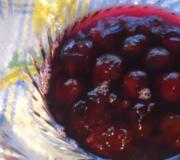
Here are examples of children's drawings using the double doodling technique.


How to help your child study better? How to make him more attentive and diligent? What if he can’t remember the material, no matter how hard he tries?
It is generally accepted that the ability to count, write and read is quite enough to consider a child ready for school. In fact, the basis of successful cognitive activity is the formation of interhemispheric connections. The left and right hemispheres of the brain are closely connected by nerve fibers. The more there are, the better developed higher mental functions are.
The left and right hemispheres should develop harmoniously, but this is not always achieved. Many parents begin to force things, teaching a child who has not yet reached 5.5 years of age to write, read, a foreign language, and play music. Because of this, the left hemisphere develops much more intensively than the right, which is responsible for:
- intuition,
- spatial coordination,
- imagination,
- perception of nonverbal information,
- as well as parallel processing of a large volume of diverse information.
These competencies are also key to successful schooling, along with reading, writing, arithmetic, and foreign language skills.
How to make the work of the left and right hemispheres coordinated and effective? Pediatric neuropsychologists recommend performing kinesiological exercises, because movements are the basis for a child’s social, emotional and cognitive development. The best results come from drawing with both hands at the same time.
Why drawing with two hands?
This kinesiological exercise is based on three main principles of strengthening interhemispheric connections.
- Diversity. The brain begins to actively develop when we focus on performing unusual movements. This also applies to fine motor skills and the articulation of new sounds, movements of the arms and legs.
- Simultaneity of actions. Both hemispheres must participate in the process, because the left, as is known, controls the right half of the body, and the right controls the left, the left is responsible for speech, and the right is for coordination of movements. Example: a game of edible - inedible, when the players must hit or catch the ball, accompanying the movements with words.
- Work with both hands. Any exercises performed with both the left and right hands help strengthen neural connections and create new ones. This could be drawing, playing a musical instrument, or building towers from a construction set.
Drawing with two hands is useful for both children and adults. The exercise helps develop a sense of symmetry, reduce anxiety, and speed up the process of correcting dysgraphia, dyslexia, accalculia, and speech development.
How to start?
The sheet needs to be well fixed on the surface, and it is better if it is not an ordinary table, but an easel in a vertically fixed board. For drawing, use gouache, watercolor, soft medium-sized brushes, thick felt-tip pens are also suitable.
First, “draw” in the air with a dry brush so that the muscles remember the movements and the child is not afraid to make a mistake. The drawings should be symmetrical and extremely simple: a house, a flower, a butterfly, a car. It is advisable to draw a line of symmetry in the middle; it will help the artist navigate, because each hand has its own half of the sheet and they should not interfere with each other.
If you explain it to children, they will immediately understand what this line is for. You can bend the sheet along it and the halves of the picture will coincide. Washing brushes, drawing paint, applying an image - all these movements must be performed simultaneously with both hands.
So where to start? For example, you decided to depict a small house. First, complete a simple task - trace the contours of the image.
- Place both brushes at one point, in our case this will be the top of the roof.
- Start simultaneously moving the brushes down the roof slopes and walls of the house, but in opposite directions.
- Control the speed of your hands, it is important that they work synchronously.
The next task is a little more difficult: you need to finish the entire drawing to the end. Draw half of the picture on a sheet of paper in advance: for a right-handed person it will be the left part, and for a left-handed person it will be the right part.
- Take markers or brushes and place them at the top of the drawing.
- The leading brush completes the missing half.
- The subordinate traces the outline of the drawing.
It is better to start two-handed drawing without relying on a finished drawing with a free image of scribbles, however, there is one condition: you must start with a line of symmetry. Try to create a symmetrical, identical pattern on both sides, making sure that the movements of your right and left hands are synchronized. After you master the doodles, you can move on to depicting real objects.
At what age can you draw at the same time?
Neuropsychologists recommend performing this exercise for children starting from 1.5 to 2 years old. They paint not with brushes, but with their fingers and palms. First of all, they learn to make prints first with their right hand (if it is dominant), then with their left, then with both hands at the same time. When this exercise is mastered, you can move on to more complex tasks: tracing and drawing.
If you notice that one hand is ahead of the other, then you will have to hold it, because the goal of the task is to ensure that all movements are performed synchronously. Gradually, the child will learn to control the dominant hand independently.
Is it necessary to use paints and markers?
After you learn how to paint with two hands, you can master other types of two-handed drawing. For example, you can create wonderful designs using wet sand, shells, small pebbles, colored threads and other materials; this is a great way to spend quality time during your summer holiday.
Selected exercises and meditations by Nishi Katsuzo
Exercise “Drawing with two hands”
Draw a circle with your left and right hands at the same time. Train for a month. Then draw a square, after the square move on to drawing a flower. The exercise can be complicated: draw a circle with your right hand, then with your left, then draw two circles with your left and right hands at the same time.
From the book NOTHING ORDINARY by Dan Millman From the book Daily gymnastics for people of mental work author N.V. KorablevThe first exercise is moving your arms with stretching. Starting position. Standing. Feet shoulder width apart. Hands to shoulders. Elbows down. Shoulders laid back. The body is bent. The back muscles are tense. Exhale (Fig. 23). Execution. 1. Raise your arms up, your hands wider than your shoulders. Palms
From the book Games with an autistic child author Elena YanushkoThe second exercise is swinging your arms to the sides. Starting position. Standing. Feet shoulder width apart. The arms, bent as much as possible at the elbow joints, are moved to the sides at shoulder height. Hands in front of chest, palms facing down. Exhale (Fig. 25). Execution. 1. Swing your arms apart
From the book Help your baby talk! Speech development of children 1.5-3 years old author Elena YanushkoNinth exercise - swinging arms with half squats Starting position. Standing on your right leg. The left leg is moved one step to the left, on the toe. Hands raised up and to the right. The body and head are turned to the right. Inhale (Fig. 44). Execution. 1. Do a “soft” half-squat and
From the book Take off your glasses in 10 lessons author Igor Nikolaevich AfoninThe second exercise is energetic swings of the arms. Starting position. Standing. Feet shoulder width apart. The brushes are compressed into fists. The left hand is raised up. The right one is pulled back (Fig. 55). Execution. Raise your right hand forward and up with a wave, and at the same time lower your left hand down and
From the book The Surgeon's Workshop author Yakov Leontievich TsivyanJoint drawing Method of joint drawing Joint drawing is a special gaming method, during which an adult and a child draw various objects, situations from the life of a child and his family, various scenes from the world of people and nature. This kind of drawing
From the book Children's massage. Step by step guide author Elena Lvovna IsaevaProductive activities - drawing, sculpting, appliqué During drawing (sculpting, appliqué) you can create a special situation of verbal communication (see above for the description of “subject drawing (sculpting, appliqué)”). At the same time, the main task of the lesson is not only training
From the book Isometric gymnastics for busy people author Igor Anatolyevich BorshchenkoDrawing and writing with the nose Look at the “Visual Acuity” table from the Appendix or at Sivtsev’s table, which hangs on the wall. Just don't strain your eyes. Determine which letters you see as clear and which are blurry. Choose a letter that you don't see very clearly. Close
From the book The Best for Health from Bragg to Bolotov. Large reference book of modern wellness author Andrey MokhovoyBetween two vertebrae... I already mentioned the intervertebral disc at the beginning of my story. He also spoke about its perfection, expediency and rationality. And at the same time, if the intervertebral disc were always complete and perfect both in its structure and in
From the book Selected Exercises and Meditations by Nishi Katsuzou15. Circular movements of the arms or the “boxing” exercise An exercise for the arms, reminiscent of boxer’s blows (see complex 2, exercise 15), can now be complicated by placing rings or rattles in the child’s hands. Perform all movements, changing the tempo and counting rhythmically.
From the book The Eastern Path of Self-Rejuvenation. All the best techniques and methods author Galina Alekseevna SerikovaExercise “Waves with hands clenched into fists” Starting position – lying on your back. Place small towel rolls under your lower back and neck to maintain the natural curves of your spine. Both hands are clenched into fists and bent at right angles at the elbows
From the author's bookExercise “Waves with hands closed in a lock” Starting position – lying on your back with small rollers placed under the cervical and lumbar spine. Both hands are clasped in front of the chest. To clasp your hands, turn your hands with your palms facing each other.
From the author's bookDrawing with the tip of the nose Remember Pinocchio from a children's fairy tale - he had a long, very long nose. Now imagine that you grew up with the same one, but your new nose has the added advantage of ending in a pencil. Now without any additional
From the author's bookExercise “Drawing with ink” To perform this exercise, you need thick paper, a brush (medium thickness) and ink. First draw stripes, changing the brush pressure from thin to thick and vice versa. Then draw circles (one inside the other) - up to 20 circles. The first circle is drawn
From the author's bookExercise 1. Tadasana (from Sanskrit tadaa - “then, while”) - “mountain pose with arms raised up” Starting position: stand straight, legs at a distance of 10-15 cm from each other. Tighten your knees, feeling as the kneecaps rise up, and push the hip
From the author's bookExercise 1 (first piece of brocade). “Support the sky with both hands and heat the triple heater” Brief formula Starting position: legs shoulder-width apart, feet parallel, knees slightly bent; shoulders lowered, pectoral and back muscles relaxed; underbelly