How to draw a squirrel step by step with a pencil easily. How to draw a squirrel: step-by-step diagrams
Now you will learn how to draw a squirrel with a simple pencil. We will need at least one soft pencil, I use three: 4H, 2B and 6B. When I was looking for a photo on the Internet to draw a squirrel, I came across an albino squirrel. I was shocked, it was a copy of my white rat, only with a fluffy tail, red eyes, and the same paws. Don’t be lazy, just for fun, look for a white squirrel, here’s a rat and that’s it. It’s strange, although the gray one doesn’t look like a rat at all. I have a lesson on drawing a baby rat, if anyone wants -. Now we will draw a gray fluffy squirrel.
Step 1. We draw, barely pressing on the pencil (I initially draw with a hard pencil), draw the head of the squirrel. Click on the picture to enlarge.
Step 2. Draw the line of the back, paw and hip of the squirrel.

Step 3. Draw the squirrel's paws.

Step 4. Draw a huge tail and the protruding part of the front paw.

Step 5. Here is the base for our squirrel.

Step 6. Paint over the eye, leaving a large highlight of white. Paint over the fruit in the paws. We erase the outline of the back and where it was, draw protruding fur close to each other with lines. We also do the same with the thigh and tail. We draw very small lines on the squirrel's forehead. We draw lines on the body, as in the picture.

Step 7. Now take a soft pencil and draw new lines on top of the drawn ones. Look at the picture, you can see everything there.

Step 8. Take either your index or middle finger and smear the lines that you drew. Leave the areas around the eyes and nose untouched. Now with a soft pencil we go along the edges, making it more saturated. You can add a little small lines on the forehead, and barely noticeably paint over the area below the nose, where the mustache and mouth are. It might get darker near the ear, maybe somewhere else, it’s hard to write everything in words. Then we take the eraser and use the edge to make strokes, just like we were drawing fur now. We erase between the ears quite a bit, we didn’t touch the nose and eyes, then where the cheek is white, on the squirrel’s elbow, the white area on top of the thigh, a little on the belly and tail. We make all the eraser strokes in the direction of the wool. We slightly smear the boundaries of these lines with our finger so that it is more or less uniform.

Squirrels are considered one of the favorite and cutest animals. They are small and fluffy, which attracts people. These animals are also friendly and quite often make contact, accepting a variety of treats. They like to use the image of a squirrel in cartoons, which children like. That's why learn to draw a squirrel It will be not only useful, but interesting. Let's find out soon how to draw a squirrel with a simple pencil using a step-by-step lesson.
Tools and materials:
- White sheet of paper.
- Eraser.
- A hard pencil.
- Soft simple pencil.
Stages of work:
Photo 1. Using a hard pencil, draw two identical circles whose edges touch. These figures will serve as the basis for the squirrel's body:

Photo 2. From the bottom circle we will begin to draw the femoral part of the squirrel’s body. The left line will have a large bend due to the special shape of the animal's body. The right line will be shorter, it touches the tail:

Photo 3. From the top circle we will draw the animal’s face, and add long ears on top. One ear will go behind the other because the animal is sitting sideways - in profile:

Photo 4. At the top we will draw a wavy curve of the back. Add paws with pointed claws:

Photo 5. Let's draw the animal's face. Add a large eye and a nose at the edge. The mouth will almost not be visible, only the outline:

Photo 6. Now let's draw the outline of the lower part of the squirrel's body. Add a shadow and outline to the bottom of the paws. Let's draw the outline of the future tail:

Photo 7. Use an eraser to remove unnecessary lines and leave only the main contours:

Photo 8. We begin to draw the outline of the muzzle. We leave three small highlights on the eye, and paint the rest. Let's leave a little empty space around the eye for a convex effect. We do not apply strokes evenly due to the fact that the head consists of bends and uneven vegetation:

Photo 9. Now let's move on to the ears and paws. We apply strokes in one direction, which will go beyond the contours. It’s not for nothing that they say that squirrels have tassel-shaped ears. Let's make the fur around the paws and make the edges of the claws sharp:


Photo 11. Now let's draw the entire body along the edges, leaving the middle empty. We also leave a shadow on the bottom part:

How to easily draw a squirrel with a pencil step by step for children and adults. Learn to draw a beautiful squirrel with a pencil step by step together with your child. Find out how to quickly and easily draw a beautiful squirrel. Every person in his life wants to learn how to draw beautifully, children especially love to draw and want to learn how to draw beautifully, they are interested in learning to draw not only nature, the sun, flowers, houses, people, but also various animals. Today we’ll see how you can easily and quickly learn to draw a squirrel. Take a sheet of paper and a pencil, look carefully at the picture where the squirrel is drawn. Look at the location of the squirrel, how and where its different body parts are located. In the center of the picture is a squirrel's body, on top is a squirrel's head, on the right is a squirrel's tail, on the left is a squirrel's paws, and at the bottom is a branch on which the squirrel is sitting. Now, in the same way, mentally, divide your sheet of paper for different parts of the squirrel’s body. First start drawing the squirrel from the head, draw the squirrel's head in the form of a circle. Draw a slightly curved line down from the circle - this will be the back of the squirrel.  Now, under the squirrel’s head, first draw a small circle, then a larger circle - this will be the squirrel’s body. Divide the squirrel's head with a slightly curved line, leave less space to the curved line on the left, and more space on the right, because in the picture the squirrel's head is slightly rotated.
  Draw the squirrel’s eyes, they should be drawn in the form of ovals, and below draw the squirrel’s paw.
  Now draw the pupils of the squirrel in black. Draw ears on the squirrel’s head; they should be drawn in the form of small triangles; draw the muzzle in the form of a small oval. Draw the lower part of the squirrel's paw. On the right side, draw the squirrel a large and fluffy tail, the tip of the tail is slightly pointed.
  Draw the squirrel's eyebrows in the form of small arches, a nose in the form of a small circle, a mouth and a muzzle. Draw the squirrel's upper paw, it should be drawn from the second small circle downwards and slightly curved. On the lower paw, draw the squirrel’s toes.
  Now draw the antennae for the squirrel and complete the mouth. Draw the squirrel's tail, chest and muzzle with small strokes - this will give the squirrel fluffiness. Look what a beautiful squirrel you have made. The squirrel can be painted, or left in black and white.
  Now let's draw another squirrel with a mushroom.
  Take a sheet of paper and a pencil, look carefully at the picture where the squirrel is drawn. Look at the location of the squirrel, how and where its different body parts are located. In the center of the picture is a squirrel’s body, on top is a squirrel’s head and ears, on the right is a large, fluffy squirrel’s tail, on the left is a squirrel’s paws. Now, in the same way, mentally, divide your sheet of paper for different parts of the squirrel’s body. First start drawing the squirrel from the head, draw the squirrel's head in the form of a circle. Below the circle is the body of the squirrel, in the form of an oval, the oval is slightly curved and uneven. On the right is a large, fluffy tail of a squirrel, the tip of the tail is slightly pointed. Below, under the oval, draw another small oval, it is drawn horizontally - this is the squirrel’s lower paw. Draw the squirrel's upper paw in the form of an oval, slightly curved.
  Now draw the squirrel’s ears, they are erect, long and slightly pointed, draw the squirrel’s nose and paint it black. Draw the squirrel's upper paw, draw the toes on the paw and draw a mushroom that the squirrel is holding. Draw the bottom of the squirrel's paw and connect the upper paw and lower paw with a line.
  Draw tassels on the tips of the ears; in the picture they are drawn in the form of small circles. Draw the squirrel’s eyes in the form of a circle and a black pupil, below draw the squirrel’s mouth. Draw toes on the squirrel's lower paw. Apply a small stroke to the squirrel's tail and chest; it will give the squirrel fluffiness. Erase the extra lines and trace the outline of the squirrel. Look what a beautiful squirrel you have made. Color the squirrel orange, color the tummy and muzzle white, color the lower leg and mushroom brown, color the leg of the mushroom white.
  ##Courses for the development of intelligence We also have interesting courses that will perfectly pump up your brain and improve intelligence, memory, thinking, concentration: ###Development of memory and attention in a child 5-10 years old Purpose of the course: to develop memory and attention in child so that it is easier for him to study at school, so that he can remember better. After completing the course, the child will be able to: 1. Memorize texts, faces, numbers, words 2-5 times better 2. Learn to memorize for a longer period of time 3. The speed of recalling the necessary information will increase ###Secrets of brain fitness, training memory, attention, thinking , counting If you want to speed up your brain, improve its functioning, improve your memory, attention, concentration, develop more creativity, perform exciting exercises, train in a playful way and solve interesting problems, then sign up! 30 days of powerful brain fitness are guaranteed to you:) ###Super-memory in 30 days As soon as you sign up for this course, you will begin a powerful 30-day training in the development of super-memory and brain pumping. Within 30 days after subscribing, you will receive interesting exercises and educational games in your email that you can apply in your life. We will learn to remember everything that may be needed in work or personal life: learn to remember texts, sequences of words, numbers, images, events that happened during the day, week, month, and even road maps. ###How to improve memory and develop attention Free practical lesson from advance. ###Money and the Millionaire Mindset Why do you have problems with money? In this course we will answer this question in detail, look deep into the problem, and consider our relationship with money from psychological, economic and emotional points of view. From the course you will learn what you need to do to solve all your financial problems, start saving money and invest it in the future. ###Speed reading in 30 days Would you like to quickly read books, articles, newsletters, etc. that interest you? If your answer is “yes,” then our course will help you develop [speed reading](/speedreading/) and synchronize both hemispheres of the brain. With synchronized, joint work of both hemispheres, the brain begins to work many times faster, which opens up much more possibilities. **Attention**, **concentration**, **speed of perception** are enhanced many times over! Using the speed reading techniques from our course, you can kill two birds with one stone: 1. Learn to read very quickly 2. Improve attention and concentration, since they are extremely important when reading quickly 3. Read a book a day and finish work faster ###Speed up mental arithmetic, NOT mental arithmetic Secret and popular techniques and life hacks, suitable even for a child. From the course you will not only learn dozens of techniques for simplified and quick multiplication, addition, multiplication, division, and calculating percentages, but you will also practice them in special tasks and educational games! Mental arithmetic also requires a lot of attention and concentration, which are actively trained when solving interesting problems. ##Conclusion Learn to draw yourself, teach your children to draw, to draw a squirrel step by step, it took you a little time, but now you know how to draw this magnificent animal. We wish you good luck in your future works.
Perhaps the most fun activity is drawing, especially if you draw with kids. This is where the unlimited expanses of imagination, fantasy and possibilities are revealed. Kids love animals very much, so they often ask: “Show me how to draw a squirrel, a bear, a hare, a fox!” What if mommy doesn’t know how? Master classes on drawing all flora and fauna come to the rescue, so drawing a squirrel will not be difficult even for those who are holding a pencil for the first time in their life.
Drawing will take place in several stages.
4. We outline the contours of the squirrel with smooth lines, smoothing out the lines of the neck, and slightly extend the muzzle. Outline the almond-shaped eyes, nose and small triangular ears. At the next stage, we draw a tail - narrow at the bottom and fluffy at the top. We add volume to the front legs, making them plump but graceful.
5. Use an eraser to erase the extra lines of the sketch, draw ears, eyes, fingers with small claws, fur on the neck, paws, tail and abdomen.
6. Draw mustaches and small tassels on the ears. If desired, you can draw a background of leaves, nut shells, dried mushrooms and berries. You can color the picture or use pencils. Our "Squirrel" drawing is ready!

If you don't want to build complex graphic compositions from geometric shapes, there is a simpler option on how to draw a squirrel. This is done using smooth rounded lines, as shown in the figure above. Just a few touches of the pencil, and a funny squirrel appeared in front of us, which even a child could draw. The main thing is to know the characteristic features of a squirrel: small front legs, a large fluffy tail and almond-shaped black eyes on a neat face. Now you know how to draw a squirrel quickly and easily.
It's a lot of fun to draw a squirrel step by step, following the visual instructions. Your joint creativity with your baby can turn into exciting educational activities, from which you will receive a lot of impressions and invaluable experience. And most importantly, the question of how to draw a squirrel will no longer cause difficulties!
The little red squirrel is a character that can often be found in fairy tales and cartoons. It is not surprising that children who study fine arts choose the squirrel as the heroine of their paintings. Often their parents help them in this process. But not everyone knows how to draw a squirrel step by step for children.
Step-by-step lessons will help you draw not only simple, but also complex images of a squirrel.
Using a simple technique, you can easily draw a squirrel step by step, even if the child does not know how to draw.
This lesson is specially designed by art teachers for children:
- Using a pencil, draw two ovals on a landscape sheet—the top one should be half the size of the bottom one. The upper oval can be drawn tilted to its side. This will be the head of the future squirrel.
- On the left side, starting from the bottom of the large oval, draw a fluffy tail, an ear with a small tassel, an eye and a left paw.
- From the middle of the second oval, draw a semicircle - this is the division for the squirrel’s legs.
- Draw a couple of legs and an acorn cap.
- Draw the second ear, nose and mouth. Complete the drawing of the acorn, which the squirrel holds tightly with both paws.
- Draw a small oval in the eyes with eyelashes and paint everything except it black.
- Decorate the squirrel as desired. It could be, for example, a reddish-orange color.
Simple drawing for young children
- Draw a large circle on top of the sheet where the drawing will be located. You can draw by hand or use a compass.
- From the bottom of the circle, draw a curved line to the bottom third of the circle. At the bottom of the line, draw 2 circles - one inside the other. This is a squirrel's nose.
- Draw 2 circles to the curved line - medium and small sizes. On the bottom circle of medium size, draw a fluffy tail on the right side. On the small circle, between the large and medium ones, draw the upper paw.
- Divide a large circle with a curved line. On the left, right from the edge of the left part of the circle, draw one oval-shaped eye, and in the middle of the second part of the circle - a second one. Draw ears with a sharp end on top of the circle.
- On the bottom circle, draw an oblong arc - this is the squirrel’s lower paw.
- Erase extra pencil marks.
- Use the vertical hatching technique to add fur. Draw eyelashes, eyebrows, mustache, two protruding teeth.
- Draw a twig with leaves under the squirrel's lower paw.
- Decorate the squirrel with colored pencils, felt-tip pen or paints.
Drawing of a squirrel for children to copy
There is another, more complex technique designed for children and novice artists who do not know how to draw a squirrel step by step:

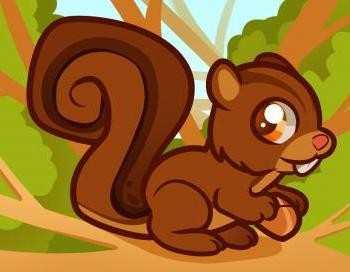
How to draw a squirrel from the cartoon “Ice Age”
The funny squirrel from “Ice Age” immediately won the hearts of viewers. Fans of the cartoon who are involved in fine arts have probably tried to draw her more than once. The presented technique will help you easily depict your favorite character on a postcard or any other surface. 
Since the squirrel from the cartoon is constantly chasing a nut, then in the picture under consideration the character will be with his favorite delicacy.
Step-by-step instructions for drawing a funny squirrel:

We draw a squirrel from the fairy tale about Tsar Saltan
Often children are asked to draw an illustration for a completed work. Drawing a fairy-tale character, a squirrel, with step-by-step instructions for children will be not only interesting, but also useful. The squirrel from the fairy tale about Tsar Saltan came to life thanks to Soviet animators. 
A step-by-step lesson will help you reproduce the squirrel that sits in the crystal castle:

How to draw a squirrel in a hollow in a tree
To draw a squirrel sitting near a hollow, you can use a simple technique and draw part of the tree with a circle. Or you can use a more complex scheme. For this drawing you need to divide the landscape sheet into 4 parts.
 To draw a squirrel beautifully, you need to follow the step-by-step instructions.
 Instructions:
- In the right rectangle in the left corner, draw a partial oval - the head of the future squirrel.
- Draw ears, an eye, a mouth and a nose, which then needs to be painted over with black.
- In the lower right rectangle, draw the upper leg in an oblong shape.
- Draw a curved line that goes through the top and bottom left rectangles. This is the back of a squirrel.
- Draw an arc under the upper leg - a division for the legs.
- Connect the arc and the curve representing the back with a smooth line, drawing the lower leg at the end.
- Draw a large fluffy tail.
- Draw the top paw and insert a mushroom or acorn into the paws.
- Draw the bottom leg.
- Color the drawing as desired.
Step by step draw a squirrel with a nut
If the child has mastered the skills of drawing an animal using simple techniques, then you can move on to a realistic depiction of the animal:

Squirrel by cells in a notebook
Children who are already familiar with numbers and can count fluently can draw in the boxes. Graphic dictation will help develop fine motor skills, attention and logic and strengthen counting skills.
Dictation - it is better to start drawing from the bottom of the drawing and gradually move to the top.

You need to dictate like this:
- Retreat one cell to the left.
- Draw a line 5 cells long.
- 1 square up.
- 3 cells to the right.
 With children over 9-10 years old, you can try to perform more complex patterns.
How to draw a squirrel 3D
Recently, drawings with a 3D effect have become increasingly popular among artists. This effect is achieved through an unusual drawing technique, and in some cases, cutting out individual elements of the design and folding it. 
The presented video tutorial and step-by-step instructions will make it easy to master the art of 3D graphics:
- First you need to draw a piece of ice with an acorn stuck inside. Scratty the squirrel tries to pull her out. Try to draw with light movements, without pressing on the pencil.
- Re-circle the silhouette, complete the pupils and sharp teeth.
- Paint over the entire design with vertical strokes, and then lightly go over it with an eraser to even out the color.
- Then darken the back of the squirrel, the right side of the tail, and the bottom of the nut. Draw the shadow of the squirrel from the piece of ice to the tail.
- Using thin scissors, trim away excess paper around the face and tail. Fold the sheet in half. Place the drawing on the bottom.
Draw a squirrel mask step by step
Mask No. 1

Mask No. 2 template-base
Template - muzzle and ears
Ready mask

Children love to try on different masks. One of them could be a squirrel mask. The techniques discussed will help you quickly and easily create a mask for children. It's as easy as drawing a squirrel in a sketchbook.
For step-by-step work you will need:
- a sheet of white paper;
- sheet of orange cardboard;
- color picture with a squirrel's face;
- glue;
- scissors;
- paper clips;
- elastic band (but you can do without it).
Progress:
- Cut 2 identical strips 4 cm wide from a sheet of paper.
- Stack the sheets on top of each other and wrap them around your head and secure with a paper clip.
- Trim the excess end, leaving 3-4 cm of paper after the paperclip.
- Glue the picture to the orange cardboard and cut out the face along the outline.
- Carefully glue the muzzle to the rim and glue the edges of the rim. The mask is ready.
For a more complex model of masks you will need:
- 2 mask templates - base and ears with a muzzle;
- colored cardboard of different colors;
- scissors;
- a simple pencil;
- glue;
- meter rubber band.
Progress:
- Cut out the necessary elements from the template. Trace the face with ears on white paper, and the base on orange. Cut them out.
- Carefully cut two large holes for the eyes and two small ones for the elastic band on the orange base.
- Measure the elastic from ear to ear and cut it off, adding 5 cm to the required length.
- Thread and fasten the elastic into the required holes.
- Glue the muzzle and ears to hide the holes from the elastic.
- Use a black felt-tip pen or gouache to draw a nose. The mask is ready.
A complex and realistic example of a squirrel
Step-by-step instructions: 


Experienced artists can move on to more complex and detailed squirrel drawings:
- Using a hard pencil, draw the outline of the squirrel.
- Using vertical hatching, draw the ears and fur on the tail. Where the tail touches the back, you need to greatly darken the strokes.
- Using a soft pencil, darken the ears, eye area, paws and tail. Re-darken the area where the tail meets the back. Using the same pencil, darken the ground around the squirrel.
- Using the hatching method, using a hard pencil, apply the main tone. The strokes should be short and almost invisible.
The presented lessons not only show how to draw a squirrel step by step for children, but also motivate novice artists to move to new heights of fine art from simple to complex.
Video: how to draw a squirrel
How to draw a squirrel, step-by-step video lesson:
How to draw a squirrel from Ice Age, watch the video: