How to paint a wooden frame to look antique. Do-it-yourself decoupage of photo frames - master class for beginners
Offers ideas for those who are constantly looking for original projects to creatively recycle things lying around into something new. Today these are old frames for paintings and photographs. The unconventional use of such frames is amazing! These are organizers, hangers, key holders, flowerpots, panels, chessboards and even furniture.
But, before you start implementing your idea, you need to transform the old picture frames. Think about your future idea, choose a color and style, select tools and materials, and decide on a technique. If the frame is wooden, then be sure to remove any remaining paint, burrs, or unevenness. Plastic frames just need to be washed and degreased. Sometimes it is enough to paint the frame with acrylic paint, but more often it turns into an interesting creative process: aging the surface, decoupage, mosaic, painting, applique, inlay and more.
trucsetbricolages
To decorate book shelves, glue finished frames to the shelf. Such decor will look very impressive on furniture if you glue them around the entire perimeter.

changeofsceneries.blogspot
Choose beautiful handkerchiefs, scraps of fabric or embroidered (knitted) motifs and decorate them with frames and glass. Depending on the selected images, such a composition will be appropriate in both the living room and the kitchen.

dwellingsanddecor.tumblr
An original shelf for cups, spices, tea or coffee. You can also place collectible cups or other items in this style.

kitchenisms
The tray is beautiful, simple and accessible even to a person who has never been involved in creativity and handicrafts. Don't forget to place a picture on the topic under the glass. It can be changed depending on the holiday.

nanaluluslinensandhandkerchiefs
The coffee table top is an old picture frame. For the legs, buy wooden balusters for stairs (sold in hardware stores). Under glass - all your imagination.

joann
Old picture frames are also popular as wall decor. They can be used either one color or multi-colored.

makelyhome
This composition with paper flowers also looks great as wall decor. But here you need to think about where such decor is appropriate. Or it will be a narrow hallway, a cottage, or a holiday decoration.

indulgy
In this example, the frame is used as a towel rack in the bathroom.

robolady.blogspot
Miniature key holder. The frame is aged. There are hooks at the top for placing keys. A very convenient thing.

hometalk
Classic - a TV in a good frame. Everything here should correspond to the chosen style.

buzzfeed
A desktop organizer consisting of a frame and strips of thick fabric. Here you can place pens and pencils, note paper and photographs, greetings to your loved one and wishes to the children.

wishfultinker.blogspot
Decorate the panels using old picture frames. Glue wallpaper, newspapers, or make drawings inside the frame using a stencil.

thehouseofsmiths
Set up a chessboard. Hang it on the wall. This will be a favorite place not only for children, but also for adults.

toysgadgets

ourfinehouse
Another organizer. Cover the cardboard with fabric and sew on pockets from old denim trousers. And you will get several pockets for pencils, scissors, knitting needles, hooks, rulers and other necessary handicraft tools. And also make a cosmetics organizer.

decozilla
Create a cozy place for your shoes. This design is easy to move to any place. And most importantly, it does not take up much space.

Watch, learn, fantasize and create your own masterpieces and give new life to old things. Good luck everyone!
Patina is the natural process of aging and oxidation that appears on antique furniture and decorative items in the form of plaque or cracks. Patina does not spoil the item at all, but on the contrary, increases its value. It is an integral element of the vintage style; it can also be found in a baroque interior and even in a loft.


However, waiting for your chest of drawers or copper doorknob to age on its own can be a very long time, especially if your items do not have a rich history. But you want to admire the patina in the interior now, which is why we have selected several master classes for you on how to create almost real patina with your own hands! So, choose what you like best!
Imitation of patina using oxidizing paints
For this method, we will need special oxidizing paints with a patina effect, primer and some kind of base that you want to turn into a vintage item. This could be, for example, a photo frame or a ceiling rosette. The base itself can be wooden, plastic or metal - the material is not too important.

First you will need to coat the base with primer to help the paint adhere better. After this, carefully paint the entire surface with gold paint and, before it has time to dry, apply a turquoise-colored oxidizing agent with a thin brush. The oxidizing agent is applied in small strokes to those areas that you want to “age.”


After some time, it will begin to appear and create exactly the patina effect that we need. Finally, the frame should be varnished. See the visual sequence of actions
Imitating patina using conventional paints

If the previous option seemed a little complicated to you, or you simply don’t want to bother looking for such paints, then you can also use ordinary ones, at the same time using your imagination and sleight of hand.

Buy acrylic paints in bronze and turquoise with a metallic effect, as well as brushes or a sponge and regular water spray.

Using a brush or sponge (you can achieve a denser and more structured coating with a sponge), paint ordinary jars with bronze paint and let them dry thoroughly.
After this, mix the paint that imitates patina with water and relieve your soul, spraying it on the jars as you please. A modern decorative element with a taste of antiquity is ready! By the way, you can decorate almost anything in this way.

"Crushed" technique
If you want to patina something on a larger scale, then don’t be scared - it’s easier than it seems. An ordinary dark brown table can easily be turned into an antique one, covered with an almost real patina.

To do this, all you need is to mix paints of a suitable shade and arm yourself with crumpled paper or a towel.

Treat the entire surface and legs of the table in a “creased” style, let it dry thoroughly and - voila! - you are the owner of a real rarity. Well, almost real, shh.

Photo: happymodern.ru, ib-gallery.ru,liveinternet.ru, livemaster.ru, redouxinteriors.com
Painting a picture frame is a rather unusual, but interesting process. In this article I will share some tricks and secrets. We will talk about finishing a self-made baguette or finishing an old one (read about how to make a baguette for a frame with your own hands).
Decorative finishing of the baguette can be done by painting or covering the profile with foil.
To paint the baguette, you can use bronze or silver paint. If you treat it not with ready-made paint, but with bronze powder, then you can do this: first paint the baguette with alkyd varnish or paint of the desired color, and then (while the layer is sticky) spray bronze powder. The bronze particles will evenly settle on the baguette and “stick” to the sticky layer of varnish. This method will give the baguette a spectacular golden look. However, such a paint layer is short-lived. Even when touched with your fingers, the “goldenness” fades. Therefore, it would be safer to additionally coat the dried layer of bronze paint with varnish. But in this case, the varnish will reduce the “golden effect”.
In addition to applying bronze powder, the baguette can be painted directly with ready-made bronze paint. You can make this paint yourself from bronze powder. To do this, you can mix bronze powder either in alkyd varnish, or drying oil, or even in ordinary sunflower oil. If it is varnish, then it needs to be slightly diluted with a solvent. The thinner the varnish, the greater the “goldenness” of the paint, but in this case its strength will be less.
In addition to regular painting, you can create the effect of old bronze. To do this, the baguette is first painted in a dark color: black-brown, brown-green, etc. The paint should be matte. Next, bronze paint is sprayed from a spray can as if “gliding” over the surface. All the “tubercles” of the protruding elements of the relief ornament will be golden, and the indentations will be dark. As a result, we get the effect of old, polished metal.
To imitate valuable types of wood, the baguette is first primed or painted with white, matte paint. Then, the coloring pigment of the desired color is diluted in the varnish (the paint should be translucent). As a rule, it is dark brown with some tint. Next, this paint is applied with a hard bristle brush (even an old and poorly washed one). Coarse hair seems to “scratch” the dark, translucent layer of paint, through which the white base of the baguette will unevenly shine through. The pattern of the wood texture will depend on how you hold and direct the brush. In this way, a wide variety of designs can be conveyed.
When covering a baguette with foil, it is first treated with glue or varnish. While the varnish is sticky, apply the foil to the baguette and press it with a sponge so that it follows the surface relief and fits tightly to the baguette. After gluing the foil, the metal surface can be tinted with translucent paint. If the foil is not golden, but white (aluminum), then it can be given a warm shade of bronze by tinting it with grated lead of colored pencils. The lead is ground to a powder and then rubbed in with a hard brush or rag.
In addition to the methods described above for decorating a baguette yourself, you can come up with a lot of others. By experimenting and improvising, each artist can come up with his own techniques and achieve interesting results in this creative process.
The process of painting a picture frame is quite a creative and unusual activity. Using some techniques and secrets will help you update your baguette. You can decorate either a self-made frame or give a second life to an old product. In this article we will look at options on how to paint a picture frame with your own hands.
How to paint a photo frame for a picture?
If you purchased a new picture frame that is not painted, then you can transform it with your own hands. How to paint or restore a frame? To paint the product, use paint of a suitable shade, as well as bronze or silver.
Bronze powder
If bronze powder is used, then the following actions must be performed:
- The baguette is covered with alkyd varnish or paint of the desired tone.
- After this, bronze powder is applied to the sticky varnish.
Important! This procedure creates a spectacular appearance with a golden or bronze tint. But such a picture frame is not durable. Even the touch of your fingers causes the “goldenness” to fade. Therefore, it is necessary to apply an additional procedure in which the powder is covered with a layer of varnish. Repeated varnishing reduces the “golden effect”.
Bronze paint
To paint picture frames, use bronze paint, which can be purchased ready-made at hardware stores. In addition, you can prepare such paint yourself from bronze powder. To do this, mix bronze powder in alkyd varnish and drying oil. Even ordinary sunflower oil is suitable for this procedure.
Important! If you use varnish, it must be diluted with a solvent. The more diluted the varnish, the greater the “goldenness” of the paint. In this case, the coated surface of the frame is not strong enough.

Aged bronze
How to age a frame? A picture frame reminiscent of aged bronze looks very stylish and beautiful. This effect can be achieved by performing several sequential actions.
How to paint a DIY antiqued bronze picture frame:
- First, the frame is given a dark shade, using a black-brown tint, brown-green tone and other color schemes.
Important! The paint used must have a matte finish.
- After this we spray bronze paint from a can over the surface of the frame using sliding movements.
Important! As a result of this procedure, all protruding parts on the surface of the frame will be golden, and the depressions will remain dark in color. In this way, the effect of an old product from which the gilding has peeled off is created.
Wood imitation
Modern technological processes make it possible to create an imitation of valuable wood texture on the surface of the frame. In this case, you need to do the following:
- The baguette is coated with a primer or treated with matte white paint.
- Then the coloring pigment is diluted in the varnish to the desired color range. Mostly dark brown color with some shade is used. The composition of the prepared paint should have a translucent consistency.
- Apply this paint to the surface of the frame with a brush with stiff bristles. Such a brush scratches the layer of applied paint and the white base is unevenly visible under it.
Important! To apply paint using this method, certain skills are required. The imitation of wood texture will depend on how the brush is positioned in the hand and what movements are used during application. A high level of skill allows you to independently come up with patterns of various wood textures.
Foil covering
There is another original painting method. To do this, the picture frame is covered with foil. How to decorate a picture frame with foil yourself:
- Before this, the baguette is treated with glue or varnish.
- While the coating dries, apply foil or gold leaf to it and press it with a sponge. The glued foil follows the relief of the frame and fits tightly to the baguette.
- The resulting metal surface must be tinted with translucent paint.
Important! When using white aluminum foil rather than gold foil, a warm bronze tone is created by using grated lead from colored pencils. The lead must be ground to a powder state. This composition is rubbed into the metal surface of the frame with a brush with a hard base or a rag.
To decorate a baguette yourself, you need a broad imagination, creative thinking and versatile creativity. By experimenting and improvising, you can come up with new techniques, methods, and achieve interesting compositions in such a creative process.
How to age a picture frame?
The appearance of the items in the living room depends on the style of the interior. Thus, an interior in the style of Provence, Vintage and Shabby Chic involves decorating existing pieces of furniture in an antique style. The antique look is created by the furniture set, complemented by aged chairs, tables and chests of drawers.
Flower pots, photo frames, all kinds of vases, wall clocks, and mirror frames are decorated in this style. It is not at all necessary to purchase such things at the markets, since the objects in the apartment can be transformed beyond recognition on your own.
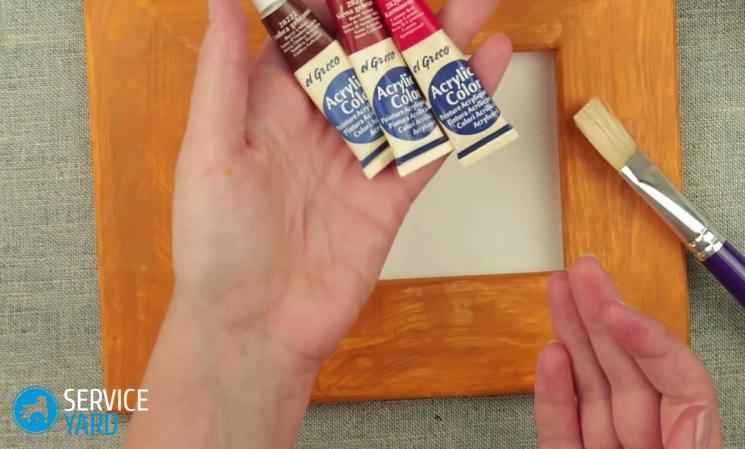
Let's look at how to paint a wooden antique-style picture frame with acrylic paint yourself.
For this we need:
- ordinary wooden frame;
- brown acrylic paint, which we use as a base;
- white acrylic paint;
- acrylic craquelure varnish;
- brush.
The first stage is painting the frame with paint, which serves as the base
Basic paint is used for pronounced cracks. Therefore, the base paint and the paint that imitates a cracked surface are selected in contrasting colors. If we use a brown tone for the main color, then it will appear in the place of the cracks.
Important! We stock up on old newspapers so as not to stain the surface on which we will work. We place a picture frame on the newspapers.
Let's start painting the frame with acrylic paint. Cover with brown color in one layer. A single layer coating is quite sufficient, since the paint has a dense composition. If somewhere the layer is not quite thick, then the second coating will be crater varnish and white paint, which will safely cover any defects of the main brown background. Our frame should dry for about two hours. Products treated with acrylic paint dry very quickly.
The second stage is processing the picture frame with crater varnish
We treat the picture frame with varnish. The thickness of the layer determines what kind of cracks there will be:
- If the applied layer is thin, the cracks will look small.
- With a thick layer of varnish, the cracks will have clearly defined outlines.
After painting, leave the frame to dry for at least 2 hours.
Important! Crater varnish is a coating that creates cracks. It is not the varnish that cracks, but the paint applied on top of it. The crater component resembles an ordinary varnish.
The third stage is painting the baguette with white acrylic paint
Quickly paint the frame with white acrylic paint. As a result, cracks appear literally before our eyes. The paint should dry for about 2 hours. When the product dries, the cracks become clearly defined and the desired texture of the product is visible.
Important! It is very important to paint the frame over the entire surface, without lifting your hand, in one stroke. You can first practice processing any other material. If you pass the brush twice over the same place, the pattern of the crack is disrupted.
With the first layer it has already appeared, and if you go through it a second time, the next layer of paint will not crack. In addition, the secondary passage literally blurs the drawing.
How to paint a frame to suit a specific interior style?
Stylishly designed frames can emphasize the interior design, so you need to choose the color scheme of the baguette, depending on the style of the room. How to paint a picture frame with your own hands, depending on the style of the interior:
- Wall decorations made from carved frames in dark gold or dark bronze tones complement fashionable glamorous interiors and are suitable for a classic option.
- Vintage style is characterized by a composition that may contain aged frames, a candlestick and various accessories such as a mirror on a stand, figurines, boxes, and antique perfume bottles.
- Pretentious frames painted in white, black and silver highlight the modern interior in the Fusion style.
- In a minimalist interior, standard square frames in white or any color that contrasts with the walls look great.
Frame style depending on the genre of the painting
The frame is the “clothing” for the painting. The design of the baguette should not cover the composition of the canvas. But there are exceptions, mainly for small-sized paintings. The ideal option is to match the texture of the baguette and the style of the painting:
- The texture of the frame can even repeat the characteristic strokes of paint or ornament used in the painting.
- If the subject of the painting is simple, the frame should be in a simple style. And vice versa - the deep storyline of the picture should be formalized by an interesting design solution of the baguette.
- Modern abstraction will not look beautiful in a lush gilded frame design. Therefore, for the simple, the simple serves, and the complex corresponds to the complex.
Important! A strict aluminum picture frame cannot reveal the airiness of the watercolor painting. But it will perfectly highlight a contrasting black and white photograph. And elegant picture frames made of light-colored carved wood are ideally combined with a delicate watercolor pattern.
- A very beautiful and modern technique for painting a baguette. In this case, the image of the painting is continued in a frame into which it smoothly “flows.”
- Also very impressive is the way of decorating a picture using two or more composite profiles of different thicknesses. In this case, it is important that the composite profile consists of frames of different widths. The inner baguette, located near the painting, plays the role of a passe-partout, placing emphasis on the painting itself, but at the same time emphasizing the beautiful design of the “external” frame.
Baguette color
If you are planning to paint a picture frame with your own hands, the color scheme also plays a big role. The color of the picture frame should be complementary and, accordingly, set off the picture image. In addition, the color scheme of the baguette implies a tone difference from the main color, either darker or lighter.
Important! It is necessary to take into account such a nuance that for paintings in cold colors a frame of a cold color is used, and vice versa - for a warm image a light-colored frame is suitable. However, there is an exception in which natural wood is combined with any shades.
Baguette width:
- The larger the picture, the wider the image baguette should be. This correspondence favorably emphasizes the significance of the picture. Such compositions are placed at the central point of the interior and become accent elements.
- Small paintings are decorated with wide frames. At the same time, compliance is maintained when the total area of the baguette is larger than the area of the image. This option looks very impressive. But you need to take into account that such a design requires a stylistic approach for other images in the room.
- When choosing frames for small images, thin baguettes are often used. This choice looks stylish and modern, especially suitable for a whole group of paintings.
How to decorate a frame?
When decorating paintings, anything can be used as a material: wine corks, various cereals, fabric, old files of glossy magazines, all kinds of shells. Let's consider the most interesting options for decorating a frame at home.
Wine corks
This method of decorating a baguette is a modern hand-made art. To design such a frame, you need to take care of the base for the baguette:
- Wine corks should be cut into thin slices.
- Using acrylic paints, add the appropriate color. The result is a kind of cork buttons.
- Now you need to turn on creativity and creative imagination to carry out the decoration. You need to glue cork buttons of various colors onto the main part of the picture frame.
Important! The frame can be designed in a multi-colored design, made in two colors or in a single color. In this case, taste, personal preferences and interior style play a role.
Groats
There is a very interesting option for decorating picture frames that are intended to be placed in the kitchen. How to decorate a picture frame with grains with your own hands:
- We treat the base of the frame with PVA glue.
- After this, generously sprinkle the surface of the baguette with the selected cereals. All kinds of cereals can be used. Barley, buckwheat, rice, and wheat are mainly used for decoration.
Important! The frame will look much neater if the base of the baguette is pre-treated with paint that matches the color of the selected grain.

Old magazines
Even from old glossy magazines you can design picture frames that create an amazingly beautiful interior:
- Cut old glossy magazines into thin strips of equal size.
- From the cut strips you need to wind tight tubes and fix them with glue.
- You need to paste these tubes over the base of the picture frame, and the unusual design is ready.
Natural materials
For the decoration process, you can use natural materials:
- Small branches of shrubs can be used to decorate outdated picture frames.
- Large branches are suitable for unusual and creative design of a baguette.
Decoupage technique
You can also paste over the base of the picture frame with interesting fragments from old magazines and comics. To decorate the frame with your own hands, you can use special paper, which is characterized by a variety of storylines.
Textile
For true needlewomen, framing a frame becomes a real art, so beautiful fabric is also used. How to decorate a picture frame with fabric yourself:
- We make the base of the baguette on a thick sheet of cardboard.
- Cut it out along the contour lines.
- Then you need to drape the surface of the frame with a beautiful fabric.
Important! There is an option for making a soft frame. To do this, use cotton wool or padding polyester, which is used to fill the baguette for the picture.
In this article, we offered you a lot of interesting ideas on how to paint a picture frame and then decorate the baguette. Choose those that appeal to you the most and which you have mastered in your practical decorating skills, then the result will certainly impress you!
Every happy moment or significant event in our lives deserves to be captured in a photo. We store most photos as files on a computer or phone, but we want to see special moments as often as possible, and guests also want to show off their own photo portrait or a successfully captured happy moment. A well-chosen frame can highlight the beauty of a photograph, but most of the same types of frames are available on sale. In this case, a good solution would be to create a photo frame with your own hands, which will make your pictures memorable due to its originality.
Vintage frame
Vintage photo frames look very impressive, especially in combination with the classic interior of a house or room. This master class with step-by-step photos will help you transform an ordinary wooden frame into an antique one.
We will need a regular untreated wooden frame, preferably so that the natural wood pattern is clearly visible on the surface.
Next you need to fire the frame using a gas burner. It is advisable to do this outdoors and away from children and flammable substances and materials for safety reasons. You can also burn it over the gas burner of your home stove, but this must be done with great care.

We continue firing until the entire surface of the frame is evenly blackened.

Then carefully clean off the top burnt fibers with a wire brush.


Movements should be directed along the wood fibers. To avoid scratches on the corners, you can use a softer synthetic brush.
We cover the frame with white patina, wait for it to dry, and use a damp cloth to wipe the surface along the grain. This will leave the patina in the shallow grooves, highlighting the dark veins created after firing.


After this, the frame must be coated with wax and polished with a soft cloth. Instead of wax, you can simply cover it with one or more layers of acrylic varnish.

The antique frame is ready!
Gift for the main man in the family
Not only an adult, but also any child can make such a car-shaped frame. And in addition to the original design of the photo, such a souvenir can be an excellent gift for dad on his birthday or on February 23rd.
To make it you will need:
- thick cardboard;
- colored paper;
- black paint;
- pencil or felt-tip pen;
- scissors;
- family photo.
First, on a piece of paper you need to draw the outlines of the car you like. If drawing is difficult, you can print an image from the Internet or copy a picture from a book or coloring book. Next, we cut out the car along the contour and cut a hole in place of the windshield.

After this, you need to outline the template with a felt-tip pen and cut it out of cardboard along the contour, paint over it with black paint.
The next step is to cut out the contours of the machine according to a template from paper with a small rectangle at the top for attaching to cardboard.

We cut out two strips two centimeters wide and about ten to fifteen centimeters long. These will be wheels - stands. They need to be bent into triangles, fastened with glue and painted black.

We add expressive details to the car.

We connect the top of the paper car with the cardboard base, glue the stands on the back, place the photo in the windshield window and glue the lower parts of the car with glue.


And this video presents the idea of decorating a photo frame using the Japanese “kanzashi” technique:
An original decor for a photo frame can be egg shells, as in these photos:


To create such a decor, you need to carefully break the shells of boiled eggs, first removing the transparent film from the inside. Then I cover the base of the photo frame with glue and fill the surface with pieces of eggshell in random order. At the end, you need to secure all this beauty with transparent varnish.
There are a lot of decor options; for example, for a marine-style interior, a photo frame with twine trim is suitable.


An original gift for a child’s birthday – a photo frame made of balloons.
For a gentle and romantic girl, you can decorate the frame with these floral arrangements made from foamiran:


Soft and cozy frame
You can make such a wonderful frame with your own hands from felt.
For this we need:
- colored felt;
- satin ribbon;
- several buttons;
- medium density transparent film;
- scissors, pencil, ruler, glue gun.

From felt we will cut out three rectangles measuring 16 by 21 centimeters, as well as various decorative details.

On one rectangle we retreat 3.5 centimeters from the outer edge and cut out a window.

The film needs to be cut a little larger than the window and secured with decorative stitching around the perimeter of the window.


Then we sew the two lower rectangles together, along the edge of the upper one we lay a connecting stitch on one side, and then we sew all three rectangles on three sides to form a pocket.

On the long side, between the layers of felt, we insert the ends of the tape to fix them at the same time as connecting the parts of the frame.

We sew wheels from buttons onto the locomotive and glue all the decorative elements together to the frame using a glue gun.


If you wish, you can try other ideas for decorating fabric frames, such as in these photos:


You can also decorate photo frames with elements molded from polymer clay.


And this video shows how you can make a photo frame from a plastic bottle.